
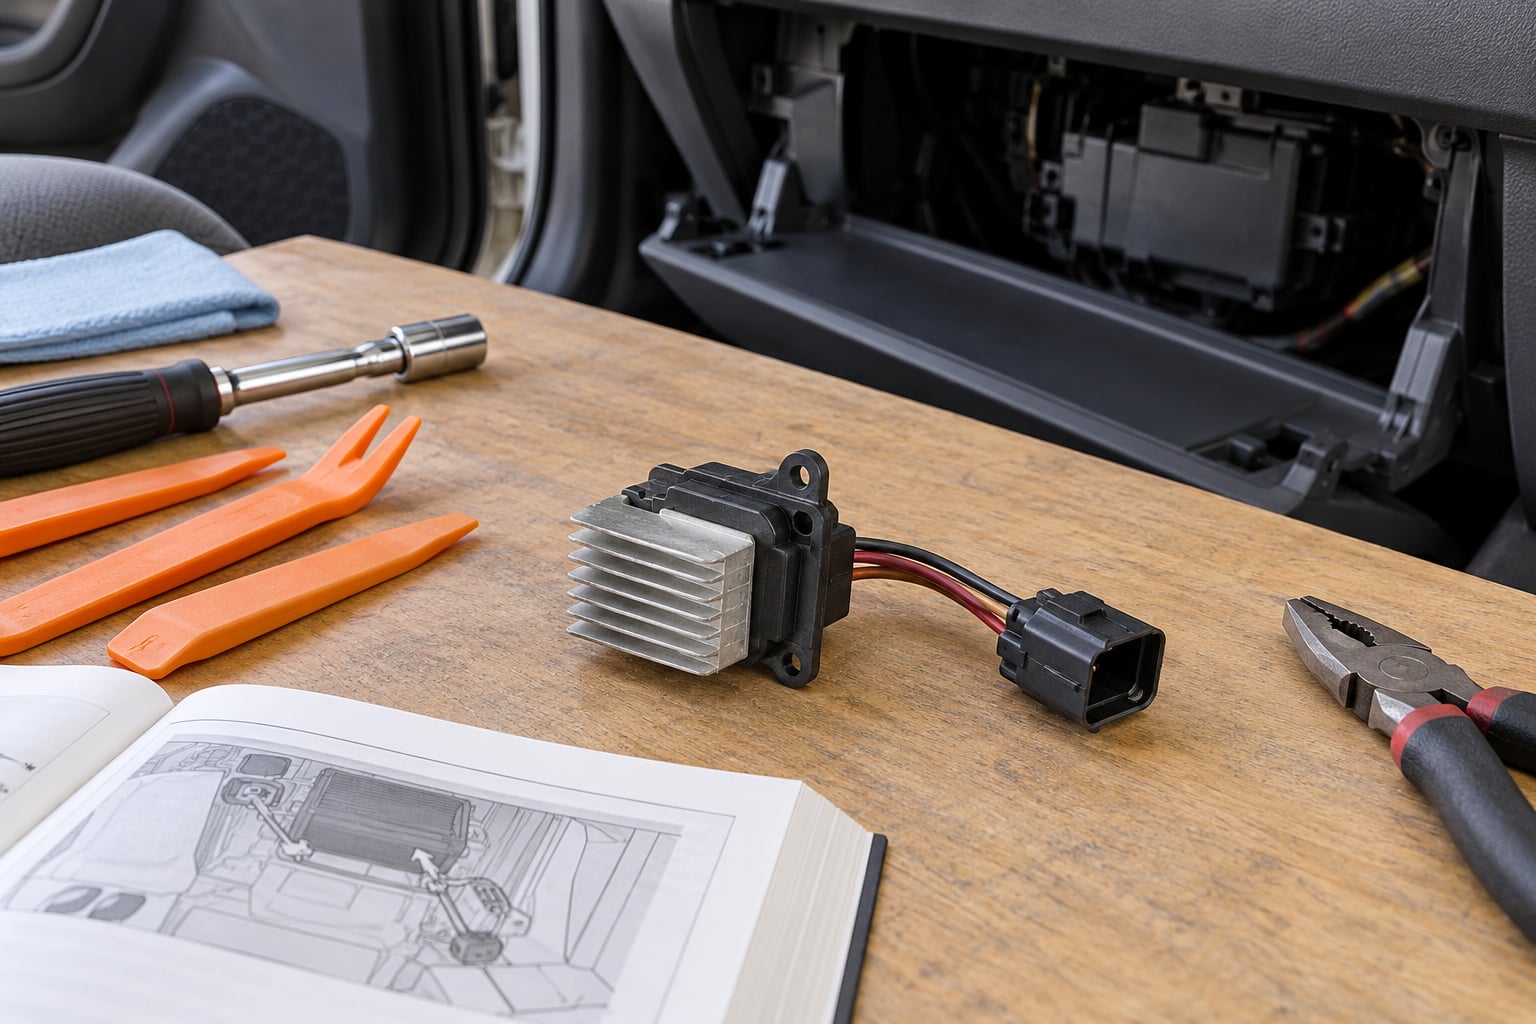
To replace a blower motor resistor, disconnect the negative battery terminal, remove the glove box or lower dash panel on the passenger side, unplug the wiring connector, and swap the small coil pack for a new one. Budget about an hour for most cars. It is a beginner-level job: the part is cheap, the tools are basic, and the only real risk is rushing the connector.
The resistor pack does one job. It feeds the blower motor less electricity so the fan can run slower than full blast. Three taps, usually three speeds. When a coil inside burns open, that speed disappears. Often the high speed keeps working because high bypasses the resistor entirely, which is why owners often think the fan is fine when it is actually broken.
There is one more thing worth knowing up front. If the resistor keeps dying, the blower motor is usually the reason. A motor with failing bearings drags extra current, the resistor cooks, and a year later the new resistor is gone too. Fixing the resistor without checking the motor is the most common reason this repair gets done twice.
Table of Contents
What You Need
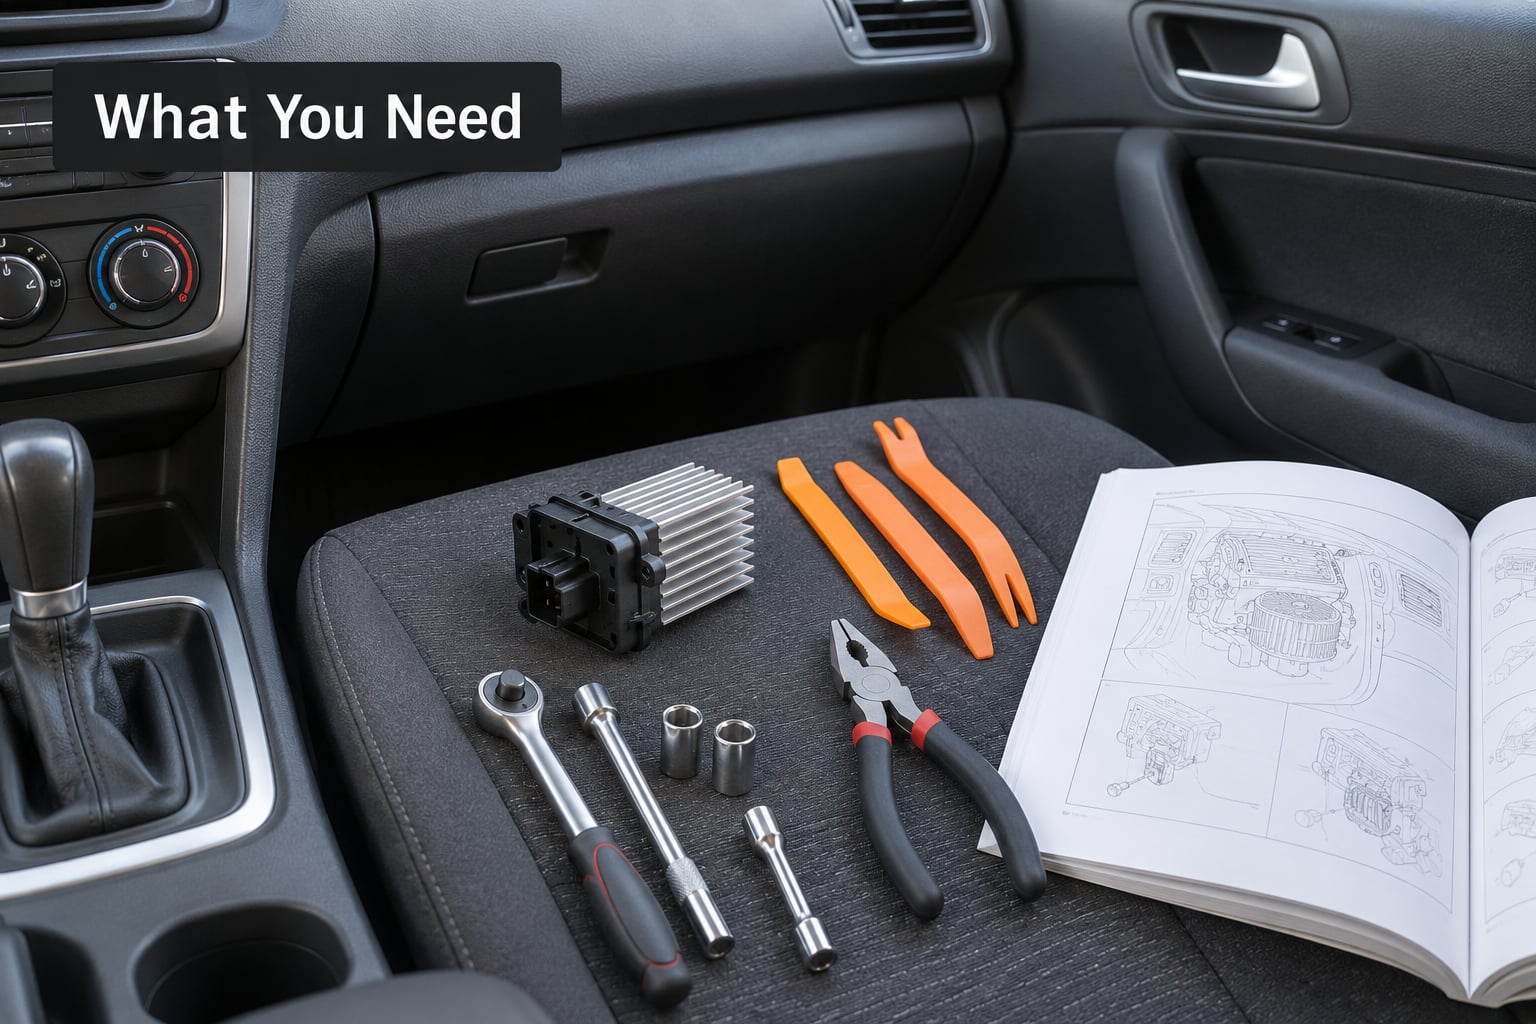
Parts
- The blower motor resistor matched to your year, make, model, engine and trim level
- A replacement pigtail connector with terminals, if the old plug is melted, browned or brittle
- Dielectric grease for the connector pins
Match the part by vehicle, not by shape alone. Resistor packs look nearly identical across trims but carry different tap values, and the connector differs between a base model and a crew cab truck. A cheap pack with a different resistance will give you fan speeds you have never heard before.
Tools
- 7 mm socket and ratchet for the glove box bolts and support strap
- 5.5 mm socket or T15 Torx for the resistor mounting screws, depending on the vehicle
- Small flathead screwdriver or plastic trim tool
- Needle-nose pliers and a pair of trim panel tools
- Wire strippers and a crimp tool if you are replacing a melted connector
- Multimeter if you want to confirm the fault before buying the part
- Work light, phone flashlight, and a small parts tray
Socket sizing matters more than the list suggests. The 5.5 mm and 7 mm sizes come up in nearly every version of this job, and grabbing the wrong one halfway through a dash panel is annoying. A torque driver is not required, but do not overtighten plastic fasteners either. Your owner’s manual for the access route takes priority over any description here, including this one.
How to Know the Resistor Needs Replacing
Turn the fan to low with the engine running. Nothing. Bump it to medium, still nothing. Push it to high and the fan roars to life. That is the classic failed resistor signature, and it is worth confirming before you buy anything.
Common signs of a bad blower motor resistor
- Low and medium speeds are dead while high still works
- A burnt plastic or hot electrical smell from the dash, often strongest at startup
- A connector or resistor that is visibly discolored, warped or cracked
- Air conditioning blowing warm on every setting even though the fan is spinning
- Fan that runs for a few minutes, then fades to nothing
- A blower fuse that blows again soon after being replaced
Resistors fail because they get hot. Mounted on the HVAC housing where engine and cabin heat soak them, they cook the wire inside the pack until it opens. The smell that comes with it is not the motor burning, so do not assume the worst when you smell it.
Resistor or blower motor or fuse
| Symptom | Likely cause | Quick check |
|---|---|---|
| High works, low and medium dead | Blower motor resistor | Lower speeds only feed through the resistor pack |
| No speed works, no sound | Blown fuse or failed blower motor | Check the fuse first, then run power direct to the motor |
| Fan runs on all speeds, air stays cold | Refrigerant charge or blend door, not the resistor | Auxiliary fan noise at low idle means the compressor is not running |
| All speeds work but connector is melted | Overloaded motor or poor connection | Replace the motor current draw, not just the resistor |
| Fan stops after a few minutes | Motor overheating or thermal fuse inside the pack | Let the motor cool, then retest each speed |
If every speed works, the resistor is not your problem. That answer comes up constantly on r/MechanicAdvice, and it is correct. The resistor only controls the steps below full blast, so a fan that performs at every setting has already proven the pack is passing current.
Step-by-Step: How to Replace a Blower Motor Resistor
Step 1: Confirm the Part and Symptom
Verify that the lower blower speeds operate and the highest speed fails, then look up the resistor by vehicle year, make, model, engine and trim. Confirm the replacement part matches the original connector and mounting style before the car is apart. A two-blade and a five-blade pack look similar in a listing photo and fit nothing alike.
If you have a multimeter, you can confirm the fault without guessing. With the key off, unplug the resistor and set the meter to continuity or ohms. Tap to tap, a healthy pack reads a low resistance, usually a few ohms, and each tap pair differs from the next. An open circuit or an infinite reading means that coil has burned out. Owners on r/NissanTitan check exactly this way, treating several open lines across the pack as a confirmed failure.
Also check motor current draw if you have a clamp meter or the skill to measure it. A healthy PSC blower motor pulls somewhere in the neighborhood of 5 to 10 amps on high. Well above that and the resistor is a symptom, not the disease. Replace the motor too, or the new resistor will cook the same way.
Step 2: Disconnect the Battery
Switch the vehicle off, open the hood or trunk, and disconnect the negative battery terminal first. Loosen the clamp, then lift the cable clear of the post so it cannot slip back on. Some people tuck the cable behind the hood strap or seat a 5.5 mm socket in the clamp to hold it out of the way.
Working around an HVAC housing with the battery connected risks a short, a blown link, and a dash that resets itself and loses its presets. Disconnecting the negative post is the standard habit behind how to replace a car battery safely, and the reasoning carries over here. Do the same while you are in the engine bay.
Give the resistor and housing time to cool. A pack that failed a minute ago can be hot enough to blister your fingers, and you cannot judge connector damage properly through burned fingertips.
Step 3: Access the Blower Motor Resistor
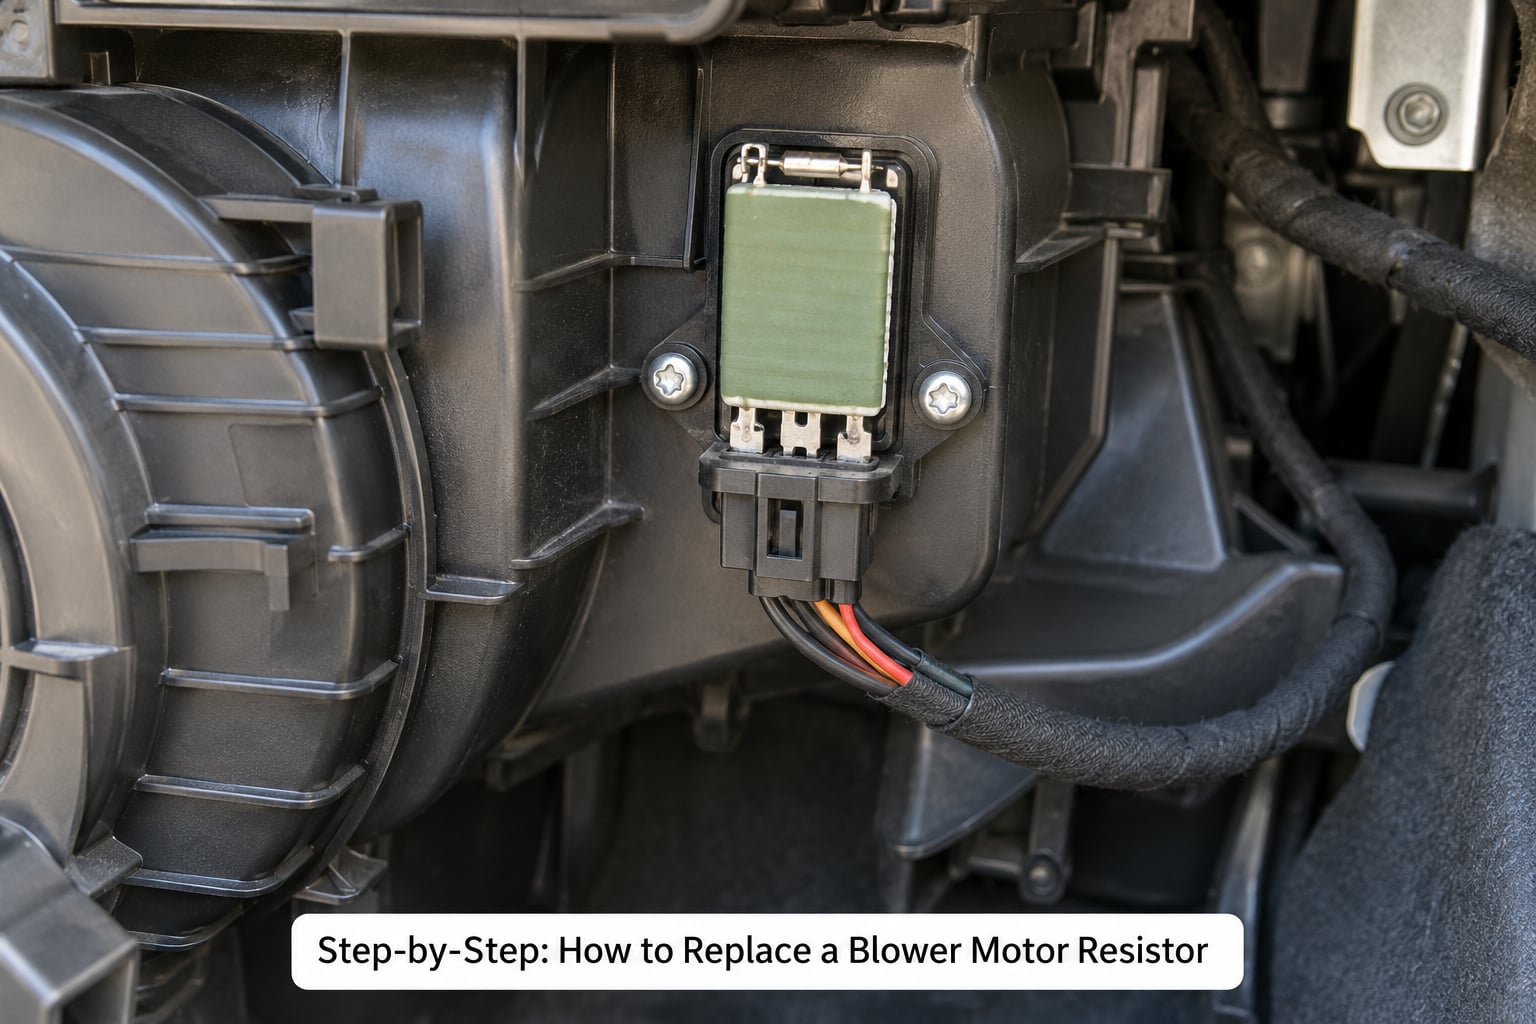
On most cars the resistor sits on the passenger side of the HVAC housing, right at or below the glove box door. Common access routes are through the glove box, from the passenger footwell with the knee bolster removed, or under the lower dash on some trucks. The owner’s manual for your model takes priority over every route described here.
Glove box removal is the most common path. Open the door, dump the contents, then remove the side and center stops. Some are plastic pins you pull straight out, others are small screws. Drop the box down carefully rather than yanking it, because the damper strap and the hinge arms break easily and the hinge arm rarely lines back up on the first try.
Chevy truck owners describe the resistor as two screws under the passenger side dash with the plug needing to come out first, which is a fair description of a lot of trucks from that era. Handling fasteners and clips gently is the same discipline you would apply to how to replace a door handle on a car: keep every clip, screw and trim piece in the parts tray, because a missing screw becomes a rattle on the drive home.
If the housing itself hides the resistor, you may need to drop the entire HVAC box. That doubles the job and adds evaporator and duct work you probably do not want on a first attempt. Check the manual, then check a model-specific forum thread before committing to it.
Step 4: Remove the Old Resistor
Take a photo of the connector and the resistor in place before touching anything, or label the plug. On some vehicles the wires are not keyed in a way that tells you where they go back, and a photo takes two seconds.
Release the wiring harness connector properly. Press the locking tab down, lift the secondary lock if the plug has one, then pull the plug straight off its pins. Grip the housing of the connector, never the wires. The common failure here is someone yanking the pigtail out while still holding the wires, which rips the terminals out of the connector body.
Now remove the mounting screws or clips. On many vehicles the plug must be disconnected before the screws come out, so if the resistor will not lift, the connector is probably still on. Take the pack straight down and out without levering against the plastic housing, which can crack and cause a real leak later.
If the connector is melted or its terminals are browned, do not reuse it. Push new terminals onto the cut wires and crimp them into a fresh connector housing, then pack the pins with dielectric grease. That repair shows up on owner forums over and over, and the recurring complaint is the same: a light-gauge aftermarket pigtail runs hot and melts again. Match the original wire gauge when you crimp.
Step 5: Install the New Blower Motor Resistor
Position the replacement pack on the housing and align its holes or mounting clips. Seat it flat against the metal so heat can pass into the housing instead of into the plastic dash. If it rocks or sits proud, you have the wrong part or the wrong orientation.
Push the wiring connector back on until it clicks and the locking tab snaps into place. Pull gently on the connector body to confirm it is seated. Never drive the plug home with a screwdriver, and never force a connector that will not go in easily, because a pin pushed back into the harness or a terminal bent sideways causes exactly the melted plug you are trying to avoid.
Route the harness so it does not touch the accelerator pedal, the steering column or any sharp edge. Pinching a wire against a moving pedal is a far worse failure than the resistor you drove there to replace.
Step 6: Reassemble and Test the Fan
Reinstall the trim panels, the glove box and any fasteners you removed, then reconnect the negative battery terminal. Tighten the clamp until it is firm, not buried. Start the vehicle and cycle the fan through every speed, one at a time.
Listen and watch as you test. Each speed should step up distinctly, the fan should sound smooth, and you should not smell anything hot. Hold each speed for thirty seconds or so. Check for loose parts rattling in the housing, a connector that darkens, or a motor that gets louder and hotter than the others.
If low and medium are still dead, the fuse is the next stop. If every speed works but the air stays cold, the resistor was never the issue and the problem is charge, a blend door, or a compressor that is not cycling. Any smell of burning during the test means shut it off and go back to the connector.
If the Resistor Is Not the Problem
A replacement resistor that does not fix anything usually points at one of five things. Work through them in order, cheapest to most expensive.
A blown fuse
Check the blower fuse before anything else. A fuse that blows again right after you replace the resistor points at a short or an overloaded motor, not at the fuse itself. Replacing the fuse a third time is not a repair.
A failing blower motor
Noise is the tell. Grinding, squealing or a fan that rattles when it spins means the bearings are going. Test the motor by feeding it power directly from the battery with the harness disconnected; if it runs away to full speed on its own, the resistor was never controlling it correctly. If the motor draws well above its normal high-speed current, replace the motor along with the resistor.
A faulty fan switch or control module
Newer vehicles with manual climate control often use a blower motor control module, a small transistor unit that chops current to set speed electronically instead of using a resistor pack. If your vehicle has one, a resistor will not fix it. Manual-control modules also fail outright and leave the fan dead at every speed.
Blocked airflow
A clogged evaporator core, a folded cabin air filter or packed ducts make the fan work harder and run hotter, which stresses the resistor. Replacing the filter and clearing the condensate drain is cheap maintenance and stops repeat failures.
Damaged wiring
Melted insulation, browned terminals or a connector that flexes loose means the current is too high somewhere. Do not wrap bad wire in tape and hope. Cut back to clean copper, crimp a proper butt connector, and heat-shrink it. If the harness is scorched, replace the affected section rather than reusing it.
Stop testing if the motor gets hot enough to smell, if the connector discolors, or if you hear arcing. Those are signs of a short, and a short will take the fuse, the wiring and possibly the control module with it.
Common Mistakes
Replacing the motor instead of the resistor. The tell is unmistakable: high works, lower speeds are dead. Pull the lower speed wires off the motor and confirm they were dead to begin with.
Forcing the connector. Pushing a plug that will not seat bends the pins back inside the housing, and the next failure is the melted connector everyone came here to avoid. Release the lock tab, confirm the pins are straight, and only then push.
Installing a universal part with the wrong resistance. Resistor packs with the same connector can carry very different tap values. Match by vehicle, not by connector shape, or the fan will run at speeds the switch cannot label.
Forgetting the negative battery terminal. A live circuit with a disconnected battery behind it can short the moment the metal tool touches the housing. Disconnect it, and confirm it is not resting on the post.
Overtightening plastic trim. The screws threading into the glove box and dash are plastic and strip easily. Snug is enough, and it is faster to add a quarter turn than to hunt a stripped screw head under the glove box.
Ignoring a blown fuse or damaged wiring. The fuse is a symptom. If it blows twice, stop changing parts and start tracing the short.
Skipping the connector. New packs arrive clean and dry. A light coat of dielectric grease on the pins keeps moisture and corrosion out and helps the next resistor survive the same heat.
Frequently Asked Questions
Is a blower motor resistor easy to replace?
Yes, it is one of the friendlier electrical jobs on a car. Most people finish in 30 to 60 minutes with basic hand tools, and the part is small enough to hold in one hand. The awkward part is access, not the repair. On many models you remove the glove box or a lower kick panel to reach the housing.
How can I tell if my blower motor resistor is bad?
The usual pattern is that low and medium speeds do nothing while high still works, because high bypasses the resistor entirely. A burnt plastic smell from the dash, a discolored or cracked connector, or air that stays warm on every setting are supporting signs. Unplug the pack and test it pin to pin with a multimeter for a confident answer.
Will a blower motor run without a resistor?
Yes, but only on high speed. Without the resistor there is nothing to drop the current, so the motor runs at full output and the fan switch carries the full draw. That extra load on the switch and connector is why a missing resistor often ends with a melted pigtail instead of a quiet fan. It also means no defrost on low settings.
How do I install a blower motor resistor?
Disconnect the negative battery terminal, open up the passenger side dash or glove box to reach the HVAC housing, unplug the wiring connector before removing the mounting screws, and lift the old pack out. Seat the new one flat, reinstall the screws, then push the connector on until the locking tab clicks. Reassemble and test every fan speed.
Where is the blower motor resistor located?
On most cars it is on the passenger side of the HVAC housing, at or just below the glove box door, or down near the floor under the dash. Trucks and vans often put it under the passenger footwell or behind a kick panel. Check your owner manual for the exact route, since trim layouts change between model years and trims.
Should I replace the blower motor and resistor at the same time?
Do both when the connector was melted, when the fan ran slower than it should, or when the motor sounds rough. Those symptoms mean the motor was pulling more current than the resistor is designed to handle, so a new resistor alone will fail again. If every speed worked before the resistor died and the motor sounds clean, the resistor on its own is the right call.
Conclusion
Start by confirming the symptom. Low and medium dead while high still runs means the resistor, and if every speed works you are looking somewhere else. Then match the part by year, make, model and trim, follow the access route in your owner manual, and treat the wiring connector as the most fragile part of the job.
That is how to replace a blower motor resistor the way a careful DIY owner does it: disconnect the battery, work from the passenger side, unplug before you unscrew, and test every speed afterward. If the fan runs rough or the connector was already melted, replace the blower motor at the same time so you are not back under the dash next month.