
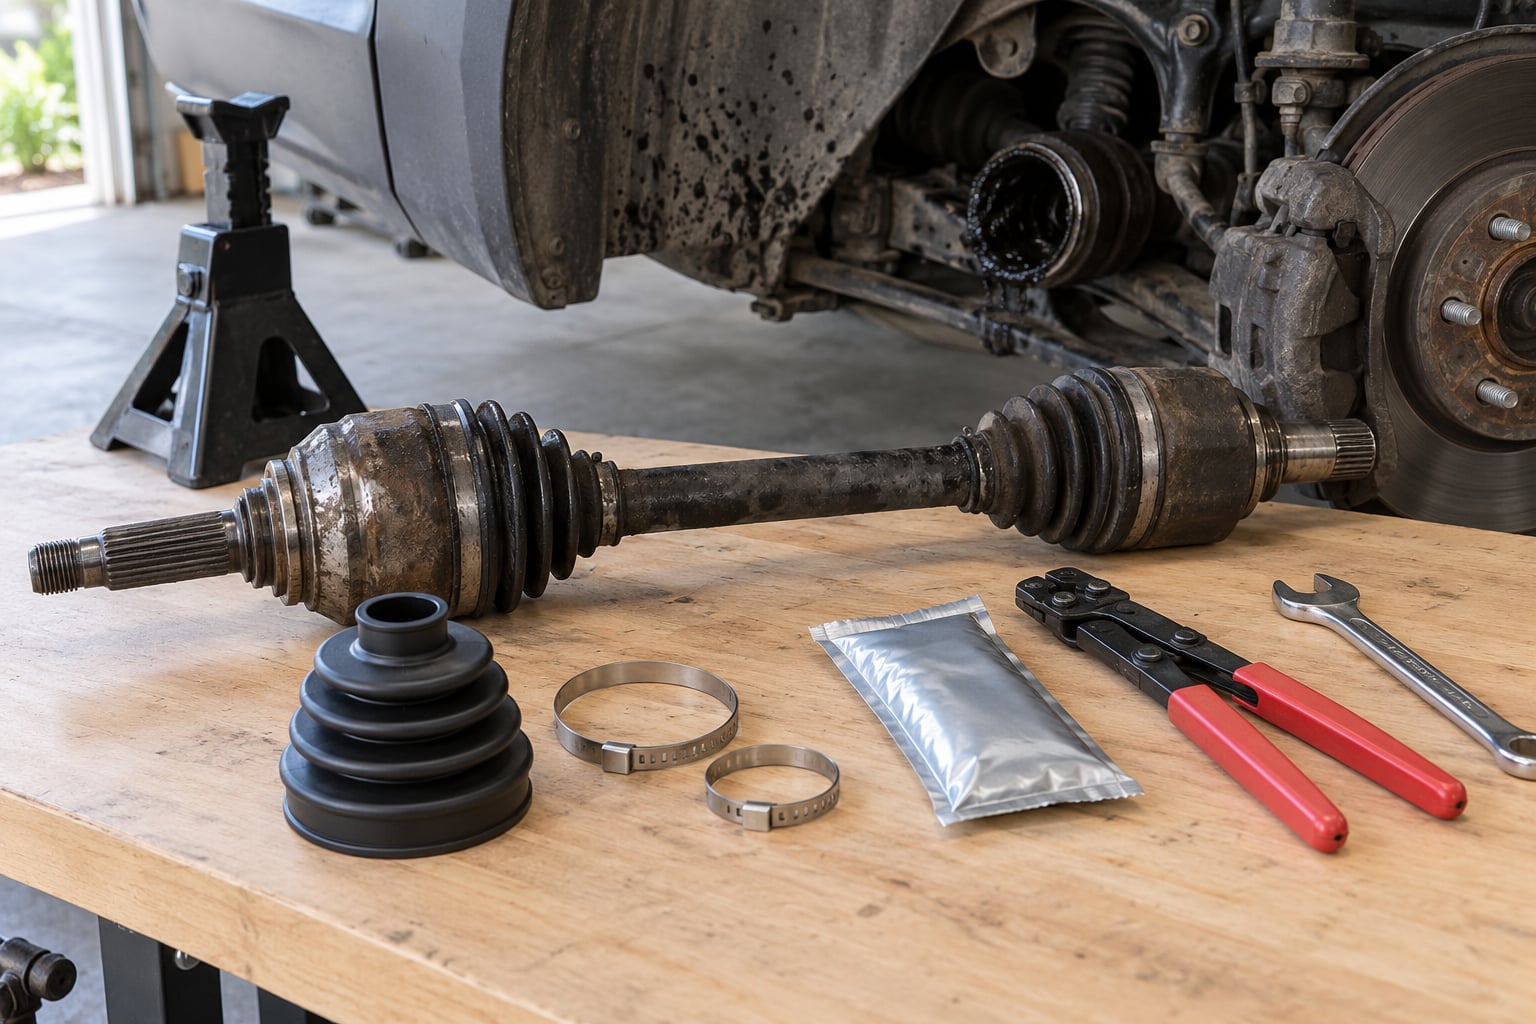
If you are asking what to do about a torn CV boot, the answer depends on one thing: whether the joint inside is still clean. Grease on the liner with no noise means a boot kit fixes it and the joint is fine. Clicking when you turn means the joint has already been destroyed by dirt, and no new boot will save it. That is the whole decision, and it takes about ten minutes to make.
A torn CV boot is not a same-day emergency. It is a countdown with a very predictable end, and the end is an axle that costs several times more than the boot you ignored. The trick is checking before you buy anything, because the symptom you can see and the part you need are often not the same part.
This guide covers the diagnosis, the tools and the full replacement sequence for front-wheel-drive and all-wheel-drive cars, BMWs included. Where a torque figure or a part number matters, use the service manual for your chassis code rather than a number from the internet.
What You Need
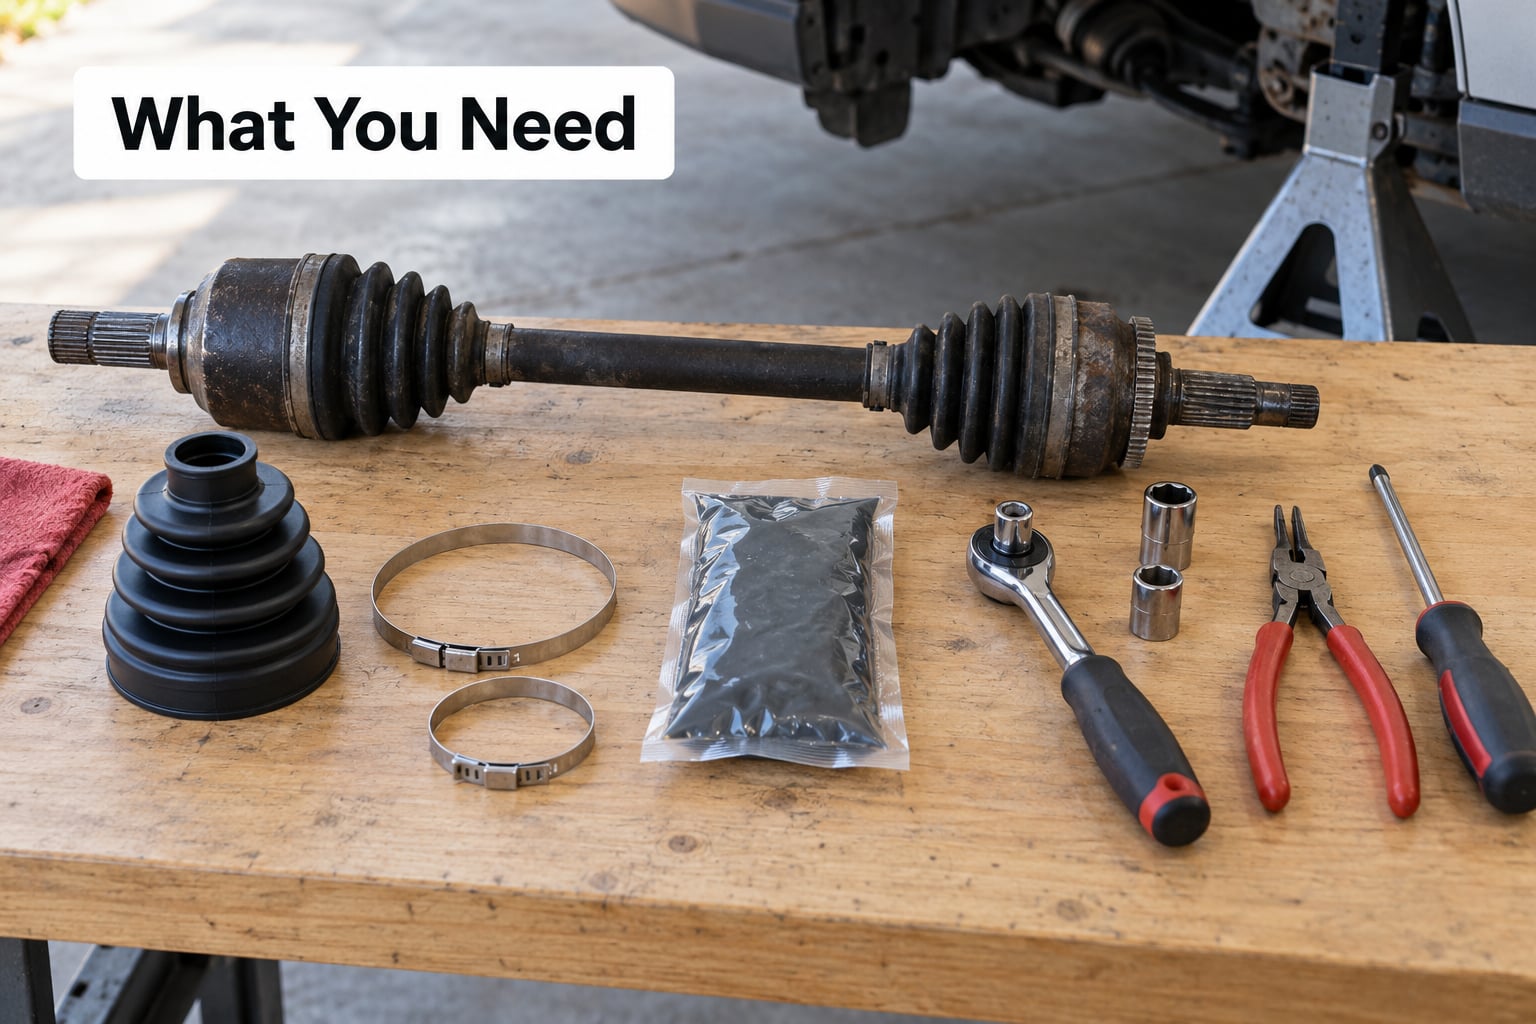
Three tool groups, and you only need the first one until you have looked at the joint.
For inspection only: a jack and a pair of properly rated jack stands, a lug wrench or impact driver, a flashlight and a phone camera. You also want gloves and a torque wrench within reach for later. Add a ball joint separator and a pry bar once you start disconnecting things.
For a boot kit repair: the kit itself, a crimping or banding tool for the boot clamp, a clamp-cutting tool, a stiff brush, brake cleaner, rags and a plastic tub to catch what falls out. That crimping tool is the item most home mechanics do not own, and it is the reason half-finished boot jobs sit in garages for years.
For axle replacement: everything above, plus a hub puller if the axle passes through the hub, a ball joint separator, a torque wrench with a calibrated range that includes the axle nut, and whatever the axle nut needs to hold it on a hub that has lost its staking.
The boot crimping tool comes in three flavours. A plier-style crimper squeezes the clamp band in place. A screw-type tool tightens a worm-drive band clamp, which is the cheap and forgiving option if your kit uses that style. A socket and ratchet with the correct band size is the third. If your kit ships with bolt-style clamps, a torque wrench is the tool that matters instead.
On parts, stick with the names that supply the carmaker: GKN Loebro, CRP and Rein, Beck/Arnley, and Vaico are the ones worth paying for. Economy kits exist and they usually work, but their rubber ages faster and their clamps loosen sooner. Use only the grease packet supplied with the kit.
Step-by-Step
How to Inspect a Torn CV Boot Safely
Both boots on each front axle can be checked with the wheel off and the vehicle resting on jack stands on level ground. Never work under a car held up by the jack alone.
Turn the wheel by hand first. That alone tells you a lot, because a healthy joint runs silent through its full range. Then look at the outer boot where it meets the wheel, and trace the boot back toward the transmission where the inner boot sits. On an all-wheel-drive car there are four boots in front of you, and on some layouts the inner one is only visible from underneath with the car on a lift.
What you are looking for:
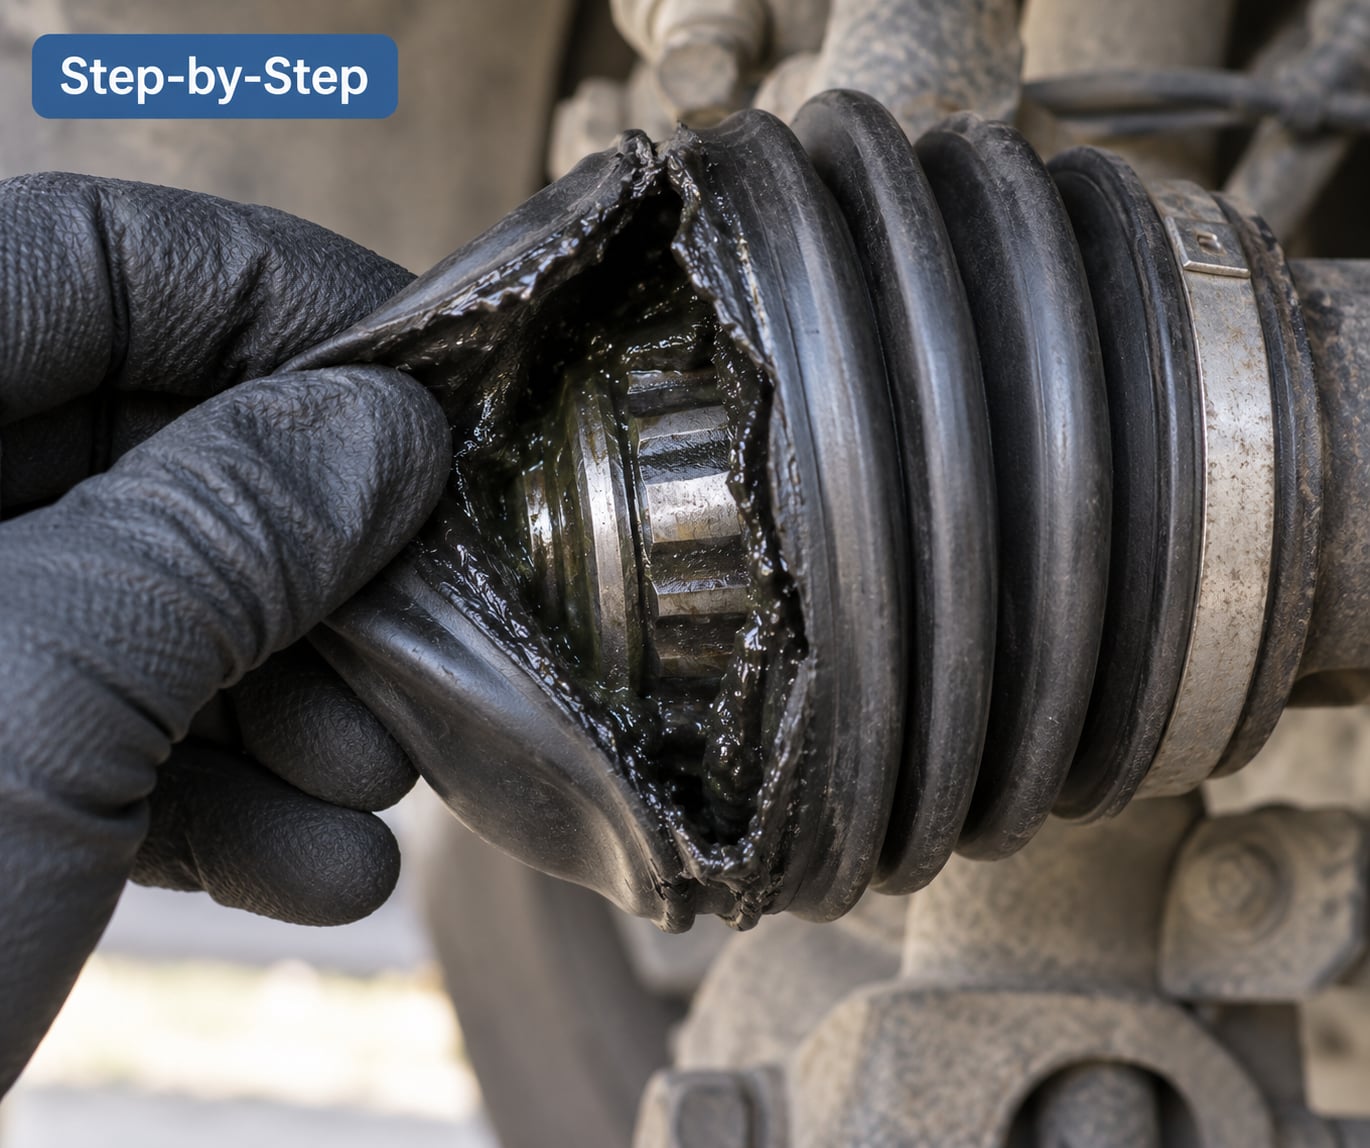
- A split along the length of the boot or a separated fold at the narrow end.
- A clamp that has walked off its groove and now sits loose on the bellows.
- Fresh black grease on the inside of the wheel, the fender liner or the control arm.
- Grit, rust-coloured water or dried grey paste inside the boot where grease should be.
- A boot that looks fine but has a shine at the widest fold, which is where cracks start.
If you find yourself wondering whether the noise is coming from the boot or the suspension next to it, it helps to know what a bad ball joint sounds and feels like, because the two get confused constantly.
Step 1: Confirm the Damage
Match what you hear and see to the repair path. The symptom tells you which part you actually need.
- Grease on the liner, no noise. The joint is probably fine. Clean it out and fit a boot kit. This is the cheap, easy case.
- Clicking or popping when you turn, at low speed. Dirt got in after the tear and the joint is already worn. Replace or rebuild the axle. A new boot will not fix this.
- A hum that changes pitch with road speed. Usually a wheel bearing, not the CV joint, but a destroyed inner joint can produce something similar on some cars. Spin the wheel and listen for change with load.
- Steering wheel shake that appears above a certain speed. Often a bent wheel or a worn CV joint that is no longer driving straight.
- Shudder at low speed in one particular gear. More often a driveline or mount problem than a boot.
Our rule of thumb is that noise changes what you buy. Grease alone means the boot. Anything audible at a standstill while turning means the joint.
Two noises worth separating from a hum are covered separately here: what causes a clicking noise when turning and a humming noise that changes with road speed.
Photograph the damage before you clean anything. The grease pattern on the liner tells you how long it has been throwing, and if the car was just out of the shop it tells you whether the tear happened on their watch.
Step 2: Decide Between a Boot Repair and Joint Replacement
Choose a boot kit when the joint was protected, the grease inside is still clean, and there is no clicking. Choose the axle when there is noise, when grit got in, or when the boot came apart rather than tore.
A boot that split along a fold from age usually means the joint stayed reasonably clean inside, so a kit is a fair bet. A boot that was punctured, or one that has been hanging loose with the clamp off, has been open to road salt and water, and the joint inside is a gamble.
On some cars the outer boot comes off without pulling the axle, so a kit is a two-hour job. On others the boots come off as a pair, which means removing the inner boot means disturbing both, and the shaft comes out of the transmission or the hub. Check the service manual before you buy the kit.
On all-wheel-drive cars, fresh oil at an axle seal service can be mistaken for a torn boot, and the reverse happens too: a torn boot lets water into the differential. If the joint gets replaced on one side, check the axle seal and the fluid level on that corner.
Step 3: Remove, Clean, and Inspect the Axle
Work from the service manual for your specific model. Torque values for the axle nut, hub bolts and flange bolts vary widely across engines and model years.
Loosen the axle nut before the vehicle is on stands, because it often tightens as the load comes off. With the wheel off, unbolt the hub or the axle flange, and if the lower ball joint or strut must come out to clear the shaft, separate the ball joint with a proper separator rather than prying. Forcing it with a chisel is how knuckles get cracked, and a replacement knuckle turns a small job into a large one.
Withdraw the shaft slowly and support it. Do not let the weight of the axle hang on the inner tripod joint or the outer joint’s splines. A tripod joint has three bearings sitting in a cage, and it will not tolerate being hung from the shaft.
Now the part that decides your repair path. Open the boot, drain everything out and look at the grease with the joint still on the shaft.
- Clean grease, colour intact, no rust or blackened water: pack it and fit the new boot.
- Water, rust, sand or metal paste in the grease: the joint is finished. Build or replace the axle.
- Play or rust on the bearing surfaces: finished, even if it still looks smooth.
Also look at the wheel side of the rotor and caliper while you are there. Grease thrown onto the rotor is messy but it does not stop your brakes, because the caliper and rotor sit outboard of where the axle grease goes.
Step 4: Install the New Boot or Axle
Work in this order: new boot on first, grease second, clamp third, shaft back in the vehicle last. It is much harder to fit a boot after the shaft is installed.
Slide the new boot over the joint and seat it fully so the bellows sit in their natural position with no twist. Check that the boot is pushed all the way onto the neck of the joint, because a boot mounted short will not seal and the clamp will have nothing solid to grip.
Pack in the grease from the kit packet. Push most of it down into the joint first so the bearings are fully coated, then work the rest into the folds of the boot and leave a little slack at the wide end for articulation. Ordinary lithium grease is not a substitute, because the joint relies on the specific film the supplied compound leaves between the bearing surfaces.
Fit the clamp and work it around the groove with a crimping tool, squeezing in several places rather than one. If you are using a worm-drive band, tighten it evenly until the band sits in the groove all the way round. If it is bolt-style, tighten the bolt to the maker’s figure. The clamp is the part that holds the whole repair together, so it gets the most attention.
Reinstall the axle, torque the axle nut to the manual’s specification, refit the brake and hub hardware, and torque the wheel lugs in the pattern the car uses. If you replaced the axle, discard the original axle nut and use a new one unless the service manual says otherwise.
Step 5: Check the Repair
Before the wheel goes on, spin it by hand through full lock in both directions. It should feel smooth and silent, with no binding and no gritty sensation.
With the wheel fitted and the vehicle back on the ground, check that there is no grease on the liner or the rotor. Turn the wheel lock to lock slowly at ground speed and listen. Silence at full lock is the single best sign that the joint packed correctly.
Re-torque the axle nut after 50 to 100 miles of driving. Then take a longer drive and confirm there is no hum, no click and no fresh grease reappearing. If the clicking comes back after a fresh boot, the joint was already damaged, and no clamp is going to change that.
Common Mistakes
Most failed boot jobs come down to six habits, and each one has a straightforward correction.
Refitting a joint full of contaminated grease. Old packs that have taken in water turn to paste, and re-greasing means removing all of it, not adding more on top. This is the most common mistake on a car where the grease has already been thrown out of the boot.
Treating a clicking joint as a boot problem. Noise at low speed means metal has already worn. Buy the axle, not the kit.
Using the wrong clamp or cutting the old clamp with the wrong tool. Cutting a band with side cutters leaves burrs and a loose end that can chafe through the boot. Cut it with a clamp-cutting tool or a hacksaw, and fit the clamp the kit was designed for.
Forgetting the grease packet, or using general-purpose grease. The packet in the kit is sized to the joint volume. Pack the joint first and the boot folds second.
Cracking the knuckle while separating the ball joint. Use a ball joint separator and support the knuckle as the taper releases. No chisels.
Overtightening the axle nut or the hub bolts. Both damage threads and can stretch the fasteners, and the torque figure is in the service manual for a reason. Also worth knowing that a seized or spinning axle nut on a hub without staking should be replaced, not forced.
One more worth naming: driving with a loose clamp. It flails against the boot and cuts it open within a few miles, which turns a cheap boot job into a full axle replacement.
Frequently Asked Questions
Can I drive with a torn CV boot?
Yes, but only if the joint is still clean. Grease on the liner with no clicking means you can drive carefully for a short distance to get parts or reach a shop. Clicking, humming or grinding means the joint is already damaged and every mile makes the axle replacement more certain. Keep it short, keep it slow, and avoid highway speeds where vibration loads the joint heavily.
Should I replace the CV boot or the whole axle?
Replace just the boot when the joint was protected, the grease inside is still clean and there is no clicking when you turn. Replace the axle when you hear clicking or popping at low speed, when the grease inside shows water, rust or grit, or when the boot came apart rather than tore. Pulling the inner boot on many cars means removing the shaft entirely, so check the service manual first.
What does a bad CV joint sound like?
A dry or worn CV joint clicks or pops intermittently while you turn at low speed, most clearly at full lock or during a slow parking-lot turn. It usually goes quiet when you straighten the wheel because the joint unloads. A hum that rises and falls with road speed is more often a wheel bearing. If you are not sure which one you have, jack the wheel up and compare the two sides while turning.
How much does it cost to replace a CV boot?
The part is the cheap part. A boot kit with grease and clamps is one of the smallest parts orders on the car, and the labor is an hour or two if the outer boot comes off with the axle in place. Shop labor adds several hundred dollars, and a complete axle in place of the boot multiplies the parts cost several times over. Quoted prices vary widely between an independent shop and a dealer.
Can I use ordinary grease inside a CV boot?
Use only the grease supplied with the boot kit. These joints depend on a specific molybdenum disulfide compound that stays in place under load and pressure, and general-purpose lithium grease does not behave the same way under those conditions. If the packet is missing, buy a kit that includes one rather than substituting from a tub on the shelf.
Do I need to replace the axle after a CV boot repair?
Not if the joint was clean and undamaged when you opened it up. That is the normal outcome when you catch a torn boot early. You do need the axle when the joint showed rust, water, grit or wear on the bearing surfaces, or when the clicking was there before the repair. On some cars replacing the inner boot requires removing the axle anyway, so the shaft comes out either way.
Conclusion
Start with the simplest test: turn the wheel at low speed and listen. No clicking means the joint is probably fine, so get the vehicle on stands, check both boots on that axle, and order the boot kit that matches your car. Clicking means the joint is already gone, and the job just became an axle replacement. Either way, decide before you buy a single part.