
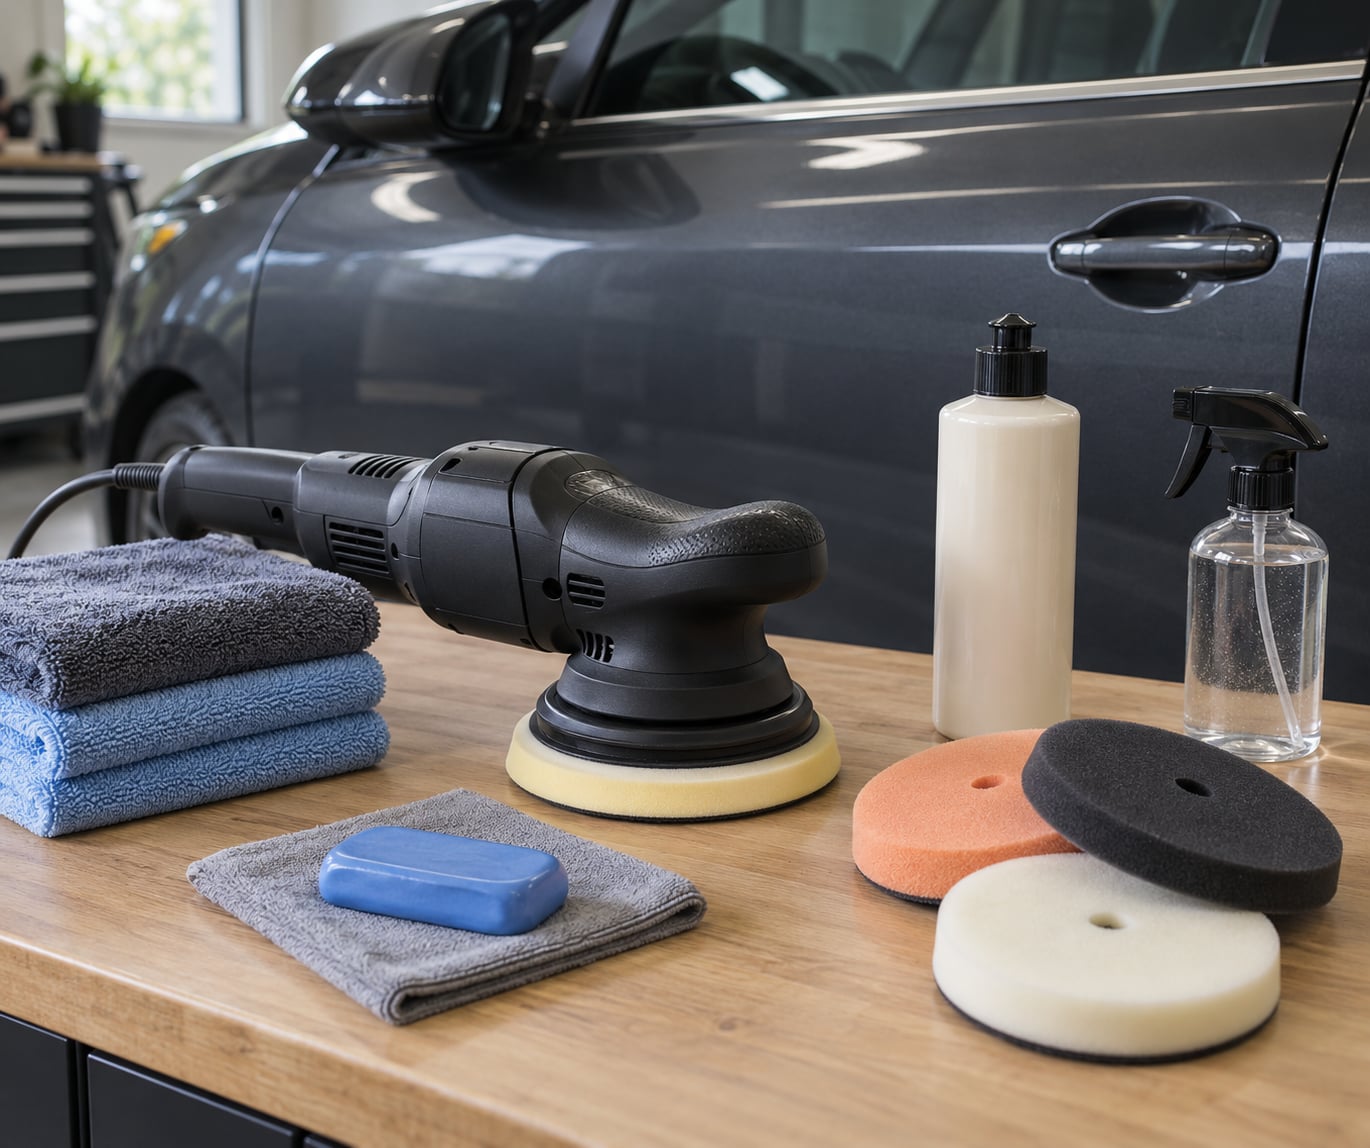
A dual action polisher, also sold as a random orbital polisher, is the safest machine for learning paint correction, because its pad spins on its own axis while orbiting a wider circle at the same time and the heat spreads out instead of burning into the clear coat. That is how to use a dual action polisher in practice: wash, decontaminate, tape, test, load a conservative pad and compound, work in small controlled sections, then protect what you just corrected.
One thing to settle before you start. A DA polisher removes swirl marks, light scratches, haze and water spots, and it will not remove a scratch that goes through the clear coat. If you can catch a fingernail in a defect, a machine polish will not fix it.
Budget a weekend the first time. Most of that time is washing, claying and wiping, not machine time.
Table of Contents
What You Need Before You Start
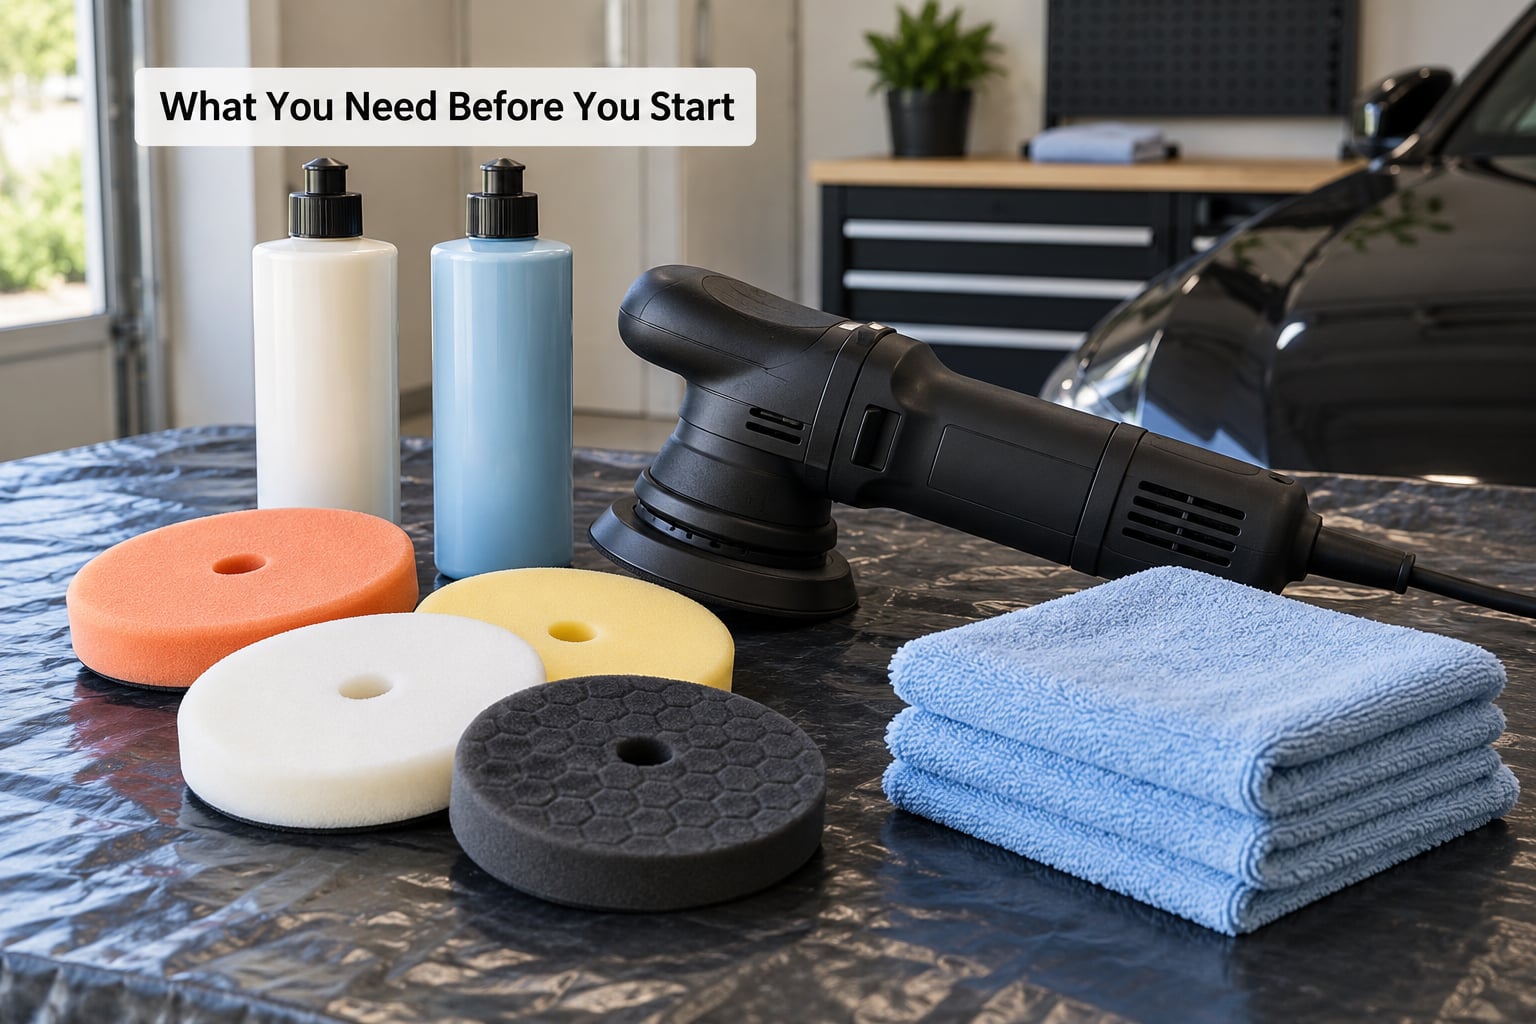
Most beginners arrive with the machine and nothing else, then spend the first hour improvising. Here is the full kit, grouped by what each item actually does.
Machine and plates. A DA with a 5 or 6 inch backing plate handles most panels. A 3 inch plate is worth having for door handles, badges, mirror caps and the tight radius along a hood edge, where a big pad overhangs the paint and heats it.
Pads, and more than you think. Get four or five of each type you plan to use. Foam, microfiber and wool pads behave differently, and a pad that has been loaded with the previous panel’s compound is a major source of micro-marring. Pads are consumables, not a one-time purchase.
Products. A compound for cutting, a one-step polish for maintenance work, and something to protect the finish afterward. Whatever you buy, look for wording that says it is safe to apply by machine or with a DA polisher.
Prep supplies. Clean edgeless microfiber towels, and more than you think you need. Six to eight per car is realistic because residue wipes get dirty fast. You also want a clay bar or decontaminating towel with its lubricant, a bucket and grit guard for washing, panel prep or diluted isopropyl alcohol, automotive masking tape, and a pad cleaning brush.
Protection and safety gear. Wax, sealant or a ceramic coating for after. Safety glasses, and a garage that is ventilated if you plan to run the machine with the door shut.
Step-by-Step: How to Use a Dual Action Polisher
1. Inspect and Test the Paint Before You Use a Dual Action Polisher
Wash and dry the car properly first, then decontaminate. Polishing over bonded grit, road film and clay dust grinds that contamination straight into the clear coat, and no amount of compound will get it back out.
Tape before you touch anything. Rubber window seals, textured plastic trim, badges, antenna bases and license plate frames will melt or burn at the tight radii where a spinning pad overhangs the edge of a panel. Low tack tape on a textured surface can still leave a mark, so follow the surface with plastic film on stubborn areas.
Look at the paint properly, under a light you can move. Modern clear coat has some give and can usually be corrected; single stage paint from decades ago, wrapped or matte finishes, and any panel already been sanded are all cases where you should be much more conservative or skip machine work entirely.
Then do a test spot on a flat panel you will not look at for a day. Twenty by twenty inches is plenty. Wrong pad or wrong compound shows up in under a minute as haze, micro-marring or a grey film, and you can stop and change it before you have covered the roof.
| Defect | What a DA polisher will realistically do |
|---|---|
| Swirl marks and fine scratches | Full removal in most cases, if the mark sits in the top of the clear coat |
| Haze, dullness, light oxidation | Full removal, and the biggest visible improvement for the least effort |
| Water spots | Improvement to full removal, depending on how deep the etching goes |
| Fine scratches you can feel with a fingernail | Improvement at best. Consider repainting that panel |
| Scratch through the clear coat to bare metal or primer | No change. This is bodywork, not polishing |
2. Choose the Right Pad and Compound
Match pad firmness to the defect, and compound aggressiveness to the pad. Softer pad and lighter compound for gloss and maintenance, harder pad and cutting compound for real swirls, and never a harder combination than the defect requires.
For a first session, a white foam finishing pad with a one-step polish is the right call on modern clear coat. It is forgiving, it finishes well, and it will not cut through clear coat while you are learning what the machine feels like.
Step up only when you have a specific defect that needs it:
- Cutting foam, usually yellow with a cutting compound for heavy swirl removal and deeper scratches. This is the combination that thins clear coat fastest, so keep sections small and pad changes frequent.
- Microfiber or wool pad with a light cut. More bite than white foam and less aggressive than cutting foam, and many people find a waffle pattern runs cooler and contours to the panel better than a flat face.
- White foam with a one-step polish for routine maintenance and gloss enhancement.
- Black or gray finishing foam with a fine polish to refine haze left behind after a cutting step.
- Soft white foam for applying wax or sealant, which is a different job from correction and runs at much lower speed.
3. Apply the Product Correctly
Load four to five pea-sized dots, spread around the face of the pad. On a large panel you can go to six or seven. What you are looking for is enough product to last roughly four to five minutes of work and no more.
Set the pad on the panel first, then bring the machine up to speed 1 or 2 to spread the dots over the whole face of the pad. Move to speed 3 and keep the pad moving in slow circles until the product is an even, thin film.
Overloading is the most common beginner mistake, and it is a self-inflicted one. Too much product throws off the back of the pad, slings across your bumper and dry door, and leaves a hazy film that takes far longer to remove than the polish took to apply. You cannot polish off excess product. You can only wipe it off.
Work one section at a time, roughly 2 feet by 2 feet, or up to 3 feet square on a large flat panel like a roof. A hood sized section is what turns a careful job into a sticky mess.
4. Polish with Controlled Movement
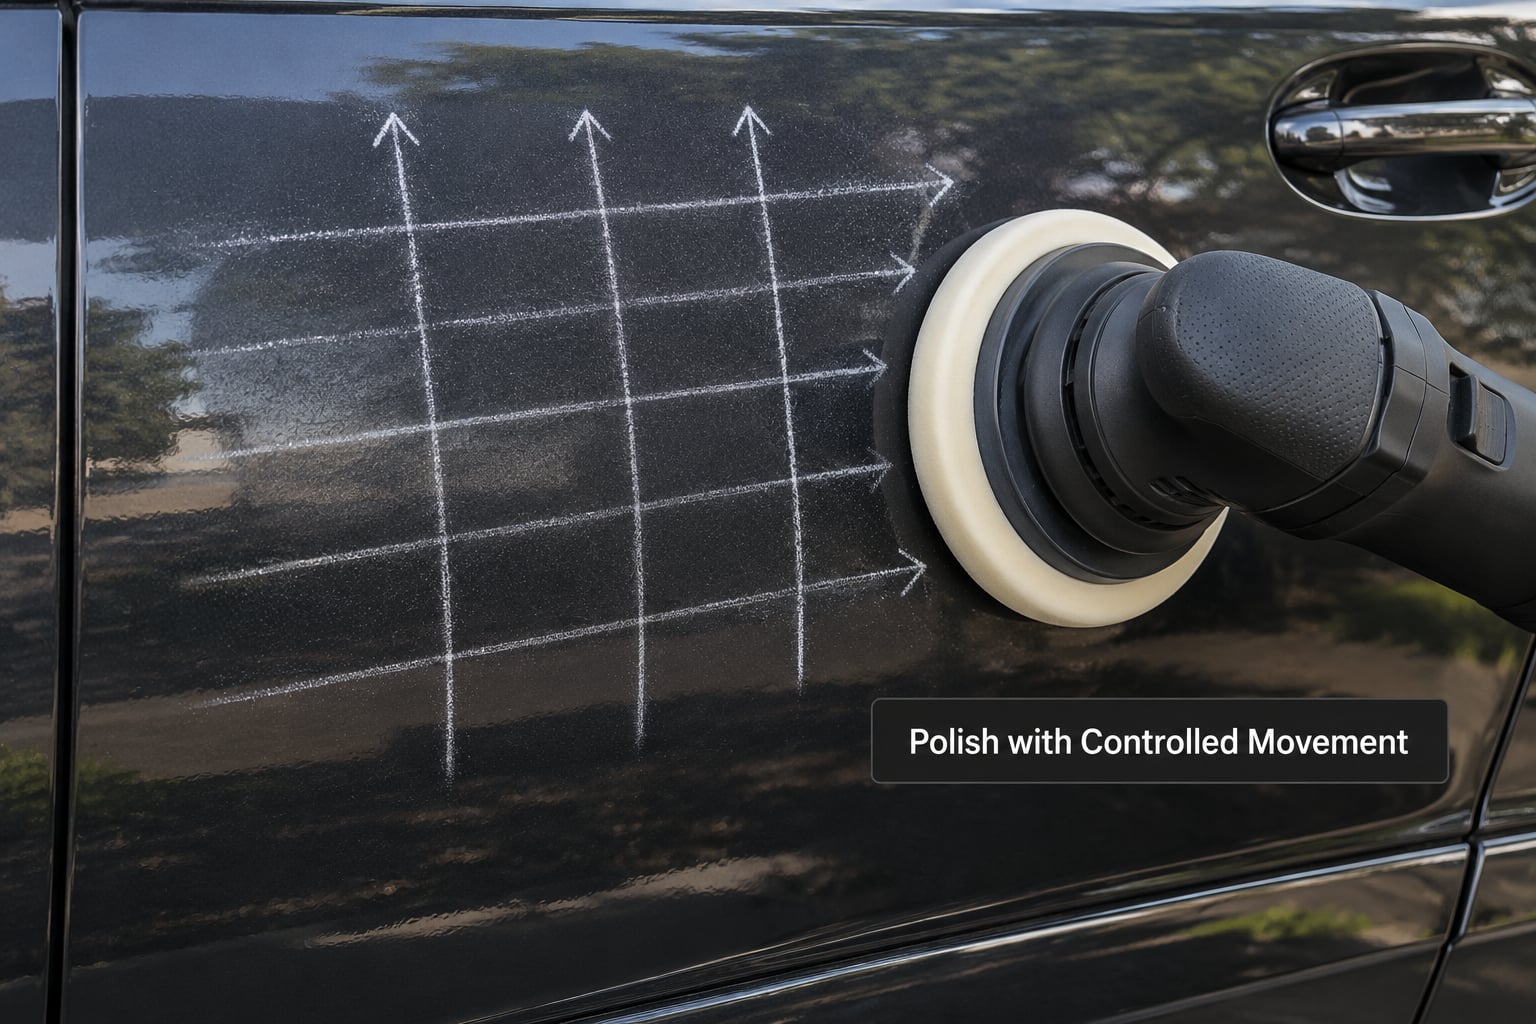
Raise the machine to speed 3 to 5 and guide it across the section in overlapping passes at roughly 1 to 3 inches per second. That arm speed is the number most beginners get wrong, in both directions.
| Variable | Setting | Why |
|---|---|---|
| Spread speed | 1 to 2 | Distributes product evenly before any cutting starts |
| Work speed | 3 to 5 | Enough pad rotation to cut, low enough to control heat |
| Arm speed | 1 to 3 inches per second | Faster movement thins the film and reduces heat and holograms |
| Pass overlap | About 50% | Even coverage without grinding one track |
| Pressure | Guide with your hands, let the machine’s weight do the work | Pressure stalls pad rotation, which is what causes heat and haze |
Work in a crosshatch pattern: overlapping passes up and down the panel first, then side to side. It covers the section evenly and makes it obvious where you have already been.
Keep the pad flat against the panel and never hold it stationary on one spot. Parking a spinning pad in one place is how you burn a mark into clear coat in about ten seconds, usually at the start or end of a panel where you are easing off.
Body position matters more than most guides admit. Get close to the panel, keep your elbows bent, and lean in so your face can see the pad and the reflection in the paint. Working with your arm extended at shoulder height feels harder and gives you a worse view of what is actually happening under the pad.
5. Check Results and Repeat Only If Needed
Lift the pad straight off the panel, without dragging it across the surface. Break the section down with a clean, dry edgeless towel folded into a square, one face per pass, then inspect in direct light rather than in open shade.
Three or four passes is a normal result for a one-step polish. Add more only if the defect is still clearly there and the paint is cool to the touch. If the panel is warm, stop and let it cool. Every extra pass thins clear coat a little, and a second pass that fixes nothing is pure loss.
Be honest about the result in direct light. Paint that looks fine in the shade can show holograms and micro-marring once the sun is on it, and that is where a lighter pad and a finer polish earns its keep.
6. Remove Residue and Protect the Paint
Do a final wipe with a fresh towel section, then strip the oils left by the polish with panel prep or diluted isopropyl alcohol. If you skip that step, sealant and wax bond poorly and you will wonder why the protection flakes off in weeks.
Let the panel cool and dry fully before protecting it. Then apply wax, sealant or a coating by hand, or by machine if you want the speed: soft white pad, a thin and even layer, speed 1 to 3, and a wider spread pattern than you used for correcting. Machine application is a maintenance shortcut, not a replacement for reading the product label, since some waxes and coatings are hand application only.
Common Mistakes That Damage Paint
Almost every damaged clear coat I have seen traces back to one of these.
Too much product. Extra polish does not polish extra. It hazes, slings and makes removal miserable. Four to five dots is the number.
Too much pressure. Push down and the pad stops rotating properly, sometimes completely. All you are doing then is generating heat with a loaded pad sitting still, which is exactly the burn-through scenario a DA is supposed to prevent. Guide the machine, do not press it.
Moving too slowly. Slow is not careful. Slow arm speed on one spot lets the compound cook into a sticky, uneven film that is harder to remove than the defect you started with. Keep the pad moving.
Parking the pad in one place. Any hesitation, any phone check, any time you stop to look at something else, and a spinning pad can leave a mark. When you stop, lift it off.
Polishing a dirty car. No amount of compound fixes dirt that has already been ground into the clear. Wash and decontaminate first, every time.
Skipping the tape. Trim, seals and badges melt at the edges. Tape costs a few minutes.
Using one pad all day. Clean pads between sections with a pad cleaning brush, and swap to a fresh one rather than trying to scrub a loaded pad back into service.
Working huge sections. Two feet square is a section. If the polish is disappearing and you are not three quarters finished with the panel, the section was too big.
Skipping the test spot. Five minutes there can save a whole panel.
Polishing hot paint in direct sun. Work in shade, on a panel that is cool to the hand. If it is warm before you start, it will be much warmer once you are ten minutes into a section.
Frequently Asked Questions
What speed should I use when polishing a car with a DA polisher?
Use speed 1 to 2 to spread the product, then speed 3 to 5 to work the section. Higher settings on a DA do not mean faster cutting, they mostly mean more heat and more haze. Move with the machine rather than pressing it, and drop back to a lower speed on tight edges, badges and trim.
How much pressure should I put on a dual action polisher?
As little as you can while keeping control. A DA polisher has enough weight to do the work on its own, and extra downward pressure actually stalls pad rotation, which generates heat instead of cutting. If the pad stops spinning freely and the panel gets warm, you are pressing too hard.
How many passes does each panel need?
Three to four overlapping passes per section is normal for a one-step polish. Judge by the result in direct light rather than by a count, and add a pass only if the defect is still clearly visible and the paint is cool. Beyond that, extra passes thin clear coat without improving the finish.
Does the pad on a DA polisher actually rotate, or just orbit?
Both. The pad spins on its own axis while the whole backing plate head orbits in a wider circle, which is why the motion is called dual action or random orbital. Because the pad does not spin in one fixed direction, it still cuts, but the heat stays spread out instead of concentrating in one spot.
Is a DA polisher safe for a beginner to use?
It is the safest machine polishers come with, and most detailers start on one. The random motion forgives small mistakes in speed and pressure. It is still capable of burning a spot if you park a spinning pad in one place, so tape your trim, test a small area first, and take it slowly.
Conclusion
The safest first session runs in this order: wash and decontaminate, tape the trim, inspect the paint, run a test spot, then use a conservative pad and compound on a white foam pad with a one-step polish. Work 2 foot sections at speed 3 to 5, move at 1 to 3 inches per second with 50 percent overlap, let the machine’s weight do the work, and inspect in direct light before you repeat anything.
Then wipe, de-oil, and protect the finish. Get that sequence right and the DA polisher is the least intimidating part of the whole job.