
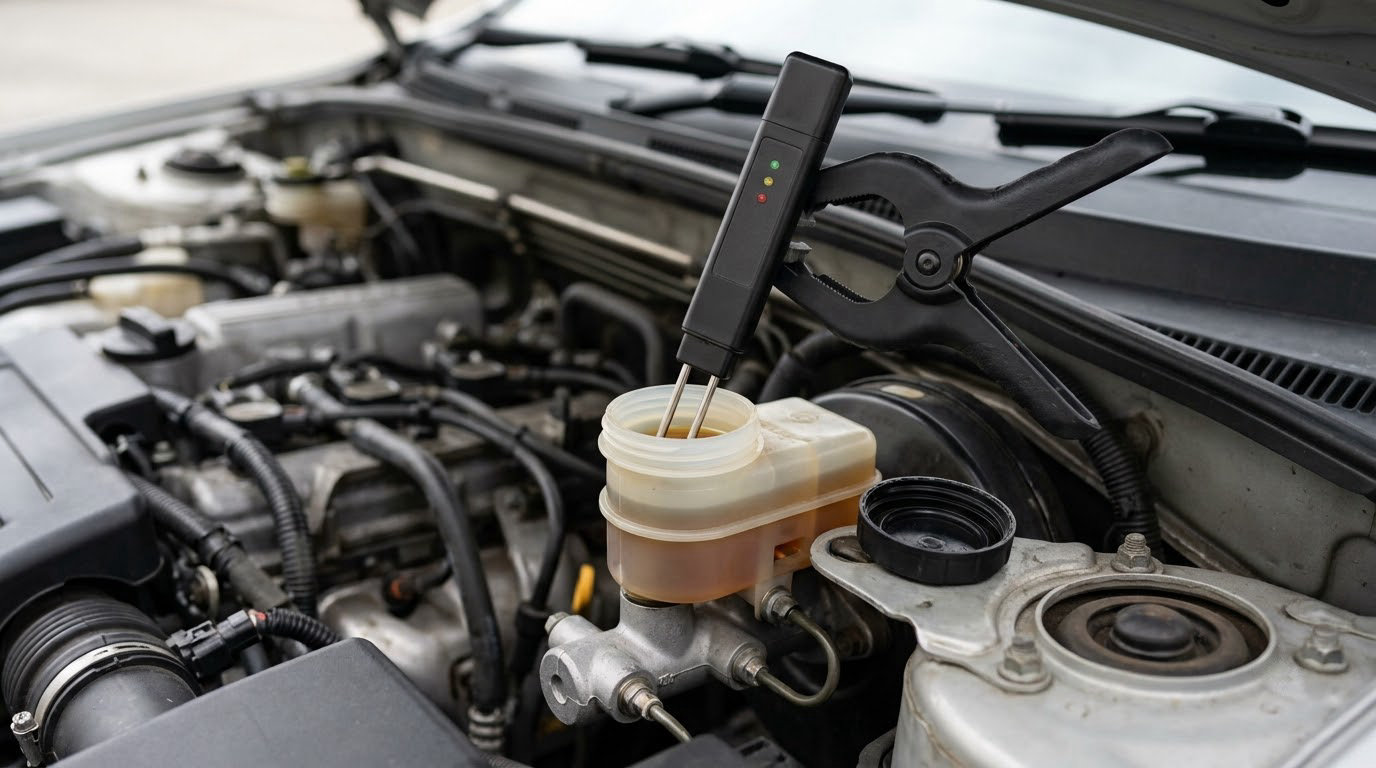
To test brake fluid with a moisture tester, park the car level with the engine off and cool, dip the tester’s probe into the reservoir without touching the sides, wipe it, dip it again, and wait for the reading. On most pen-style meters, anything at or above 2% moisture means schedule a flush, and 3% or more means stop putting it off.
The whole job takes about ten minutes, and the tester costs less than a single shop coffee. What it does not do is tell you anything about pads, discs or calipers.
Brake fluid is hygroscopic, which is the polite way of saying it drinks water straight out of the air through rubber seals and the brake lines. Water drops the fluid’s boiling point, so under repeated hard braking the fluid can part-way to vapour instead of staying liquid. That shows up as a soft pedal, longer pedal travel, or brake fade on a descent. The number on the tester is the only cheap way to know it is happening.
Table of Contents
- What You Need
- How to Test Brake Fluid with a Moisture Tester
- Common Mistakes
- Safety and Maintenance Tips
- Frequently Asked Questions
- What moisture percentage is bad for brake fluid?
- How often should I test brake fluid for moisture?
- Can I test brake fluid with a refractometer instead of a moisture tester?
- Does a moisture tester detect other brake-fluid problems?
- Should I flush brake fluid after a failed moisture test?
- Can I mix DOT 3 and DOT 4 brake fluid?
- Conclusion
What You Need
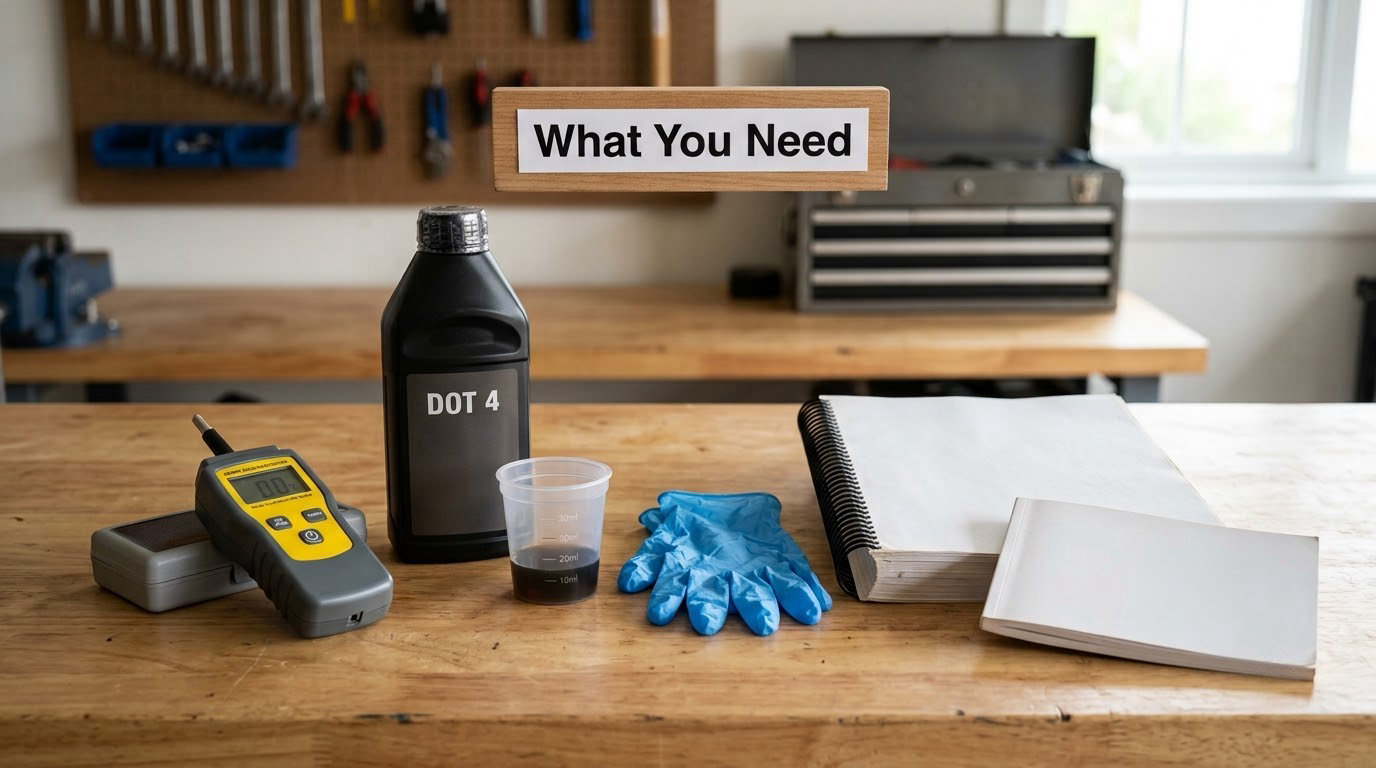
Gather this before you pop the cap, so you are not halfway through a test with nothing to write on.
- A brake fluid moisture tester. A pen-style conductivity meter is the DIY standard. Read the label to see which fluid types it is calibrated for.
- The brake fluid specification for your BMW.
- A clean, lint-free rag or paper towel.
- Nitrile gloves. Brake fluid eats paint.
- A small clean container, syringe or turkey baster if you want to sample away from the car.
- A paper towel or drip tray to catch drips.
Your owner’s manual is on that list for a reason. It tells you whether the car takes DOT 3, DOT 4 or, on some models, DOT 5.1, and it is the last word when a tester’s reading and the manual disagree. A moisture tester measures water content only. It cannot see worn pads, a leaking wheel cylinder, or air in the lines.
How to Test Brake Fluid with a Moisture Tester
Check the Tester and Fluid Requirements
Start with fresh batteries. A weak cell makes a conductivity meter drift, and a drifting meter gives you a number with no confidence behind it. Most pen testers also come with a calibration or zero-check step that expects a known-dry reference.
Then match the tester to the fluid. On a forum thread in r/CarTrackDays, owners complained that widely sold units are calibrated for DOT 4 only, which makes a reading on DOT 3 or DOT 5.1 close to meaningless. A DOT 4-only meter on a DOT 3 car is guessing. If your tester does not list your fluid type, test anyway for a rough trend, but treat the percentage as an estimate.
Note the bottle’s date if the fluid is already open. Most people find a container that has been sitting on a shelf since the last service.
Prepare the Vehicle and Fluid Sample
Park on level ground, leave the engine off, and let everything cool down. Cold fluid gives a slightly different conductivity reading than warm fluid, and a hot system means hot components under the cap.
Find the reservoir on the master cylinder, check the level against the MIN and MAX marks on the plastic, and clean around the cap before you remove it. Wipe the inside of the cap too; it usually holds a layer of condensed water or old grime that would otherwise drip straight back in.
Take the sample straight from the reservoir with the probe, or with a clean baster into a dry glass. Whatever you use must be bone dry. A damp funnel, a water bottle cap, or a squeeze bottle that once held tap water will read high and send you chasing a problem that is not there.
Run the Moisture Test
- Lower the probe into the fluid until the sensing tip is fully submerged. Keep it off the bottom and off the reservoir walls; touching metal changes the reading.
- Hold it for five to ten seconds, or until the meter stops flickering. This is the settling time the calibration depends on.
- Wipe the probe with the clean lint-free cloth. One pass, straight down, no scrubbing.
- Re-dip it for a second reading. The second number is the one most owners treat as the real result, and the gap between dip one and dip two is a useful accuracy check on your technique.
- Read the display or count the lit LEDs. Five LEDs in green, yellow and red is a common scale, with the last red band meaning 4% or worse.
- Write it down, along with the fluid type and the mileage. A number without those three details is a number you will doubt in six months.
Before you trust any of it, dip the probe into known-new fluid from an unopened bottle. If it will not read near zero, the meter is out of calibration and its answer on your car means nothing. Owners on the enthusiast forums have flagged testers that never reached zero on fresh fluid as the single most common accuracy complaint.
Interpret the Reading
Here is how to test brake fluid with a moisture tester and actually use the answer. The bands below are the common industry reading, but your BMW service manual takes priority every time.
- 0% to under 1%. Fresh or recently flushed. Note the reading and move on.
- 1% to 2%. Acceptable for now, not good forever. Plan a flush inside your normal service window, sooner in humid climates.
- 2% to 3%. Schedule a fluid change. This is the usual action threshold, and owners who found two yellow lights on a soft pedal treated it the same way.
- 3% to 4%. Flush soon. At this level the wet boiling point has dropped far enough that fade under repeated braking becomes a real possibility.
- 4% and above. The top red band. Do not drive the car hard until the fluid is replaced.
Two things change how much a number matters. Fluid age does: most makers specify an interval around two years or 24,000 to 40,000 miles, and much of that limit is about moisture rather than pad wear. DOT 5.1 silicone behaves differently, since it absorbs far less water and tends to read near zero regardless of age, so a rising number on a silicone-filled car means something specific happened to that fluid.
Flush or Replace When Needed
Once you are past 2%, a flush is the fix. A proper flush pushes new fluid through the master cylinder, lines and each caliper in turn, with the reservoir kept topped up and each wheel bled in turn until old fluid stops coming out. Skipping the refill while bleeding is how people end up with air in the lines and a pedal that goes farther than it should.
Use only the fluid your BMW calls for, from a sealed container. Fluid that has been open absorbs moisture from the bottle itself, which defeats the flush you just paid for.
Mixed fluid is worth being blunt about. DOT 3 and DOT 4 are close enough that a shop will often blend them, but never assume a swap is free of consequence. Silicone DOT 5 fluid is a different chemistry and will not mix with glycol at all, so check the cap and the manual before anything goes into the reservoir.
Have a qualified shop bleed and inspect the system if the pedal feels spongy after the flush, if fluid is low between services, if you see it in the fluid, or if any part of the system is open.
Common Mistakes
Testing dirty fluid. A reservoir with a rusty ring around the cap, a probe that has been in the tool drawer for a year, or a container rinsed with tap water all bias the result high. Fix: clean the reservoir and the cap, and rinse the probe with clean brake fluid before the first dip that counts.
Testing the wrong specification. A DOT 4-only meter cannot be trusted on DOT 3 or DOT 5.1. Fix: check the fluid type on the reservoir cap and the manual against the tester’s calibration label before you read anything into the result.
Opening a hot system. You get a less stable reading, and you are working over hot metal. Fix: park, wait, and test cold.
Treating one number as a diagnosis. A moisture reading covers one variable. Fix: pair it with a level check, a look at the fluid’s colour and clarity, and a pedal-feel assessment. A soft pedal with clean, low-moisture fluid points somewhere else, such as air or a caliper sticking.
Adding distilled water to improve the number. This is the internet’s worst brake advice and it does the opposite of what you want. Fix: replace the fluid. If a reading is high, the answer is new fluid, not dilution.
Believing fluid colour alone. Dark fluid tells you it is used. It does not tell you how much water is dissolved in it. Fix: use the meter for the number and colour only as a rough screen.
Safety and Maintenance Tips
- Never work on a hot system. Brakes hold heat for a long time after a drive, and fluid burns.
- Work in a ventilated space. Glycol vapour is not something you want to breathe heavily, and spilling it on your skin calls for soap and water, not a workshop rag.
- Brake fluid strips paint and attacks coated wheels. Mop it up immediately and rinse the surface.
- Store fluid sealed, upright, in the original container. Once opened, treat it as a short-life item rather than something to keep in the cupboard for years.
- Check the level at every oil change. Low fluid usually means a worn pad or a leak, and it is a monthly-style check once you know the car.
- Keep the cap clean and the reservoir free of debris between services.
- Dispose of used fluid through an auto parts store or a hazardous waste facility rather than pouring it out.
One last thing worth knowing: fluid does not circulate and mix evenly through the whole system. A reservoir reading and a caliper reading can legitimately differ, which is why one owner with 2.5 years and 10,000 miles on the fluid saw under 1% at the brakes but 4% in the clutch. If a car has been neglected badly, sampling a bleeder port as well as the reservoir gives you the worse of the two numbers, and the worse one is the one to act on.
Frequently Asked Questions
What moisture percentage is bad for brake fluid?
Around 2% is the usual action threshold, and many owners treat it that way. From 3% upward the wet boiling point has dropped enough that brake fade under repeated hard braking becomes a genuine possibility, and 4% or more means do not drive hard until the fluid is replaced. Your BMW service manual takes priority over any generic number.
How often should I test brake fluid for moisture?
Once a year for most cars, and any time you notice a soft pedal or plan a long descent. If the fluid has never been changed and the car is more than two years old, test now rather than waiting. Track-day drivers test before every event because hard braking is exactly the condition that turns a mediocre reading into a problem.
Can I test brake fluid with a refractometer instead of a moisture tester?
Yes, and a refractometer is the more accurate instrument. It measures the refractive index of the fluid, which maps closely to water content, so it gives a real number rather than an LED band. The catch is cost and technique, which is why most DIY owners use a conductivity pen and reserve the refractometer for track prep or shop work.
Does a moisture tester detect other brake-fluid problems?
No. It measures water content, nothing else. A low reading does not rule out degraded fluid from heat, contamination with oil or coolant, or a fluid that is past its interval. Copper and contamination test strips exist for that, and the level check, the fluid colour and the pedal feel still have to be part of the picture.
Should I flush brake fluid after a failed moisture test?
If the reading was 2% or higher, yes. The fluid is flushed with new fluid of the type your BMW specifies, bled in sequence at each caliper, with the reservoir topped up throughout. If a flush does not fix a spongy pedal, the problem is likely air, a sticking caliper or a leak rather than moisture, so get it inspected.
Can I mix DOT 3 and DOT 4 brake fluid?
Mixing them is not ideal but it will not destroy anything; the risk is that the blend falls below the viscosity and boiling behaviour your car was designed for. DOT 5 silicone is a different chemistry and must never be mixed with glycol fluid. Use only the specification in your owner’s manual, from a sealed container.
Conclusion
Start by dipping the probe into the reservoir cold, wiping it, re-dipping, and reading the second number. If it comes back at or above 2%, book the flush using only the fluid your BMW manual specifies, and keep your eyes off the wheel and away from the cap until the system is bled properly. That single ten-minute check is the earliest warning you will get that your brakes are about to get worse.