
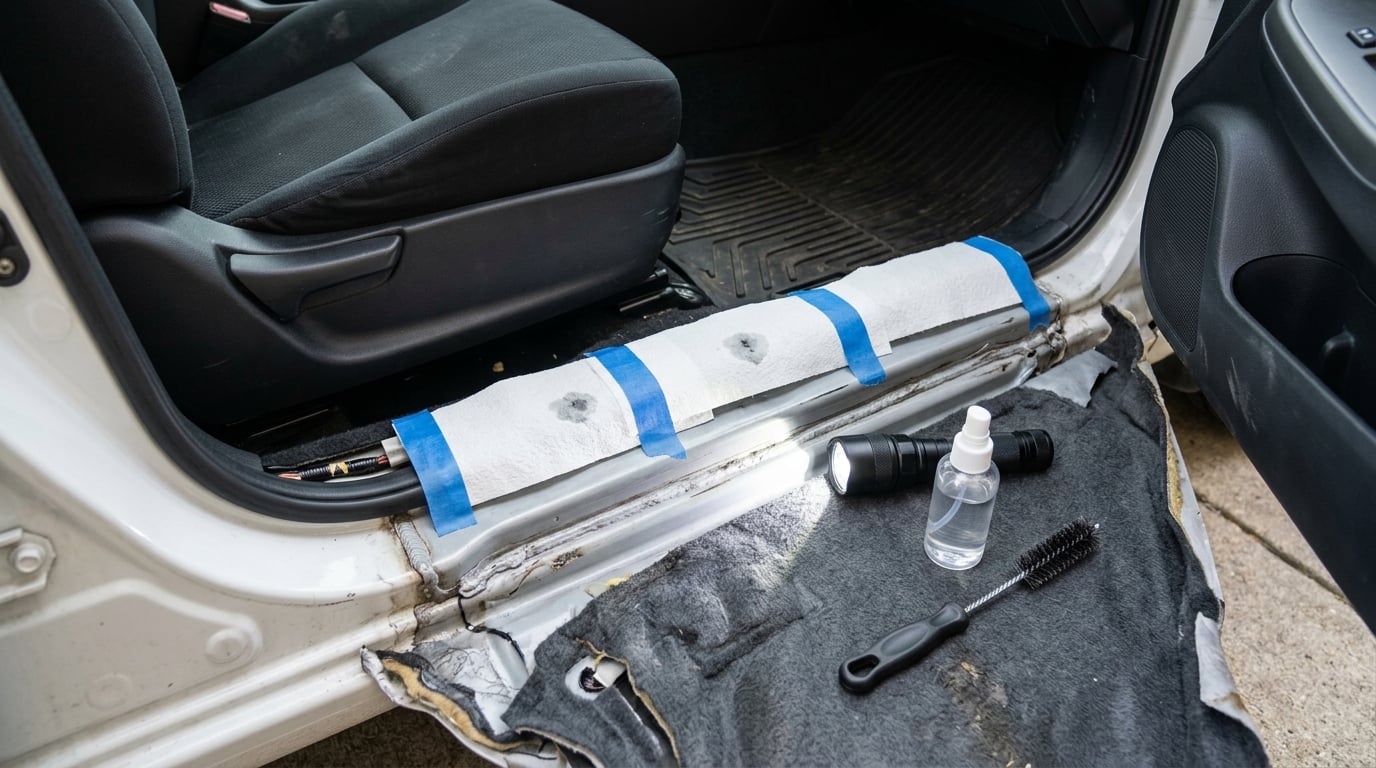
Updated for October 2026
To find a water leak in a car interior, you work out when the water shows up, dry the cabin completely, then reproduce the leak and trace the water back to where it actually entered. The wet patch on the carpet is almost never the entry point, because water runs along wiring looms and soaks upward into foam padding before it finally drops to the floor.
Most people get stuck because they start by pulling trim. Start at the other end instead: the timing of the leak narrows the suspect list faster than any amount of disassembly. Budget a couple of hours for the first pass, longer if you have to drop a kick panel or a seat, and call it a weekend job if the car has a sunroof.
There is one more thing to sort out before you get wet: the passenger footwell on most cars is where the body control module, a handful of relays and several wiring connectors live. If you see standing water there, or green corrosion on a connector, stop driving the car until the source is fixed and the footwell is dry.
Table of Contents
- What You Need
- How to Find a Water Leak in a Car Interior: Step by Step
- 1. Record When and Where the Water Appears
- 2. Dry the Interior Before Testing
- 3. Inspect Sunroof, Window, and HVAC Sources
- Sunroof and drains
- Windshield and cowl
- Windows, weatherstripping and the door membrane
- Heating and air conditioning
- 4. Reproduce the Leak With Controlled Water
- 5. Trace the Water’s Path
- 6. Remove Only the Trim Needed for Inspection
- 7. Isolate the Source and Confirm the Diagnosis
- 8. Repair, Dry, and Prevent a Repeat
- Common Mistakes
- Frequently Asked Questions
- Where do car interior water leaks usually start?
- Why is my car carpet wet after rain even though the windows are closed?
- Can a water leak in a car cause mold or electrical damage?
- How do I find a car leak if there is no visible puddle?
- What BMW areas should I inspect for an interior water leak?
- When should I take my car to a mechanic for an interior leak?
- What to Do First After Finding the Water Source
What You Need
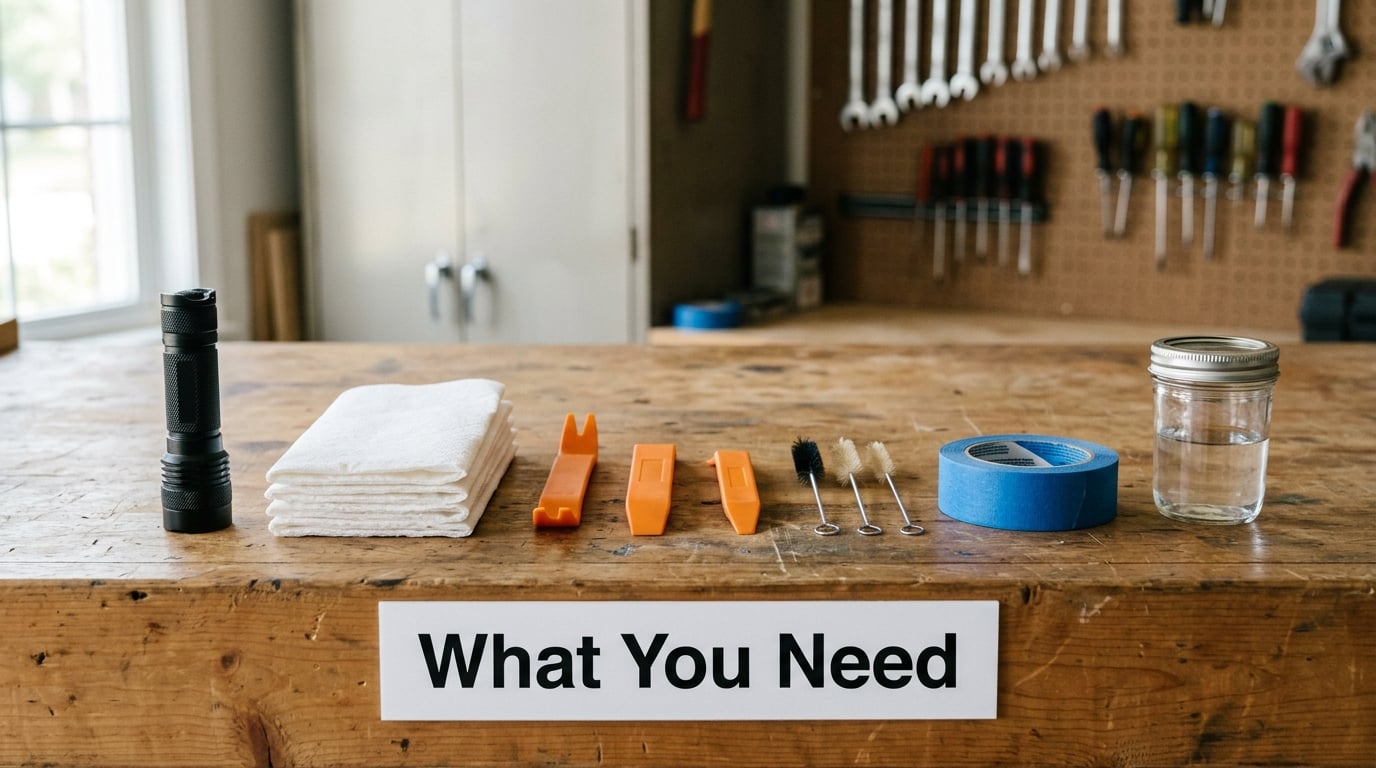
The tool list for this job is short, and most of it you already own. Bring more light than you think you need, because the difference between spotting a wet seam and missing it is a narrow beam at a low angle.
- A bright flashlight or a headlamp. A headlamp frees both hands, which matters once you are under a dashboard with a hose in one hand.
- Absorbent paper towels or plain paper towels. These are your moisture detector. Hold a sheet against a seam and it tells you wet or dry instantly.
- Absorbent powder, talcum powder or cornstarch. Diag.net regulars recommend dusting it along suspect seams; it turns into a dark line exactly where water travels.
- Painter’s tape for marking a drip point and for the newspaper-strip seal test described in step 5.
- Trim removal tools, plastic spudgers and a flat screwdriver. Metal pry bars will scar the pillar trim and cost you more than the leak.
- Small nylon brushes or a flexible drain snake for the sunroof and cowl drains.
- A spray bottle and a garden hose with a gentle nozzle, plus a bucket.
- A wet/dry vacuum and, if you have one, a small dehumidifier.
- A phone camera to shoot a video of the interior while you are outside pouring water.
Gather your vehicle information too. The build date of the car, any records of windshield, sunroof or door glass work, and whether the leak started before or after that work narrow the field before you touch a single screw. Follow the manufacturer’s procedure in the owner’s manual for anything involving trim, drains or the cabin air filter housing, and leave glass resealing and heater core work to a shop.
How to Find a Water Leak in a Car Interior: Step by Step
The sequence below is ordered by cost and effort. Each stage either eliminates a group of suspects or narrows the field, so skipping ahead to step 6 with a wet carpet and no timing information is what turns a two-hour job into a weekend one.
1. Record When and Where the Water Appears
The first clue to help find the leak is when it happens. Write down the date, the weather, whether you drove through rain or snowmelt, whether the car went through a car wash, and exactly which areas were damp when you noticed. Then check whether it only shows up on a slope, only after using the air conditioning or defroster, or with no rain at all.
This single question is the highest-value step in the whole process, because each answer eliminates a different set of suspects before you touch a tool.
| When the water appears | Most likely sources | Where to look first |
|---|---|---|
| Only after rain, snowmelt or a car wash | Windshield urethane bead, cowl drains, door weatherstripping, sunroof seals | Top edge of the windshield, cowl grille, door frames |
| Only when parked facing downhill or on a slope | Blocked drain, loose body seam, hatch or liftgate lock, door latch area | Drain outlets, quarter panel seams, hatch striker |
| Only after running the air conditioning | Condensate drain tube, or a cabin air filter housing seal | Evaporator drain under the passenger side |
| Only after using the defroster or heater | Heater core, or the A-pillar or cowl area feeding the HVAC case | Top of the firewall, HVAC case seams |
| Car wash only, never in rain | High-pressure-only seal failure, usually a door or hatch seal | Newspaper-strip seal test on doors and hatch |
| No rain at all | Coolant, an interior hose, a failed window regulator drain, an open drain bung | Identify the liquid first, then follow the hose |
| Different area on every rain | Several small leaks, or water travelling along a common path | Trace the path with powder before replacing seals |
Note the pattern of the damp area too. A damp patch on the passenger seat with a dry footwell usually means the water is coming down a pillar or the A-pillar, not up from the floor.
2. Dry the Interior Before Testing
Testing a wet cabin is guesswork, because the first drop you see may be the last of the original water. Pull the floor mats, then the rubber trunk mat, and vacuum up standing water with the wet/dry vac.
Foam padding under the carpet is the reason this step matters. Owners on a Porsche Club GB thread described foam that held massive amounts of water and needed a dehumidifier in the car for days after the leak was fixed. A saturated pad holds enough moisture to make every seam look wet, so a false positive sends you chasing a leak that isn’t there.
Run the heater on high with the windows cracked, park in the sun with the doors unlocked, or place a dehumidifier and a bowl of cat litter inside overnight. Keep water away from electrical components while you work: unplug nothing, but don’t spray near the fuse box or the body control module, and don’t leave standing water in a footwell overnight.
Once the carpet feels dry to the touch and the paper-towel test comes back clean in the footwells, you have a baseline you can trust.
3. Inspect Sunroof, Window, and HVAC Sources
Work top-down. Water entering high on the car travels a long way, and a puddle in a footwell frequently starts at the roof, the windshield, or the top of a door.
Sunroof and drains
If the car has a sunroof, open it and look along the seal channel for grit, leaves or a crust of dried wax. Follow each drain tube to its outlet and check that water runs out when you pour a cup in the channel. On panoramic roofs, check that the drain tubes are actually connected to the drain troughs and not just pushed loosely into place. A VW and Audi panoramic roof owner on a forum described a drain tube that was completely disconnected rather than blocked, which no amount of cleaning would have fixed.
Windshield and cowl
Examine the cowl grille at the base of the windshield for leaves, then confirm the cowl drains are open. Run a finger along the top edge of the glass and the urethane bead looking for voids, gaps or a bead that has pulled away from the pinch weld. BimmerFest members make this a routine check after glass replacement, because a new windshield with a poor bead leaks down the A-pillar and out of a footwell several weeks later.
Windows, weatherstripping and the door membrane
Check the window seals, the rubber weatherstripping around each door, and the plastic vapor barrier membrane inside the door. A torn or displaced membrane lets water spray into the cabin even when the outer seal looks perfect. A door that does not latch flush is also a leak source, as an owner on the Rennlist 928 forum found when a latch adjustment, not a failed seal, was letting water down the door lip and into the footwell.
Heating and air conditioning
Open the glove box and look at the cabin air filter housing. A missing or unseated filter, or a housing cover that isn’t clipped, lets rain and road spray straight into the HVAC box. Then trace the A/C condensate drain tube from the evaporator to its outlet under the car; it runs down the passenger side and clogs with leaves, fungus and insulation dust. A clogged drain shows up as water in the passenger footwell after a long drive on a hot day, or as damp carpet right below the evaporator.
Identify what the liquid is before you go further, because the fix changes completely. A UV dye test, the same technique used in how to find an oil leak with UV dye, tells coolant from water fast.
| What you see | Likely liquid | What it points to |
|---|---|---|
| Clear, odorless, cool | Rain water or A/C condensate | Seal, drain, cowl, sunroof |
| Clear, odorless, appears only after the defroster runs | Condensate off the evaporator, or a blocked drain | A/C drain tube or cabin filter housing |
| Sweet smell, slightly colored, damp carpet and misted windows | Coolant | Heater core or a cooling system hose. Stop driving and check the pressure cap |
| Soapy or sharp solvent smell, near one corner | Washer fluid from a rear hose or nozzle | Rear washer hose, roof or hatch-mounted nozzle line |
| Sticky, oily, near the front | Power steering or brake fluid | A failed line or fitting, not a body seal |
Coolant pooling on the passenger side with a sweet smell means the heater core, which sits behind the dashboard and is not a DIY job. Put the car up on a lift or at the shop and leave the interior teardown alone.
4. Reproduce the Leak With Controlled Water
Once the cabin is dry, you make the leak happen on purpose. The cheapest test is a garden hose with a gentle nozzle applied to the roof and upper body, a few minutes at a time, while someone sits inside with a flashlight and paper towels. The tape trick: press a strip of painter’s tape at each suspect seam, then peel them off in order and read the wet ones first to the last.
The car wash sit-and-watch test is more thorough and turns up seals that a gentle hose misses. Book a wash on a dry day, ride in with the car, and note which jets produce a drip. Rennlist owners confirmed this alongside the hose and smoke machine methods.
The bucket and phone video test covers leaks that need standing water rather than spray. Park the car on a slope facing the suspect area, place the phone inside with the camera recording, then pour a bucket of water over the roof and glass. Afterward, play the video frame by frame to catch the first drop.
Keep the pressure gentle and the water moving. A jet blasting into a door gap at close range will push water past a seal that only ever drips in real rain, and you will chase a fault you do not have. Never spray into the cabin, never aim water at the fuse box or the OBD port, and never do this in freezing weather.
5. Trace the Water’s Path
The wet spot tells you where the water ended up, not where it came in. Follow the trail upward. Water is drawn along wiring looms, seam sealer and fabric, so it can travel a long way from the opening before it becomes visible.
- Paper towel test. Press dry paper against the headliner, pillars, carpet edges and under the seats in turn. The sheet that goes wet first is upstream of the puddle. Work from the floor toward the roof and the first wet sheet is your best candidate.
- Powder trail. Dust talcum powder or cornstarch along a suspect seam. It turns dark in a narrow line where water runs, which shows the path clearly in low light. This is the trick diag.net posters reach for, and it works well on body seams and door frames.
- Low-angle light. Put the flashlight on the floor and aim across the carpet. A wet surface catches the beam as a shiny line that an overhead light completely hides.
Run the newspaper-strip seal test on hatches, liftgates and doors at this stage. Cut or fold strips of newspaper, close the hatch or door on them, then pull each one in turn. A strip that comes out loose means that point is not sealing, and a dab of tape marks the spot for later.
An automotive smoke machine is the most precise tool you can use here, and the method Rennlist owners rate above everything else. Run it inside the cabin, keep an eye on the rate of air being drawn out, and watch for smoke escaping anywhere along the roofline, pillars and glass edges. Use an automotive smoke machine, never a party fog machine, which leaves a greasy glycol film on the glass and trim. Do it on a dry day, ventilate well, and never leave smoke building up inside a closed car with the engine off.
6. Remove Only the Trim Needed for Inspection
Most interior leaks can be found with the carpet still down. If the paper and powder tests point at a body seam, a sill, or the base of a door, you only need to open a narrow window into that area.
Work from the cheapest removal first. Kick panel screws usually come out with a trim tool, and lifting the carpet edge out from under the sill moulding exposes the sill and the floor pan without moving a seat. Sill trim usually lifts out of its clips once the end cap is pried, and seat rails typically need only the rail bolts at the front.
Keep every clip, and keep them in order, because trim panels rarely go back correctly if you mix up the parts. If a wiring connector or a seat belt buckle is in the way, unplug it only after photographing where it goes, and never work around a seat belt pretensioner or a wiring harness that needs a special tool to release.
Do not pull the entire carpet as a first move. Carpet is stapled at the edge, glued in spots and stretched to fit, so lifting all of it usually means a re-stretch or a replacement. A second consideration is that once the carpet is up, the foam padding underneath holds water from the original event, which throws off every retest. Pull only what the trail points to.
7. Isolate the Source and Confirm the Diagnosis
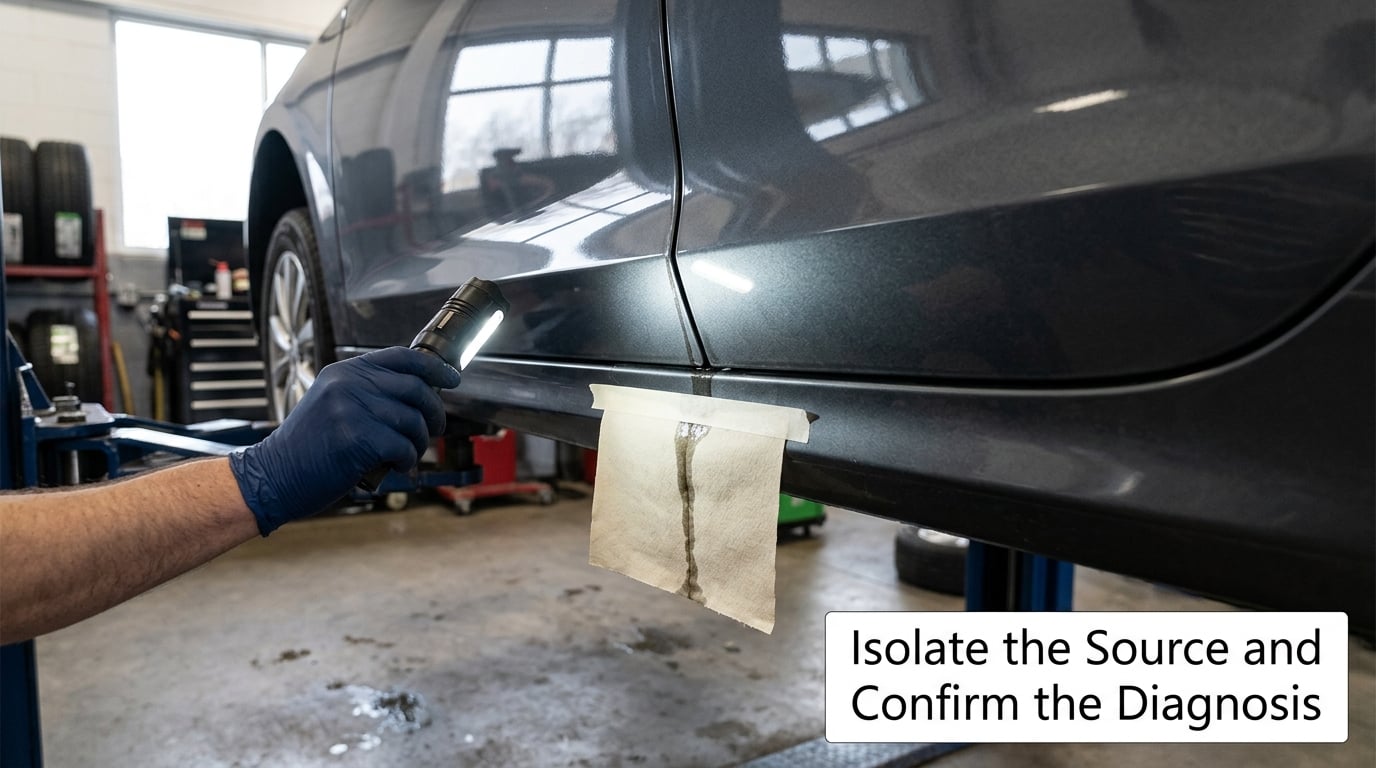
Divide the vehicle into zones and test one at a time, so you know which zone is responsible. Spray only the roof and the top third of the doors, wait, then check. Move down to the door middles, then the sills, then the fender and quarter panel seams.
With the sill exposed, check the body seam and sealer for a gap, a broken spot, or a seam that has been separated and pinched. Look at the drain tubes while you are in there, and check for a hose or connector that has pulled away. On hatchbacks, pull the striker and check that the latch mechanism isn’t spraying water into the cargo area, which is what happened to one 928 owner even after the hatch seal had already been renewed.
Confirm the diagnosis before you buy parts. A leak is confirmed only when water enters along the same path, in the same place, on repeat tests under similar conditions. If the puddle moves around between storms, you have not found the source yet, and replacing seals is the classic way to spend money without fixing anything.
8. Repair, Dry, and Prevent a Repeat
Once the entry point is confirmed, the repair is usually small. Clear a blocked sunroof, cowl or A/C drain tube and flush it with water until it runs free. Replace torn weatherstripping or a door membrane, reseat the cabin air filter and clip its housing cover, or apply seam sealer to a faulty body joint.
For a windshield with a bad urethane bead, or a heater core leaking into the cabin, this is where DIY stops. Both need the dashboard or the glass handled professionally, and coolant in the footwell means the cooling system needs a pressure test first.
Now dry the interior properly. Vacuum the wet padding, run a dehumidifier for at least 24 to 48 hours with the doors open or cracked, keep the heater and fan on high, and park in the sun whenever you can. If the foam still feels heavy or smells musty after two days, it needs longer, not a cover-up. Baking soda brushed into the carpet and left overnight helps with odor, though it will not remove mold.
Prevent a repeat with a short seasonal routine. Clear the sunroof channels and cowl drains twice a year, more often if you park under trees, and check the cabin air filter clips while you are there. Check door seals and the hatch seal for compression set, and confirm every drain actually discharges water. While you are inspecting tires and pressures, it’s also worth learning how to fix a slow leak in a tire, since a wet interior is often discovered on the same long drive where a tire issue gets noticed.
Common Mistakes
Soaking the whole car. A pressure washer aimed at every seam floods sound areas and gives you a dozen false positives. Test one zone at a time with a gentle flow.
Believing the dampest carpet is the source. The wettest area is the lowest point, not the entry point. Trace the path with paper and powder before you decide where the hole is.
Ignoring condensation. A puddle under the car after using the air conditioning is normal. Water inside the cabin after a hot drive is not, unless the condensate drain is blocked, which is a real fault worth checking.
Pulling trim too early. Removing the carpet before you have narrowed the location costs hours and makes the retest unreliable. Work top-down with paper and powder first.
Drying before finding the source. If you dry the car, find the source, and dry it again, the foam holds enough water to make the next test useless. Find it first.
Replacing carpet before the repair. New carpet laid over a damp pad goes musty in weeks. Repair, then dry, then replace.
Driving on with water in the footwell. Standing water in the passenger side is where body modules and connectors live. Green corrosion on a connector, a flickering interior light, or a no-start after a wet spell means stop driving and have the wiring checked.
A couple of final tips. Record every test in a note on your phone, including what you sprayed, for how long and what you found, because you will repeat the process and memory gets the details wrong. And check the spare wheel well, the antenna base and the rear washer hoses, which are less obvious entry points but get missed constantly.
Frequently Asked Questions
Where do car interior water leaks usually start?
Most interior water leaks start above the floor, not in it. Common entry points are the top edge of the windshield, cowl and sunroof drains, door weatherstripping, the door vapor barrier membrane, the cabin air filter housing, the hatch seal, antenna bases and rear washer hoses. Water then runs down a pillar or along a wiring loom before it reaches the carpet, which is why the puddle rarely marks the source.
Why is my car carpet wet after rain even though the windows are closed?
Closed windows rule out the obvious and leave seals, drains and body seams. Look first at the top edge of the windshield and the cowl drains below it, then the door rubber and the membrane inside each door, then the sunroof channels if the car has one. A window that is not fully up or a slightly open sunroof can also let rain in without looking open, so check the glass and rail positions before dismantling anything.
Can a water leak in a car cause mold or electrical damage?
Both, and both are serious. Carpet foam, door foam and the headliner padding hold water for days, and mold can start within about 48 hours in warm, damp conditions. Electrically, the passenger footwell is home to body modules and connectors on most cars. Standing water or green corrosion on a connector there can cause shorts, flickering lights and no-start conditions, so treat that as a stop-driving problem rather than a cleaning job.
How do I find a car leak if there is no visible puddle?
Work with detection tools rather than looking for water. Hold a dry paper towel against the headliner, pillars, carpet edges and under the seats, working upward from the floor, and the first sheet that goes wet is upstream of the problem. Dust talcum powder along suspect seams for a dark water trail, and park on a slope with a phone recording inside while you pour water over the roof to catch the first drop on video.
What BMW areas should I inspect for an interior water leak?
Start with the top edge of the windshield. BimmerFest members routinely check the urethane bead for voids and gaps after glass replacement, since a poor bead lets water travel down the A-pillar and exit at the footwell weeks later. Then check the cowl drain area, the door rubber and membrane, the antenna base gasket, and on older cars the sunroof drain tubes. If the leak appeared after glass or trim work, start where that work was done.
When should I take my car to a mechanic for an interior leak?
Take it in when the liquid is not plain water, when standing water sits in the passenger footwell, or when green corrosion is visible on a connector. Sweet-smelling liquid means the heater core, which sits behind the dashboard, and a faulty windshield bead or a roof drain buried under headlining needs the glass or trim handled properly. A shop leak-test fee is cheaper than a new headliner, carpet set and a module that has already corroded.
What to Do First After Finding the Water Source
Fix the source before anything else. A cleared drain, reseated filter housing or replaced seal costs very little compared with a new headliner and carpet set, and every day the car stays wet undoes your repair.
Then dry the whole cabin rather than the visible patch. Vacuum the foam, run a dehumidifier for 24 to 48 hours, keep the heater on high with the windows cracked, and give it longer if the padding still feels heavy.
Next, look for the damage the water already did. Check the connectors under the passenger and driver footwell for green corrosion, look at the fuse box, and inspect wiring and any module that sat in standing water. Get that checked before the car is driven in the rain again.
Finally, repeat the original test. Reproduce the same conditions that revealed the leak, whether that was a car wash, a heavy rain or a slope, and confirm water no longer reaches the carpet. Only then put the trim, carpet and mats back, and replace any carpet or padding that stayed musty after drying.