
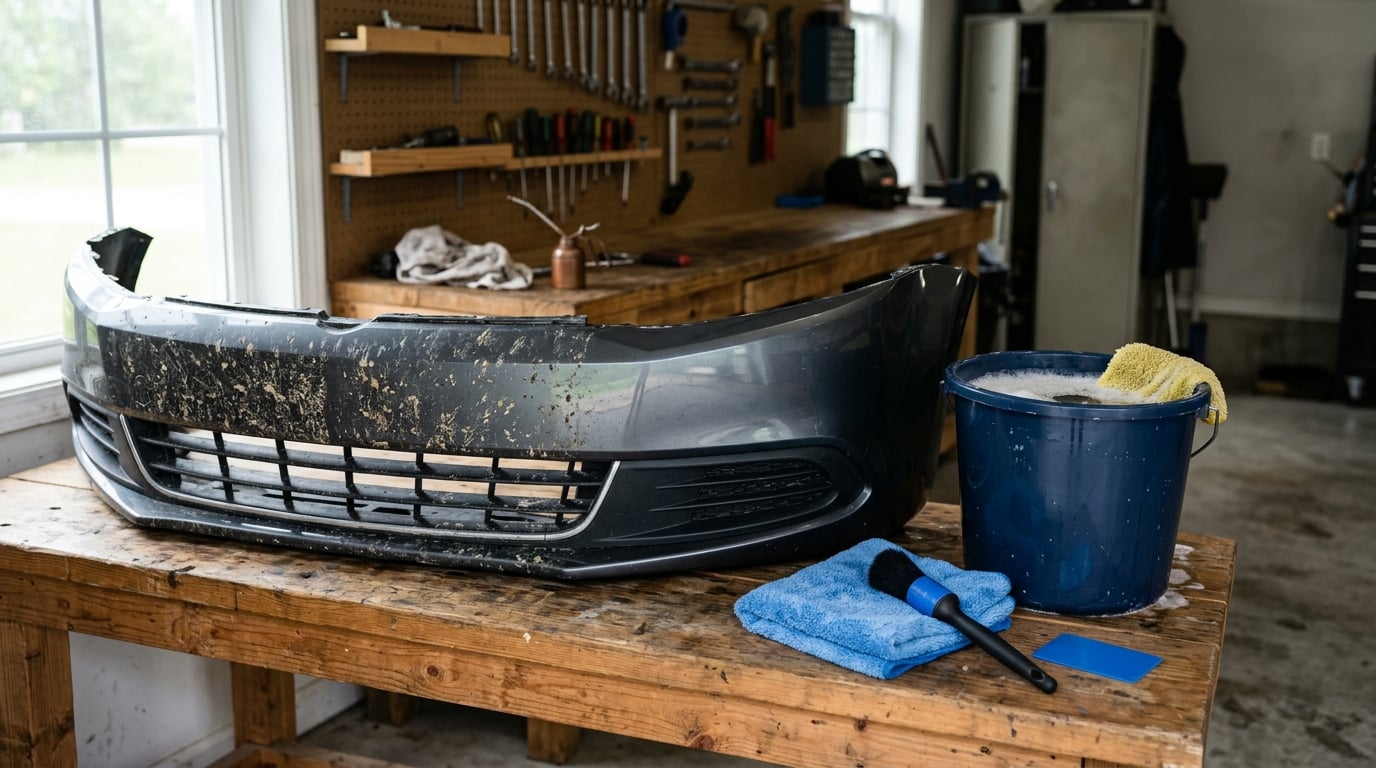
Bug splatter comes off a front bumper with lukewarm water, a mild soap, and patience. Wet, fresh residue usually lifts within a few minutes of soaking. The baked-on crust that seems to need a razor blade is the one that causes damage, and it only gets that way when somebody wipes it dry first.
That is the whole trick. You are not scrubbing a stain off; you are reversing a bond. Insects carry mildly acidic digestive fluid and protein that stick to clear coat within seconds of impact, and a bumper sitting in summer sun can begin etching the finish in a matter of hours. The residue comes off, but a faint outline of every splat can stay behind in the paint.
So the order of operations matters more than the product. Cool the panel, wet it, give the cleaner time to work, then use the lightest thing that moves the residue. The whole job takes 20 to 30 minutes for a heavy front bumper and under ten for a light dusting.
Before you start, sort the mess into one of three piles. Fresh bugs that have been on the car for a few hours soak straight through. Bugs that sat through a hot day need a full pre-soak and a mesh sponge. Bugs that have been there a week or more may be stained into the clear coat, and no amount of scrubbing will bring that back, because the stain is now in the paint rather than on it.
Getting that split right early is what keeps the rest of this guide simple, and it is the reason most failed attempts end up needing paint correction rather than a bucket of soap.
Table of Contents
- What You Need
- Step-by-Step: Removing Bug Splatter from a Front Bumper
- Common Mistakes and What to Do Instead
- Frequently Asked Questions
- Can I remove bug splatter from an unpainted plastic bumper?
- How long should I soak bug splatter before scrubbing it?
- Is automotive bug remover safe on painted front bumpers?
- What should I do if bug residue leaves marks after washing?
- Can I use a metal scraper to remove dried insects?
- How do I remove bug splatter from textured plastic without damaging it?
- How to Remove Bug Splatter from a Front Bumper: Start With a Gentle Soak
What You Need
You can do this with things most people already own. The full kit is a bucket, a hose or two sprayers, a mild soap, two or three clean microfiber towels, a soft-bristled detailing brush, and one plastic card for stubborn spots. Everything else is optional.
- Two buckets or one bowl and a spray bottle. One holds your soapy solution, the other holds plain water for rinsing a towel between passes.
- Lukewarm water. Warm enough to relax the residue, well short of hot. A comfortable bath-temperature feel is the target.
- A pH-neutral car shampoo or a mild dish soap. Either works. Soap is only a surfactant, so a heavier degreaser is unnecessary for a bumper.
- Three or four microfiber towels. More than you think. Turning to a clean face on every pass is the single biggest difference between a clean bumper and one covered in swirl marks.
- A soft-bristled detailing brush. The kind with soft plastic or natural bristles, for seams, textured plastic, and the grille edge.
- A plastic card. A gift card or old membership card, used only for flattened residue that has already softened. No metal, ever.
- An automotive bug remover. Optional. An enzyme-based bug and tar remover on a heavy summer build-up saves real time, and it is the one product most worth buying.
- A hose with a gentle nozzle spray. Pressure is a detail, not a requirement. Never hold a trigger sprayer or pressure washer tip within a few inches of the bumper.
What is safe depends on the finish. Soapy water, a soft brush, and microfiber are safe on painted, unpainted, and textured plastic alike, which is why they do the heavy lifting. A clay bar with plenty of lubricant is fine on a painted bumper and on raw textured plastic, but skip it on a grille insert or anywhere with a matte or satin wrap, because it will leave a shiny polished patch that is difficult to blend out.
Skip anything abrasive, anything melamine, and anything you would not put your hand in. If a product stings your skin, it has no business on a bumper.
Step-by-Step: Removing Bug Splatter from a Front Bumper
Work in shade or indoors, and give yourself twenty minutes. Rushing is what produces the scratches, not the tools.
1. Identify the bumper finish and test a hidden area
Start by figuring out what you are actually cleaning. A painted bumper has body colour and a smooth clear coat. An unpainted valance has that grainy, sandpaper-like texture. Grille inserts, plate surrounds, and lower trim are often a different, glossier plastic that shows every swirl.
Look at the underside of a parking lip or the inner edge of the wheel arch, which never sees a hose, and run a gloved finger across it. A glossy painted cover feels smooth and slightly slick. Textured plastic feels coarse. Knowing which you have decides whether a sponge is even on the table.
Then test. Put a small amount of your cleaner on a concealed section near the wheel arch, let it sit for a minute, and rub with a clean fingertip. If the colour shifts, dulls, or feels slippery, stop and use plain soapy water instead. Do this before you treat the whole bumper rather than halfway through.
You know the product is safe when the test patch looks identical to the untouched area next to it once it has been rinsed and dried.
2. Pre-soak the bug residue with lukewarm water
Let the bumper cool first. A hot panel makes cleaner flash off before it does anything, and cool water on hot glass can crack it. Either way, working on a panel at room temperature is easier on the finish and on the product.
Rinse the bumper with lukewarm water, then put your soap in a bucket and mix it until the water feels slick, not foamy. A tablespoon in a full bucket is plenty. Apply it with a spray bottle or a mitt, working top to bottom so dirty solution runs over cleaner surfaces rather than the other way around.
You want the panel visibly wet and standing in soapy water. Let it run down into the grille and the plate recess too, since those collect the heaviest residue and are the ones people forget.
The rinse is the test. If the water running off is coming away dark and brown, the soap is already lifting things and the soak is doing its job.
3. Let the cleaner soften the splatter
Give it 60 to 90 seconds on a heavy build-up, a couple of minutes on anything baked on, and keep the surface damp while you wait. Dwell time is the entire reason this method works, and it is the step people skip in a hurry.
Residue sits on the bumper in a dry crust with a sticky protein layer underneath. Water and soap creep under that layer and break it, so a few quiet minutes do the work of several aggressive passes. Do not let the panel dry out. If it starts to look chalky, re-wet it rather than letting a new crust form.
After the wait, the residue should feel soft and slightly slimy under a gloved finger, and a light wipe should leave a smear on the towel rather than a hard flake.
4. Loosen residue with a soft brush or plastic scraper
There is a safe order of escalation, and most people should never go past the second stage. First, press a clean microfiber towel flat on the softened residue and pull straight back, no scrubbing motion. One pull removes a surprising amount on fresh bugs.
Second, for what remains in the seams, around the plate recess, or across textured plastic, use the soft detailing brush in short light strokes following the shape of the surface. On a textured valance, small circles feel better than long strokes because the texture hides the dirt between the peaks.
Third, only for a flattened patch that has soaked properly and still will not budge, lay the plastic card almost flat, press lightly, and slide it under the edge in a single motion. Never scrape across the bumper, never scrape toward the edge of the plastic, and stop at the first sign of resistance. A card that catches is a card that will gouge.
You know the residue is ready when the towel comes away with brown transfer instead of dragging a strip of crust along with it.
5. Wash the bumper and remove remaining residue
Now work in small sections, roughly the size of your hand, so you never have a dirty towel over clean paint. Spray fresh soapy water onto each section, use a clean face of the microfiber towel, and turn to a fresh face constantly.
A dedicated mesh bug sponge speeds this up on the painted cover. Dampen it, add a drop of soap, and work in straight overlapping lines with light pressure, keeping it flat and horizontal rather than tilted. The mesh gives you hundreds of tiny filaments instead of one abrasive patch, which is why it does not scratch the way a rough sponge does.
If the residue is still fighting you, go back to step 3 and soak again. Re-wetting and waiting will almost always beat more pressure, and pressure is the one variable you cannot take back out of the clear coat.
Residue lifts cleanly when the towel stays clean. Once it starts smearing grey across the panel, flip the towel.
6. Rinse, dry, and inspect the finish
Rinse the bumper from the top down with plain lukewarm water until nothing comes off the cloth. Any soap you leave behind attracts dust and can leave a hazy film that looks like damage and is not.
Dry with a clean microfiber towel or a chamois, working in one direction, and then look at the bumper in indirect light, ideally by a doorway or under a garage light. Direct sun hides things you want to see.
Any faint outline you can still see at that point is etching, not dirt. A light finishing polish applied by hand with a clean microfiber pad can improve a shallow one, but if the marks only fade in direct sun, that is a clear-coating problem for a body shop rather than a driveway.
Follow the vehicle care instructions for wax, sealant, or coating on the rest of the bumper, and put a layer of protection back before the next long drive. The work is finished when the bumper feels smooth under a gloved palm and the towel comes away clean.
Common Mistakes and What to Do Instead
Almost all damage people do to a bumper during bug removal comes down to dry wiping, wrong tools, and impatience. Each of these has a straightforward correction.
- Scraping dried insects with metal. A razor blade or a chip of a box cutter on a dry splat gouges clear coat, and the mark is permanent. Instead, soak until the residue is soft, then use a plastic card at a low angle with almost no pressure.
- Using hot water. Heat sets some protein residue and can warp or stain plastics, and a thermal shock on glass is a real risk. Lukewarm water relaxes bugs perfectly well.
- Applying undiluted chemical. Straight bug and tar remover, straight degreaser, and undiluted vinegar can strip wax, haze matte finishes, and leave a patch that needs a rewash to fix. Follow the dilution on the label, use more of the weak solution, and give it longer.
- One dirty towel over the whole bumper. Grit trapped in a used towel becomes a sanding tool. Flip to a clean face for every section, keep a separate towel for rinsing, and never go over a clean panel with anything that has touched bugs.
- Treating textured plastic like glossy paint. Polish, abrasive sponges, and clay make a permanently shiny patch on a matte or grainy surface that will not blend. Stick to soapy water, a soft brush, and gentle pressure on raw plastic and matte wraps.
- Ignoring droppings, sap, and road tar. Bird droppings are more corrosive than insects and deserve a much shorter dwell. Bird and bug removers handle both, but if a dropping is going white or flaking, rinse it off quickly and do not wait for a long soak.
One more worth naming: running through an automatic car wash with a heavy bug build-up on the front. The cloth strips are dirty, the bumper is dirty, and the result is baked residue ground across the finish. Deal with it yourself first, or expect a polish afterwards.
Once you have a clean bumper, keeping it that way is a job worth looking at before the next highway run, whether you are choosing between a sealant, a ceramic coating, or film, or comparing what a touchless wash will and will not take off.
Frequently Asked Questions
Can I remove bug splatter from an unpainted plastic bumper?
Yes, and it is actually the easier surface to work on. Raw or unpainted plastic has no clear coat to etch, so the only risk is scratching the grainy texture or leaving a shiny polished patch. Soapy water, a soft detailing brush, and light pressure are all you need. Skip clay bars, polish, and abrasive sponges on textured plastic, since they change the surface appearance permanently.
How long should I soak bug splatter before scrubbing it?
Give it 60 to 90 seconds for a heavy build-up and two to three minutes for anything that has been on the car for a day or more. Keep the panel damp during the wait, and re-wet it if it starts drying. A useful test: the residue should feel soft and slightly slimy under a gloved finger, and a light towel pull should leave a smear rather than a hard flake.
Is automotive bug remover safe on painted front bumpers?
A pH-neutral bug remover is safe on clear coat, and a dedicated bug remover is usually gentler than a general bug and tar remover, which is formulated to strip sealants as well as residue. Test any product on a hidden area near the wheel arch first and let it dry fully before you judge it. Never use a degreaser or tar remover full strength on a coated or freshly waxed bumper.
What should I do if bug residue leaves marks after washing?
Look at the panel in indirect light before you do anything else. Dirt and soap film wipe away, so a mark that survives a rinse and a dry is etched into the clear coat rather than sitting on it. A light finishing polish applied by hand with a clean microfiber pad improves shallow marks. If the outline only shows in direct sun, that is a body shop job, not a driveway one.
Can I use a metal scraper to remove dried insects?
Do not. A blade on dried bug residue cuts clear coat, and you will feel the damage later rather than at the moment it happens. Soak the residue until it is soft first, then use a plastic card held almost flat with light pressure. If the card catches or drags, the residue needs another minute of soaking, not more force.
How do I remove bug splatter from textured plastic without damaging it?
Skip the clay bar, the polish, and anything abrasive, because those leave a permanently shiny patch on a grainy surface. Use lukewarm soapy water, a soft-bristled detailing brush, and light pressure, working in small circles so the bristles reach between the texture peaks. Rinse often and keep a separate clean towel for the final wipe, or the grit you lifted will grind back in.
How to Remove Bug Splatter from a Front Bumper: Start With a Gentle Soak
Start by identifying the finish and testing your cleaner where nobody can see it. Then give the panel a lukewarm soapy soak and wait a full 60 to 90 seconds before you touch it at all. That single pause is what separates a clean bumper from a scratched one.
Fresh bugs removed gently will never need anything more than soap and a microfiber towel. Bugs that have baked on and got scrubbed are the ones that cost real money to fix, and they were not ruined by the insects. They were ruined by trying to remove them dry.
Put protection back on the bumper once it is clean, too. The next long drive is coming, and a waxed, sealed, or coated surface gives you the option of the same gentle method again.