
A wheel bearing is the sealed, greased ball-and-roller bearing set inside the wheel hub. It lets the wheel spin smoothly while carrying the car’s weight and handling cornering loads. Learning how to replace a wheel bearing means pulling the hub off the steering knuckle, fitting a new bearing or hub assembly, and torquing every fastener to the manufacturer’s specifications.
On a BMW, the exact job changes with the chassis code, the axle, and the brake type, so confirm those three things before you buy anything. A bolt-in hub assembly unbolts and swaps in about an hour with hand tools. A press-fit bearing comes out of the knuckle and needs a press to go back in, which is a different level of job entirely.
What follows is the process in the order a careful mechanic works through it: confirm the fault, match the part, lift safely, disassemble, extract the old bearing, install the new one, torque, and road test. Torque values are model-specific, so treat every number in the service manual as gospel and everything here as method.
Table of Contents
- What You Need
- How to Replace a Wheel Bearing
- 1. Confirm the Wheel-Bearing Failure
- 2. Identify the Correct Replacement Procedure
- 3. Raise and Secure the Vehicle Safely
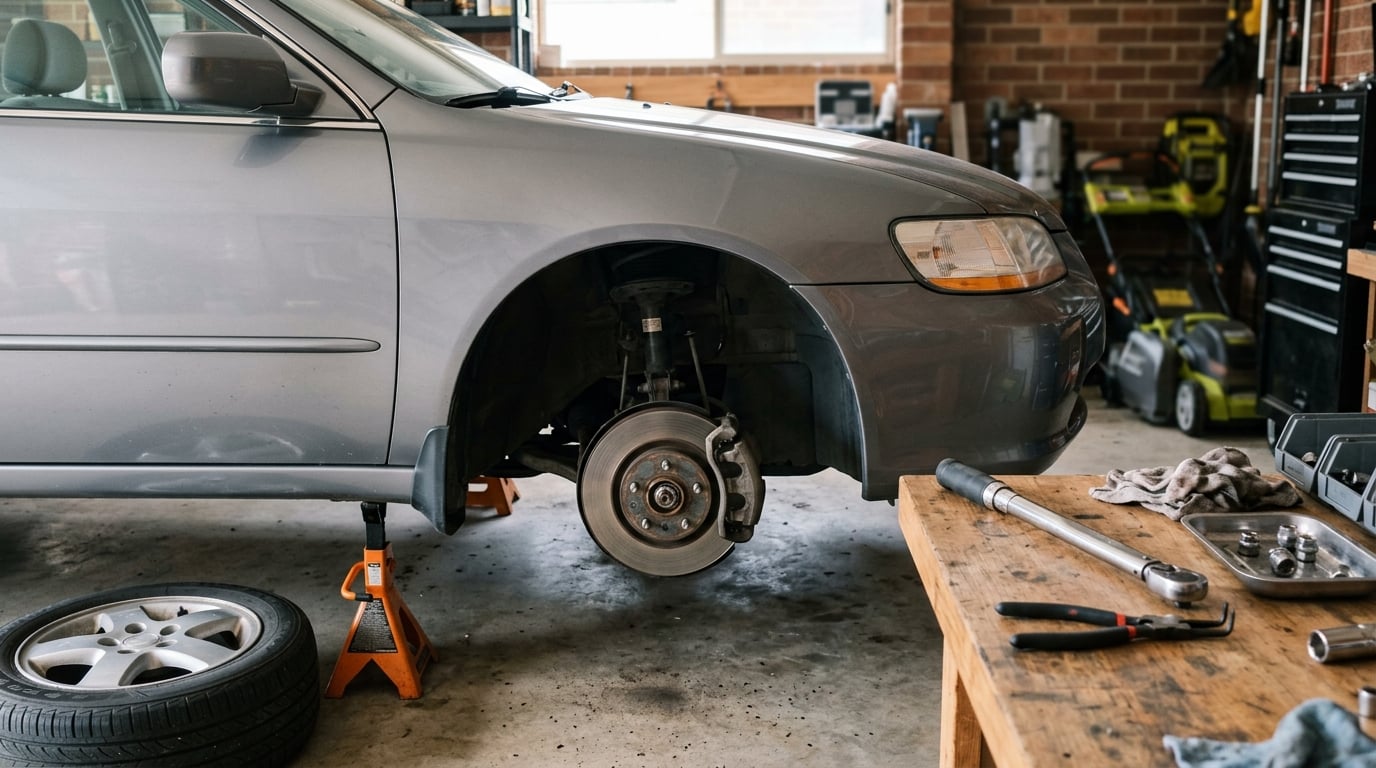
- 4. Remove the Wheel and Access the Hub
- 5. Remove the Old Bearing or Hub Assembly
- 6. Install the New Wheel Bearing
- 7. Reassemble, Torque, and Test the Repair
- 8. Recheck After a Short Test Drive
- Common Mistakes
- Frequently Asked Questions
- Can I drive with a bad wheel bearing?
- Should I replace just the bearing or the whole wheel hub?
- Is replacing a wheel bearing difficult for a DIY mechanic?
- How do I tell if the noise is from the wheel bearing or the brakes?
- Do I need an alignment after replacing a wheel bearing?
- Why does a new wheel bearing make noise after installation?
- Conclusion
What You Need
Start with the part, and match it to the vehicle rather than to the marketing name. A BMW hub and bearing assembly is identified by the chassis code, model year, axle position, brake package, and whether the hub is a bolt-in unit or a pressed-in bearing with a separate flange. Cross-reference the part number against your VIN or chassis code before ordering, because left and right sides are not interchangeable on many models and the ABS tone ring position differs between the front and rear assemblies.
For the tools, split the list in two. The first group is common hand tools most garages already have:
- Floor jack and a pair of rated jack stands
- Lug wrench or impact wrench for removing the wheel fasteners before lifting
- Metric socket set, including the axle nut socket and any deep sockets the strut-to-hub bolts need
- Torque wrench with a range that covers the axle nut, strut bolts, tie rod end, and final wheel torque
- Pry bar, dead blow hammer, ratchet, and a small pick or snap-ring pliers
- Wire or a bungee cord to hang the brake caliper
- Brake cleaner and a lint-free rag
- Safety glasses, gloves, and a creeper or mechanic’s stool
The second group is specific to the bearing job, and this is where most beginners get stuck:
- A hydraulic or arbor press with the correct diameter adapter sleeves for pressing the bearing or flange
- A slide hammer and appropriate puller if the hub is press-fit but the knuckle does not need to come off
- Snap-ring or circlip pliers, sometimes called C-clip pliers, for the retaining ring inside the hub
- A three-jaw or two-jaw hub puller as a backup to the slide hammer
- External snap-ring pliers for axle retainer rings on models that keep the axle in with a ring rather than a nut
- A new axle nut and a new cotter pin, both single-use items
- Threadlocker if the manual calls for it on the axle stub or hub bolts
Torque specifications are the part people skip and then regret. Look up the axle nut figure, the strut-to-hub bolts, the tie rod end, the lower control arm bolts, and the final wheel torque in the service manual for your exact vehicle, and write them on a piece of paper before the car goes up on the stands. An impact gun is fine for removing fasteners that will be replaced, but the axle nut goes on with the torque wrench, and that single habit is what keeps the new bearing alive.
How to Replace a Wheel Bearing
The order below matters. Several of these steps, especially loosening the axle nut with the weight on the ground, will not be possible once the car is in the air.
1. Confirm the Wheel-Bearing Failure
A humming, grinding, or growling noise that rises with road speed is the classic sign, but plenty of other parts make similar sound. The trick is to test before you pull anything apart, because a bearing job is a long one to do twice.
Get the car on stands and do a spin test: with the transmission in neutral and the parking brake released, spin the wheel by hand as fast as you can. A good wheel is silent. A rough, gritty, or grating feeling means the bearing is already damaged. Then do a rock test: grip the top of the tire at the 12 o’clock and 6 o’clock positions and rock it vertically. Any perceptible play points to a worn bearing or a worn hub bearing bore rather than a brake or tire problem.
If you have a chassis ears tool, listen to each corner while someone rotates the wheel. An infrared thermometer is useful too: drive a few miles, park, and compare the temperature of the hub areas. A bearing running significantly hotter than its neighbours has failed or is about to.
| What you notice | Likely cause |
|---|---|
| Humming that rises with speed | Worn wheel bearing |
| Grinding or rasping, worse when turning | Advanced bearing failure |
| Roaring plus a heavy hot smell | Seized bearing, replace immediately |
| Shudder or vibration under braking | Warped or contaminated brake rotor |
| Click that repeats once per revolution | CV axle or wheel bearing play at the joint |
| Squeal that changes with pedal pressure | Brake pad or caliper, not the bearing |
| Rubbing or flapping noise | Tire sidewall damage |
2. Identify the Correct Replacement Procedure
Every hub design falls into one of two families, and the difference decides your tool list, your time, and whether this is a home job. Look at the back of the old hub. If the bearing sits inside a unit that is bolted to the steering knuckle from behind, it is a bolt-in hub assembly and there is nothing to press. If the bearing is a separate steel or cast-iron ring pressed into the knuckle bore, with a hub flange that slides onto it, it is press-fit.
| Factor | Bolt-in hub assembly | Press-fit bearing |
|---|---|---|
| How it comes off | Unbolt from the knuckle | Press or slide hammer after removing the knuckle or flange |
| Key tool | Socket set and torque wrench | Hydraulic press with adapter sleeves |
| Axle removal | Usually required, axle splines into the hub | Usually required, flange splines onto the axle |
| Typical DIY time | 1 to 2 hours per corner | 3 to 4 hours per corner for a beginner |
| Skill level | Confident intermediate | Advanced, or pay a shop for the pressing |
| Failure risk if rushed | Axle nut over-torque, bent studs | Brinelled rollers, tilted press, early failure |
On many BMWs the front uses an integral bolt-in hub and bearing unit while the rear may be a pressed bearing inside the knuckle, so do not assume the front procedure applies to the back. If the hub bore looks scored or pitted after the old bearing comes out, the knuckle is finished and the whole hub assembly is the only sensible path.
Once you know which type you have, pull the torque numbers for that vehicle. Every BMW service manual is organised the same way, and the axle nut torque, the hub bolts, and the strut fasteners are listed per axle. Update those figures for anything you have modified.
3. Raise and Secure the Vehicle Safely
Two things happen before the car leaves the ground, and both are skipped by people in a hurry. First, break the axle nut loose with the wheel still supporting the car’s weight. Second, loosen the wheel fasteners a quarter turn.
Then jack the car up at the manufacturer’s lifting point, lower it onto jack stands rated for the vehicle, and drop the wheel under the sill as a secondary support. Chock a wheel on the ground side. You will be working with hands and a wrench near a car resting on one jack stand at a time, so give the stands a wiggle test before you trust them.
4. Remove the Wheel and Access the Hub
Take the wheel off, then unbolt the brake caliper and hang it from the strut or spring with wire so the caliper never dangles by the brake hose. The hose is the weak point and a hanging caliper will eventually crack it.
Pull the rotor off the hub. If it sticks, spray it with brake cleaner around the hub face and rock it; do not hammer it hard enough to shock the new bearing if one is already fitted. Remove the dust shield behind the rotor on models that use one, since it has to come out to clear the hub.
Unplug the ABS wheel speed sensor at its connector and route it clear of the work area rather than letting it hang by the wire. Disconnect whatever the knuckle requires: the tie rod end, the lower control arm, the strut-to-hub bolts, and the anti-roll bar link on some models. Support the knuckle so it cannot drop onto the CV axle and damage the inner joint.
5. Remove the Old Bearing or Hub Assembly
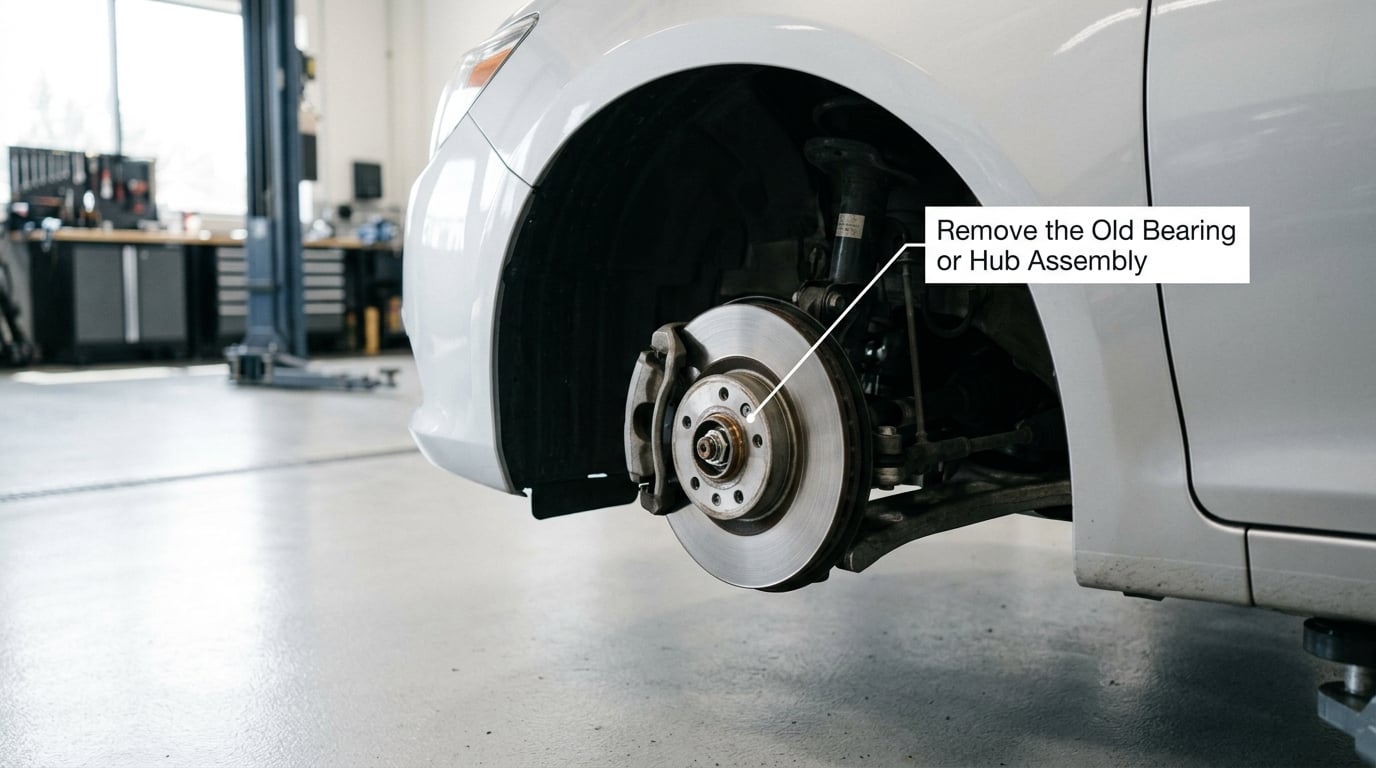
With the knuckle loose, remove the axle nut and pull the axle or CV axle straight out of the hub splines. A long pipe over the axle end and a hammer tap is the usual method, and the guidance on BMW forums is clear that this needs to be gentle and well lubricated. Never drive the axle out sideways; the splines will gall and the joint will fail.
For a bolt-in hub, the hub is now simply a set of bolts. Unbolt it from the back of the knuckle and it comes away in one piece, which is why this design is so much friendlier.
For a press-fit bearing, the sequence depends on the layout. On many designs the axle comes out of the hub, the hub flange pulls off the bearing, and the bearing is pressed out of the knuckle. On others the knuckle comes off the car entirely so the bearing can be driven out from the back. Check the manual for your chassis code rather than guessing.
Before extracting anything, look inside the hub for the retaining ring. The snap ring, also called a C-clip or circlip, sits in a groove inside the hub bore and holds the outer race in place. Snap-ring pliers are the right tool; a flat screwdriver chews the ring and the groove. Once the ring is out, attach the puller to the flange and work the slide hammer in measured, rotating taps so the load stays even.
If the bearing will not move, resist the urge to hit it harder. Forum accounts of bearings that generated sparks under the slide hammer for minutes without budging are usually corrosion cases, and users on Audizine attribute them to salt-belt exposure binding the hub to the knuckle. A penetrating oil applied for a day, warm water or a heat gun on the housing, and alternating pressure on the puller are the moves that work. Removing the knuckle and using a press is the other option, and it is the honest one when the press fit is genuinely seized.
6. Install the New Wheel Bearing
Inspect the new part before it goes in. Check that the inner and outer races move smoothly by hand, that the seal is not nicked, and that the ABS encoder ring on the hub has not been damaged in the box. This is the moment to catch a defective part instead of discovering it on the road.
For a press-fit bearing, the whole job rests on pressing, not hammering. Support the knuckle on the press plate and press only against the race being driven. Force on the rolling elements is what brinells them, and a brinelled bearing can sound fine on the bench and fail within a few thousand miles. Users on the Dodge Caliber Forum put it plainly: a hammer or rubber mallet is not a substitute for a press.
Install the bearing square to the bore. If it enters at an angle, stop, pull it back out, and start again; a cocked bearing that is tapped home will preload unevenly and wear out early. Stop pressing the moment the shoulder contacts the housing, then check depth against the manual because the snap ring has to sit in its groove with clearance.
Install the new bearing onto the axle or over the hub flange as the design requires, and fit the snap ring back with pliers. A new axle nut and a new cotter pin go in now, not at reassembly. The old nut is a single-use item because the threads stretch during tightening, and a stretched nut will not hold preload the way the manual specifies.
7. Reassemble, Torque, and Test the Repair
Reassembly runs in reverse, with two extra checks. Watch that the ABS sensor wire clears the knuckle’s travel and that the dust shield seats fully before the rotor goes back on. Route the sensor lead the way it was originally clipped, not in a new path that will chafe.
Tighten the axle nut to the service manual specification with the torque wrench, through a socket on the axle, with the wheel off the ground and the weight on the springs or the car on a lift. That stance is why the axle nut is tightened before the car settles. Then torque the strut, tie rod, and control arm fasteners in the order and values the manual gives.
Before the wheel goes back on, spin it by hand and listen. Silence and smooth rotation is the pass condition. Now install the wheel and torque the fasteners in a star pattern at the specified value.
Finally, clear the ABS codes if your scan tool holds any from the sensor being unplugged, and reset the tire pressure monitoring system if the car has one, since it recalibrates with a wheel off the road.
8. Recheck After a Short Test Drive
Start with a short loop around the block at low speed and listen for anything that was not there before. Check steering feel: a pull to one side or a vibration through the wheel means the hub is not seated or the wheel is bent, and you should stop and recheck the fastener torques.
On the first highway drive, listen for the original noise being gone rather than for total silence, which takes a few minutes of driving before any grease settles. Feel for heat by pulling into a driveway and holding a hand near the hub area, or use the infrared thermometer again and compare corner to corner.
If you removed the steering knuckle or loosened the tie rod or control arm, a wheel alignment is part of this job, not an optional extra. Small changes to toe and camber accelerate tire wear and change how the car feels on the road.
Stop driving immediately and investigate if you notice a new rumble, a steering-wheel shimmy, grinding under load, or a hub that heats up again within a few miles. The bearing is either not seated, the axle nut is not holding preload, or a race is damaged, and none of those get better with more highway miles.
Common Mistakes
Most early failures trace back to a handful of avoidable errors. Here are the ones worth writing on the same paper as your torque numbers.
- Striking the rolling elements. Hammering a bearing on, or pressing through the wrong race, brinells the rollers and creates a failure that arrives months later. Press against the race being installed, square, to the shoulder.
- Tightening the axle nut before the hub is seated. Preload matters. A loose hub running under an axle nut at full torque destroys the new bearing and the splines with it.
- Reusing the axle nut and cotter pin. Both are single-use. Buy them with the bearing and treat them as part of the job.
- Using an impact gun to set the axle nut. A gun does not read a torque value, and over-torqued stub threads are a documented cause of repeat failures in owner reports. Removal is fine, installation is not.
- Forgetting the ABS wheel speed sensor. The sensor comes out with the knuckle on most models and must be reseated, clipped, and functional. An unplugged sensor gives a warning light and an incorrect speed reading, and the codes can be stored silently.
- Leaving the dust shield out or misaligned. It fits between the rotor and the knuckle, and a missing shield lets road grit into the new bearing.
- Damaging the rotor or studs in teardown. A painted rotor face or a plain screwdriver on the hub face will bend studs. Support the hub, tap evenly, and replace a bent stud rather than forcing it.
- Misdiagnosing brake or tire noise as a bearing. A rotor that shudders under braking and a worn tire both sound like a bearing at highway speed. Do the spin test and the rock test before ordering parts.
- Skipping the alignment after knuckle removal. A pull to one side feels like a steering problem and wears tires fast.
- Working with only a jack under the car. Jack stands, every time, with the wheel under the sill as a backup.
One more habit pays for itself. Take photos of every connector and clip before you unplug it, and label the driver side and passenger side hardware. Half of the frustration people report on forums is not mechanical, it is trying to remember which bracket went where after the knuckle was on the floor.
Frequently Asked Questions
Can I drive with a bad wheel bearing?
You can drive a short distance to get home or to a shop, but treat it as a timing issue, not a normal trip. A worn bearing that has started to grind or roar means the hub has play, which lets the rotor and the ABS tone ring drag and can heat the hub enough to affect braking. If the wheel can be moved by hand at the tire, stop driving and tow it.
Should I replace just the bearing or the whole wheel hub?
Replace the whole hub assembly whenever the hub bore or flange shows scoring, rust pitting, or blueing after the old bearing came out, and whenever the service manual lists the hub and bearing as one assembly. Many BMWs are built that way, and a pressed bearing that has been in a corroded housing rarely lives long. A bearing-only job makes sense when the housing is clean and the manual calls for it.
Is replacing a wheel bearing difficult for a DIY mechanic?
A bolt-in hub assembly is a confident intermediate job: hand tools, a jack, jack stands, and a torque wrench get you through one corner in an hour or two. A press-fit bearing is a different category, because it needs a hydraulic press with correct adapters and a clean, square press. If you do not own a press, budget for borrowing one or paying a shop to do the pressing.
How do I tell if the noise is from the wheel bearing or the brakes?
Take the car on stands and spin the wheel by hand. A gritty or rasping feel with no sound tied to the pedal is a bearing. Then rock the tire at the 12 and 6 o’clock positions; play there means the bearing or hub. A sound that appears only when you press the brake pedal, or a vibration that grows as you slow down, points at the pads, caliper, or a warped rotor instead.
Do I need an alignment after replacing a wheel bearing?
Only if the steering knuckle came off, or if you loosened the tie rod end or lower control arm. Those components set toe and camber, and even a small change shows up as a pull in the steering and uneven tire wear. On a design where the hub unbolts and the knuckle stays mounted, alignment is optional, though a quick check is cheap insurance.
Why does a new wheel bearing make noise after installation?
The usual causes are a cocked or brinelled bearing from pressing, a hub that was not fully seated, or an axle nut that was not torqued to specification so the preload is wrong. A seal that was nicked or a bit of grit left in the housing will also sound rough immediately. Recheck the installation, confirm the hub seats by hand before tightening, and replace the bearing before driving further.
Conclusion
Begin by confirming the exact axle and hub configuration on your chassis code, because that single fact decides whether this is a bolt-and-socket job or a press job. Then confirm the fault with a spin test and a rock test so you are not tearing into a healthy corner.
The rest is discipline: support the car on stands, disconnect the ABS sensor and suspension links cleanly, extract the old bearing without forcing it, press or bolt the new one in square against the correct race, and torque the axle nut to specification with a wrench rather than a gun. Get those five right and the road test should be quiet and smooth. Anything else and you will be back at the tire in a few thousand miles.