
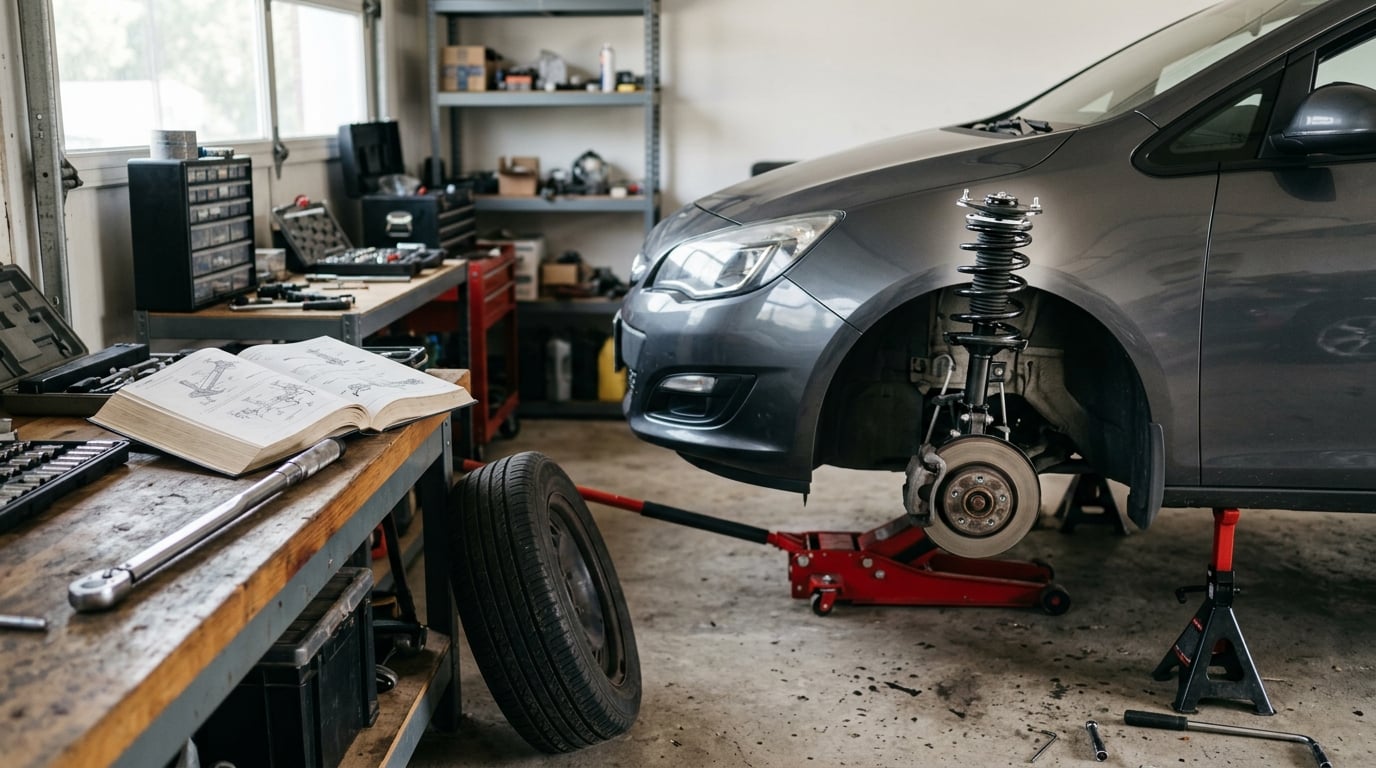
Yes, you can replace struts yourself, and on a complete pre-assembled unit the job usually takes two to three hours a side for a first-timer. The part that makes it safe is a quick-strut: the spring, mount and bearing arrive as one unit, so you never compress a coil spring. The part that makes it hard is the strut top nut and the two strut-to-knuckle bolts, which love to seize.
Learning how to replace struts yourself is mostly a discipline problem rather than a skill problem. If you raise the car on jack stands, mark every orientation before you pull it apart, and torque the fasteners to the numbers in your service manual, this is a job most weekend mechanics finish in an afternoon. People on r/MechanicAdvice keep steering beginners toward pre-assembled units for exactly that reason.
A warning before the tools list. A strut is not a shock absorber, and a gas-charged hatch or liftgate strut is a completely different part that shares only the word. Everything below refers to the structural front and rear strut assembly that carries your vehicle’s weight.
Table of Contents
What You Need
Get the part number right first. The strut number stamped on the old body plus your year, make, model and trim gets you the correct assembly, and it is the only piece of information that cannot be guessed at the parts counter. Check whether the listing is a shock-only, a strut mount, or a complete assembly with the spring and top mount already on it.
The tool list is short, and most of it you probably own already:
- Complete strut assembly (quick-strut), pre-assembled
- Floor jack and a pair of rated jack stands
- Socket set, breaker bar, and a torque wrench
- Strut top nut socket, the deep kind
- Penetrating oil and a wire brush
- Brake cleaner, safety glasses, wheel chocks
A torque wrench is the one tool people borrow and forget to return. Strut fasteners are the structural bolts of your suspension, and tightening them by feel is how a strut ends up loose after a highway speed. A breaker bar or impact wrench saves the arm on the seized bolts, and penetrating oil sprayed a day ahead turns a two-hour struggle into a five-minute one.
You also need the vehicle-specific service manual. The exact torque values, the tightening sequence, and whether a new thread locker or a replacement locking nut is required are all in there, and none of them are guessable. If your vehicle uses a spring separate from the damper, add a proper two-stage spring compressor with safety hooks to the list.
How to Replace Struts Yourself: Step-by-Step
1. Confirm the Correct Struts and Replacement Parts
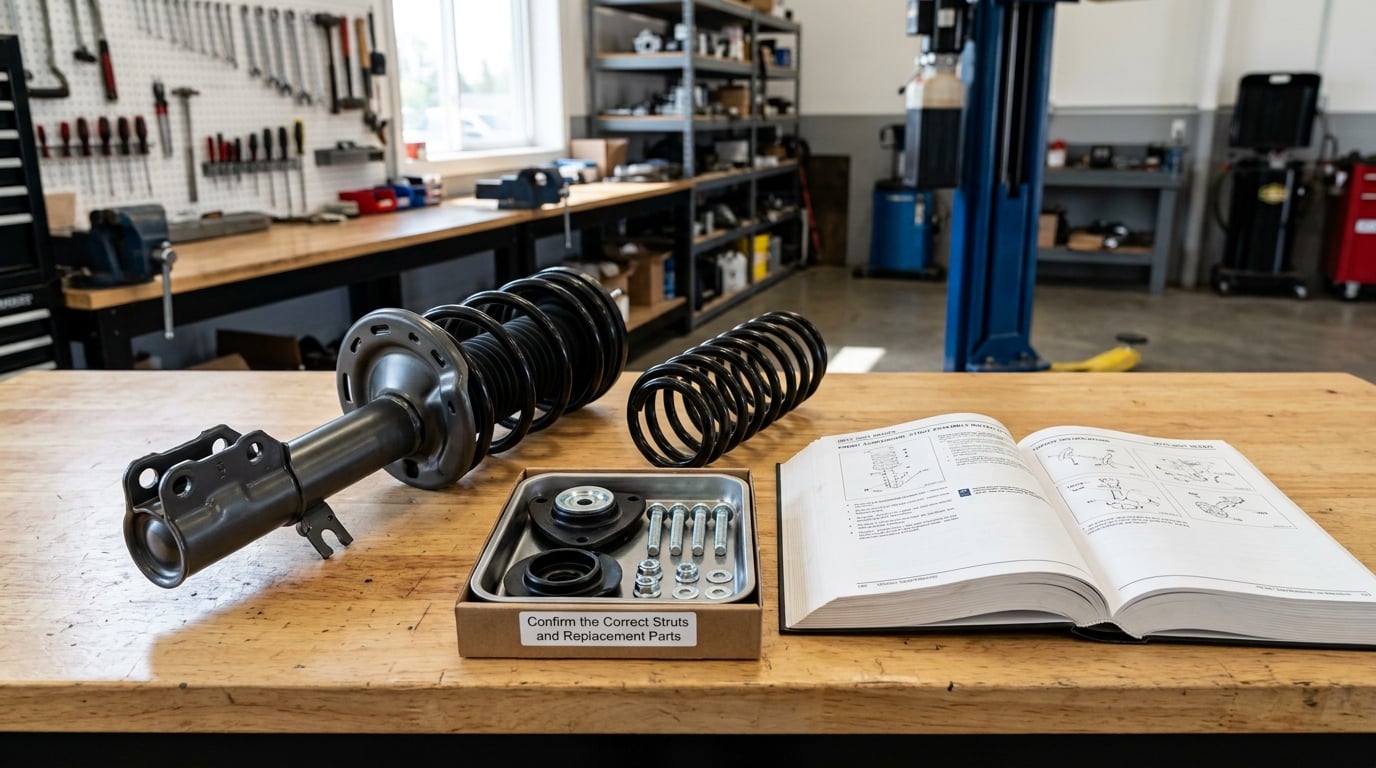
Identify the axle and the side before anything else. A left strut and a right strut are usually mirror images, not the same part, and swapping them means a perch that does not seat or a brake line routed into the spring.
Note the spring design, the mount type, and whether the top mount, bearing and dust boot come with the assembly. If the new unit has a shorter stroke than the old one, or a bump stop that sits lower, the ride height changes and the alignment is no longer a suggestion.
Before the old strut comes out, look at it. A torn dust boot, a rusted spring end, a cracked spring isolator or a mount with rounded bushing holes are all parts you want to replace in the same visit, because the labor is already paid for.
2. Prepare the Vehicle Safely
Work on a level, sealed surface with room to get a jack under the sill or pinch weld. Set the parking brake hard, and put a wheel chock behind the opposite rear wheel. Never work under a car held up by a floor jack alone; the jack is for lifting, the stands are for holding.
Raise the car and set the stands under the factory support points before you remove anything else. If you have to reach the top mount inside the engine bay or the trunk, disconnect the battery negative cable first on vehicles where the manual calls for it, particularly if you will be working near wiring or if the car has a strut-mounted ride-height sensor.
Support the suspension with the wheel off the ground. Struts carry a spring with real stored energy even at rest, and the lower control arm can swing once the knuckle bolts are out.
3. Remove the Wheel and Access the Strut
Loosen the lug nuts with the wheel still on the ground, then raise the corner and remove the wheel. That order matters: studs rarely clear the hub face with the car fully loaded.
From the wheel well, you can now see the strut running from the steering knuckle up into the body. Take photos before touching anything, especially of the brake line bracket, the ABS sensor clip, and the top mount. Those photos solve the reassembly problem that trips up most first attempts.
Disconnect the brake line from its bracket where the manual says to, and unclip the ABS sensor wire from the strut body. Unbolt the sensor from the knuckle only if the service procedure requires it, and never let a hanging brake hose twist the caliper.
4. Remove the Old Strut Assembly
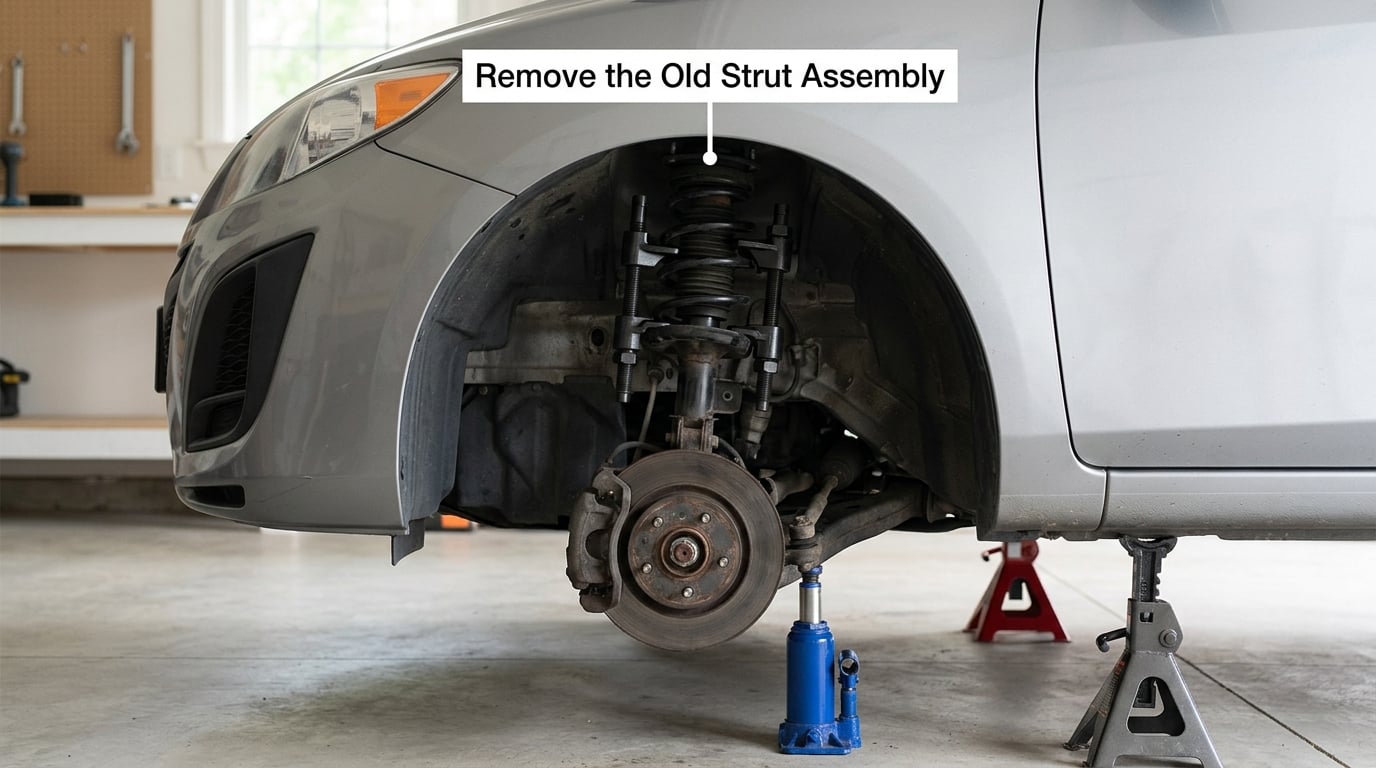
Support the knuckle and control arm with a jack or a stand rated for the load, then remove the two strut-to-knuckle bolts. On many vehicles the outer bolt is captured and comes out with the lower arm; on others the whole knuckle has to be supported before either bolt clears.
Reach the top mount next. Front upper mount nuts usually come out through a hole in the engine bay, and rear ones often hide behind a metal heat shield or under a trunk liner. Spray penetrating oil on all of them beforehand and give it time.
Here is the hard rule: on a vehicle with a separate spring, never loosen the strut top nut before the spring is properly compressed. A spring under full compression stores enough energy to throw a two-pound retainer across a garage. A pre-assembled quick-strut skips this entire hazard because the spring arrives held in the assembly.
Lower the assembly out slowly, and mark the orientation of the perch, the spring isolator and the top mount. Get the orientation wrong and the car will sit unevenly with a bump-stop clunk you will chase for months.
5. Compare the New and Old Parts
Lay the old strut next to the new one and compare body length, piston rod extension, spring diameter and mount shape. Any mismatch means the wrong part or a different trim level, and it is easier to return a part on the driveway than to explain a pull to the manufacturer.
Check that the new assembly includes the top mount, bearing, spring isolator and, on many builds, a dust boot and bump stop. On reassembled units you transfer the old mount and isolator onto the new damper instead, and the manual will show you which parts are one-time-use.
Do not modify hardware to make a mismatched part fit. Stack washers, drill out a bolt or force a bracket to reach and you have created a joint that will loosen under load.
6. Install the New Strut Assembly
Slide the new assembly into the wheel well and line up the two lower holes. Hand-start the strut-to-knuckle bolts, snug them, and leave them loose until the upper mount is set.
Fit the top mount, spring isolator and bearing, and pay attention to orientation: the perch faces the correct direction, the mount’s stop tab lines up, and the bearing is not twisted. On strut cartridges you install fresh hardware onto the new piston rod and tighten the big nut to specification before the assembly goes into the car, which is the one moment where over-tightening is easy.
Torque the lower strut-to-knuckle bolts to the service manual value, then the upper mount nuts, following the stated sequence. If the manual specifies a locking nut, a new nut, or a thread compound on that fastener, use it. Then reconnect the brake line and secure it to its bracket, and clip the ABS wire back to the strut body where it was.
Reconnect the sway bar link and steering components if you disturbed them, and confirm the brake hose has no twist that will tug as the wheel turns.
7. Reassemble the Suspension and Wheel
Reconnect the lower control arm and any trailing links, then check that the ball joint, control arm and strut move freely through their travel without binding. Ball joints have their own torque and often their own cotter pin, and a missing cotter pin is a road hazard, not a small detail.
Refit the wheel and tighten the lug nuts in a star pattern, then lower the vehicle until the tires touch, then finish the lug torque with the wheel on the ground. Cross-tightening matters on both the fasteners and the studs.
Before the car comes off the stands, do one more look underneath at anything you may have left unbolted or hanging.
8. Check Alignment and Test the Repair
Lower the car to the ground, then walk around it and shake each wheel. Any free play at the wheel means a forgotten fastener or a component you damaged. Check tire pressure on all four, and set the ride height, since a car on stands usually sits differently than it does on its springs.
Arrange a wheel alignment after the replacement. Changing a strut alters camber and toe, and driving on a new strut with the old alignment settings causes uneven wear and unpredictable handling. Toe-only alignment is sometimes acceptable on a solid axle, but a front strut replacement on an independent suspension generally wants a full four-wheel alignment.
Take a first test drive slowly in a quiet area, then on a straight road. Listen for clunks over bumps, a hum that changes with speed, or a steering wheel that no longer centers. A rattle on the first drive usually means an untrimmed bump stop or a missing spring isolator; a pull to one side means something is still loose or the alignment is out. If any of that shows up, stop driving and go back over the work.
Replacing Rear Struts
Rear struts are the same job in a tighter, more hidden space, and most written guides skip them entirely. The difference is access, not technique.
Start in the cargo area. Remove the trunk liner or carpet panel by releasing its plastic push-in fasteners, and expect to find the upper mount nuts directly under the trim, or hidden behind a stamped metal shield. Access through the rear quarter trim or C-pillar trim is needed on some vehicles, so check the manual before pulling a corner that does not open up.
At the wheel, the same lower bolt removal applies, with a lower control arm or trailing arm instead of a steering knuckle. Rear struts on many models are separate from the spring, so a compressor and the same safety rules apply. On models where the spring sits directly on the upper mount, the procedure is the mirror image of the front.
One practical difference: nothing on the front side of the car blocks access on the rear, so rear work usually goes faster than front work once the trim is out. Budget extra time for the trim itself, which is fiddlier than the mechanical part.
Torque Specifications
Strut fasteners do need to be torqued, and the correct values come from the vehicle service manual. These are typical published figures for a common passenger-car platform, given so you know the order of magnitude and can recognise a wild answer, not so you can skip the manual.
- Strut-to-knuckle bolts: typically 140-159 Nm. Structural, and tightened with the suspension at ride height.
- Upper strut mount nuts: typically 39-54 Nm. Check for a marking on the mount, because some specify more.
- Piston rod or top-hat nut: typically 59-88 Nm, with a new lock nut or thread compound if the manufacturer says so.
- Lug nuts: vehicle specific. Star pattern first, then a recheck at 100 km where required.
- Lower control arm and ball joint: vehicle specific, with a new cotter pin or castellated nut if the original was removed.
If a strut is not torqued to spec, the mount can develop play that shows up as a clunk over bumps, and the bolts can stretch or strip. If it is over-torqued, you crush the spring isolator or the mount bushing. Both failures are avoidable with a click-type torque wrench and a service manual open on the bench.
What Else to Replace While the Wheel Is Off
This is the question forum regulars ask most, and the answer is the labor argument. The corner is already apart, so anything inspected now costs a few minutes instead of a second visit.
- Sway bar end links. Cheap, and the usual source of a knock over bumps that gets blamed on the new struts.
- Ball joints. Check for play in the wheel by pushing and pulling at the 12 and 6 o’clock positions with the tire on the ground.
- Lower control arm bushings. Look for cracked rubber or a torn mount that lets the arm shift under load.
- CV boots. Split or leaking grease is a joint failure in waiting, and replacing the axle is far worse than replacing the boot.
- Spring isolators and dust boots. Often omitted from strut kits and a top cause of post-install rattles.
- Wheel bearings. Listen for a hum that changes with speed, and check for play with the wheel lifted.
Do not swap unrelated parts just because they are cheap. Inspect, decide, and keep the receipt for parts you suspect but cannot confirm.
Common Mistakes
Working under a car on a jack alone. Jack stands under the factory support points, every time. A stand in the wrong place is worse than none, because it looks like safety.
Loosening the top nut before compressing the spring. On a separated spring and damper design, the spring will launch. Compress it first, or use a complete assembly and never face the problem.
Reusing damaged hardware. A rusted or nicked strut-to-knuckle bolt will not reach spec and may not survive the first pothole. Replace one-time-use bolts and any nut with a locking feature.
Ignoring orientation. Mark the perch, the isolator and the mount before removal. Put the mount in backwards and you get a rattle or an uneven ride that sends you back to the driveway.
Torquing by feel or by impact only. Impact wrenches get the bolt snug; they do not set torque. Finish with a torque wrench and the manual’s sequence.
Forgetting the brake line or ABS wire. Both come loose with the strut. A dangling brake hose is dangerous, and a pinched sensor wire kills an ABS light months later.
Skipping the alignment. New struts change the geometry. Alignment is part of the job, not an optional extra.
Driving it hard to test. Slow, straight, quiet first. If there is a clunk, a pull or a hum, fix it before you reach highway speed.
And a few jobs that are a hard pass at home: bolts that will not move after a day of penetrating oil, hardware rusted through, a hub or knuckle that is damaged, or a spring that will not compress evenly. Those belong in a shop with an alignment rack and a press.
Frequently Asked Questions
Can I replace struts myself?
Most people can, especially with a complete pre-assembled strut. The dangerous part of the job, compressing a coil spring, disappears when the spring and mount arrive as one unit. You still need a floor jack, jack stands, a torque wrench and the vehicle service manual. If a bolt will not move or the spring will not compress evenly, stop and hand it to a shop.
What tools are needed to replace struts?
A floor jack and rated jack stands, a socket set, a breaker bar or impact wrench, a click-type torque wrench, a deep strut top nut socket, penetrating oil, a wire brush, brake cleaner and safety glasses. Add a spring compressor only if your vehicle keeps the spring separate from the damper. Most people are surprised that the top nut socket is a different size and shape from anything else in the box.
Do I need to replace the spring at the same time?
With a complete assembly, the spring comes with it and there is nothing to decide. If you are rebuilding the original strut, replace the spring as a pair on the same axle, and replace the spring isolator and dust boot if either looks tired. Never mix a new spring onto a strut you have not confirmed is rated for that spring rate, and never reuse a spring that has any rust or damage at the ends.
How long does it take to replace a strut?
Budget two to three hours per side for a first-timer using a complete pre-assembled unit, and a full weekend if you take on all four corners. Rebuilding an original strut with a separate spring adds time, and seizing bolts add more. A helper makes the job faster and safer. Add an hour for a rear corner once the trunk trim is out.
Do I need an alignment after replacing struts?
Yes, plan on a wheel alignment afterwards. Struts set camber and toe, and new ones rarely match the old alignment settings. On an independent front suspension a full four-wheel alignment is the norm. A toe-only check may be acceptable on some solid-axle rear setups, so follow the service procedure for your vehicle rather than guessing.
Can I replace only one strut at a time?
Do not. Raise both corners on the same axle at the same time, and replace struts in pairs on that axle, because a new strut beside a tired one changes the handling balance. You also cannot safely remove a single strut with only one corner raised, because the suspension geometry leaves the assembly partly loaded. A second axle can be done on a different day.
Conclusion
The first thing to do is confirm the exact part number for your year, make, model, trim and axle, then pull the vehicle-specific service manual and read the torque section before the car is apart.
From there, the job is straightforward if you stay disciplined: complete assemblies mean no spring compressor, both corners of one axle go up together, every orientation gets marked, and every structural fastener gets set with a torque wrench. Stop and bring it to a shop if you cannot identify a fastener, if a spring will not compress evenly, or if the test drive shows a clunk, a pull or a hum.