
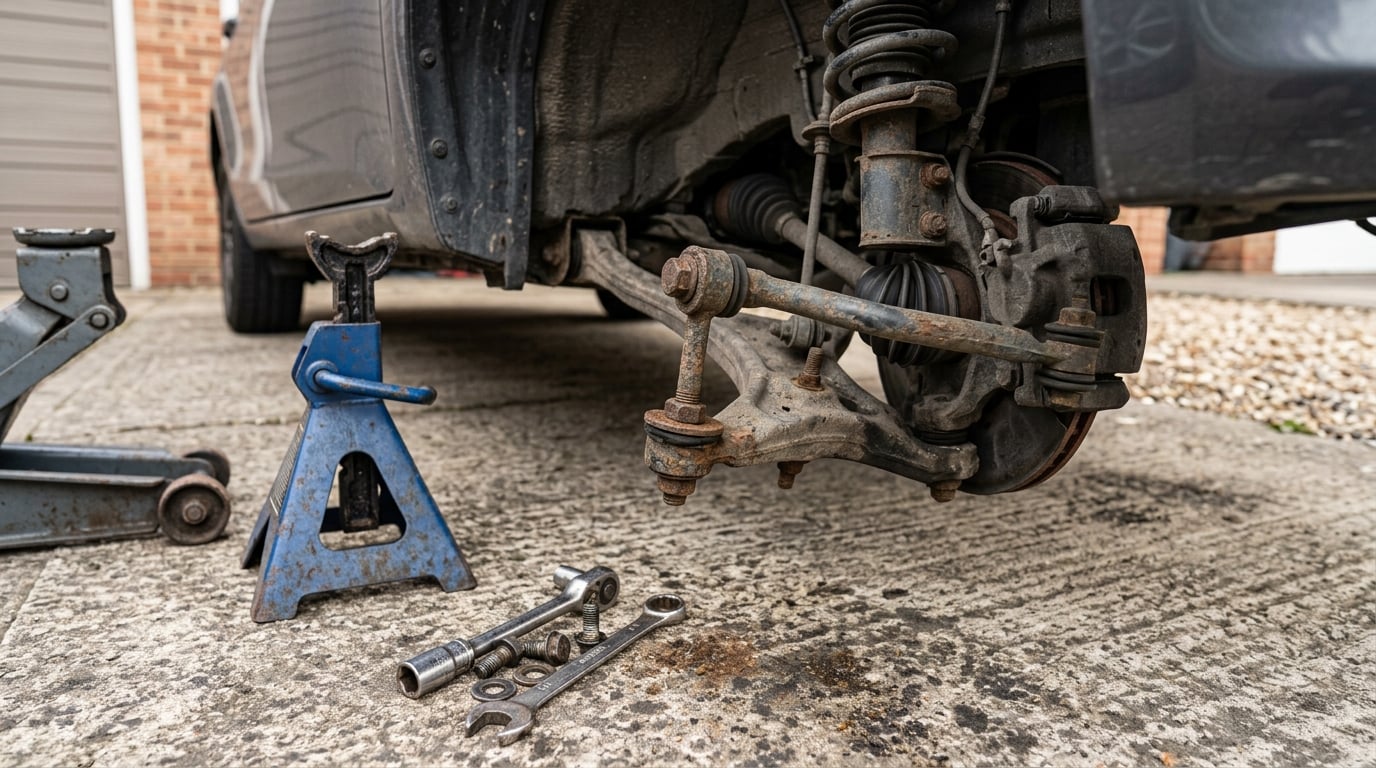
A rattle that only shows up over small bumps is most often a sway bar end link, and it is also the part people blame when something else is making the noise. Sway bar end link noise diagnosis comes down to three things: reproducing the noise with the suspension loaded, finding real play at the link joint, and ruling out the strut mount, control arm bushing and wheel bearing that mimic it.
The full sequence below takes 30 to 60 minutes with hand tools and a safe place to work, and it needs no parts to get started. That matters because the most common expensive mistake in this area is replacing a control arm that was never loose while a cracked link keeps clunking.
Table of Contents
- What You Need
- Step-by-Step Sway Bar End Link Noise Diagnosis
- 1. Confirm the noise happens over bumps and rough roads
- 2. Inspect the end links in place
- 3. Check for play in the joint
- 4. Listen and compare each wheel to isolate sway bar end link noise
- 5. Inspect the sway bar and mounting hardware
- 6. Rule out nearby suspension and brake components
- 7. Decide whether the link is safe to drive
- Common Mistakes
- Frequently Asked Questions
- Conclusion
What You Need
You need a safe way to lift the car, light, and something to apply mechanical advantage. Beyond that, the whole diagnosis runs on what most garages already have.
- A floor jack and three properly rated jack stands, or a vehicle lift. Never work under a car held only by the jack, and jack on the frame or the manufacturer-specified pinch weld point rather than the rocker panel.
- Wheel chocks, on the wheel diagonally opposite the one you raise.
- A flashlight or headlamp. End links sit in shadow behind the wheel, and a split bushing is easier to see than to feel.
- A pry bar or long breaker bar for applying force at the joint. Watch what you lever against, a CV boot or a brake hose will not forgive a slip.
- A rubber mallet, for tapping the sway bar to hear a dull response through the mounts. Never strike the end link itself.
- Basic hand tools, usually a ratchet with 17 mm, 18 mm and 19 mm sockets, plus a torque wrench if you go on to fit a replacement.
- A phone voice recorder. Forum DIYers consistently say a recording of the noise is what finally convinces a shop that the fault is real.
- A wheel alignment check afterwards, if you disturbed strut-to-knuckle, ball joint or control arm fasteners during the work.
Step-by-Step Sway Bar End Link Noise Diagnosis
Work the steps in order and do not skip ahead to the part you can reach first. Most misdiagnoses come from deciding on the cheapest visible component before confirming where the noise lives.
1. Confirm the noise happens over bumps and rough roads
The noise should appear over expansion joints, small road joints, speed bumps and potholes, usually at low speed, and it often gets louder in a turn as the suspension loads up.
That on-and-off character is the first filter. A link rattle is a discrete event with silence between it; a continuous hum, hiss or growl that never switches off is a tire, wheel bearing or airflow problem instead. A knock that shows up while braking, accelerating or turning hard is steering geometry, not a sway bar link.
Cold weather is worth noting. DIYers report clunking becoming more obvious in winter as the bushings and boots stiffen, so a noise that only appears on a cold morning is a common early symptom rather than a strange one.
2. Inspect the end links in place
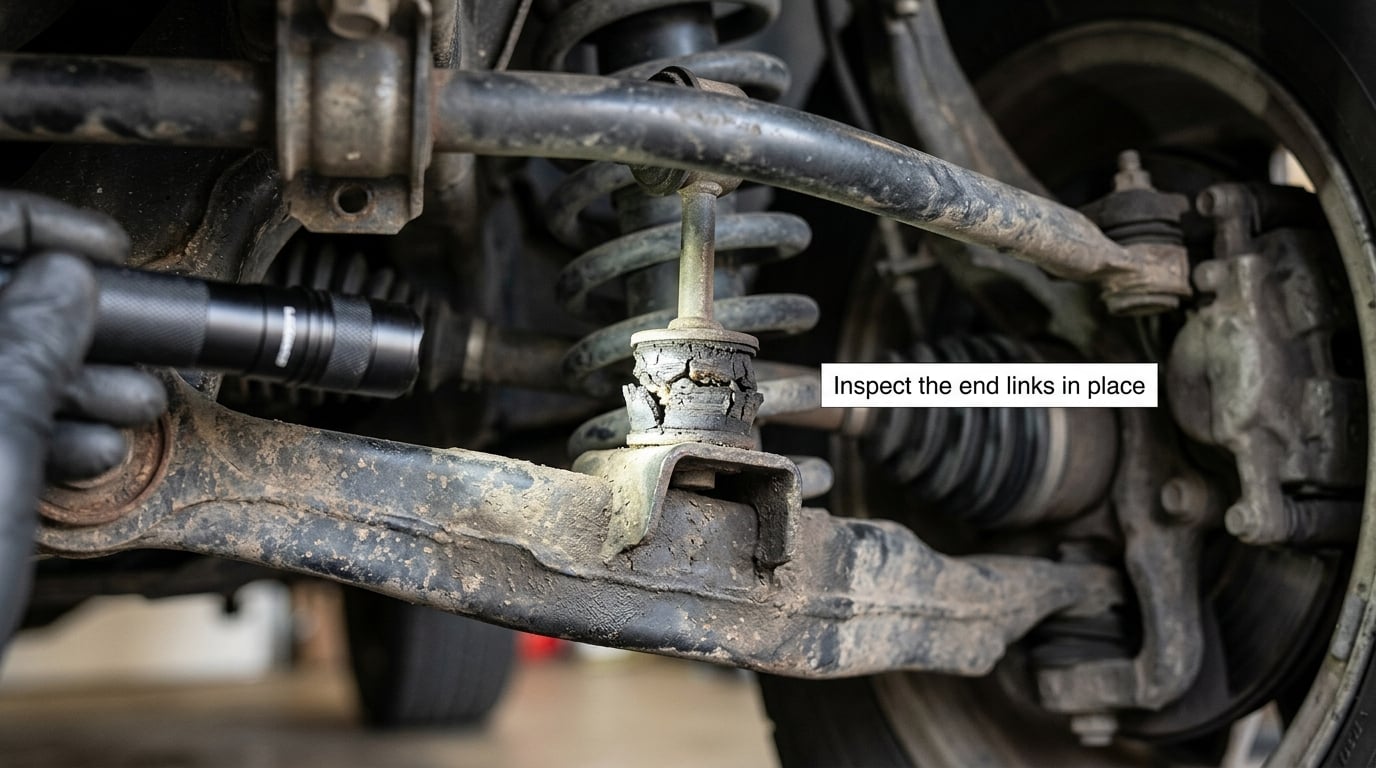
Front end links sit at each end of the front sway bar, running between the bar and the strut or control arm, usually just behind the wheel face. Rear links only exist on independent rear suspensions, many body-on-frame trucks and SUVs run a leaf-spring rear axle with no rear sway bar at all.
With the wheel turned or removed and the car supported, look for a split or separated bushing, a torn boot, orange rust scale on the stud, a missing or corroded fastener, a visible gap at the ball socket, or a link hanging loose. A shiny bright ring around the ball stud where a grease fitting used to sit is a common sign the socket has been moving.
Also compare both sides. If one link looks obviously worse than the other, you likely have your culprit. If both look identical and fine, keep going, because the noise is coming from somewhere else.
3. Check for play in the joint
A healthy end link has almost no free play. Grip the link body firmly and try to move it up and down, and separately try twisting it, then compare that with the other side of the car.
Whether the car is on the ground or jacked up changes what you are feeling, and this is where most DIYers get confused. With the wheels on the ground the suspension is loaded, which is the condition the link actually works in, and the noise is reproduced by the same movement your hands make. With the wheel in the air the bar hangs from its D-shaped bushings and the link is unloaded, so it is easier to reach but the joint sits at a different angle.
Use both. The loaded hand shake test is the more reliable of the two for confirming a fault, while the unloaded position is better for measuring how much slack exists in the ball socket.
For the pry bar test, place the bar under the link body close to the joint and lift gently, just enough to load the socket. DIYers on Bob Is The Oil Guy describe roughly a quarter inch of slop, about 6 mm, as the practical line between a link that is merely serviceable and one that has failed. Visible free movement, or a link you can twist through a range with no resistance, is a failed joint.
4. Listen and compare each wheel to isolate sway bar end link noise
Take the car to an empty parking area or a quiet straight road and drive the same input several times, changing one thing at a time. The cleanest test is the same bump, once straight ahead and once while holding a gentle steering input, because a front link takes side load as the bar twists.
Position matters too. A front link usually gets louder over dips, curbs and mid-corner transitions, and the sound often follows the steering wheel. A rear link tends to give a duller thud that carries into the cabin and gets worse with passengers or load in the back.
Nobody checks the rear as often as the front. Forum reports name Toyota and Lexus rear links as a recurring high-failure item, Subaru front links as a salt-belt regular, and GM truck front links on Silverado and Sierra as a common repair, while Honda and Acura machines often lose the bar bushing before the link itself. Treat that as a starting hint for your own car rather than a verdict, since wear still comes down to mileage, roads and salt.
5. Inspect the sway bar and mounting hardware
The bar and its clamps can produce a noise that sounds like a link problem. Check each clamp bolt for looseness, missing hardware, rust bloom or a clamp that has rotated so the bushing is no longer seated on the flat of the bar.
Then look at the D-shaped bushings where the bar passes through the subframe or frame rails. A dried-out bushing makes a low groan or creak over slow undulations rather than a sharp clunk, and it often leaves a greasy streak on the frame. Tap the bar gently with a rubber mallet along its length and listen for a dull thud that travels rather than a sharp rattle.
Play in the bar itself also lets the link ball stud knock against its own housing. If the bar moves under your hand at the mounts, the mounts are the first thing to repair, not the link.
6. Rule out nearby suspension and brake components
Once the link, the bar and the clamps check out, work outward to the parts that share the same corner. This is where most wasted money happens, because the strut mount and lower control arm bushing fail far more often than the link and sound similar at low speed.
| Component | What the noise sounds like | When you hear it | What you feel or see |
|---|---|---|---|
| Sway bar end link | Sharp single clunk or hollow rattle | Small bumps, curbs, hard turns | Play at the joint, split bushing, torn boot |
| Sway bar bushing | Low groan or creak | Slow undulations, compression | Greasy streak, bar moves at the clamp |
| Control arm bushing | Dull thud, sometimes hollow | Small bumps, any load change | Split rubber, no rattle quality |
| Lower ball joint | Knock on impact | Bumps, braking, cornering | Boot split, play at the joint, clunk on load |
| Tie rod end | Rattle with a steering bias | Turns, especially at low speed | Play through the steering, loose boot |
| Strut mount | Rubbery clunk | Bumps, turning, braking | Dusty cracked mount, clunk over bumps |
| Wheel bearing | Growl or hum | Speed, not bumps | Changes with road speed, no clunk |
| Caliper or heat shield | Rattle or shimmer | Very low speed, braking | Silences when you brake lightly |
Two quick eliminations are worth doing. If the noise fades to nothing the moment you touch the brake pedal, it is a caliper pad, clip or heat shield. If it changes pitch with road speed and never switches off, you are listening to a wheel bearing, not a link.
For the control arm bushing specifically, jack the car and try to rotate the wheel fore and aft. Slop in the wheel that shows up in that direction, without a rattle at the link, is a bushing. Remember that the ball joint sits directly behind the bushing on most front corners, so check both before ordering anything.
7. Decide whether the link is safe to drive
Book the replacement when the joint has visible play, the bushing is split or the boot is torn, the stud is corroded deep enough to look eaten away, or the noise is confirmed at the link during the loaded test. Those are not urgent overnight, but they will not get better. Sway bar end link noise diagnosis is only finished when you have cleared the rest of the corner, not just found something that looks tired.
Stop driving and get it repaired or towed when a link has separated and is dangling into the wheel well, when the bar has come loose from a clamp, or when the clunk is severe and grows with every joint in the road. A detached link can swing into the tire, and a loose bar changes the handling geometry on a car that no longer steers as designed.
Until then, slow down, avoid potholes and speed bumps, and get it sorted within a week or two rather than letting a failing joint wear the opposite side of the joint. If the vehicle cannot be lifted safely, the fasteners are seized from road salt, or every component you checked looks fine while the noise continues, hand it to a qualified suspension shop. Chasing an unidentified clunk by replacing parts in order is how a 30-minute job turns into a full day of labor.
Common Mistakes
Most expensive diagnoses of a clunk come from one of these, and all of them are avoidable.
- Greasing every joint to quiet the noise. It works for a few days, hides the fault and traps grit against the bushing. Use grease only on links designed with a grease fitting, and only to test the theory.
- Replacing the cheapest visible part first. The end link is small, cheap and easy to reach, so it takes the blame. Mechanics and DIYers on MechanicAdvice and AskMechanics both describe the control arm bushing and strut mount being the real cause more often than the link.
- Confusing tire or wheel noise for a rattle. A tread band, a cupping tire or a dry wheel bearing will sound metallic. None of them are quieter over bumps only, which is why step 1 matters.
- Tightening or hammering a link that is already damaged. A nut that will not hold, or a stud that turns with the wrench, means the socket or the stud is stripped. Keep loading it and you can snap it inside the control arm.
- Skipping the fasteners. Salt-belt cars hide seized nuts, and the neighboring link usually has to come out to get at the one you want. Soak the hardware first, and torque the new link to the manufacturer figure rather than by feel.
- Ignoring the alignment question. Replacing an end link alone does not move the alignment. Loosening strut-to-knuckle, ball joint or control arm fasteners during the job does, so add an alignment check whenever those bolts come out.
- Testing only with the wheel in the air. An unloaded bar hangs on its bushings and can mask a joint that clunks the moment the suspension is loaded. Confirm with the car on the ground before you clear it.
Two habits pay off. Record the noise on your phone each time you drive it, because the pattern tells you more than the sound does. And when you do replace the links, do both sides even if only one is worn, since the matching part is usually on the shelf and the labor is already paid for. That discipline is what separates sway bar end link noise diagnosis from parts throwing.
Frequently Asked Questions
What does a bad sway bar end link sound like?
A worn sway bar end link makes a sharp, hollow clunk or a light metallic rattle that happens once per event, not continuously. You hear it over small bumps, expansion joints, speed bumps and potholes, and it often gets louder through a steering input. A continuous hum that never stops with the bumps is usually a tire or wheel bearing instead.
Can you drive with a bad sway bar end link?
Yes, for a short distance. A link that is worn but intact usually leaves you with less roll control and a clunk over bumps, which is uncomfortable rather than immediately dangerous. You should not drive it if the link has separated and hangs into the wheel well, or if the bar has come loose from a clamp. Slow down, avoid rough roads, and get it fixed soon.
How urgent is it to replace sway bar links?
Treat confirmed play at a link as a repair within a week or two rather than an emergency. The joint wears progressively and will eventually split, and it grinds the opposite side of the connection on the way out. A clunk that suddenly becomes severe, that grows with every road joint, or that comes with a link hanging loose means stop driving and have the car recovered.
How to check for play in sway bar links?
With the car on the ground, grip the link body and try to move it up, down and side to side, then compare it with the link on the other side of the car. A healthy ball socket gives almost no free play. With the wheel off the ground the bar hangs unloaded, so use that position to measure the slack, then confirm again on the ground where the suspension is loaded.
How much play should be in sway bar links?
Almost none. A small amount of rock at the joint is normal, but a link you can visibly shift or twist has a worn ball socket. DIYers commonly use roughly a quarter inch, about 6 mm, of slop as the practical line between serviceable and failed. Also weigh the two sides of the car against each other, because a link that feels different from its partner is already a useful result.
Should you be able to move sway bar end links by hand?
A little, yes. End links are joints, not solid rods, so a small amount of movement at the ball socket and the bushing is normal and part of how they work. What you should not find is slop, a free rattling sound as you move it, or a range of movement that lets the link twist without any resistance at all.
Conclusion
Start by reproducing the noise over a bump with the suspension loaded, then inspect and play-test both end links by hand. If the link is clean, move on to the sway bar clamps and bushings, and then to the strut mount, control arm bushing and wheel bearing on the same corner before you buy anything. Get sway bar end link noise diagnosis wrong in the early steps and the rest is guesswork, so spend the extra twenty minutes on checks one through six. A severe, worsening or unaccounted-for clunk is the signal to stop and let a suspension specialist take a look.