
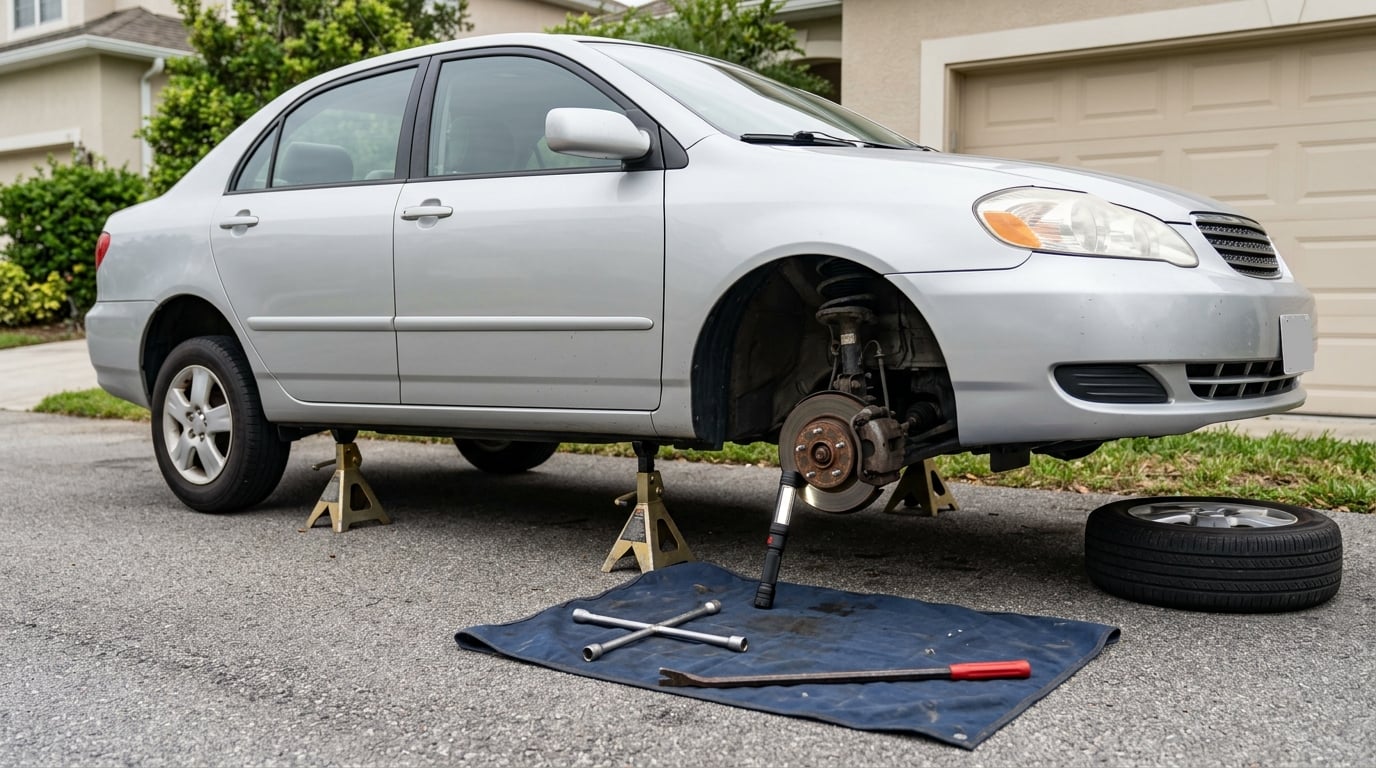
A clunk in the front suspension is a single heavy knock that happens when a worn joint, bushing, link, or mount develops free play and then strikes its opposite stop as the wheel moves through its travel. On a BMW the first three places to check are the front sway bar end links, the sway bar bushing clamps, and the lower control arm bushings, followed by the strut top mount and the ball joints.
Diagnosing it yourself takes 30 to 60 minutes with the car on jack stands, and most of that is thinking rather than turning bolts. The order matters: the cheap causes get ruled out first, because the most common outcome is a link or a bolt rather than a strut assembly.
Below is the sequence I would walk, in the order I would walk it, on a BMW with a knock over driveway aprons, speed humps, or rough residential pavement. It assumes a MacPherson strut front end, which most BMW passenger cars use. Larger SUVs and a few other models run a multi-link front axle where the equivalent checks sit on different arms, and I flag where that changes.
Table of Contents
- What You Need
- Step-by-Step
- Common Mistakes
- Frequently Asked Questions
- Can a clunk in the front suspension make a car unsafe to drive?
- Is a clunk usually caused by a wheel bearing?
- How do I tell a sway bar link problem from a strut problem?
- How can I check for suspension play without damaging my car?
- Do front control-arm bushings cause clunks over bumps?
- When should I have a front-suspension clunk inspected by a mechanic?
- Conclusion
What You Need
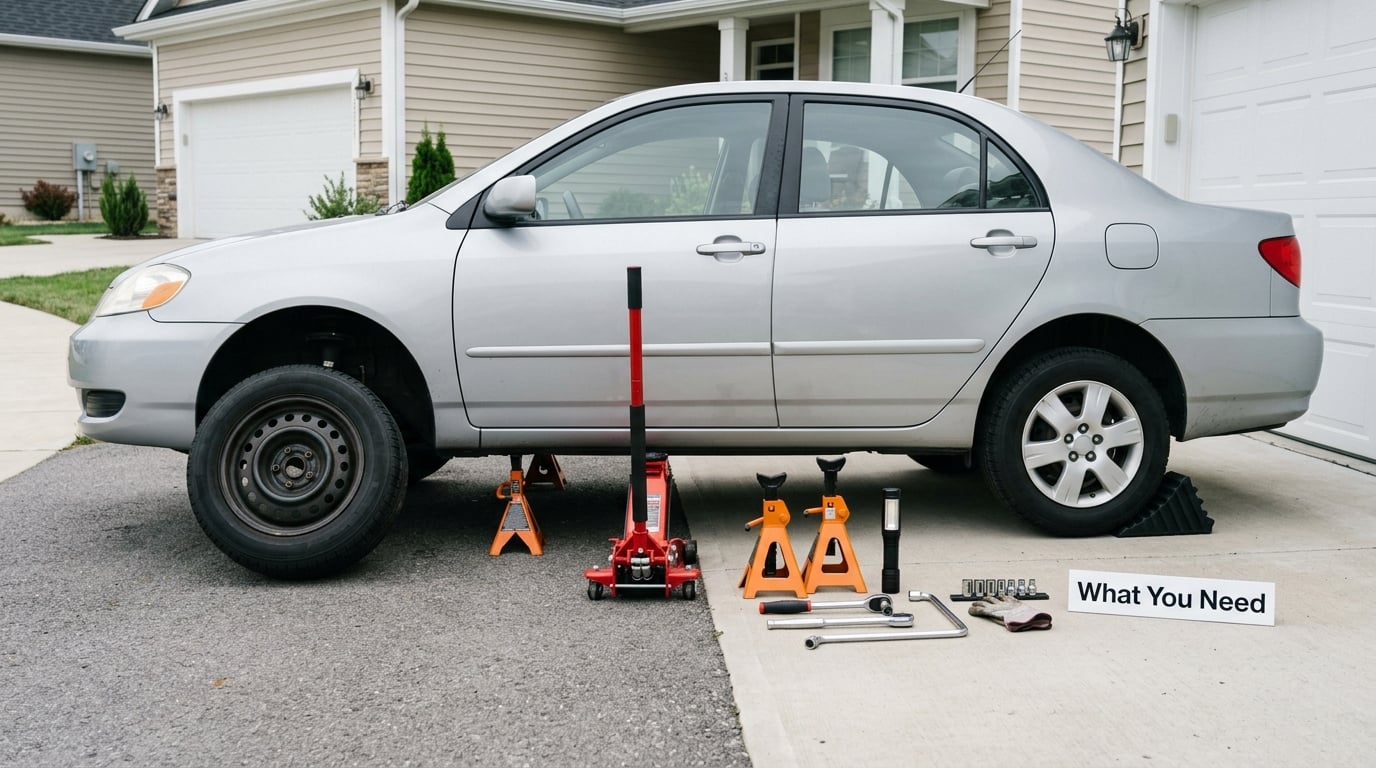
Start with the support equipment, because everything else depends on the car being held correctly. A pair of rated jack stands on solid, level ground, a floor jack, and wheel chocks. Your owner’s manual lists the factory support points for the sill or subframe, and those are the points to use, not the exhaust or the pinch weld.
Never get under a car supported only by a jack, even for thirty seconds. That is the one rule in this whole guide that has no exception.
Beyond that, the rest of the kit is small:
- Wheel chocks so the car cannot roll when it is lifted and when you shake a wheel.
- Lug wrench or impact wrench for the wheel bolts.
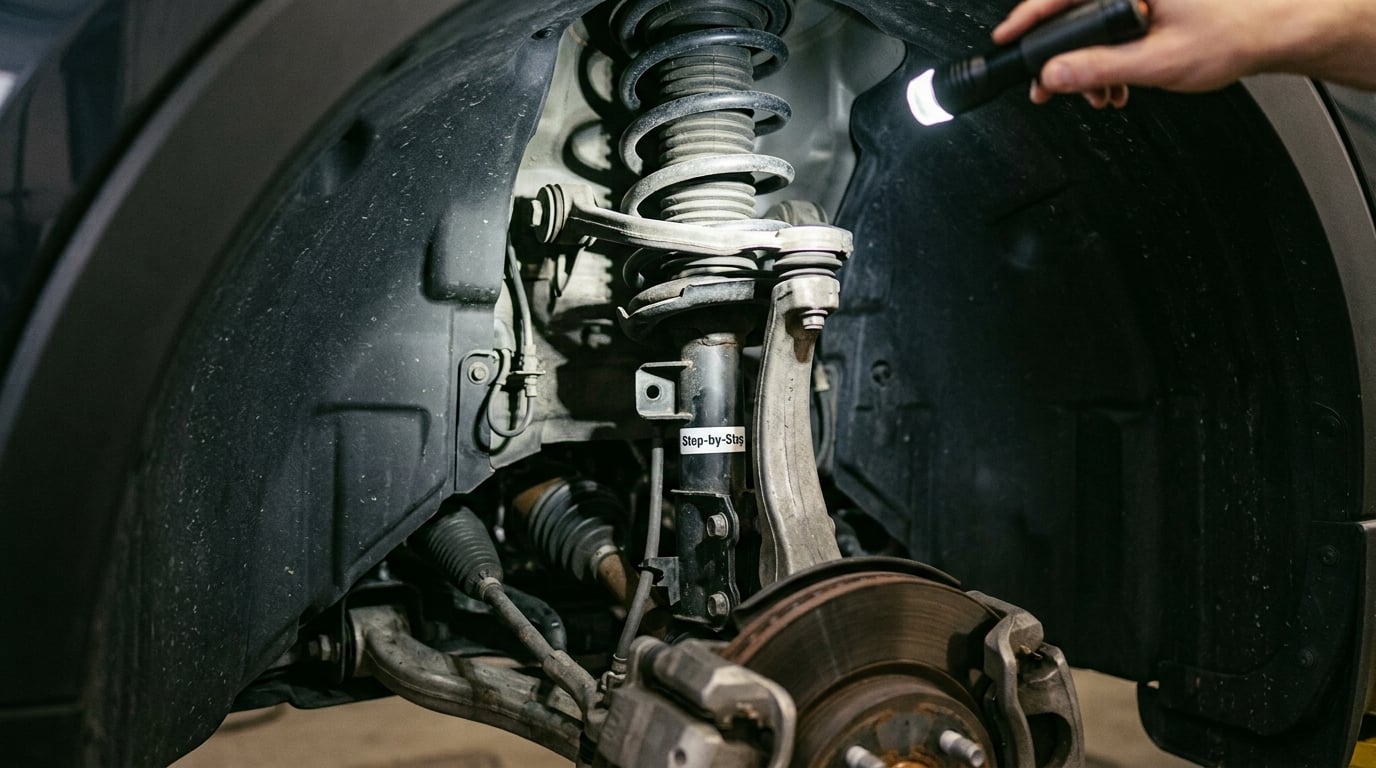
- A flashlight or headlamp, since most of the inspection happens in a wheel well with the wheel off.
- A pry bar or inspection tool for levering bushings and checking play. A long flat bar is what most people at home use.
- A rubber mallet or small hammer for tapping bushings and brackets to hear whether a component is solid.
- A torque wrench for anything you tighten.
- Manufacturer-approved lubricant if you replace a link or re-seat a rubber bushing, plus thread lock where the manual calls for it.
- A phone to record the noise before you start. A voice memo at the moment it happens is worth more than a description written an hour later.
A lift makes the work easier, and it also makes the noise reproducible while somebody else turns the wheel. If you do not have one, jack stands on a driveway with the car sitting square and fully unloaded are fine for this kind of static check. The one thing you lose is the loaded-wheel test described further down, and that is a small loss.
Step-by-Step
1. Confirm When the Clunk Happens
The whole diagnosis hinges on the trigger, so characterise the noise before you touch a single fastener. A clunk is one heavy, hollow or metallic knock. A pop is sharper and higher in pitch, a rattle is a rapid series of light taps, and a hum rises with speed and stays flat when you change road input. Those four are different faults with different parts, and plenty of people chase a rumble for weeks because it sounded like a knock at walking pace.
Record the specifics while you drive, because the pattern is what narrows the search:
- What road input triggers it: one sharp bump, a series of small ripples, a driveway apron, a pothole edge, a speed bump, or nothing at all on smooth pavement.
- Compression or rebound: the clunk on the way up into the bump, on the way down out of it, or both. A knock that only happens as the wheel drops usually means free play taking up. One that happens as the wheel is pushed up points more toward a bump stop or a top-out.
- One wheel or two: a raised driveway entrance where a single wheel hits the edge loads one side of the car hard. A rough road that clunks across the whole width loads both wheels at once. You can engineer both tests on a quiet street with a driveway apron or a wooden speed bump.
- Straight, turning, or braking: a clunk that appears only while turning points to the anti-roll bar, its links, or its bushings, because that is the moment those parts take side load. A clunk on braking is often pad knockback, hardware, or a caliper, not the suspension at all.
- Load: does it change with passengers or cargo? A noise that only appears with weight in the back is a hint about where the free play sits.
- One side or both: a clunk heard on one side of the car narrows the search to that corner, and several BMW owners have found the answer that way.
- Ride mode, if the car has electronic dampers: a noise that appears only in Comfort and not in Sport is pointing at the damping control rather than a mechanical part.
One pattern from a real case is worth remembering. An owner of a high-mileage crossover reported a clunk over bumps and down hills that was felt through the seat but not through the steering wheel, and the steering wheel stayed quiet the whole time. Vibration in the body without any steering wheel feedback usually means the load is being absorbed lower down, in the control arm or bushing area, rather than at the steering linkage or the wheel bearing.
Write the answers down. When a shop says they found nothing on the lift, your notes are what make the second visit productive, because a clunk that only appears under load often will not reproduce with the wheels hanging.
2. Inspect Tires, Wheels, and Wheel Fasteners
Do this before disassembly, because it takes five minutes and it eliminates a surprising share of false alarms. A shifted tire bead or a wheel that has been hit can produce a hollow knock that everyone then blames on the suspension.
Check the tire pressure cold on all four, because pressure changes how the tire handles an edge and a low tire makes a rim knock far more likely. Look at the tread across the full width of the tire and around its circumference for a shift, a cupping pattern, or a bulge on the sidewall. Compare the inner and outer edges of the tread: if one side is visibly more worn than the other, that is a strong sign something in the suspension or steering has been moving unevenly, and it is a clue worth following before you go further.
Then look at the wheel itself. Scuffing or a bend on the inner rim, a lip that has been rolled by a pothole, or corrosion at the mounting face all produce a knock. Check that the wheel bolts are present and that you cannot rotate the wheel on the hub by hand past a barely perceptible movement, with the car on the ground and the parking brake set.
Also check the brake pads. A pad that has backed off its backing plate, or a caliper bolt that has walked, will clunk over a bump and is a very common look-alike. If the noise changes when you lightly touch the brake pedal, it belongs to the brakes, not the suspension.
3. Check the Sway Bar Links and Sway Bar Bushings
Start here. The front anti-roll bar, its end links, and the bushing clamps that hold the bar to the chassis are the highest-yield first check on a BMW, and the community consensus across owner forums has been consistent about that for years. They are also the cheapest parts on the list, which is exactly why they get overlooked when someone is braced for a strut quote.
With the wheel off, you are looking at a short vertical or slightly angled link running from the end of the sway bar up to a bracket on the strut or control arm. On most BMW front ends the sway bar runs across the car behind the front wheels, and the links sit on each end.
Work through it like this:
- Grab the link and shake it. There should be essentially no free play at the ball stud in the middle of the link. Movement there is the answer. A rubber boot that is split, torn, or pushed out of position means the grease inside has likely gone and the joint is on its way out.
- Check the bolts at both ends of the link. A link that looks tight can still have a loose lower bolt, which is a genuinely common outcome. Check them by hand first, then confirm with a torque wrench to the figure in your service manual, not to a number from a forum post.
- Look at the bushing clamps. The bar is held by a clamp bracket with two bolts and a rubber bushing. Watch for shiny wear marks on the bar where it has moved side to side inside the clamp, and for cracking or separation in the rubber itself. A worn bushing lets the bar knock against the bracket and it will be loudest on a road crown or an uneven camber, which is why the noise shows up on sloped roads and not on a flat driveway.
- Recheck the tire wear. If a side of the tread is already uneven, the anti-roll bar hardware may have been loose for a while.
Aftermarket links get popped by potholes and by a car hitting a curb hard, and a popped link sounds different from a worn one. One owner described that noise as somebody popping a bubble repeatedly rather than a clunk, and the fix was replacing cheap aftermarket links with the correct ones. If your car has an aftermarket anti-roll bar, the bushing positions may also have been changed, so a noise that started after the modification is worth tracing back to that install.
4. Test the Control-Arm Bushings and Front Suspension Joints
If the anti-roll bar hardware is solid, move down the load path. On a MacPherson strut front end, the lower control arm runs from the subframe out to the knuckle, and its two bushings at the subframe end do most of the work of locating the wheel in front-to-back and side-to-side movement. When they wear, the wheel has slack, and that slack is the clunk.
Identifying the parts is the first job. The lower control arm is the large arm below the spring, running from a bracket on the subframe to a ball joint or bolt at the bottom of the knuckle. The knuckle is the upright that holds the hub and connects to the strut. Above and in front sits the tie rod, which runs from the steering rack to the knuckle and is steering, not suspension, even though it is often checked in the same breath.
Now test them:
- Look before you lever. Cracks that run across the rubber but do not go all the way through, surface scuffs from a tool, and light crazing are common and are not by themselves a failure. A bushing is done when the rubber has separated from the outer shell, when you can see daylight through a split, when the metal sleeve is visibly displaced in the rubber, or when grease has pushed out through the rubber and run down the arm.
- Pry with the wheel supported correctly. The arm must be loaded as it would be on the road, otherwise you will get movement everywhere and learn nothing. A practical approach is to jack the car until the tire just clears the ground, which loads the arm through the spring, then lever the tire up and down by hand. The vehicle must be jacked at a manufacturer support point and supported by stands before you ever go under it.
- Feel for the direction of the movement. Play that is mostly up and down at the inner bushing is normal suspension travel. Play up and down that takes up only after a lot of pressure, or that you can feel through the whole arm, is wear.
- Do not force a pry bar against a ball joint. A pry bar against a ball joint boot is how a ball joint gets destroyed during a diagnosis. If you find play in a ball joint, that is a finding, not a test to keep repeating, and the joint should be assessed by someone with the right tool. On a multi-link front axle the ball joint arrangement is different from a MacPherson strut, so this is a case where following the service manual for your specific model matters.
Some owners work a long pry bar around every bushing and mount in the wheel well and listen for the hollow return, which is a perfectly reasonable field test. The limit is that it tells you something is loose, not which part is loose, so pair it with the direction of the play and the road input you recorded in step 1.
One more thing to check here: the fasteners. Elongated or worn bolt holes in the subframe bracket, visible thread wear, and bolts that are hard to break loose because of rust and thread locker all produce the same symptom as a failed bushing. The lower strut bolts and the subframe-to-body bolts deserve the same hand check and the same torque verification.
5. Check Wheel Bearings, Struts, and Mounts
If the links, bushings, and joints all feel solid, you are into the parts that cost more, so slow down and work carefully. Start with the wheel bearing, because it is the easiest of these to rule out and the most commonly blamed by mistake.
With the car on the ground, parking brake on, and the wheel still on, grip the tire at the 9 and 3 o’clock positions and rock it. Then grip at 12 and 6 and rock again. Movement at 9 and 3 is play in the wheel bearing or the hub. Movement at 12 and 6, near the top and bottom of the tire, points toward the ball joint or the upper control arm, because that is where the steering load tries to rock the knuckle. A bearing that is on its way out is also usually audible as a hum that rises with road speed and changes slightly when you turn, and a bad bearing does not clunk, it hums. If your noise is a hum, stop reading this section and go look at bearings and CV axles.
On the strut itself, check three places. The top mount bolt torque is the first, because an under-torqued top mount lets the whole strut assembly twist in the tower and produces a heavy single knock that is easy to mistake for a spring problem. The top bearing is the second; it should rotate smoothly by hand, with no roughness, no binding through its travel, and no rust ring. The lower strut bolts at the knuckle are the third, and the spring seats and spring isolators are worth looking at for a shifted or cracked seat, which will clunk as the spring loads and unloads.
Now the one that catches people out. The jounce bumper, also called the bump stop, sits inside the spring and limits compression travel. When it splits internally, the outer shell still looks perfect from underneath, and the shock then travels far enough to hit its internal stop and clunk hard. It is invisible on a visual inspection, and it was the most useful technical answer in one long owner thread about a clunk that had already survived a full strut replacement. If everything mechanical checks out and the clunk only happens when the suspension is loaded hard, that is where I would look next.
Then work outward. A strut or damper that is worn out can allow enough wheel travel to reach the bump stop, which means a failed damper can present as a bump stop clunk, and vice versa. Subframe bolts and body mount bolts transfer movement into the front end on some models, so a hard jolt or a kerb strike can leave one loose with no visible damage anywhere else. On a car with a tyre that has shifted or a wheel that has been changed recently, recheck the wheel torque, because a wheel nut backing off partway produces a hollow knock that everyone then diagnoses as a suspension part.
Finally, the look-alikes, which are worth a few minutes because they are cheap to check. Brake pad knockback and loose caliper hardware, an exhaust heat shield that has come loose, an underbody panel or splash shield rattling, engine and transmission mounts that let the powertrain move on a bump or a gear change, a CV axle boot that has split, a steering rack mount, and loose cargo in the boot. A loaded spare wheel or a jack in the boot has solved more than one mystery. If the clunk comes with a rattle that keeps going after the bump, suspect a shield or a panel before you start taking suspension apart.
6. Verify the Repair Before Driving
Once the cause is found and fixed, the check matters as much as the repair. A knuckle or a strut mount is one-time-use hardware on most modern cars, so if you disturbed it, replace it with the new fastener rather than reusing the old one, and torque everything to the value in the service manual for your model.
Run through this before the car moves:
- Every fastener you touched is torqued to the specified value, including the wheel bolts, checked with a torque wrench rather than a torque-limiting impact on the final pass.
- The wheel clears the strut and the inner fender liner with the suspension at full lock in both directions. Nothing is rubbing, and nothing is caught on a brake line or a wiring harness.
- The spring sits correctly on its seat, the top mount is oriented as it was, and the boot is seated evenly.
- Brake lines and ABS sensor wiring are routed clear of the moving arms and away from sharp edges.
- Nothing you installed is a used bolt, a generic bolt, or a fastener from a different length grade.
If the repair touched a control arm, a ball joint, a knuckle, a strut, or the subframe, plan on an alignment check. Replacing any of those shifts the geometry the alignment was set to, and a car that was straight will pull or eat a tyre if you skip it. Ask for an alignment after the work rather than before it, and get the alignment spec from your own model, not from a generic chart.
Then take a road test over the same kind of input that produced the noise in step 1, at low speed first. If the clunk is gone and nothing new has appeared, you are done. If the noise is unchanged, that is information: the cause is something you have not yet found, so go back to the recorded trigger rather than ordering another part.
One branch worth naming: a clunk that appears right after suspension work, a tyre service, lowering springs, or a hard kerb strike. That timing points at a bolt that was left loose, a wheel nut that did not get torqued, a spring seat installed wrong, or a fastener that is one-time-use and got reused. Check what changed before you assume anything wore out.
Common Mistakes
Most wasted money on this problem comes from a handful of repeated errors.
Guessing from a cold start. Nobody reproduces a clunk reliably with the car cold, on level ground, at walking pace. If you skip the characterisation in step 1, you are guessing, and the guess is usually the most expensive part on the list.
Ignoring fasteners because the part looks new. A sway bar link or a strut mount that is physically intact can still be attached with a loose bolt. Check every bolt you can reach with a hand before you blame the rubber.
Confusing a hum with a clunk. A rising hum with speed is a wheel bearing or a tyre problem. A single knock that repeats over bumps is suspension hardware. Different tools, different parts, and confusing them wastes a whole afternoon.
Replacing parts without a confirming test. This is the most expensive error on the list, and it is common. One owner thread followed a clunk through a long diagnostic arc that ended with a loose lower sway bar link bolt found at the dealership, after struts had been suspected. Write down the result of each test, and do not let a quote turn into a replacement without a test that points at that part.
Prying with the wrong support state. A suspension part tested unloaded gives you false play, and a pry bar against a ball joint boot can destroy a serviceable joint. Load the car as it sits on the road, support it properly, and use a ball joint separator tool rather than a lever if you are going to test that joint at all.
Condemning every surface crack on a bushing. Outer surface crazing, small scuffs, and shallow cracks that do not reach the metal are normal for a rubber bushing of a certain age. Replacing every bushing on the car because of that is one of the classic oversells on this repair. Separation, a split you can see light through, a displaced metal sleeve, and grease pushed out of the rubber are the conditions that matter.
Driving on with unresolved symptoms. A clunk on its own is rarely urgent. Loose steering, a pull, severe vibration, a tyre showing uneven wear, or a fastener you cannot get tight is a different category, and no repair is worth continuing to drive through that.
A few habits that pay off. Use a pen and write the trigger down instead of relying on memory. Ask a shop to ride with you or to road test the car, because a technician who hears the noise is far more useful than one who only sees a car on a lift. And if a shop cannot tell you which test produced their conclusion, that is worth knowing before you sign anything.
Frequently Asked Questions
Can a clunk in the front suspension make a car unsafe to drive?
Usually not on its own. A worn link or bushing is a nuisance rather than an emergency. It becomes a safety issue when you also have loose or wandering steering, a pull, a wheel that moves visibly at the hub, severe vibration, or a fastener you cannot get tight. A ball joint is the part that can separate with little or no warning, so never treat a ball joint finding as probably fine. Stop driving and have it inspected if the steering feels vague or the car is not tracking straight.
Is a clunk usually caused by a wheel bearing?
Rarely. A worn wheel bearing usually announces itself as a hum or growl that rises with road speed and changes when you turn, not as a single knock over bumps. The way to tell them apart is the wheel test: with the car on the ground, rock the tire at 9 and 3 o’clock, then at 12 and 6. Play at 9 and 3 points to the bearing or hub, play at 12 and 6 points to the ball joint or upper control arm.
How do I tell a sway bar link problem from a strut problem?
A sway bar problem shows up on road crowns, uneven pavement, and while turning, because that is when the anti-roll bar takes side load. A strut or top mount problem usually clunks when the wheel is pushed up into a bump or drops away from one. The hand check settles it fast: grab the end link and shake it for play, then check the bushing clamps for wear marks, and only then look at the top mount torque and bearing.
How can I check for suspension play without damaging my car?
Support the car on jack stands at the manufacturer support points, never on a jack alone, and never work underneath an unsupported car. Load the arm the way the road loads it, then move the wheel by hand and feel for play in the bushing, watching the direction of the movement. Do not pry against a ball joint boot, because that destroys a serviceable joint. If a joint is inaccessible or the result is unclear, have a shop assess it.
Do front control-arm bushings cause clunks over bumps?
Yes, and they are one of the most common causes. The bushing locates the wheel and absorbs the front-to-back and side-to-side forces of a bump. Once the rubber separates, the wheel has slack that takes up with a single hollow knock as the suspension loads and unloads. Signs of a genuinely failed bushing include separation from the outer shell, a split you can see daylight through, a displaced metal sleeve, or grease pushed out through the rubber.
When should I have a front-suspension clunk inspected by a mechanic?
Get a shop involved when the noise only happens dynamically and comes back clean on a lift, when you find play in a ball joint, when the car pulls or wanders, when a tire is wearing unevenly, or when the repair means touching a strut, knuckle, control arm, or subframe. Suspension work usually needs an alignment afterwards, and stored spring energy on a spring and strut assembly is a shop job. A documented trigger, recording, or a ride-along request makes the visit far more productive.
Conclusion
Start with a written noise pattern, then work the cheap things in order: tire pressure and wheel fasteners, the sway bar end links and bushing clamps, the lower control arm bushings, then the joints, strut mount, and subframe hardware. Each test should narrow the list rather than confirm a part you already had in mind.
Stop driving and get the car inspected if the clunk comes with loose steering, a pull, severe vibration, or a fastener that will not stay tight, and leave anything involving a ball joint or stored spring energy to a shop. A quiet, straight, verified car and an alignment are the finish line, not the replacement part itself.