
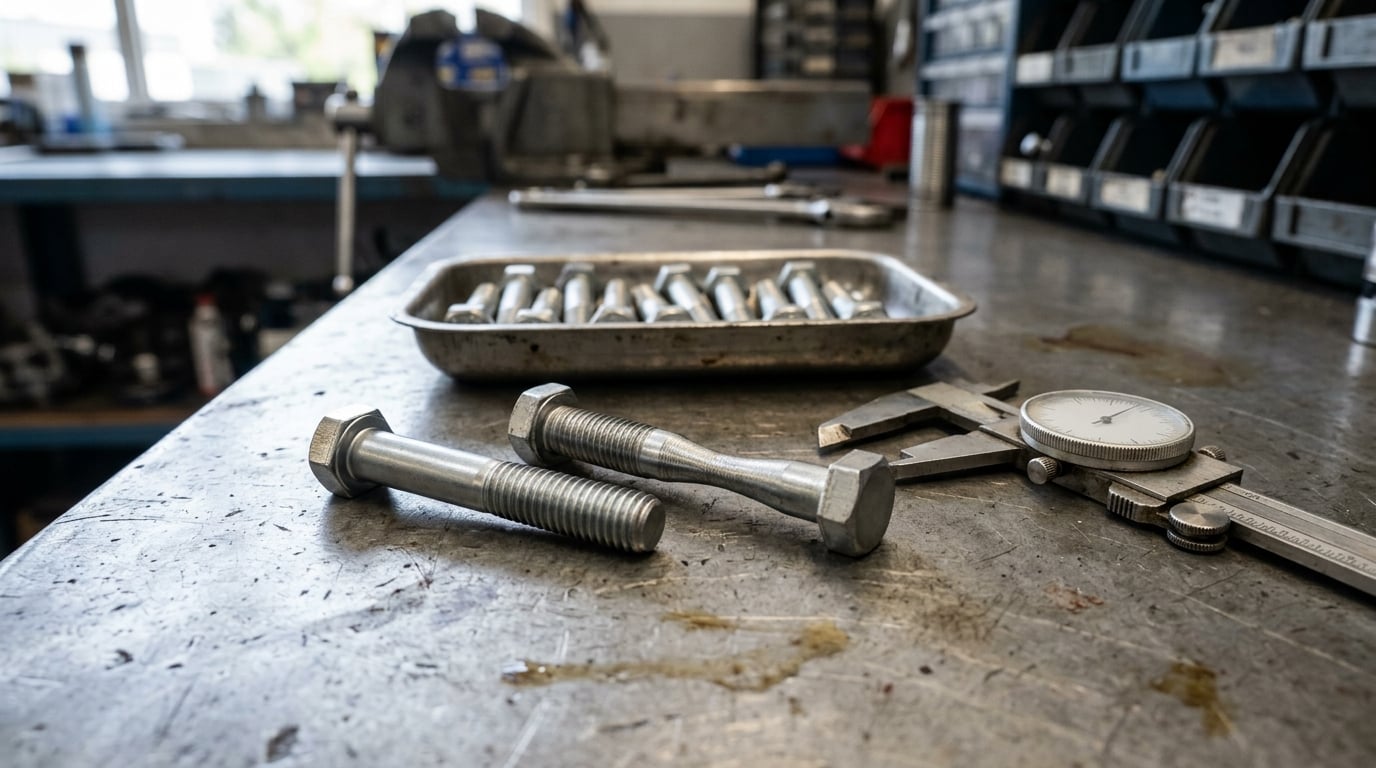
You can tell if a bolt is stretch to yield without guessing, and the answer starts with paperwork rather than a wrench. Read the service manual spec for that exact fastener: if it lists a seating torque plus an angle in degrees, you are holding a torque-to-yield bolt. If it lists one torque value and nothing else, it is a conventional reusable bolt.
Most people asking how to tell if a bolt is stretch to yield are actually asking one of two questions. The first is whether the fastener is the stretch type at all. The second is whether this particular bolt has already been stretched, which matters because a bolt that has yielded once cannot be put back the way it was.
Key takeaways
- A torque value plus an angle in degrees means torque-to-yield. One torque value alone means conventional.
- Stretch bolts are usually a slightly lower grade, a tapered stud or a reduced shank, and often have a spline or an inset hex you cannot fit a normal socket to.
- Once a bolt has been stretched, its length never comes back. Measure it against a new one of the same part number.
- Install them dry, never with an impact wrench, and treat them as single-use hardware.
BMW head bolts are the classic case, along with ball joints, tie rod ends and control arm fasteners on many European cars. The same rules apply to all of them, so I will use a cylinder head as the running example and note where suspension hardware differs.
Table of Contents
- What You Need
- How to Tell If a Bolt Is Stretch to Yield
- Step-by-Step: Inspecting and Replacing a Stretch Bolt
- Common Mistakes
- When a Stretch-to-Yield Bolt Must Be Replaced
- Frequently Asked Questions
- Can you visually tell if a bolt is stretch to yield?
- How much does a stretch-to-yield bolt stretch?
- Should stretch-to-yield bolts ever be reused?
- Is stretch to yield the same as torque to yield?
- What happens if a stretch-to-yield bolt is overtightened?
- Do all BMW head bolts need to be replaced after removal?
- Conclusion
What You Need
Start with the correct specification. Without it you are working from folklore, and folklore is how head bolts end up over-torqued.
- The service manual spec for your engine. The torque figure, the angle in degrees, the number of stages, and whether the bolt is single-use.
- Calipers or a micrometer. For diameter and effective thread length, measured before the bolt goes back in.
- A new bolt of the same part number. This is the only reliable baseline for judging existing stretch.
- A torque wrench and a torque-angle gauge. A beam or clicker type for the seating torque, a protractor-style gauge for the extra degrees.
- A thread gauge for the mating hole. Internal threads can gall just as badly as the bolt.
- Bright light and a clean bench. Necking and thread damage are hard to see in a cramped engine bay with old oil everywhere.
- Degreaser and a wire brush. Clean threads tell you more than a dirty one photographed in a forum post.
One thing you do not need is an impact wrench. Not for seating, not for breaking loose, and not at all for the final angle.
How to Tell If a Bolt Is Stretch to Yield
A stretch-to-yield bolt is designed to be tightened past its elastic limit so it plastically elongates, which gives a far more consistent clamp load than a conventional bolt at the same torque. Past yield, the extra turning builds clamping force very slowly, so the joint is controlled by the bolt’s own stretch rather than by thread friction.
That design leaves physical evidence behind. The four things worth checking are the identification, the threads, the dimensions, and the history.
Check the Bolt’s Identification and Location
Start with the least glamorous method, because it is the most reliable: read the specification for that exact position in the assembly. Torque plus angle, sometimes called torque-and-angle, is the signature. A torque-and-angle procedure can be applied to a conventional bolt as well, so the procedure alone does not always settle the question, but it tells you the joint depends on measured rotation.
Where the bolt sits is the next clue. Head bolts on bi-metal engines, connecting rod caps, ball joint studs, tie rod ends, control arm bolts and shock tower fasteners all commonly use this approach. An accessory bracket bolt in the same engine bay almost certainly does not.
Markings help. Torque-to-yield fasteners usually carry a part number, a head stamp or a supplier marking, and they are frequently a slightly lower grade or a different coating than the surrounding hardware. That is not because the steel is worse, it is because a controlled, repeatable yield point is more useful than maximum strength.
Look for Thread Damage and Permanent Deformation
A stretched bolt has necked: the shank has drawn down in diameter where it carried the load. Run a finger along it under good light and you can often feel a waist that was not there when the bolt was new. This is the check mechanics describe most often, and it is a decent screen rather than proof.
Threads tell the rest of the story. Crest flattening, pulled or stripped threads, a thread runout that no longer lines up, and a bolt that will not sit square in its bore all point to a fastener that has been loaded past where it should have been.
On the bmw2002faq stretch bolt thread, the working definition is straightforward: yield is the point where plastic deformation happens with little increase in clamp force. That is why the damage stays even though the tightening keeps going.
Measure the Bolt Before Removal
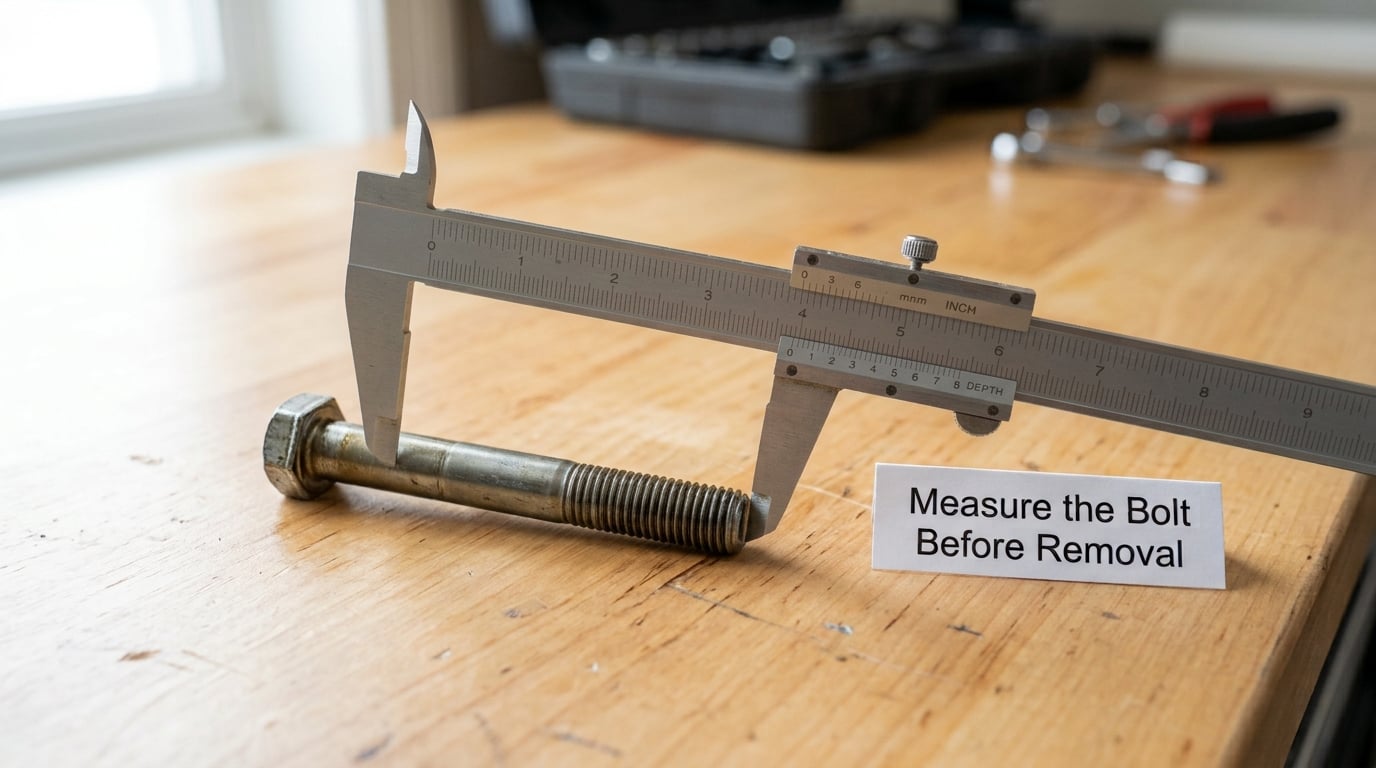
Appearance lies, measurement does not. Take the bolt off and lay it next to a new one of the same part number, then compare effective length under the bolt head with calipers or a micrometer.
Measure across the shank at several points and around two perpendicular axes. A bolt that has been stretched shows a slightly longer effective length and a slightly smaller shank diameter, and the two together are far more convincing than either alone.
If you only have a marker and a rule, put a witness mark on the shank of the new bolt at a fixed distance from the head, then mark the used bolt the same way before it goes in. After removal, the mark distance tells you how much it grew. Crude, but it works and it is how a lot of this gets checked in a home garage.
On the Bob Is The Oil Guy head bolt thread, the field advice is to compare the length against a new bolt, and treat necking plus thread condition as the serviceability check. That is the right instinct. Remember that these people are describing a used bolt that came out of someone else’s engine; the safe call for your own repair is still a new bolt.
Check for Stretch Marks and Installation History
Some manufacturers mark the fastener itself. Paint or witness marks on the head, a torque-angle reference line, or a matching mark on the mating part are meant to show a fastener that has already been taken to its angle once. If you find one, the bolt has been installed before.
Records matter too. If the engine has had the head off, the head bolts were very likely stretched at that time. Some shops replace them anyway because the cost of a new bolt is trivial against the cost of a second failure.
Look for signs of careless reassembly: mismatched bolts in a row, one fastener that sits deeper or shallower than its neighbours, a head that has been refit with a different bolt pattern, or a torque-angle mark that does not line up. A bolt installed outside its prescribed procedure is no longer a known preload, whatever it looks like.
Step-by-Step: Inspecting and Replacing a Stretch Bolt
Work in this order and you will not be guessing at any point. The whole job on a cylinder head takes a day, and the inspection part takes an hour.
1. Identify the Fastener and Its Specification
Pull the procedure for your engine before you touch the wrench. Find the seating torque, the angle or angles, the tightening order, whether the threads are wet or dry, and whether the manual calls the bolt single-use. Write it down. The tightening order matters as much as the number, because a cylinder head is not flat and loading it unevenly distorts the sealing surface.
2. Inspect the Bolt Head, Threads, and Shank
Look at the head for cracks, damaged corners, corrosion and rounded drive features, and check the flange where it contacts the surface. Run the threads through your fingers: they should feel continuous, with sharp crests and no flattened or torn sections. If the fastener has a spline or an inset hex, check it for round wear, since that changes the effective angle you apply.
3. Measure Diameter and Effective Thread Length
Measure from the underside of the head to the tip of the full thread, which is the effective length a torque-angle calculation depends on. Then measure the shank at three or four points and note the smallest reading. A difference of a few thousandths of an inch, combined with visible necking, confirms the bolt has been stretched. Without a new bolt to compare against, you cannot make this call, which is exactly why the new one is worth ordering before you start.
4. Inspect the Hole and Mating Threads
A stretched bolt is often only part of the failure. Pull the thread gauge through the hole and the mating part. You are looking for galling, torn threads, a distorted bore, a bearing surface that has been hammered flat, and contamination such as sealant smeared into the first threads.
On tapered suspension joints, also inspect the taper itself. A fastener over-tightened past its prescribed angle can stretch far enough to crack the female half of the taper, and that damage cannot be filed out.
5. Replace the Bolt and Follow the Torque-and-Angle Procedure
Install the correct new fastener, dry unless your manual explicitly says otherwise. Run it down snug, then tighten to the specified preliminary torque with a torque wrench, and finally rotate the additional angle the manual calls for, using a torque-angle gauge.
Do not substitute a final torque value for the angle. You would be guessing at clamp load, and the whole reason this hardware exists is to remove the guesswork. On many suspension studs the seating torque sits in the 15 to 30 ft-lb range with a final rotation of roughly 140 to 225 degrees; head bolts are often tightened in two or more stages. Those numbers vary widely, so treat them as orientation and use your own manual.
TTY, Torque-and-Angle, and Conventional Bolts Compared
| Feature | Torque-to-yield | Torque-and-angle | Conventional |
|---|---|---|---|
| Spec format | Seating torque plus a total angle | Seating torque plus an added angle | One torque value |
| Clamp load consistency | Highest, controlled by the bolt’s stretch | High, controlled by rotation from snug | Varies with thread friction and lubrication |
| Physical clues | Tapered stud, reduced shank, spline or inset hex | Often the same hardware as TTY | Plain hex or external thread, full shank |
| Reusability | Single use, replace after removal | Usually single use | Reusable within its proof load |
| Best verification | Length and shank measurement against a new bolt | Procedure and torque-angle record | Torque wrench setting alone |
One thing to keep straight: torque-and-angle and torque-to-yield are often used interchangeably on parts bins and service bulletins. The practical difference is where the angle starts. In a torque-to-yield procedure the bolt is first taken to a defined seating torque, which puts it at yield, and the angle that follows sets the final load. In a torque-and-angle procedure the added rotation is measured from snug.
Common Mistakes
Judging stretch by eye alone. A bolt can look perfect and still be stretched, because yielding leaves the surface almost unmarked. Measure length and shank diameter against a new bolt before deciding.
Reusing a single-use bolt. The r/tdi advice is blunt: do not reuse stretch bolts. Once a bolt has yielded, backing it off and re-torquing to the same angle does not restore the original clamp load, because the material has already taken a permanent set.
Mixing bolt types in one row. A stretch bolt beside a conventional one produces two different clamp loads, and the joint fails at the weaker one. Match the part number on every position.
Tightening by feel. Feeling that the bolt keeps going past the torque value is normal for this hardware, which is precisely why feel is not a measurement.
Applying a final torque instead of the angle. The two produce different preload, and the torque value is not interchangeable with the angle.
Lubricating the threads or using an impact wrench. Oil, anti-seize or wet assembly lube lowers friction, so more torque is delivered into the bolt itself and it over-stretches. Assembly lube is routine for a conventional head bolt spec and wrong for a stretch one. An impact wrench is worse, since it can add hundreds of foot-pounds before it stops.
GM service information quoted on the ChevyHHR forum sets a useful precedent: discard any torque-to-yield bolt that saw more than 20 lb-ft, and note that the splines on the bolt head exist specifically so the torque angle can be set accurately. The same forum explains that the splines are the reason the fastener looks different from ordinary hardware.
When a Stretch-to-Yield Bolt Must Be Replaced
Replace it when the manufacturer lists it as single-use, when it has already been stretched once, when measurement puts it outside tolerance, when it is damaged in any way, when it was installed outside the prescribed procedure, or when the repair calls for new hardware as part of the job.
That last case is the one most often argued about, because guidance genuinely varies by application.
| What you see | What it means | What to do |
|---|---|---|
| Necked shank, slightly longer than new | Bolt has yielded and is carrying its intended preload | Treat as single-use and replace on removal |
| Flattened or torn thread crests | Over-torqued, cross-threaded, or removed under load | Replace, and check the mating threads |
| Crack in the head or a sharp neck transition | Fatigue from running past the yield point | Replace immediately, do not reinstall |
| Sheared shank with a clean break | Shock or overload failure, not a torque problem | Find the cause before installing replacements |
| Stripped hole with an undamaged bolt | The hole failed, not the fastener | Repair or replace the housing, then fit a new bolt |
A stretched bolt is the normal end state of this hardware, not a defect. The bolt was designed to end up there, which is why it is specified as replace-once.
One safety note before you start: back fasteners off in the reverse or star pattern the manual specifies, and never loosen a fastener that is holding a load you cannot recreate. On a head, loosening one bolt while the rest are still at full preload is a known way to end up with a bent head or a cracked block.
Frequently Asked Questions
Can you visually tell if a bolt is stretch to yield?
Sometimes, but never with confidence on your own. Clues include a spline or inset hex you cannot fit a normal socket to, a tapered stud, a shank that is thinner than a new bolt of the same part number, and a paint or witness mark. None of these proves it. The specification in the service manual is the authority, and a length and shank measurement against a new bolt is the confirmation.
How much does a stretch-to-yield bolt stretch?
Enough to change the preload, and enough to measure. Typical target stretch for head bolts is a few thousandths of an inch, roughly 0.001 to 0.003 inch on a common multi-length head bolt, and the factory figure is part of the service data. Suspension studs stretch by a similar small amount along their effective length. Always measure the effective length under the head, not the overall length including the unthreaded shank.
Should stretch-to-yield bolts ever be reused?
Treat them as single use. Once a bolt has been stretched its material has taken a permanent set, so backing it off and tightening it to the same angle again cannot return it to its original clamp load. Some manufacturers permit reuse in specific low-load applications, so the manual for your engine wins over any general rule. When the guidance is unclear, replacing the bolt costs far less than a repeat failure.
Is stretch to yield the same as torque to yield?
Yes, in practice the two names are used for the same hardware, and torque-to-yield is the more common term. The idea is to tighten a bolt past its elastic limit so it plastically elongates, then use the resulting stretch to set a consistent clamp load. Some brands print stretch-to-yield on the packaging, others print TTY or torque-to-yield, and service manuals may also describe the procedure as torque-and-angle.
What happens if a stretch-to-yield bolt is overtightened?
The bolt keeps taking load past the point it was designed to hold, and it either necks severely or snaps. On a tapered suspension joint, the extra stretch can crack the female half of the taper, which is not repairable. Lubricated threads make this worse, because less torque is lost to friction and more reaches the bolt. An impact wrench is the fastest route to failure, which is why these fasteners are tightened dry, slowly and to an angle.
Do all BMW head bolts need to be replaced after removal?
On most modern BMW engines with plastic expanders and torque-to-yield bolts, yes, they are single-use and replaced as a set. Older engines with metal washers and reusable bolts are the exception, and the service manual for your specific engine states which case you have. Checking the head bolt procedure before you start also tells you the seating torque, the angles and the tightening order, which matter more than the bolt price.
Conclusion
Start at the book, not the bolt. Find the specification for that exact position, and treat torque plus an angle as your signal that the fastener is stretch-to-yield and single-use. Take the old bolt out, clean it, and measure its effective length and shank diameter against a new one from the same part number so you know what you were working with. Then fit new hardware and tighten it dry, in the specified order, to the seating torque and on to the final angle.