
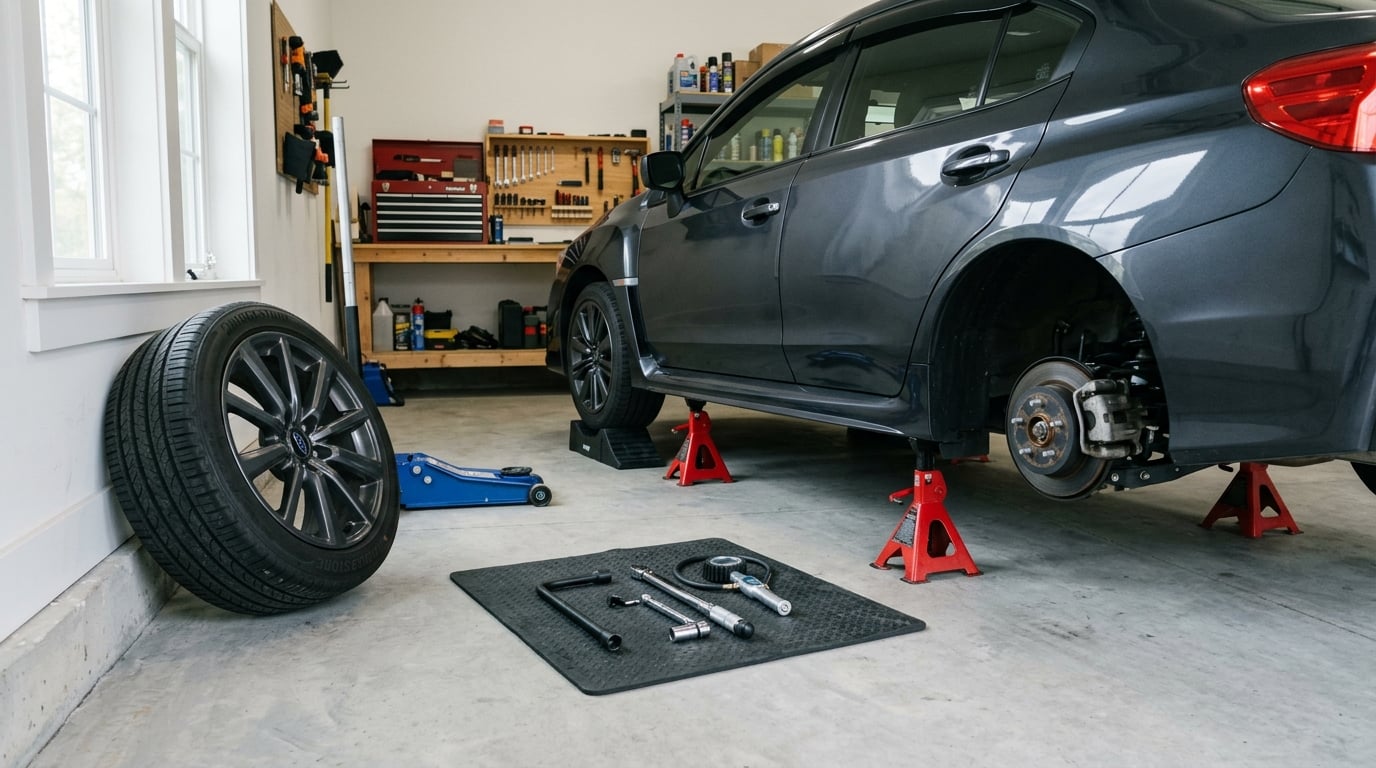
Yes, you can rotate tires at home. Most drivers finish the job in 30 to 45 minutes with a floor jack, two jack stands, a lug wrench and a torque wrench, because a rotation is only four wheels coming off, moving to new positions, and going back on in the pattern your vehicle calls for. The hard part is not strength. It is supporting the car properly and torquing the lug nuts to the manufacturer’s number in a star pattern.
Rotation exists because tires wear unevenly. The front axle does the steering, so those tires scrub in turns and their outer edges usually go first, while the rear tires take braking and load and wear across the middle. Left alone, that difference shows up as a shimmy at highway speed or a car that pulls to one side. Moving each tire to a different position spreads the wear and buys you more months before the set needs replacing.
It is also the cheapest tire work there is. A rotation preserves tread you have already paid for, keeps wet-weather traction from falling off a cliff on one edge, and most tire manufacturers ask for evidence of regular rotation before they honor a tread-life warranty claim. If your manual gives an interval, follow it rather than any number on the internet.
Table of Contents
- What You Need
- Step-by-Step Tire Rotation
- 1. Read the manual and the tire pattern before you lift anything
- 2. Inspect the tires and wheels while they are still on
- 3. Break the lug nuts loose with the car on the ground
- 4. Lift the car and support it on jack stands
- 5. Move the tires into the pattern the manual calls for
- 6. Reinstall the wheels and tighten in a star pattern
- 7. Lower the car, then check pressure and re-torque
- Common Mistakes
- Frequently Asked Questions
What You Need
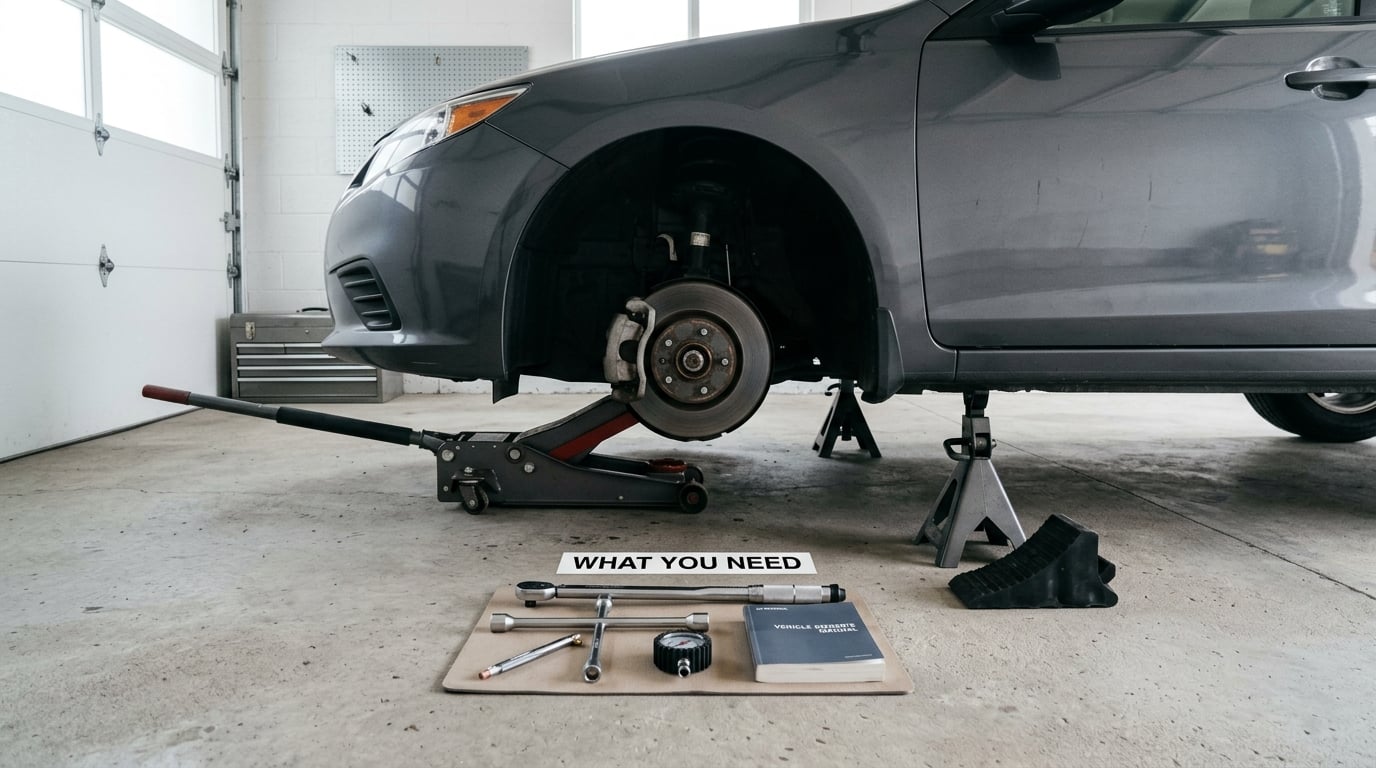
Here is the short version, which is the same list Google pulls into its answer panel:
- Floor jack rated for at least your vehicle’s weight, with the vehicle’s approved jacking point in mind.
- At least two jack stands, ideally four. Two lets you work corner by corner; four let you set the whole car on stands at once. Never crawl under a car held up by the jack alone.
- Wheel chocks for the wheels still touching the ground. Every set costs a few dollars and prevents the car rolling.
- Lug wrench or breaker bar with the socket size that fits your wheel nuts or bolts. The socket is usually stamped on the nut itself.
- Torque wrench in the range your vehicle needs. Most passenger cars land somewhere between 80 and 120 ft-lbs; trucks and SUVs with alloy wheels are often higher. Read your own spec, do not borrow a number from this article.
- Tire pressure gauge, since you will set pressure after the rotation.
- Penetrating oil, a wire brush and gloves. The spray softens seized nuts, and the brush clears brake dust off the hub face so the wheel sits flat.
- Your owner’s manual or the driver-door jamb placard. This is the document that settles the pattern, the torque figure and the rotation interval.
Two items on that list do the real work. Jack stands decide whether the job is safe, and the torque wrench decides whether the job is right. Everything else is convenience. The owner’s manual outranks any guide, including this one, because it knows your drivetrain, your wheel sizes and whether your tires are directional.
Step-by-Step Tire Rotation
1. Read the manual and the tire pattern before you lift anything
Open the manual’s maintenance section and find three things: the recommended rotation interval, the pattern, and the wheel nut torque specification. Manufacturers usually list the interval as 5,000 to 8,000 miles or twice a year, whichever comes first. Towing heavy, hauling, or driving on gravel pulls that number much closer.
Then confirm the pattern is allowed for your exact tire set. Cross patterns move tires diagonally, which balances front and rear wear. A same-side front-to-back swap is simpler and is what many manuals specify when the tires are directional or the sizes are staggered. Directional tread has arrow marks on the sidewall, and those tires must keep pointing the same way as they roll, forward or backward, not sideways.
2. Inspect the tires and wheels while they are still on
Walk around the car and compare all four tires before anything comes off. Look for feathering, where the tread blocks lean to one side, and for cupping, where the center of the tread is worn into a scalloped shape. Either one points to alignment or balance rather than rotation, and rotating a tire that has that wear just spreads the problem around.
Check the sidewalls for cuts, bulges and cracking. Pull anything out of the tread that you can reach, and note the DOT date code stamped on the sidewall so you know how old the tire is. If you want a reference for factory tread depth versus what you have now, our guide on how much tread new tires have covers the numbers worth knowing.
Confirm all four tires are the same size, load rating and type. A rotation on a staggered setup that your manual never approved can change how the car handles and how fast the tread wears.
3. Break the lug nuts loose with the car on the ground
Park on level, hard ground, shift into park or first gear, and set the parking brake. Chock the wheel diagonally opposite the one you are about to work on, and stay with that habit every time.
With the tire still carrying the car’s weight, break each lug nut loose about a quarter turn. If a nut will not move, spray penetrating oil on it, wait fifteen minutes, and try again with the socket seated fully. Never hammer a wheel off and never put the full weight of your body on a breaker bar. If a nut rounds off or a stud strips, stop there and let a shop deal with it. That is the most common reason a thirty-minute job turns into a weekend.
4. Lift the car and support it on jack stands
Find the jacking points listed in the manual. On most cars that means a pinch weld seam behind each front wheel and a similar reinforced point behind each rear wheel. Never jack under a pinch weld or under a plastic sill cover. If your car has a factory lift point, use it.
Raise one corner, swing the jack stand under the approved support point, and lower onto it until the stand locks at its ratchet notch. Then move to the next corner. With only one jack, work one corner at a time, lower the car fully before rolling to the next side, and never let the jack become your only support while you are underneath. DIYers on r/MechanicAdvice confirm that a same-side swap with one floor jack is entirely workable as long as the car is fully lowered between corners.
Only remove the wheels once you are sure the car is stable and cannot move. Pull the wheel off straight, and if it sticks, do not lever on the tire sidewall. Back the nuts off another quarter turn first.
5. Move the tires into the pattern the manual calls for
There are four common patterns, plus two that depend on your setup:
- Forward cross: the driver-side front goes to the rear passenger side, and the passenger-side front goes to the rear driver side. The rears move forward and cross to the opposite side. Common on front-wheel-drive cars, where the front tires wear fastest.
- Rearward cross: the mirror image, with the rear tires crossing to the front. Common on rear-wheel-drive and all-wheel-drive vehicles.
- X-pattern: all four tires move diagonally to the opposite corner. Often called a diagonal swap, and it suits all-wheel-drive vehicles that rotate every tire through both axles.
- Front-to-back, same side: front left to rear left, front right to rear right. Simple, and the usual answer when the tires are directional or the fitment is staggered.
- Side-to-side: tires swap across the front and across the rear without changing axles. Used with staggered tire sizes where the larger tire belongs on the rear.
- 5-tire rotation: the full-size spare joins the set. Check the spare’s wear against the road tires and move it into the position that balances the wear. If the spare has never been driven on, it should not be the first one you swap in.
If your tires are directional, check the sidewall again after each wheel goes on. The arrow has to point in the direction the tire rolls, which means a rear-mounted directional tire has to be turned around on the rim before you bolt it back up. Some all-season tires are marked for both directions, and those can move freely.
6. Reinstall the wheels and tighten in a star pattern
Seat each wheel all the way onto the hub studs before you start a nut. Bolt the wheel on by hand first so the threads are properly engaged, then tighten with the wrench in a star or cross sequence: opposite corner, then opposite, working around until every nut has had a turn. Sequential tightening on one side leaves one nut carrying the whole load and the other loose, which is how a wheel works loose on the highway.
Set the torque wrench to the figure on your driver-door jamb sticker or in the manual, and bring each nut down to spec. Most passenger cars fall between 80 and 120 ft-lbs, and trucks and SUVs with alloy wheels commonly sit higher, so the sticker is the number that matters. An impact wrench is fine for breaking the nuts loose before the lift, but not for the final tightening unless it is torque-limited and you know how it behaves. Over-torquing is the single most reported complaint from drivers whose lug nuts were done wrong at a quick-lube shop, and the result can be a rounded nut or a stripped stud that costs far more than the rotation saved.
7. Lower the car, then check pressure and re-torque
Lower the vehicle, pull the jack stands, and remove the chocks. Set tire pressure cold, against the number on the driver-door placard rather than the number molded into the sidewall. Cold matters, because pressure climbs as the tire warms, and checking hot can leave you a pound or two light. If you rotate through the cold season, the placard value still wins, and our guide to what PSI car tires should be in winter covers how cold weather changes it.
Many manufacturers ask you to re-check lug nut torque after the first 50 to 100 miles of driving. Set an alarm for the end of the next few days and go over each wheel with the torque wrench again. Also watch your tire pressure monitor light, because sensors have to relearn after a rotation and some vehicles show a warning until you drive a full tank or reset the system.
You will know the job is finished when all four wheels are seated flat, every nut is at spec, the car sits level, and the steering wheel is centered. A vibration at highway speed is not a failed rotation; it usually means the imbalance or uneven wear was already there and has now moved to a position where you can feel it.
Common Mistakes
Almost every bad home rotation traces back to one of these, and each one has a straightforward fix:
Working under a jack alone. A floor jack is a lifting device, not a support. If you do not own stands, have the car lifted at a shop, or borrow a set before you start. This is the line between a sensible DIY job and a genuinely dangerous one, and nobody on the forums thinks it is a fine shortcut.
Using the wrong pattern. Crossing directional tires or using a pattern your manual never approved for your tire sizes can change handling and accelerate wear. Check the sidewall arrows before you move anything, not after.
Skipping the compatibility check. Rotating a staggered set without following the manual’s rule can put the wrong size on the wrong axle. Same size, same load rating, same type, or leave them where they are.
Tightening in sequence instead of star pattern, or leaning on the wrench. Star pattern distributes clamping force evenly. Hanging your body weight off a lug wrench is how studs get stripped and bearings get damaged.
Over-tightening with an impact wrench. Once the nut is seated, back it off. Torque-limited settings are not a substitute for knowing your vehicle’s number.
Forgetting the re-torque. Nuts can settle slightly in the first days of driving. A quick re-check after 50 to 100 miles takes five minutes and closes the job properly.
Rotating tires that should be replaced. A rotation is maintenance, not a repair. Tires worn to the legal 2/32 inch, cracked, bulged or separated get replaced, not swapped. Tire age matters as much as tread, so check those date codes while the wheels are off. Our guide on how long tires last in years covers what the codes mean and when rubber gives up regardless of remaining tread.
Frequently Asked Questions
Can I rotate tires at home myself, or is it a shop job?
Yes. Any driver with a floor jack, at least two jack stands, wheel chocks, a lug wrench and a torque wrench can do it on level ground in 30 to 45 minutes. Support the car on stands before you go underneath it, break the nuts loose while the tire is still on the ground, and torque to the number on your driver-door placard.
What is the best pattern for tire rotation?
Most front-wheel-drive cars use a forward cross, meaning the front tires move straight back and the rear tires cross to the opposite side. Rear-wheel-drive and all-wheel-drive vehicles usually use a rearward cross or an X-pattern. Directional or staggered tire sets usually require a same-side front-to-back swap instead, so the manual decides.
Do I really need to rotate my tires every 5,000 miles?
Most manufacturers specify 5,000 to 8,000 miles or twice a year, whichever comes first, so rotating at the oil-change interval is an easy habit to keep. Rotate sooner if you tow a heavy trailer, haul cargo, or spend time on gravel. If you miss an interval, do not double up. Return to the normal schedule and rotate at the next opportunity.
What pattern do you use when tightening lug nuts?
Always use a star or cross pattern, working from one nut to the diagonally opposite one and around until every nut has been tightened once, then repeat in the same order. Going around in a circle leaves the first nut loaded and the last one loose. Finish with a torque wrench set to the spec on your door-jamb sticker.
Is there a wrong way to rotate tires?
Yes, several. Rotating directional tires sideways is the clearest one, since the tread only works one way. Others include using a pattern the manual does not approve for your tire sizes, tightening lug nuts in sequence rather than star pattern, and rotating a set where some tires are worn out, cracked or bulged. Rotation maintains tires, it never rescues a damaged one.
What is the correct pattern for rotating a spare tire?
With a full-size spare, rotate all five tires and treat the spare as a fifth member of the set. Check its tread against the road tires before deciding where it goes, and keep any never-used spare in a position where it will still be usable. A space-saving spare under the cargo floor is too small to rotate and should be left alone.
Start at the beginning and the job gets simple: read your owner’s manual for the pattern and the torque figure, set up on level ground with jack stands and chocks, work one corner at a time, and tighten in a star pattern. That is how to rotate tires at home without turning a cheap afternoon into a repair bill.