
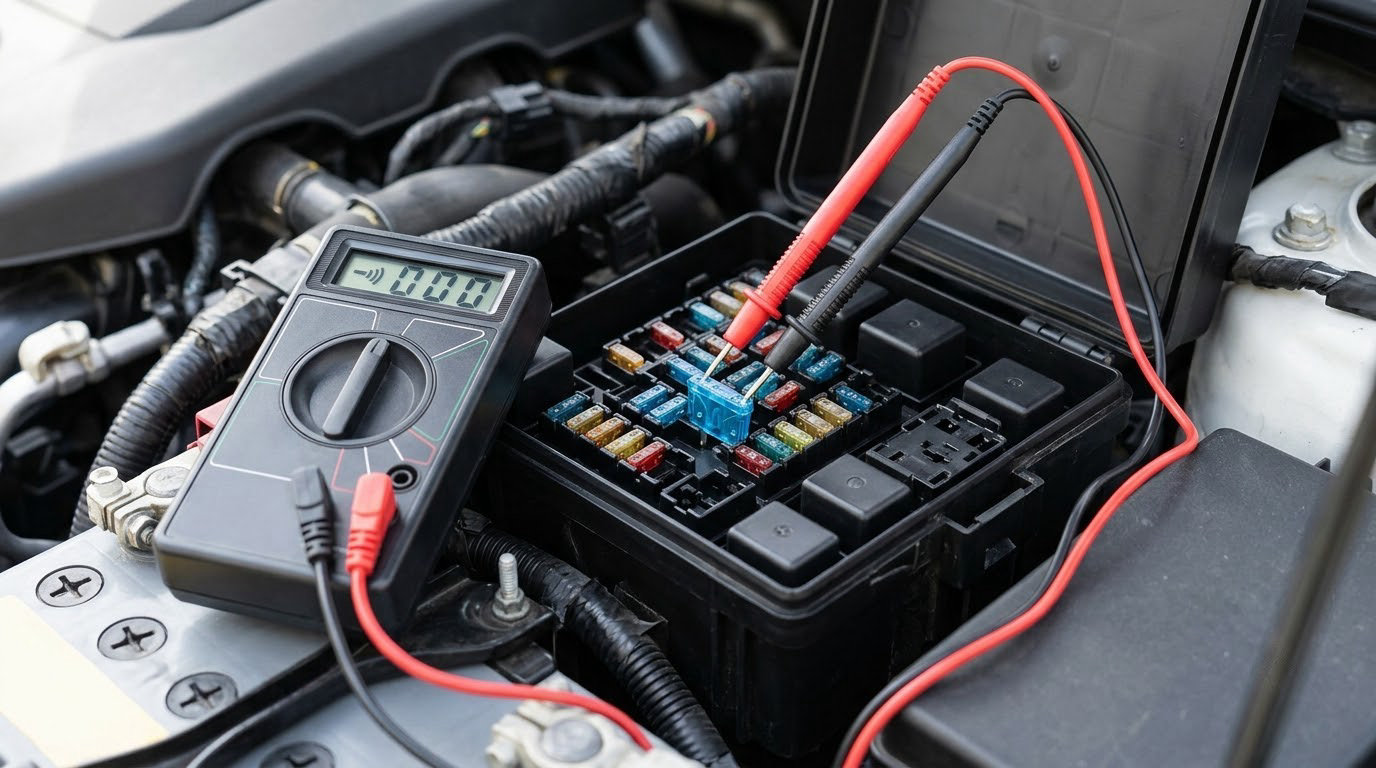
To test a fuse in a car, pull it out of the fuse box, look at the filament, then touch a multimeter set to continuity to both metal prongs. A beep or a near-zero reading means the fuse is good. No beep, or an OL or 1 reading, means it is blown. The whole job takes under five minutes.
That matters more than it sounds. A dead headlight, a radio that never turns on, a blower motor that only works on high, or a car that cranks but won’t start are all classic blown-fuse symptoms, and the fuse is the cheapest thing to rule out before you buy a part.
Most cars have two or three fuse boxes: one in the driver footwell, one under the hood, and often one in the glovebox or trunk. The one under the hood usually holds the higher amperage fuses for the alternator and cooling fans, and it may hold a different set in cars with two engines or a hybrid system.
Table of Contents
- What You Need
- Step-by-Step: How to Test a Fuse in a Car
- Common Mistakes
- Frequently Asked Questions
- Can I visually tell whether a car fuse is blown?
- What multimeter setting should I use to test a car fuse?
- Why does a new fuse keep blowing in the same circuit?
- Is it safe to use a test light to check a car fuse?
- What happens if I install a higher-amperage fuse?
- Do I need to disconnect the battery before testing a fuse?
- Conclusion
What You Need
Start with the vehicle documents, because a fuse box with forty identical slots is useless without a way to match a number to a circuit.
- Owner’s manual or service manual — usually has the fuse diagram and the amperage for each circuit.
- The fuse box cover — the diagram is often molded right into the plastic lid.
- Multimeter with continuity mode — the most accurate method and the one worth owning.
- Cheap test light or circuit tester — a pen-shaped probe with a small bulb, useful if you never plan to own a meter.
- Fuse puller — most fuse boxes include a plastic one in the spare fuse slot. A needle-nose plier works too.
- Flashlight — for seeing inside a dark footwell and for holding a fuse up to the light.
Before you touch anything: ignition off, key out of the ignition, doors closed so the courtesy light does not drain the battery, and the parking brake set. Never bridge a fuse slot with a jumper or a piece of wire. That removes the protection that is there to stop a fire, and the wire that overheats is the wire that melts.
Step-by-Step: How to Test a Fuse in a Car
Step 1: Identify the Correct Fuse and Circuit
Match the symptom to a circuit first. One dark headlight points to the headlight or parking light fuse, not to a random 15-amp slot. Check the diagram on the fuse box cover or in the owner’s manual, and match the amperage printed on the fuse to the number in the diagram.
Then work out which box feeds the circuit. Interior fuse boxes usually handle the cabin, and the engine bay box handles the alternator, fuel pump, and cooling fans. Some circuits get power from both, so if you pull the wrong box you will pull a good fuse and conclude the circuit is fine.
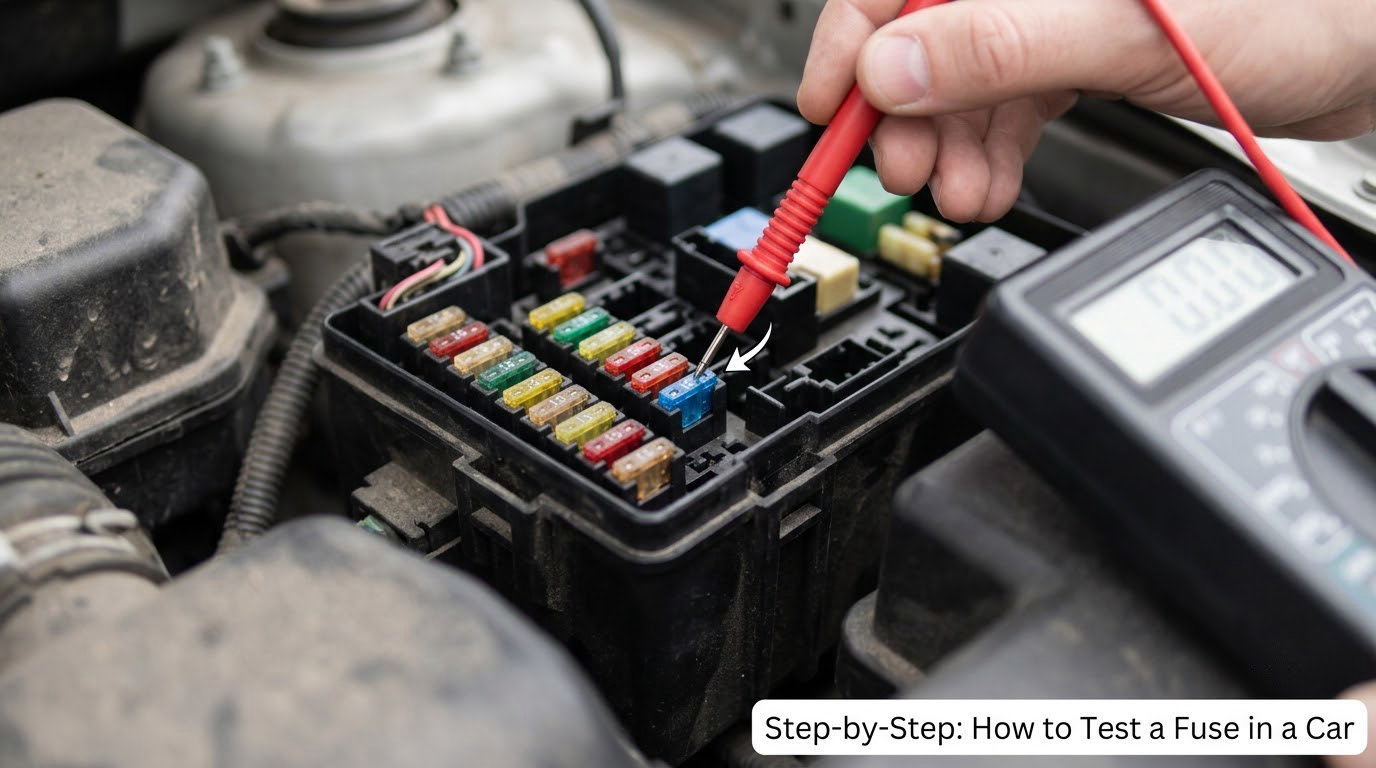
You can also test in place before pulling anything. With the ignition on and the accessory dead, put your meter on DC volts and push one probe onto each of the two prongs you can reach from above the fuse. Both test points at 12 volts means the upstream side is live. One at 12 and one at 0 means the fuse is blown. The trouble with this method is that an unloaded circuit with the switch off will read zero on both sides, so a false zero is common. Treat it as a hint, not a verdict.
Step 2: Perform a Visual Inspection
Pull the fuse straight up with the puller, and hold it up to a light. A good blade fuse has an unbroken flat metal strip running across the top between the two prongs, usually in a small window in the plastic. A blown fuse shows a gap, a darkened smear, or a visibly thinned or stretched link where the metal melted.
Look at more than the filament. A casing that is cracked, browned on the outside, or no longer sits flat in its socket was probably pushed too hard or was installed backwards. A cartridge-style fuse in a puller holder shows the same thing, just without the window.
Appearance alone is not proof. Forum owners on r/mechanics and r/MechanicAdvice keep pointing out that a clear plastic blade fuse can look perfect and still be open internally, where the link is hairline-cracked or the end caps have loosened. Confirm with a meter before you replace a part.
Step 3: Test the Fuse With a Multimeter
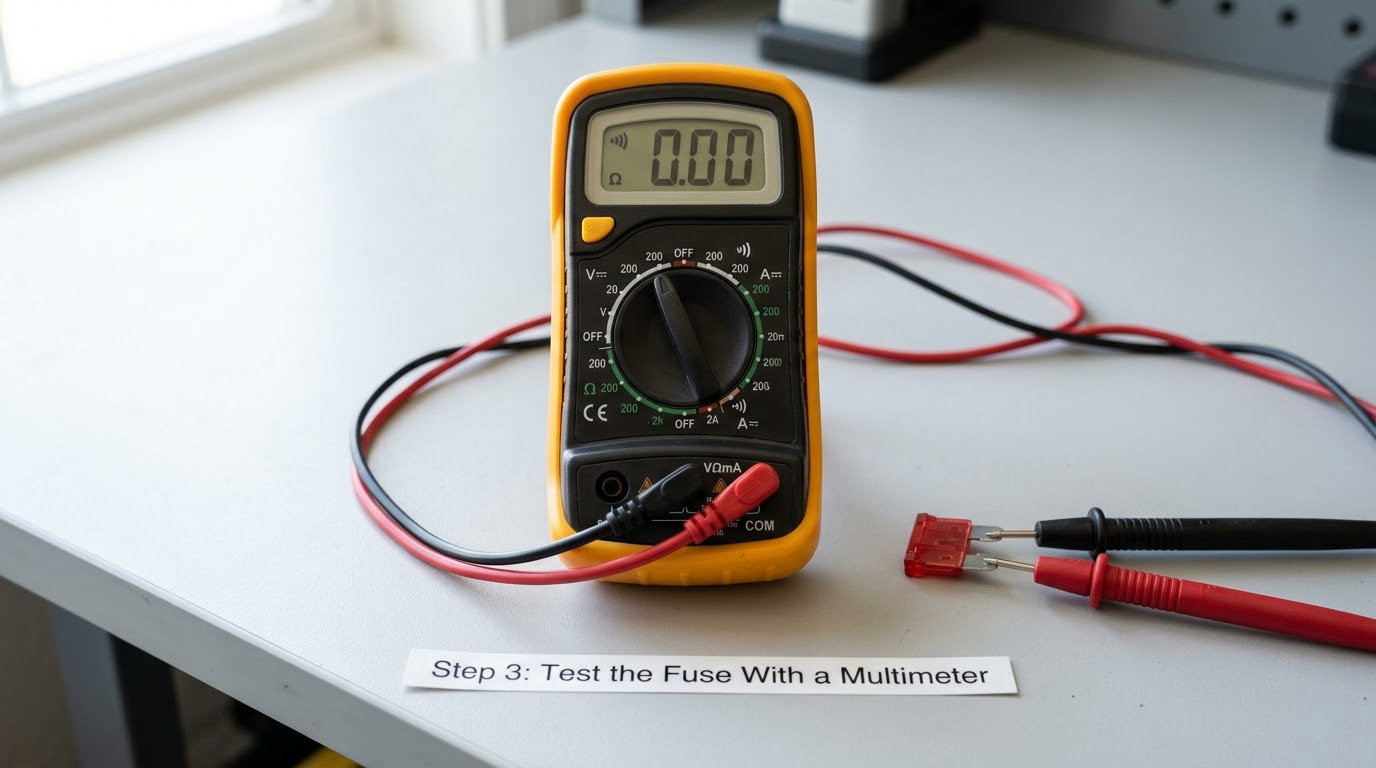
Set the dial to the continuity symbol, the one that looks like a loudspeaker or a series of rising dots. On many meters the ohms setting sits right next to it, and either works. Continuity gives you an audible beep, which means you can keep your eyes on the fuse instead of on the display.
Touch the two probes together first. A good meter beeps immediately with a reading near zero. If yours does not, replace the battery before you trust it on anything.
Now press one probe tip onto each metal prong, right where the fuse meets the plastic, and hold for a second. Fuses are not polarized, so probe direction does not matter.
Read it like this:
- Beeps, 0.0 to 0.5 ohms — the fuse is good. The filament is an intact strip across the window.
- No beep, reads 1 or OL — the fuse is blown. Look for a gap, a dark smear, or a thin spot in the link.
- Reads something in between — usually a bad connection or a socket problem, even though the fuse often looks fine.
A good fuse measures almost no resistance because it is a piece of metal. Anything that reads a few hundred ohms or more is telling you the current has a hard time getting through, which is a failure even if the fuse has not blown yet.
If you do not have a meter, the test light does the same job in a crude way. Put the tip on one prong, the cap end or ground clip on the other, and press the button. Light means continuity. It costs a few dollars and it is not polarised either, but it tells you good or bad, not bad or slightly bad.
Step 4: Confirm the Fuse and Check for Other Problems
Install a replacement with the same amperage printed on the old one, the same type, and from the same manufacturer. A 10-amp circuit takes a 10-amp fuse. A 25-amp fuse in that slot lets current run well past what the wire behind it can carry, and the wire heats up, melts its insulation, and can start a fire. If a slot takes two different ratings, the diagram tells you which is correct.
Then turn the key and see if the circuit came back. If a brand-new fuse blows again, the fuse was never the fault. That means current is reaching ground somewhere it should not, and a short to ground is the usual cause.
Isolate it instead of swapping fuses in a loop. Put the new fuse in, then unplug or disconnect the loads on that circuit one at a time and retest after each. When the fuse stops blowing, you have found the circuit. Water intrusion in a door jamb or under a carpet, a chewed wire near a hinge, a crushed wire under a seat rail, an aftermarket alarm or amplifier, or a cheap add-a-fuse tap with a loose connection are all common culprits.
If the new fuse holds and the accessory is still dead, the fuse is not your problem. Look next at a relay in the same box, a corroded socket that the fuse no longer makes contact in, a blown bulb, or a switch. A socket with green or white powdery residue needs cleaning with an electrical contact cleaner and a soft brush, or a fuse box that has seen water should be dealt with properly.
Common Mistakes
Testing the wrong slot wastes more time than any other error. With forty similar fuses in the box, guessing is worse than reading the diagram.
- Upsizing the amperage. Never. It is the single most dangerous habit in this whole job, and mechanics say it over and over on the forums.
- Bridging the terminals with a wire or a probe. You remove the only thing standing between a short and a burnt harness.
- Ignoring corrosion. A fuse that reads fine out of the box can still fail in the car because the socket is pitted. Clean it or replace the fuse holder.
- Probing terminals that are live. Test with the ignition off for the meter method. Leave the key in only for an in-circuit voltage test, and only with the meter on volts, not on ohms or continuity.
- Replacing a fuse without a diagnosis. If it blew once it might be an overloaded circuit. If it blows every time, something downstream is shorting.
- Leaving an add-a-circuit tap in place. Accessory fuse taps are a frequent source of repeat blows, and they hide a failed tap behind a fuse that keeps failing.
- Skipping the meter check on a fuse that looks fine. Visual inspection catches most failures and misses the rest.
One last note on the meter. Do not measure ohms or continuity on a circuit that has power on it. The meter is designed for a dead circuit, and putting it across live voltage gives you a reading you cannot trust at best and a damaged meter at worst.
Frequently Asked Questions
Can I visually tell whether a car fuse is blown?
Usually, yes. Hold a blade fuse up to a light and look for a break, gap, or dark smear in the metal strip across the top window. A good fuse shows an unbroken flat link. But a hairline crack can stay hidden inside a clear plastic case, so visual inspection is a fast first pass, not the final word. Confirm with a meter set to continuity before you buy a part.
What multimeter setting should I use to test a car fuse?
Use the continuity setting, the dial marked with a speaker or sound wave icon, because you get an audible beep. The ohms setting works just as well and gives you a number instead. Before testing anything, touch the two probes together. A working meter beeps and reads zero. If it does not, change the battery so you are not chasing a false result.
Why does a new fuse keep blowing in the same circuit?
Because the fuse is a symptom, not the fault. Something on that circuit is drawing more current than it should, or current is reaching ground through a short. Unplug the loads on that circuit one at a time and retest until the fuse holds, which tells you where to look next. Common causes are water intrusion, a pinched wire, a failing motor, or an aftermarket alarm, amplifier, or fuse tap.
Is it safe to use a test light to check a car fuse?
Yes, provided you use it with the ignition off and never on a live circuit. A bulb tester is not polarised, so it does not matter which prong you touch first. It gives you a simple good or bad answer and costs a few dollars. It cannot tell a good fuse from a slightly degraded one the way a meter can, so many owners end up buying one anyway.
What happens if I install a higher-amperage fuse?
The fuse no longer trips at the current the circuit was designed to handle, so a fault that would have blown it instead heats the wiring behind it. The insulation softens, the conductor melts, and you have a short or a fire, usually somewhere behind a dash or door panel where it is expensive and hard to find. If a slot takes two ratings, the fuse diagram tells you which one is correct.
Do I need to disconnect the battery before testing a fuse?
No. Turn the ignition off, remove the key, and close the doors, and you are fine for pulling and testing a fuse with a meter. Disconnecting the battery matters when you are working with live voltage measurements or touching wiring directly, or if a short is actively blowing fuses. Do not work on ohms or continuity while the circuit has power, whatever the battery is doing.
Conclusion
Start with the diagram, pull the right fuse, look at it in the light, and confirm with a meter set to continuity before you install anything. A beep means the fuse is fine and the fault is somewhere else in the circuit. No beep means replace it with the same amperage and the same type, then find out why it blew.
If a new fuse blows again, isolate the circuit rather than looping the swap, and if you end up chasing wiring behind a dash, hand it to a shop.