
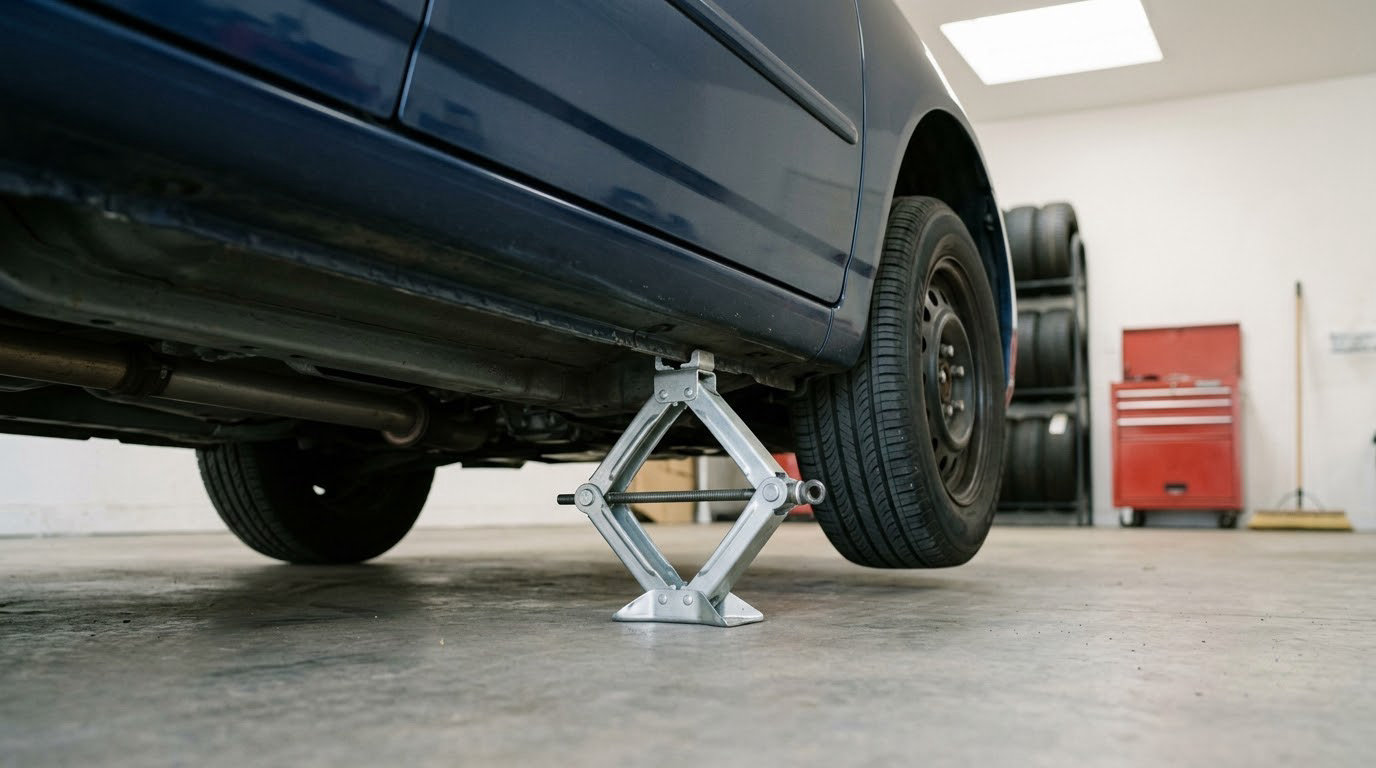
On most cars, the jack points are reinforced sections of the pinch weld tucked under the rocker panel, one just behind each front wheel and one just in front of each rear wheel, which gives you four side points. Trucks and body-on-frame SUVs add frame rails or a rated subframe. Your owner’s manual jacking diagram is the final authority.
That answer sounds simple until you are lying under a car at 9pm with a floor jack in your hands, trying to tell a factory-approved point from a dozen pieces of metal that all look strong. Getting it wrong is the most common source of self-inflicted car damage, and the fix costs almost nothing: two minutes with the manual before the jack touches anything.
Table of Contents
Where Are the Jack Points on a Car?
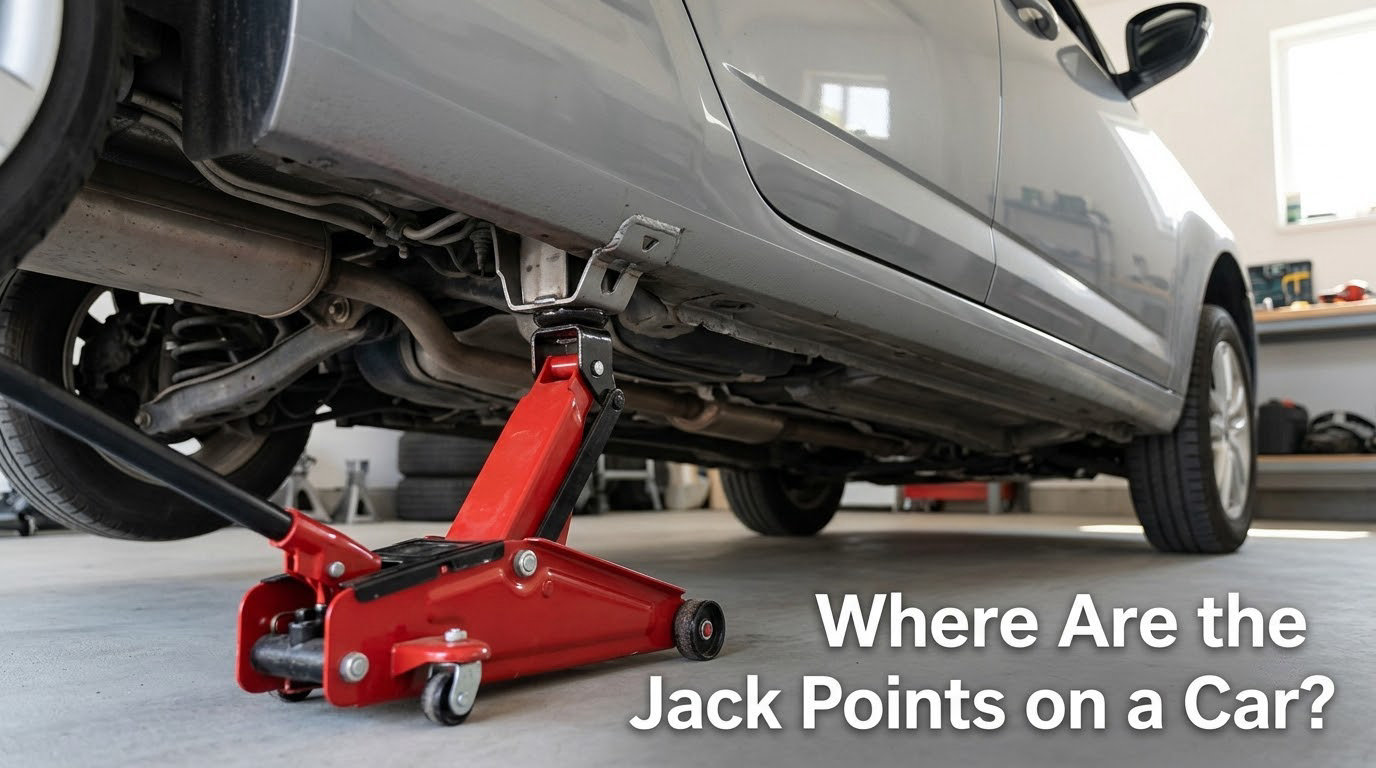
Where are the jack points on a car? They are the factory-approved locations on the body or frame that are engineered to carry the vehicle’s weight while it is lifted, and on a typical unibody passenger car that means four reinforced spots along the pinch weld, two per side.
Each point sits behind a front wheel or ahead of a rear wheel, in the seam where the floor pan folds up into the door sill. That folded lip is what gets its name: pinch welds squeeze two layers of sheet metal together during manufacturing, and the factory adds extra gauge metal around the sections approved for lifting.
What a pinch weld actually is
The pinch weld, also called the rocker seam or sill flange, is a folded edge of steel about an inch tall. On a modern car it is roughly 0.8 to 1.2 mm of sheet metal, which sounds thicker than it is once you consider it is folded, coated in undercoating, and carrying a car that weighs a ton and a half.
It is strong along its length but weak in the direction a flat floor-jack saddle pushes. That is why a bare steel saddle folds the lip over, cracks the coating, and starts a rust seam that spreads for years. A slotted pinch-weld adapter sits over the flange with a channel cut into it, so the metal folds into the slot instead of buckling. Use one every single time you lift at a pinch weld.
Unibody cars versus body-on-frame trucks
A unibody car has the engine, cabin and cargo area welded into one structural shell, and the shell itself is the thing being lifted. The sill and the subframe carry the load, which is why the pinch weld matters so much.
A body-on-frame truck or SUV sits on a separate ladder frame, and the body is only partly structural. Those vehicles have obvious frame rails running the length of the chassis, usually with a factory jack pad or bracket welded to the rail near the doors. The sill is then just a cover over the rail, not the load path.
Quick tell: crawl under it and look for a wide rectangular rail with body bolts passing through rubber isolators. If you see that, you have a frame. If you see a flat floor with stamped ribs and no separate rails, you have a unibody.
How to Find the Correct Jacking Points on Your Car

Start with the manual, not with the underside of the car. Every owner’s manual has a jacking diagram, usually in the roadside assistance or emergency section, and it names the exact points for your year, make and model.
If the paper manual is gone, search your year make model owner manual PDF and the same diagram is usually in there. Manufacturer service information and workshop manuals are the next best source, and a dealer service department will look it up for you. What you should not do is use a diagram from a different model that looks similar, because jacking points move between generations and even between trim levels.
What approved jack points look like
You are looking for cues, and the factory usually leaves several:
- A notch or cut-out in the sill flange, often a rectangular or triangular gap in the pinch weld itself.
- A molded arrow or triangle on the plastic side skirt, rocker cladding or undertray pointing at the spot.
- A heavier, thicker section of seam that looks different from the metal a few inches either side of it.
- A flat reinforced pad or lifting socket on a frame rail, sometimes with a threaded hole or a raised square boss.
- A paint or seam-sealer mark that the factory leaves to show the approved lift area on some models.
Not every notch is a jack point. Some are drain holes, some are assembly marks, and some sit on the door skin rather than the structural sill. If the manual does not show a point, treat it as unapproved. That stance is the whole safety argument in one sentence.
How to actually see the point in your own driveway
Most of the anxiety in forum threads comes from not being able to see anything at all under a dirty car. A few cheap fixes solve it:
- Get low and use light. A headlamp on your head plus a work light on the ground beats a phone flashlight every time. Bounce the light off the white concrete so the shadow under the sill disappears.
- Use ramps or a creeper. A pair of plastic drive-on ramps raises the car enough to slide a creeper under and look up at the sill properly, and the low-profile ramp doubles as your safety support.
- Take a photo with your phone. Shoot from the ground upward. It is far easier to spot a notch in a photo than to find it with your eyes in the dark, and you can zoom in on the image.
- Clean the contact patch first. Years of undercoating, road grime and wax hide the seam. Wipe the area with degreaser and a rag, and the reinforced section and any marking appear almost immediately.
Once you can see it, run a flat coin or a feeler gauge along the seam. The approved section is stiffer and resists flex more than the metal ahead of and behind it, and that stiffness difference is often clearer than any marking.
Checking whether a pinch weld is rust-compromised
Experienced owners treat visible rust on a pinch weld as a no-lift condition, and that is the right default. Look for flaking paint, surface rust spreading along the seam, a soft or crumbly feel, or a crease from a previous lift.
If the seam is compromised, do not try to make it work. Options in order of preference: lift at a rated frame rail or subframe point shown in your manual, use a two-post lift or a drive-on lift at a shop, or have the pinched section repaired at a body shop before you continue doing work underneath. A creased pinch weld traps water and will fail along the crease line, so it is worth fixing properly rather than cosmetically.
Common Jack Point Locations on Cars
Locations vary by model, but the pattern is consistent enough to give you a starting point. Visual similarity does not prove a point is safe, so use this table to orient yourself and then confirm in the manual.
| Vehicle type | How to tell | Side lift point | Front central point | Rear central point |
|---|---|---|---|---|
| Sedan or hatchback (unibody) | No separate ladder frame; flat floor pan with stamped ribs | Pinch weld behind the front wheel and ahead of the rear wheel | Rated front subframe pad, often where the rear subframe bolt passes through | Rear subframe or an approved control-arm mount point |
| Coupe or convertible (unibody) | Same one-piece shell, often with a shorter or boxed sill | Same four pinch-weld points | Front subframe pad, sometimes marked with a small arrow | Rear subframe pad |
| Compact crossover or SUV (unibody) | Taller body with plastic cladding over the sills | Pinch weld, often slightly lower and just behind the cladding | Front subframe pad, reachable with a low-profile jack | Rear subframe, sometimes a brace ahead of the rear wheel |
| Body-on-frame truck or SUV | Visible rectangular frame rails with the body bolted on | Frame rail at a factory jack pad or sill bracket beside the door | Frame rail crossmember near the front, often a designated pad | Frame rail, frequently a crossmember just ahead of the rear bumper or spare tire |
| Performance or lowered car | Very low ride height, stiffened structure, limited clearance | Manual-specified sill points only; some models approve no side lift at all | Subframe pad, may need a low-profile or long-reach jack | Subframe or approved rear structure; often no rear jack point is given |
| Hybrid or electric vehicle | Battery pack bolted to the floor between the axles | Same sill points, usually with a manufacturer adapter or lift pad | Subframe pad outside the pack envelope; never over the pack | Rear subframe or rated rear structure, never under or beside the pack |
What Can You Damage by Using the Wrong Jack Point?
Bending a rocker panel or creasing a pinch weld is a body-shop bill, not a parts-store bill. The cheaper mistakes are the punctured plastic undertray and the cracked oil pan, and the expensive one is the car that shifts or drops while somebody is underneath it.
Lifting loads a car through structural members that tie into the body, which is why factory points are reinforced. A flat floor pan has no such path, so it stretches, creases and eventually tears. The same goes for a differential cover on a live rear axle: jack it square in the middle and the housing can crack, and the pinion seal goes with it.
| Contact point | What likely happens | Safer choice |
|---|---|---|
| Flat floor pan sheet metal | Crease, stretch, tear through, then rust from inside | Never lift here; use an approved sill or subframe point |
| Plastic undertray or side skirt | Cracks into fragments that fall into the bay | Remove it only if the manual allows, then use the point behind it |
| Oil pan | Puncture and immediate oil loss, engine damage | Rated subframe pad ahead of the pan |
| Transmission or transaxle pan | Cracked casing and fluid leak | Rated subframe pad, never the pan itself |
| Control arm or ball joint | Bent arm, ruined joint, binding steering | Approved subframe or stand point instead |
| Driveshaft or CV joint | Bent shaft, torn boot, vibration at speed | Rated crossmember or rear subframe point |
| Exhaust pipe or heat shield | Crushed, leaking, sharp edges on the road | Keep the saddle clear of the exhaust run |
| Fuel tank, fuel or brake lines | Puncture, leak, fire risk | Never; approach from the approved point only |
| High-voltage battery pack on an EV or hybrid | Puncture and thermal event, total loss | Never; use manufacturer-specified points and lift pads |
Rocker panels in particular are a repeat offender. They look substantial because they are visible and finished, but on a unibody car the outer skin is cosmetic and the flange behind it is what folds. The repair is a welded sill section, body filler, primer, paint and alignment check.
How to Use a Floor Jack Safely
Finding the point is half the job. The other half is lifting without tilting the car or leaving it on the jack alone, and the order of operations matters more than most people expect.
- Check the jack rating against the car. A two-ton jack is not enough for a midsize sedan, let alone an SUV. When in doubt, the heavier-duty jack costs less than one oil pan.
- Park on level, hard ground. On soft soil, hot asphalt or a slope, put a wide board under the jack base and chock the wheels on the downhill side. Stand tips on uneven ground drop cars.
- Set the parking brake, engine off, transmission in park or in gear. Automatic stays in park, manual goes in first with the parking brake on.
- Position the jack at the approved point on the side you are working. For a roadside tire change, use the side point nearest the flat tire.
- Fit a slotted pinch-weld pad if the point is a sill flange, and make sure the saddle sits flat and fully on the pad rather than balanced on an edge.
- Follow the 3/4 rule. It means the jack’s lift arm should start at about three-quarters of full extension and reach the point in one smooth pump, rather than starting collapsed. The common misunderstanding is that the tire should come off the ground while loading; in practice most floor jacks want the tire still touching down as the arm takes the load, then a final pump to lift. If the arm runs out of height before the point, you have the wrong jack.
- Pump slowly and listen. Creaking, a shifting sensation, or a saddle that slides sideways all mean stop. If the jack is not square on the point, the car is on a slope, or the pad is not seated, lower it and fix that first.
- Place the stands before you touch the wheel. Put them at the rated stand points, set the locking pawl, and lower the jack until it just kisses the underside. Verify the vehicle is stable by pushing firmly on the sill, then again by rocking the car.
- Never work under a car supported by the jack alone. The jack is a lifting device, not a support. Two stands for one end, four for all four corners.
How many jack stands do you need
Two stands for one corner of a car, four for all four. Most people get this wrong by putting both stands under one side, which loads the body unevenly and can twist the sill it is being lifted by. Jack the front or the rear first, support that end on two stands, lower the car, then repeat on the other end.
A pair of 3-ton stands is a 3-ton pair, not 3 tons each. ASME’s PASE standard, which covers portable automotive service equipment, sets the load ratings that make the number on the label meaningful, and the Automotive Lift Institute publishes a vehicle lifting points guide that is worth reading once before you lift anything unfamiliar.
Keep the jack handle lowered whenever you are under the vehicle. A raised handle is a lever arm across the bay, and a car settling slightly can turn it into a spear. On stands, the car is on the locks, not on the jack.
Jack Points on a BMW: What to Check Before Lifting
Most modern BMWs are unibody, so the same four pinch-weld points apply, with a few model-specific wrinkles that catch people out.
- Underbody shielding. Plastic acoustic panels and aerodynamic undertrays cover large areas of the underside and often hide the marked point. Remove them only if your service information says to, and refit them before lowering the car.
- Materials vary by model. Some models use aluminum or composite sill reinforcements and subframes rather than steel. An approved steel point on a different generation is not transferable, and aluminum needs a pad that spreads the load.
- All-wheel drive and air suspension. Vehicles with adjustable suspension need jack mode or lift mode engaged from the controls first, or the system drops the body as soon as the wheel leaves the road.
- Stay clear of service parts. The battery, coolant expansion tank, steering gear, exhaust and charge ports all sit in areas that look structural and are not.
- Use model-specific service information. A diagram for a nearby model year is the second most common source of a bent sill on these cars. If the point is not shown for your exact model, treat it as unapproved.
The same rule applies everywhere on the car, including the front. Where you place a floor jack under the front of a car is normally a rated pad on the front subframe, the cradle, or the K-frame at the point where a subframe bolt passes through, and never the radiator support or the bumper beam, which are designed to take low-speed impact, not vertical load.
Frequently Asked Questions
Can I use the pinch weld as a jack point?
Yes, on most unibody cars the pinch weld is the factory-approved side jack point, usually marked by a notch or arrow behind the front wheel and ahead of the rear wheel. Use a slotted pinch-weld adapter every time. A flat floor-jack saddle folds the thin flange, cracks the coating and starts a rust seam that spreads for years. Never lift on it if the seam looks rusty, creased or soft.
Should I jack up the car before placing jack stands?
Only as much as needed. Raise the end of the car you are working on until the tire is an inch or two off the ground, set the stands at the rated stand points, and lower the jack until it just touches the underside. The jack does the lifting, the stands do the supporting. Never work under a car held up by the jack or by a scissor jack alone.
Why can’t I find the jack points on my car?
Most often it is visibility, not absence. Undercoating, road grime and wax hide the seam, and a plastic undertray may cover the marking entirely. Get low with a work light, slide a creeper or drive-on ramp under the car, and wipe the contact area with degreaser. The reinforced section and its notch or arrow usually appear within minutes. If the manual shows no point there, it is unapproved.
Are all cars lifted at the same locations?
No. Most unibody cars use four pinch-weld points, but trucks and body-on-frame SUVs lift on frame rails with factory pads, EVs and hybrids add specific lift points and adapters around the battery pack, air-suspension cars need lift mode engaged, and lowered or performance models may approve only a subframe point. The pattern is similar; the exact location is always model specific.
What type of jack stand should I use?
Choose stands rated above your vehicle’s weight, with a locking pawl and a head that matches the point: an axle-top head for a solid rear axle, a flat or ratcheting head for a pinch weld or subframe pad. Check the pawl on every placement, and remember a 3-ton pair is 3 tons combined. Replace any stand with a bent leg, a cracked ratchet, or a base that rocks on the ground.
Can lifting from the wrong point damage the car?
Frequently, and often in ways that are not visible until much later. A flat floor pan creases and tears, a plastic undertray cracks, an oil or transmission pan punctures, a control arm bends, and a high-voltage battery pack on an EV is catastrophic. The pinching of a rocker panel is the expensive one because it is a body-shop repair. Confirm the point in the manual before the first pump.
What to Check First
Before anything else: identify your exact year, make and model, then open the owner’s manual and find the jacking diagram. Compare it to what you can see under the car, and if a point is not shown for your model, treat it as unapproved rather than probable.
Then work in this order: park on level hard ground, parking brake on, transmission secured, wheels chocked, jack rated above the car’s weight. Fit a slotted pinch-weld pad if you are lifting at a sill, pump slowly to about an inch of tire lift, and set rated stands at the rated points before you touch a wheel or go underneath.
Finding where are the jack points on your car is a two-minute question with a two-minute answer in the manual. Everything expensive in jacking comes from skipping those two minutes.