
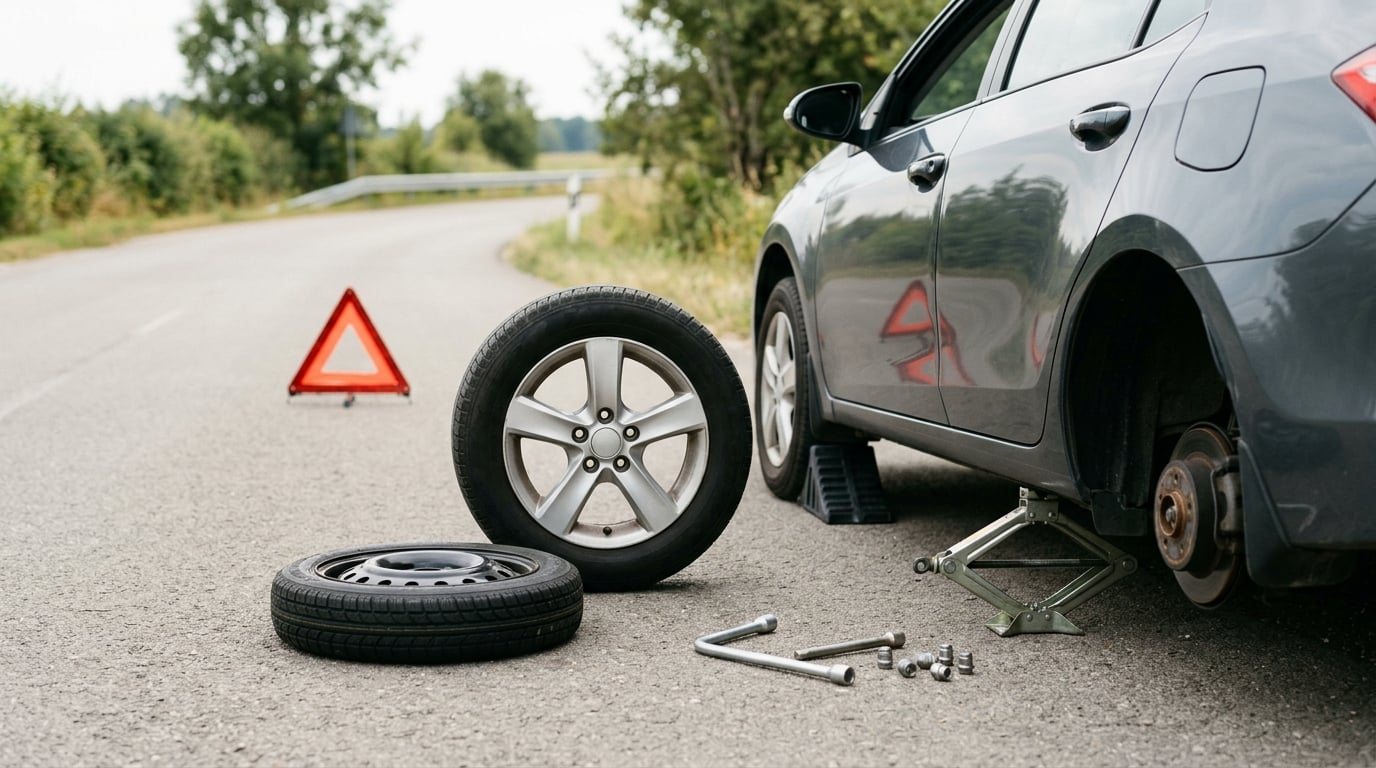
To change a flat tire step by step, you loosen the lug nuts while the wheel is still on the ground, jack the car up on the manufacturer’s jack points, swap the wheel for the spare, then finish tightening in a criss-cross pattern with the car back on the ground. On a safe flat surface it takes about 15 to 25 minutes, and anyone with a working jack, a lug wrench and a usable spare can do it.
The part that catches people out is the safety setup, not the wheel. While the car is on the jack, do nothing to it except change the wheel.
Table of Contents
- What You Need
- How to Change a Flat Tire Step by Step
- The Short Version: How to Change a Flat Tire Step by Step in Six Moves
- 1. Pull Over Safely and Assess the Damage
- 2. Check the Spare and Gather the Tools
- 3. Loosen the Lug Nuts Before Jacking Up the Car
- 4. Jack Up the Vehicle on a Safe Surface
- 5. Remove the Wheel and Inspect the Hub
- 6. Install the Spare Tire Correctly
- 7. Lower the Car and Torque the Lug Nuts
- 8. Stow the Equipment and Check the Spare Pressure
- 9. Drive Slowly to a Tire Shop
- Common Mistakes That Cause the Job to Go Wrong
- Frequently Asked Questions
- Can you change a flat tire yourself?
- Where do you put the jack when changing a flat tire?
- How long does it take to change a flat tire by yourself?
- How long and how fast can you drive on a spare tire?
- Why is my tire pressure light still on after I changed the tire?
- When should I call roadside assistance instead of changing it myself?
- Conclusion
What You Need
You need a spare that will actually hold air, a jack rated for the car, the matching wheel wrench, and a flat patch of ground with room to work. Everything else is a comfort item.
- Owner’s manual — it holds the jack points, the spare’s pressure spec, the tightening torque and the temporary-spare distance limit. Read the tire-change page before you touch anything.
- Vehicle spare — full-size, compact temporary, or a trunk-mounted kit. Check the sidewall for damage, cracks or a date code, and check the pressure if you can.
- Scissor jack — the one supplied with the car is matched to its lifting points. A hydraulic floor jack is faster for a seasonal swap at home, but it needs a firm surface and a way to lower the car safely on its own.
- Lug wrench — the four-point wheel wrench that came with the car, or a breaker bar. A torque wrench is worth having for the final pass.
- Wheel lock key — if the car has locking lug nuts, the key lives in the glovebox or under the trunk floor. Without it the wheel does not come off.
- Tire pressure gauge — a pencil-type gauge is enough for checking the spare.
- Wheel chocks — a wedge of wood or a folded piece of lumber works. Put one behind the wheel diagonally opposite the flat.
- Warning triangles — one behind, one ahead, as far as the scene allows.
- Flashlight and gloves — for the side of a dark road at night.
BMW and other European cars use a different fastening bolt style on some models, where the wheel comes away on one central locking bolt instead of studs and nuts. Read your manual before you assume the wheel lifts straight off.
If a tire is losing air steadily, the fix may be simpler than a full change. How to fix a slow leak in a tire covers the soapy-water and valve-stem checks worth doing before a roadside swap.
How to Change a Flat Tire Step by Step
Work in the order below. Each step tells you what to do, how to tell it worked, and when to stop and call for help instead.
The Short Version: How to Change a Flat Tire Step by Step in Six Moves
- Park on firm, level ground out of traffic, hazards on, parking brake set, transmission in park or first gear.
- Chock the wheel diagonally opposite the flat, and get everyone out of the car.
- Break the lug nuts loose while the tire is still carrying the car’s weight.
- Jack up on the manufacturer jack point until the tire clears the ground.
- Pull the nuts off, take the wheel down, slide the spare onto the studs, start the nuts on by hand.
- Lower the car fully, tighten in a star pattern with your weight, stow the kit, and drive straight to a tire shop.
1. Pull Over Safely and Assess the Damage
Drive as far off the roadway as you can before touching anything. Hazards on, transmission in park or in gear, parking brake hard on, nobody in the car. If you are on a highway shoulder or a busy road, stay buckled in and call roadside assistance — that location is the reason, not your skill level.
Look at the tire before you plan the trip. A nail or screw in the tread is usually a spare-and-go situation. A sidewall slash, a bulge, a torn bead, or a bent wheel means you need a tow, because the wheel itself may be damaged.
Stop and call for help if the jack will not hold, the ground is soft or sloped, there is no usable spare, or a locking wheel key is missing.
2. Check the Spare and Gather the Tools
Lay the spare, jack, wrench, chock and any wheel lock key where you can reach them without walking around the car. Inspect the spare for cracks or exposed cords — one that has bounced around a cargo floor for three years is worth inflating before you trust it.
Two checks confirm this step worked: the spare holds air when you press the sidewall, and you found the key if the car uses locking nuts.
3. Loosen the Lug Nuts Before Jacking Up the Car
Fit the wheel wrench over each nut in turn and break it loose with one or two turns counterclockwise, lefty-loosey. That is all you do at this stage — the nuts stay on and the wheel stays on the hub, which is what keeps it from dropping the moment the weight comes off.
Expect real resistance on the first nut, especially if the wheels have not been off in a while. It should give after that first effort. If a nut spins freely, will not budge, or the wheel wobbles as you turn, stop: a stripped or seized fastener, or a damaged wheel, is a job for a shop.
4. Jack Up the Vehicle on a Safe Surface
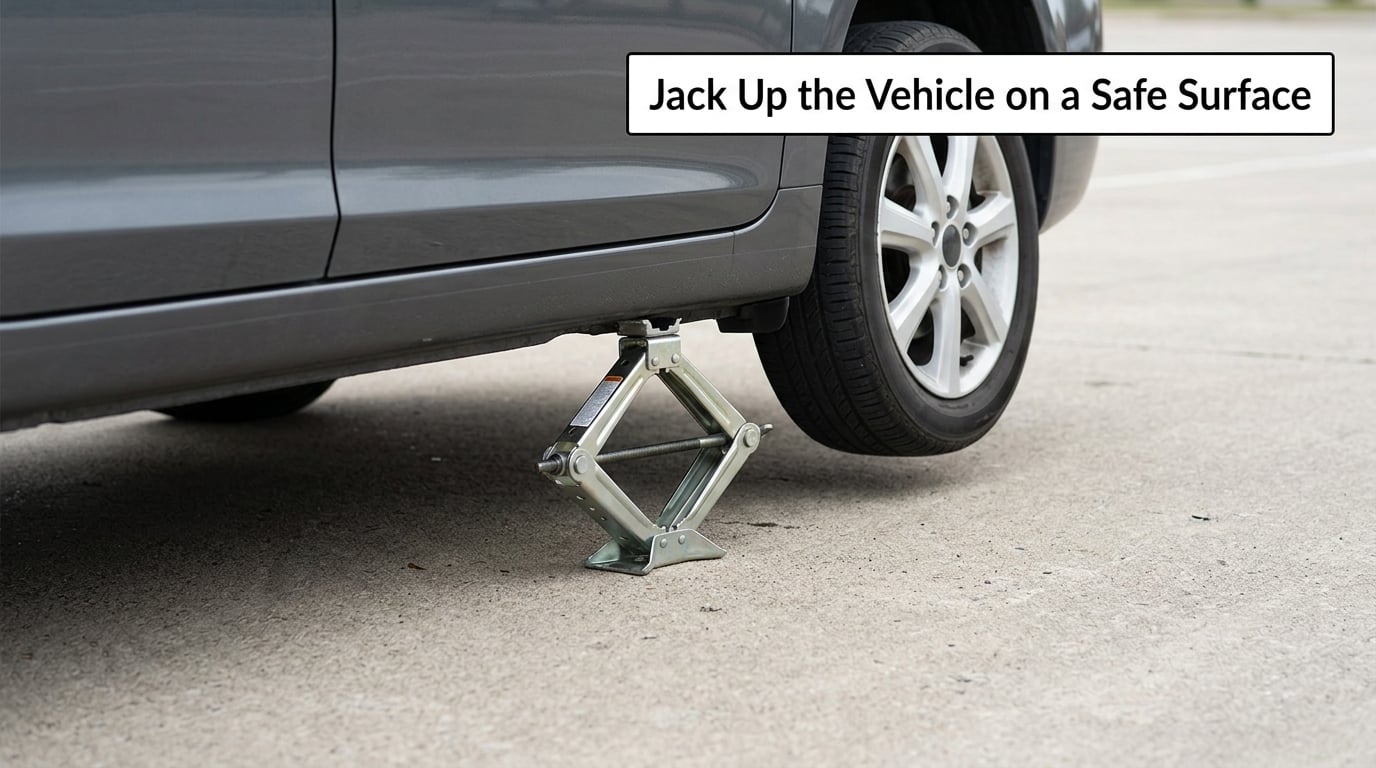
Find the jack point. Most cars mark it with a small bracket or notch in the sill, a few inches in from the wheel and roughly level with it; many manuals also show a reinforced pinch-weld point just behind the door opening. Place the jack so the body load goes into that structure, never against the plastic rocker trim. With a scissor jack, the saddle or wheel brace must sit in a solid part of the vehicle, not mid-door.
Some vehicles need their own procedure first, such as releasing a stabilizer or sill brace. If your manual says so, follow it over anything here.
Pump the jack until the tire clears the ground by about two inches, which is all you need. Stability is confirmed when the tire hangs free, the car sits level or tilts very slightly toward the flat corner, and the jack is locked in its raised position. Do not put any part of your body under the car, and do not rely on the factory jack alone if you need to reach underneath — that is what jack stands are for, and they are not part of a stock roadside kit.
5. Remove the Wheel and Inspect the Hub
Drop the nuts into a bag or a wheel cover so they do not roll away. Some cars reverse one or two nuts to counter an anti-theft thread direction, so match each nut to its stud as you pull them off. Support the wheel with both hands and pull it straight off, taking its weight the whole way — a 20-inch alloy weighs more than people expect.
Look before the spare goes on. Check that the studs are straight, the threads are clean, the rotor and caliper are visible and undamaged, and nothing is hanging where the wheel sits. Check tire orientation too: on an asymmetric tire the outboard face has the larger shoulder.
If you see a damaged stud, a scored or rusty hub face, or a caliper in the way, that is a stop-and-tow moment.
6. Install the Spare Tire Correctly
Lift the spare onto the studs and push it all the way in until the hub face sits flat against the wheel. Do not force it, and do not start a nut until the holes are lined up — a cross-threaded stud is a real and expensive mistake. The wheel should rest level on the hub with no gap, which is also how you know the studs are not being pulled out of alignment.
Spin each nut on by hand until everything is holding the wheel. That stage matters: it keeps the wheel centred while you get the wrench back on, and it catches a nut that will not seat properly before the car is back on the ground. The step worked when the wheel is flush, every nut starts freely by hand, and nothing is binding.
7. Lower the Car and Torque the Lug Nuts
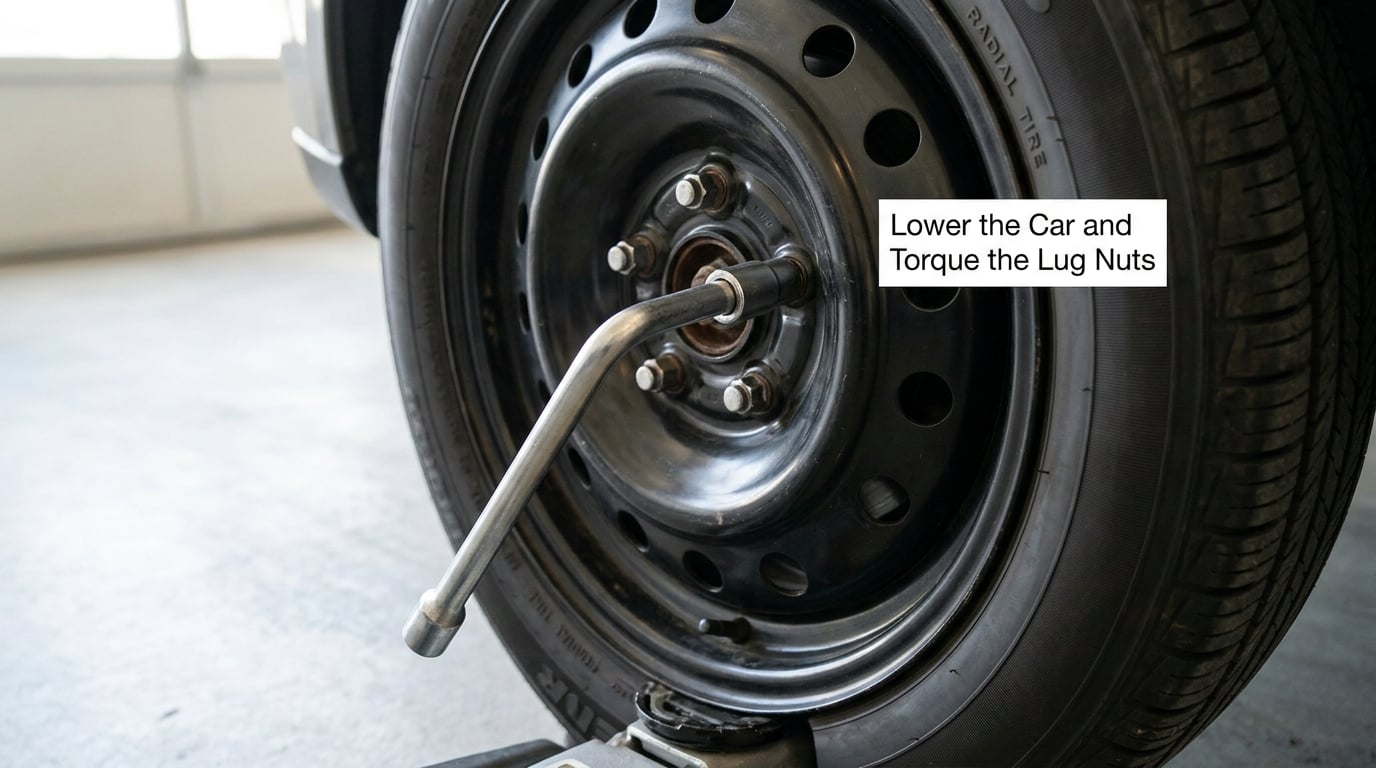
Lower the car with the jack until the tire just touches the pavement, leaving the weight mostly on the jack. Tighten the nuts snugly in a star pattern, then lower the car fully and remove the jack from under it.
Now comes the part that actually clamps the wheel. Tighten each nut firmly, in a criss-cross or star order rather than going around the circle — opposite nuts first, then the ones in between. Circular tightening leaves one nut bearing the load and skews the wheel. The manual’s torque figure is the target; without a torque wrench, tighten with a firm pull of your arm through the wrench, not a jump on the end of it. Over-tightening stretches a stud, and that is the failure nobody sees until weeks later.
Two signs it worked: the wrench tightens every nut with no jump or spin before it stops, and the wheel sits square with an even gap all round.
Snug with the car still on the jack, then full pressure with the car on the ground, in a star pattern. Never put your full weight on the wrench while the wheel is in the air — that unloads one stud and loads another unevenly.
Retorque all four after about 40 to 60 miles, or after the first drive heats the hub, because lug nuts lose a little preload as the components seat.
8. Stow the Equipment and Check the Spare Pressure
Refit the hubcap or wheel cover if you removed one — plastic covers snap into tabs at the studs, and the wheel nuts hold them. Then return the flat tire, jack, wrench, chock and wheel lock key to their storage places. Do not leave the jack in the footwell where it can slide forward under braking, and secure the loose wheel so it cannot roll around the cargo area.
Check the spare’s pressure while you are still parked, and compare it with the door-jamb placard. Compact spares commonly run far higher than the road tires, in the 55 to 60 psi range, so a single number for the whole car is not safe to assume.
Expect the tire pressure warning light to stay on, or a low-pressure warning for the tire you removed. Many systems only clear after you drive a short distance at highway speed, and some need a scan tool to reset once the full-size wheel is refitted. If the spare is a compact temporary, the cluster may show its own pressure rather than the road tire’s. Our guide to what PSI car tires should be explains how to read a placard and what a pressure number actually means.
9. Drive Slowly to a Tire Shop
A full-size spare on a matching wheel is just a normal tire for the trip. A compact temporary spare is not. Treat it as a temporary spare with real limits: most are rated no higher than 40 to 50 mph, and the manufacturer’s distance limit is often 40 to 70 miles — the so-called 50-50-50 rule you will see quoted. Your own manual overrides any number you read here.
On a compact spare, keep the speed down, avoid hard braking, fast cornering and lane changes, take turns and ramps slowly, and park level when you arrive because the sidewall flexes. The narrower, harder spare also changes braking and grip in the wet, so leave more room than feels right.
Have the flat tire inspected and repaired from the inside with a patch-plug combination, or replaced, rather than looking only at the tread. A shop can pull the bead, check for internal damage and reset the TPMS. Check the tire’s age while it is off — how to tell how old a tire is covers the sidewall date code. Replace pairs on many front- or rear-drive cars so you do not mix a new tire with a much older one.
Common Mistakes That Cause the Job to Go Wrong
These are the failures that turn a fifteen-minute job into a trip to the shop.
- Jacking on soft ground or a slope. A scissor jack on sand, mud, a driveway apron with a dip, or any incline lets the car settle as you turn the wrench. Move to level, compacted ground first, or call for help.
- Using the wrong point. Jacking on the rocker trim, the exhaust or a pinch weld without the reinforcement the manual points to bends the body and leaves the car unsupported. Follow the manual’s diagram.
- Full wrench pressure while the wheel is in the air. The whole weight swings onto the studs unevenly and the wheel can work loose when it lands. Snug in the air, tighten on the ground.
- Going around in a circle instead of a star. Sequential tightening leaves one nut carrying the load and can bend a wheel or crack a stud. Star pattern, every time.
- Over-tightening with a long pipe or your body weight. Wheel studs are steel, not torque-rated bolts. Tight until firm, then stop.
- Driving on a compact spare like it is a road tire. Exceeding its speed or distance limit destroys the tire itself and puts the car’s handling somewhere it should never be.
- Never looking at why it went flat. A tire that loses pressure repeatedly usually has a nail, a bead or a wheel problem. Skip the inspection and you will be back on the same shoulder in a month.
- Never checking the spare. A spare that has been sitting deflated for two summers is a spare that will not seal. Inflate it to spec and re-check it on a schedule.
Two extra precautions. First, do not get under a car supported by a jack alone. Second, be cautious about strangers who stop to help, especially outside a bank or a store right after you have been inside with a visible wallet — this pattern gets flagged constantly in roadside discussions, and nobody needs you to accept help on a dark shoulder. Stay in the car with the doors locked if you would rather not talk to anyone.
Prevention is easier than roadside work. Check tire pressure monthly and before long trips, especially cold mornings, and check the spare on the same schedule. Rotate every 5,000 to 7,000 miles so tread wear stays even. Replace tires below 2/32 inch of tread depth, which is roughly the second set of tread-wear bars on the sidewall, or when a penny test stops showing tread in the grooves. And take tires out of service at ten years old regardless of remaining tread.
Frequently Asked Questions
Can you change a flat tire yourself?
Yes, most drivers can, and it usually takes 15 to 25 minutes. You need a flat safe spot away from traffic, a jack that fits the car, the matching wheel wrench, a wheel lock key if fitted, and a spare that holds air. If the location is unsafe, the jack will not hold, the damage is to the sidewall or wheel, or the spare is also flat, call roadside assistance instead.
Where do you put the jack when changing a flat tire?
At the manufacturer jack point for that side, usually a reinforced bracket or notch in the sill or frame a few inches in from the wheel and level with it. Some manuals also show a pinch-weld point just behind the door opening. Check the manual diagram, keep the jack on hard level ground, and never jack against plastic rocker trim or the exhaust.
How long does it take to change a flat tire by yourself?
Plan on 15 to 25 minutes if the car is already parked safely and the tools are out. A first-timer with a stiff set of lug nuts, a hubcap that fights back, or a spare that needs inflating should expect closer to 30 to 40. Practising the whole procedure once in your own driveway beforehand typically cuts that to about 15 minutes.
How long and how fast can you drive on a spare tire?
A full-size spare is a normal tire, so normal limits apply. A compact temporary spare is usually capped at 40 to 50 mph and roughly 40 to 70 miles of driving, the 50-50-50 rule. Your owner’s manual gives the figure for your car and always overrides anything you read elsewhere. Stay off highways, brake and corner gently, and treat the tire as temporary.
Why is my tire pressure light still on after I changed the tire?
Because the system is monitoring a different tire than the one you fitted. If the wheel you removed holds the sensor, the car is reading the spare or a pressure from the last drive. Many systems clear after a short drive, and a full-size wheel going back on usually needs a scan tool to reset. Until it clears, treat it as a real low-pressure warning.
When should I call roadside assistance instead of changing it myself?
Call for help on a highway shoulder, an unlit road, heavy traffic, or anywhere you would be standing in an unlit place. Also call if the damage is to the sidewall, bead, wheel or hub, if the jack will not hold its height, if the ground is too soft for the jack, if there is no usable spare, or if a locking wheel key is missing. A tow is always the right call on a steep shoulder.
Conclusion
Make the scene safe first: flat ground out of traffic, hazards on, parking brake set, chock diagonally opposite, everyone out of the car. Loosen the lug nuts while the tire is carrying the weight, jack on the manufacturer’s point and no further than you need, get the spare on flush, and tighten in a star pattern only after the car is fully back on the ground.
Then get the damaged tire to a shop. Not every puncture is safe to drive on, and a tire that went flat once may have a bead, a rim or an axle problem behind it. Have it inspected, repaired from the inside or replaced, and retorque the wheel after the first 40 to 60 miles.