
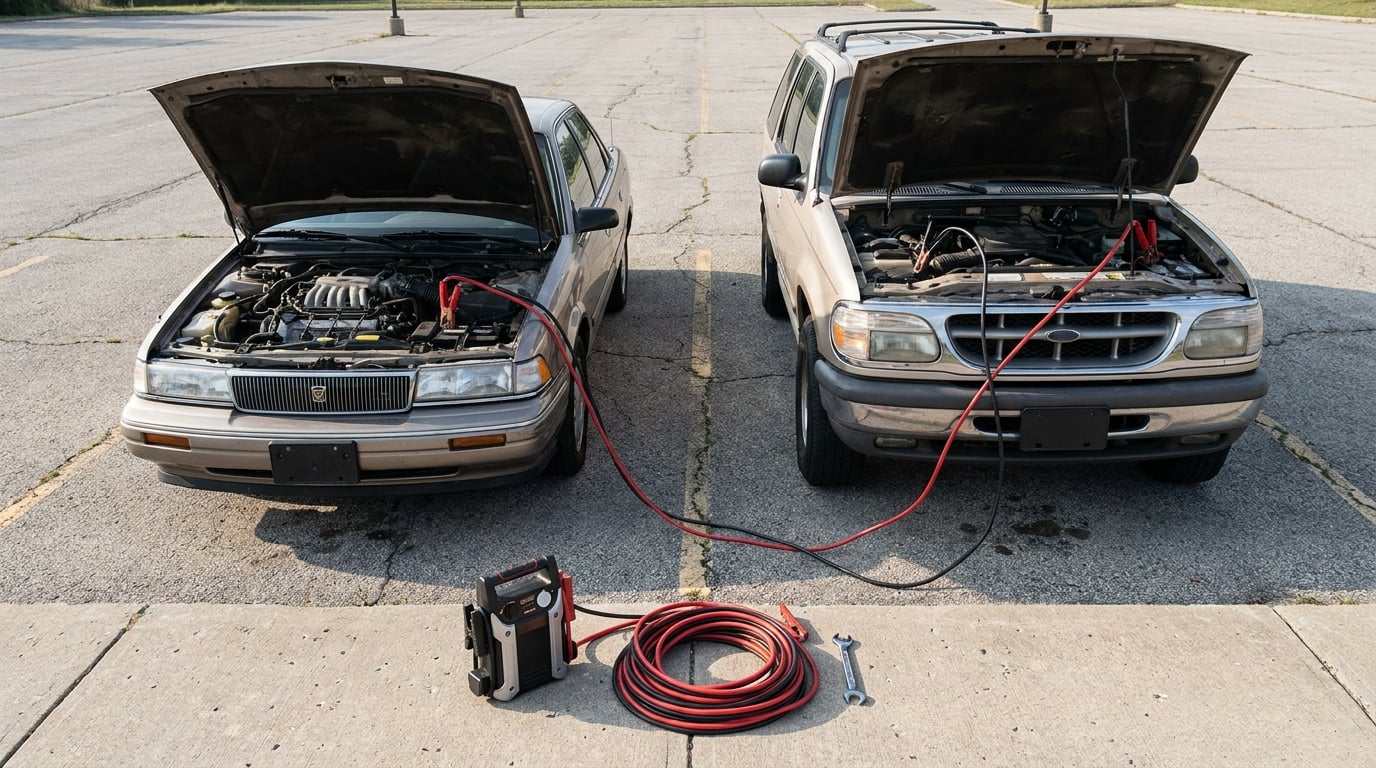
To jump start a car safely, park both vehicles without touching, switch everything off, and connect the cables in this order: red to the dead battery’s positive terminal, red to the good battery’s positive terminal, black to the good battery’s negative terminal, then black to a clean unpainted ground on the dead car. Start the donor engine, give it a few minutes, then crank the dead car. The whole job takes about five minutes.
Most of the hesitation people feel around a jump start comes from the same place: nobody has watched it done, and the cable order sounds like a test you can fail. It isn’t. Four connections, one order, and a few rules that keep the sparks small and the donor car’s electronics out of trouble.
I’ll walk through the whole procedure below, including the two mistakes that actually cost people money, and what to do when the car still won’t start afterward.
Table of Contents
- What You Need
- How to Jump Start a Car Safely, Step by Step
- 1. Prepare Both Vehicles
- 2. Inspect the Batteries and Cables
- 3. Connect the Red Clamp to the Dead Battery
- 4. Connect the Other Red Clamp to the Good Battery
- 5. Connect the Black Clamp to the Good Battery
- 6. How to Jump Start a Car Safely With the Final Connection
- 7. Start the Vehicles in the Correct Order
- 8. Remove the Cables in Reverse Order
- 9. Check for Charging Problems
- Common Mistakes and Safety Rules
- Frequently Asked Questions
- Can I jump start a car in reverse?
- Why does my engine rev up when I connect the jumper cables?
- What should I do if my car will not start after a jump start?
- Is it safe to use a portable jump starter?
- How long should I drive after jump-starting a car?
- How do I know whether the battery or alternator is bad?
- Next Steps After a Successful Jump
What You Need
A jump start needs very little: a donor vehicle with a healthy 12-volt battery, a set of jumper cables, and eye protection. Gloves are worth grabbing too, because battery terminals carry a thin film of corrosion that is unpleasant to handle.
If you do not have a second car nearby, a portable jump starter with its own clamps does the same job. Follow the connector order printed on the unit, which is usually identical to the cable order below. Many modern packs also have a reverse-polarity alarm, which is a helpful safety net if you are new at this.
Check voltage before you connect anything. Nearly every passenger car and light truck sold in the last few decades runs a 12-volt system, and jumping a 12-volt battery with a 24-volt heavy-duty battery will fry electronics. Some motorcycles and older vehicles run 6 volts, and a few commercial trucks run 24. If the two vehicles do not obviously match, stop and check the labels on the batteries.
Now inspect the cables. You want solid copper or copper-clad aluminum wire, insulation with no cracks or exposed strands, and clamps that close firmly with a squeeze. A cheap set with stiff, nicked insulation can arc internally and melt, which is worse than the dead battery you started with.
Look at the battery terminals too. A white or blue-green crust on a post is corrosion, and a clamp sitting on top of it may not be making contact at all. Scrape the post with a wire brush or a coin until the metal is bright, then wipe it with a rag. Many drivers whose “jump didn’t take” were really fighting a loose clamp on a crusty post.
How to Jump Start a Car Safely, Step by Step
1. Prepare Both Vehicles
Park the two cars nose to nose or side by side, close enough that the cables reach comfortably, and make sure the body panels do not touch. A gap of a few inches is plenty. Metal-to-metal contact creates a direct short between both electrical systems, and you can damage the donor car’s electronics before the cables even go on.
Put both transmissions in park (or neutral with the handbrake set on a manual), set the parking brake on both cars, and switch off engines, headlights, and everything else that draws power. Open both hoods. You are done when both batteries are exposed and neither engine is running.
2. Inspect the Batteries and Cables
Before clamping on, take ten seconds to look at each battery. Stop and do not jump if you see a bulging or swollen case, a leaking battery, a broken terminal, or a cable clamp that has melted from a previous attempt. A damaged battery can vent hydrogen gas, and adding a charger to one is how people get hurt.
Run a finger over each post. Sticky residue, a strong smell, or a swollen lid all mean the battery needs replacement, not jumping. If both batteries look normal, you are clear to continue.
3. Connect the Red Clamp to the Dead Battery
Red is positive, and the first red clamp goes on the positive terminal of the dead battery. Identify that post by the plus sign or the word POS stamped into the case, not by cable color alone, since cables get swapped and mislabeled. Most cars also hide the negative side under a black plastic cover that you have to lift or remove first.
Positive first is the rule because it makes the last connection the one that can spark. If the cables were attached to the car body first, closing the final clamp on the battery would complete the circuit through the vehicle, and the current would be far higher than the cables are meant to carry.
4. Connect the Other Red Clamp to the Good Battery
Now attach the second red clamp to the positive terminal of the donor battery. Both positive connections are made, and neither vehicle is running yet.
Keep the cables where moving parts cannot reach them. An idling belt, fan, or throttle body will chew through an insulated cable without warning, so route the length along the fender and away from the radiator fan.
5. Connect the Black Clamp to the Good Battery
Attach the black clamp to the negative terminal of the donor battery. Black is negative, and the terminal is usually marked with a minus sign. Some cars put the negative on a separate post away from the battery itself, so follow the cable to where it actually goes rather than assuming.
This connection is on the running-or-idle car, and it is the one that worries beginners most. Touching the black clamp to the donor vehicle’s engine block, alternator housing, or battery bracket is safe ground. The rule is simply that the clamp and the hand holding it must never touch bare metal on the same car while the other clamp is still on a battery.
6. How to Jump Start a Car Safely With the Final Connection
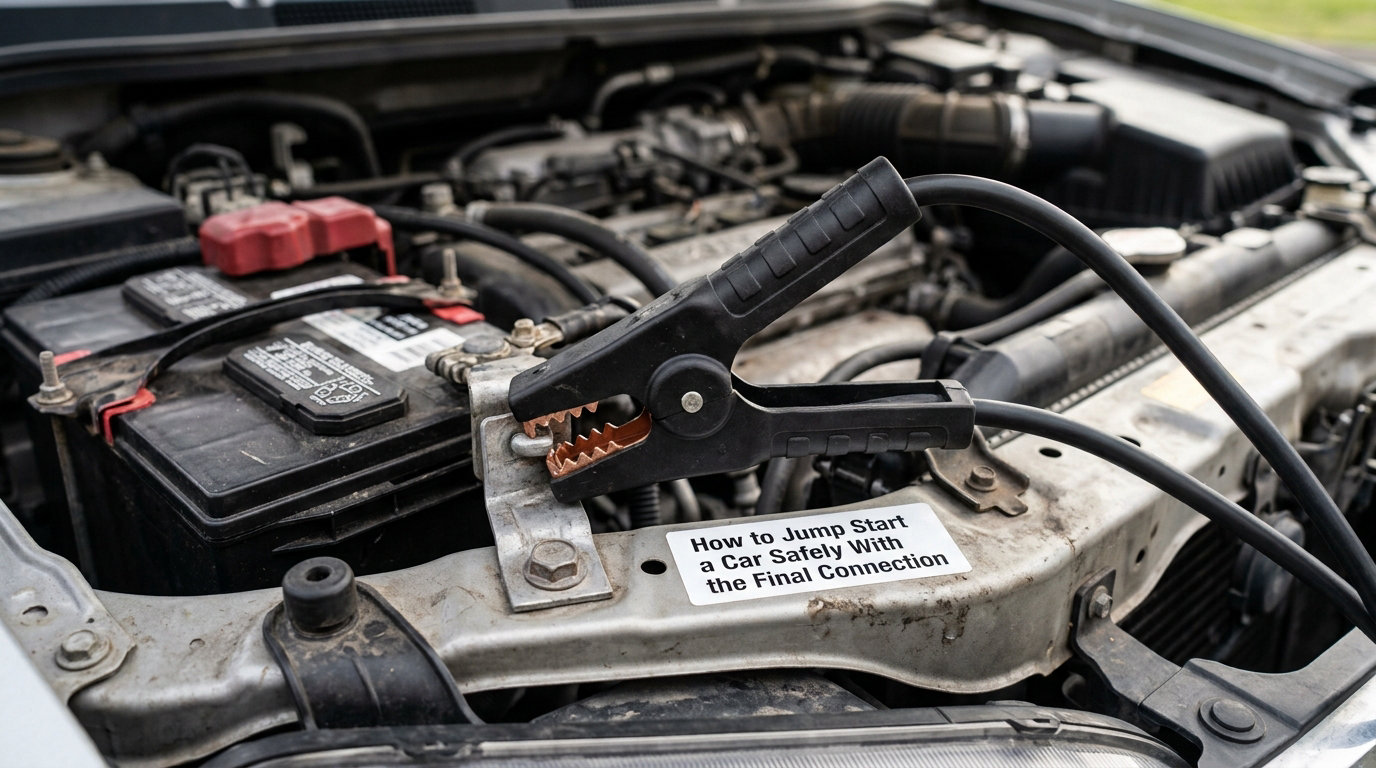
Make the fourth and last connection to a clean, unpainted metal grounding point on the dead car, well away from the battery. A designated grounding bolt, an unpainted engine block bracket, or a bare metal strut mount all work. If the only ground you can find is the dead battery’s negative terminal, that is acceptable on most cars, but the engine block is the safer choice if you can find one.
This is the connection most likely to spark, and a small pop with a brief flash is normal. It happens because a discharged battery can hold a surface charge, and current flows as the clamp makes contact. Sustained hissing, a large flash, or smoke means you should disconnect it, back off, and check your order. Mechanics on r/AskMechanics and r/MechanicAdvice note that a spark at a proper ground point is expected and not a sign of a mistake.
7. Start the Vehicles in the Correct Order
Start the donor vehicle and let it idle for three to five minutes. Some owners rev the engine a little to raise alternator output, which charges a bit faster, and forum technicians such as those posting on BobIsTheOilGuy and Team-BHP favor attaching the cables with the donor engine off and starting it afterward as the gentler approach for the donor’s alternator.
Then turn the key in the dead car. A healthy sign is a normal crank speed and the engine firing on the first or second try. If you hear a rapid clicking and the engine never catches, the battery is either still too flat or something other than the battery is the problem. Step back to the diagnosis below rather than cranking repeatedly.
8. Remove the Cables in Reverse Order
Exact reverse of the connection order, and the black clamp comes off first:
- Remove the black clamp from the grounding point or the dead battery’s negative terminal.
- Remove the black clamp from the donor battery’s negative terminal.
- Remove the red clamp from the donor battery’s positive terminal.
- Remove the red clamp from the dead battery’s positive terminal.
Work on one car at a time so a loose clamp never swings back to touch a live terminal. Never let the two clamps touch each other while they are still connected to a battery, because that is the same short as touching the cables together, just at the end instead of the beginning.
9. Check for Charging Problems
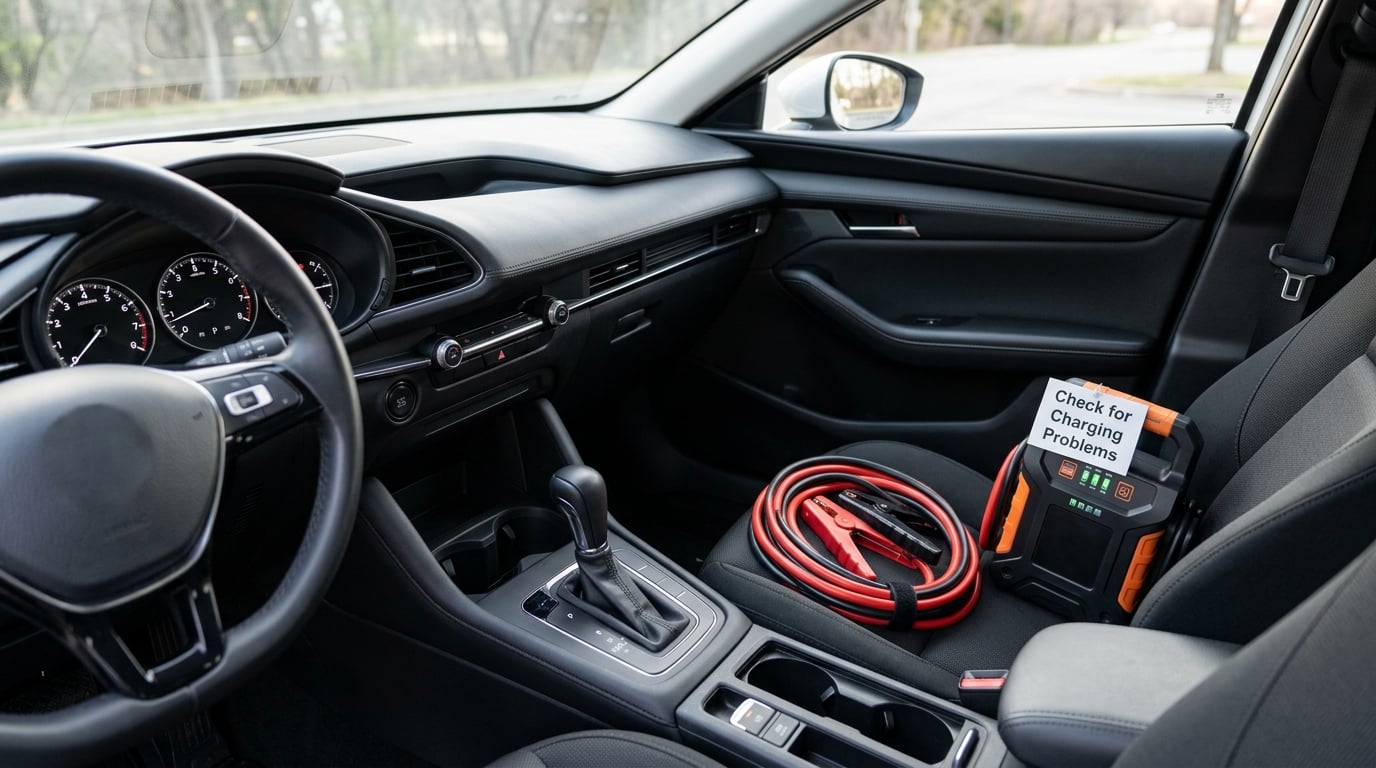
With the cables off, leave the engine running and see whether it settles to a steady idle. Listen for a fast, uneven flutter, which points at an alternator that is not holding a steady charge. Watch the battery and oil warning lights: if either stays on after the cables are removed, the charging system is not doing its job.
You can also park with the engine off and the key on, then turn on the headlights. Dimmish lights that brighten when you rev the engine suggest a weak alternator. Bright, steady lights with no crank point somewhere else entirely, usually the starter or a fuse.
Common Mistakes and Safety Rules
Almost every jump-start problem traces back to one of seven mistakes. Each has a straight correction.
- Reversing the cables. Red to negative, black to positive. Disconnect everything, start over, and confirm the terminals by their markings, not by cable color. Technicians on r/MechanicAdvice report that the most common real damage from a wrong-order jump is a blown main battery fusible link, which is a short relay-cable replacement rather than a full electrical overhaul.
- Making the final connection on the wrong point. If your black clamp ends up touching the dead car’s positive post or a metal part linked to it, you have shorted the pack. Unhook and re-seat it on a proper ground.
- Jumping a damaged battery. A bulging case, a leak, a heavy chemical smell, or a melted terminal means stop. Get it replaced and transported, not charged.
- Mixing voltages. A 6-volt system or a 24-volt truck battery will damage one of the two cars. Check the labels when the vehicles are not an obvious match.
- Letting the clamps touch each other or swing onto a terminal. Coil the cables loosely around your forearm when you are not using them, and remove them one car at a time.
- Starting the donor car and cranking the dead one immediately. The donor’s alternator needs a few minutes at idle to push enough current into the dead battery. Give it three to five.
- Cranking over and over. A starter pulls a huge amount of current, and repeated long cranks without a start will overheat the starter motor. Three attempts, thirty seconds each, then stop and reassess.
Two safety points settle most of the worry. First, 12 volts cannot electrocute you, so gloves and eye protection are about chemical burns and stray sparks rather than shock. Second, a charging battery gives off hydrogen gas, which is why jumping a car outdoors in open air is the right call and why you keep your face back when the last clamp goes on.
A few conditions are worth naming outright. Jump starting in the rain is fine as long as the clamps and terminals are dry enough to grip, because wet metal conducts and turns a small spark into a bad one. In cold weather, expect the first crank attempt to be slow. And for a hybrid or EV, the engine may never start because the combustion engine is not what powers the car, so only the 12-volt accessory battery is the jump target; check the owner manual before touching the battery on those vehicles.
Frequently Asked Questions
Can I jump start a car in reverse?
Some people mean driving the car back to position, others mean wiring it in reverse. The correct connection order is red to dead positive, red to good positive, black to good negative, black to ground. If you have already connected everything in the wrong order, disconnect it fully and start over rather than continuing.
Why does my engine rev up when I connect the jumper cables?
That surge is usually your foot finding the accelerator. Many drivers do not realize the idle rises when a second battery is attached, and a quick rev tells the alternator to push more current into the dead battery, which helps it take a charge faster. Tap the throttle gently instead of holding it, and let it settle back to idle before you try to start the dead car.
What should I do if my car will not start after a jump start?
Listen to what it does. A slow, groaning crank means the battery is still too flat, so leave the donor running for another five minutes and try twice more. Rapid clicking with no crank points at the starter or a blown fusible link instead. No sound at all, no lights, means a bad fuse or a disconnected or dead battery. After three failed attempts, stop cranking and call roadside assistance.
Is it safe to use a portable jump starter?
Yes. A portable jump starter is a sealed battery with the same clamps and the same connection order, so it is safer than borrowing a stranger’s car because nothing on the donor side can be damaged. Check that the pack is charged, confirm the polarity indicator shows a correct connection, and follow the clamp order printed on the unit, which is almost always red, red, black, black.
How long should I drive after jump-starting a car?
Drive for at least 20 to 30 minutes, or longer if you can. The alternator only recharges a battery while the engine runs, and that window needs to be long enough for the charge to come back up. If the car dies again within a few miles or will not hold a charge, the battery is finished and needs testing or replacement rather than more jump starts.
How do I know whether the battery or alternator is bad?
A bad battery will crank slowly, sound sluggish, or click without ever firing, and a jump may only hold for a day or two. A bad alternator lets the car start and run, then the battery dies again because it is never being recharged. Listen for a fast, uneven idle or a warning light that stays on, and have the charging system load tested before buying a battery.
Next Steps After a Successful Jump
Drive the vehicle for 20 to 30 minutes after the jump, and longer if the trip allows. The alternator needs running time to bring the battery’s charge back up, and a short trip around the block is not enough to clear a deeply discharged battery.
Then think about what caused it. If you left the headlights, dome light, or an accessory on overnight, the battery is probably fine and a single jump settles it. If the battery is several years old, or the car died for no clear reason, get it load tested at a parts store or a shop before you buy anything, because a battery that passes the test may be hiding a failing alternator drawing on it.
Clean the corrosion off both posts, tighten the clamp on the negative side, and check the hold-down bracket while you are there. If a seized fastener turns that cleanup into an afternoon project, how to remove a broken bolt from an engine block safely covers the extraction methods that avoid damaging the head. Then keep a set of cables or a portable jump starter in the trunk. The second time a car dies, you will be annoyed instead of stranded, and annoyed is a much better place to be.