
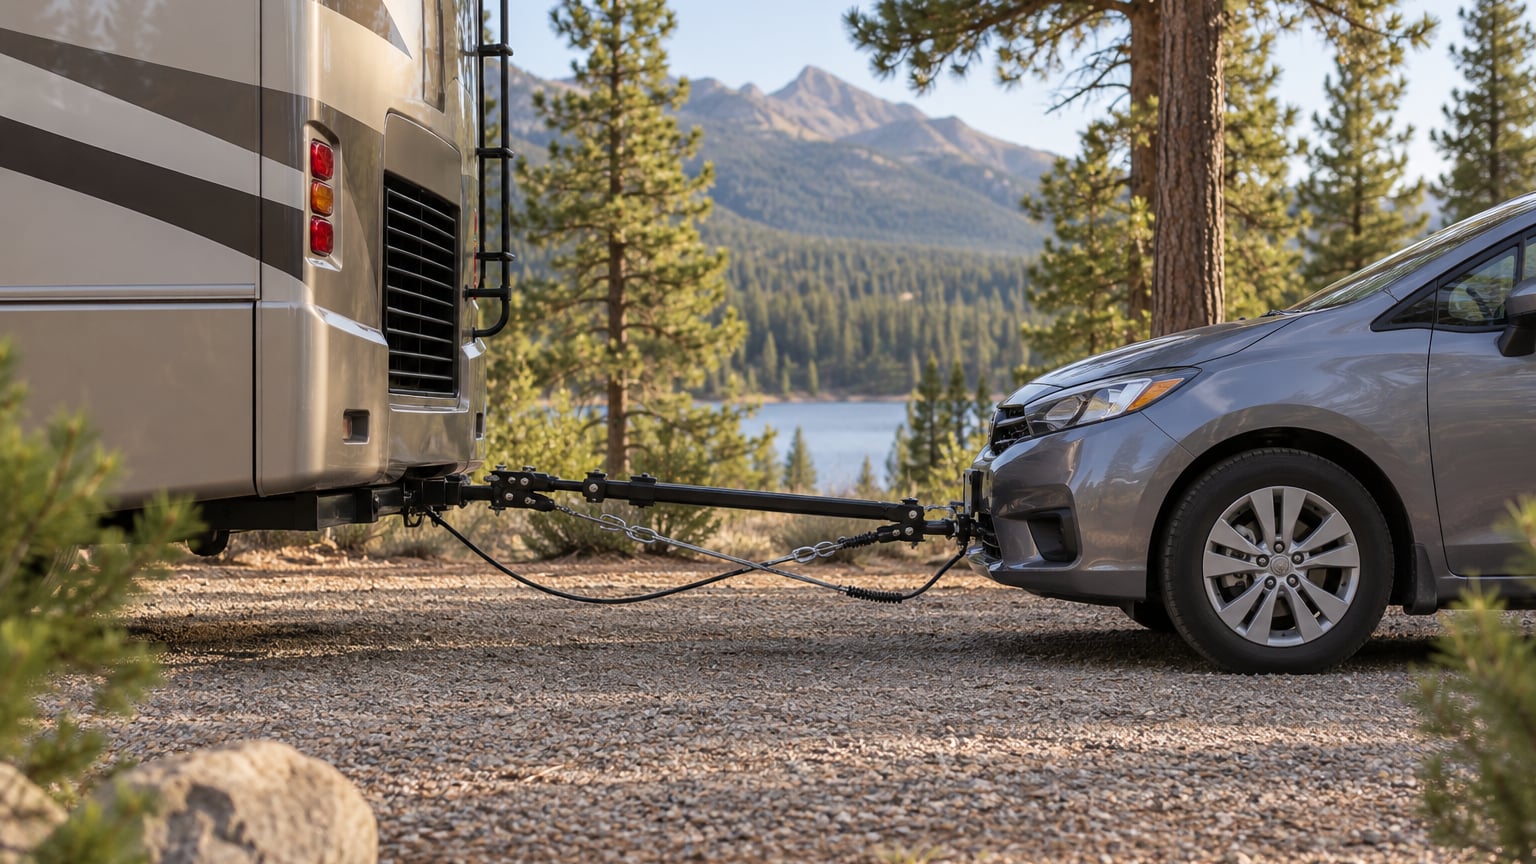
To flat tow a car behind an RV, you bolt a base plate to the car’s frame, clip a tow bar into the RV’s receiver hitch, cross the safety cables, plug in the wiring umbilical so the brake lights and turn signals work, then set the transmission to neutral and unlock the steering so all four wheels roll freely. That is the whole process in one sentence, and once you know the order it takes about ten minutes.
The catch is that most cars are not built for it. Whether a specific year and model can be flat towed comes down to what the manufacturer approved for recreational towing, and the answer lives in a single section of the owner’s manual. Check that first, before you buy a single part.
Below is the setup in the order it has to happen, plus a pre-trip check you can run in about five minutes and a list of the mistakes that show up in almost every first-timer’s trip.
Table of Contents
- What You Need Before You Flat Tow a Car Behind an RV
- Step-by-Step: How to Flat Tow a Car Behind an RV
- Common Flat Towing Mistakes and How to Fix Them
- Frequently Asked Questions
- Do I need a braking system to tow a car behind an RV?
- Can I flat tow a car with an automatic transmission?
- What speed and distance are safe when flat towing?
- Is towing a car behind an RV bad for the car?
- What tire pressure should I run on a flat towed car?
- What should I do if the toad separates from the tow bar?
What You Need Before You Flat Tow a Car Behind an RV
Six pieces of hardware do the work, and each one has a job you should be able to name. If you can’t explain what a part does, you probably don’t need it installed yet.
Base plate. A steel plate bolted to the toad’s frame, with reinforced mounting points where the tow bar arms attach. This is the structural link between the car and the tow bar, and it is the part most likely to be installed badly. A factory base plate uses existing frame bolt holes. A full plate, or tabs that bolt through body sheet metal, are different animals and can affect the car’s warranty.
Tow bar. The A-frame bar that reaches from the RV’s receiver hitch to the base plate. Most are self-aligning, meaning they pivot and straighten themselves as you back the RV up. Steel bars are heavy and hold height better on rough roads; aluminum bars are lighter to lift but can be noisier over pavement. Either way, the bar must be rated for the loaded weight of your car.
Safety cables. Two steel cables with hooks at each end. They go on every setup, and they cross underneath the tow bar rather than running parallel, because crossed cables resist the side-to-side movement that happens in a jackknife. Owners on the RV forums treat crossed cables as the single non-negotiable item, and the law in many states agrees.
Umbilical cord. The wiring harness that plugs into a seven-pin socket on the car and carries the RV’s brake lights, turn signals, running lights and hazards to the car’s bulbs. Without it, the car behind you is a dark shape with no visible braking.
Supplemental braking system. An auxiliary brake unit on the car that adds the RV’s brake pressure to the car’s own brakes. Proportional units sense how hard you are braking and match it, so the toad pushes forward against the tow bar instead of swinging. Portable units bolt on and come off with the car, which suits a daily driver. Permanently installed units are tidier but harder to fit and often need bracket fabrication.
Breakaway cable. A cable with a switch on it, clipped to the RV’s tow bar or safety cables and attached to the auxiliary brake. If the car ever separates, the cable pulls the switch and the brakes apply automatically. It is a last resort, not a substitute for cables and pins.
Two more things belong on the list even though they are not bolted to anything: the RV’s receiver rating and the car’s curb weight. The car has to sit well inside the RV’s tow rating, the hitch’s own capacity, and the RV’s gross combined weight rating. Forum conversations about a roughly 4,800 lb toad against a 5,000 lb limit are exactly why people check before they buy hardware.
Finally, keep both owners’ manuals in the cab. The RV manual has the tow rating and the GCWR sticker; the car manual has the recreational towing section and the required transmission state. Reading both is the cheapest part of the whole job.
Step-by-Step: How to Flat Tow a Car Behind an RV
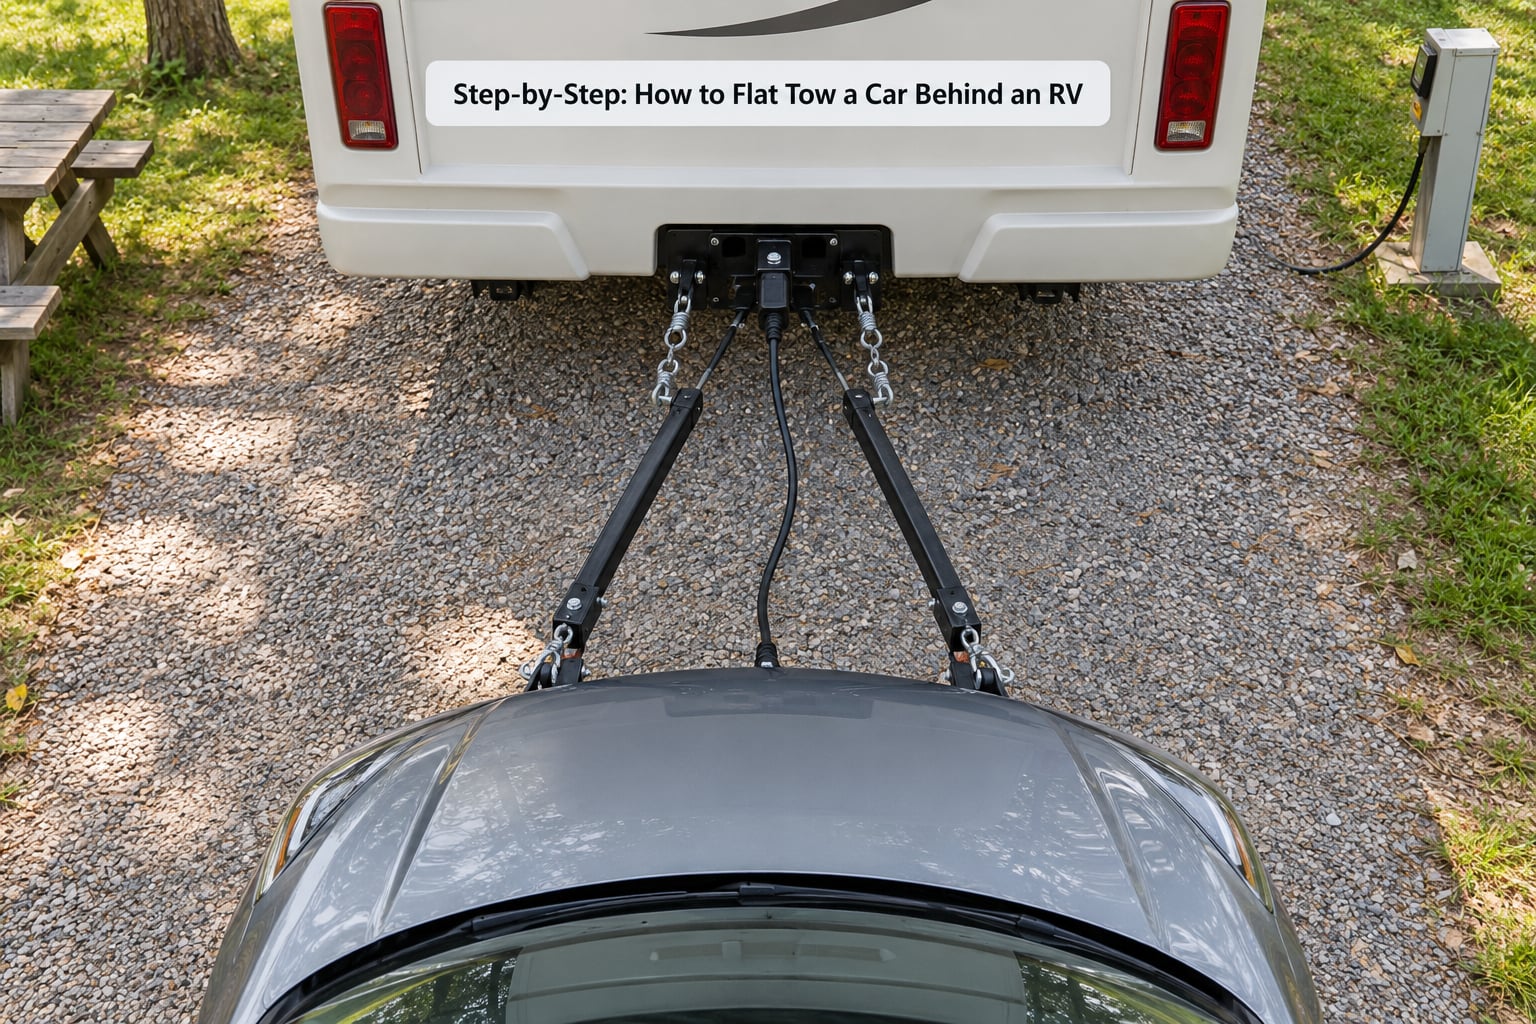
The order below matters. Connecting the wiring before the car is positioned, or driving off before the breakaway is attached, is how people end up with a light that doesn’t work or a brake that never engages.
1. Confirm the car and RV are approved for flat towing
Open the car owner’s manual and find the recreational towing section. That section names the exact configurations the manufacturer approved, including which transmission, which drive mode, and in some cases which model years or axle options. A tow bar kit sold for a Jeep Wrangler in one generation does not automatically apply to the next one.
Some hard rules come out of that manual. The transmission matters most. Many modern automatics and every CVT are not approved, because a towed car needs a lubrication path that keeps working with the engine off. In a conventional automatic, oil is thrown to the gears by a spinning pump; when the engine is off, that pump stops, and the gears that carry the driving load are left splash-lubricated by whatever oil happens to cling to them. The rear bearings suffer too. Manual transmissions aren’t a free pass, since the counter shaft is splash-lubricated by the same oil thrown from the input shaft.
Older two-speed automatics and older manuals were built with the lubrication to survive it, which is why a lot of long-distance toads are older trucks and SUVs. Drivetrain layout matters just as much. Four-wheel drive with a transfer case that has a genuine neutral position gives you a way to unlock the driveshaft so it can spin without turning anything. All-wheel-drive systems that simply decouple electronically have no mechanical neutral, and the manufacturer usually does not approve them.
Check the other manual details too: tire size and whether a spare is required, minimum ground clearance, whether the steering column must be unlocked rather than locked, and whether the owner’s manual or a dealer installation is needed to keep the warranty intact. Then check the RV side. The toad’s curb weight has to sit comfortably below the RV’s tow rating and the receiver’s rating, and if the RV has a tow rating it’s the number on the placard inside the door jamb or in the manual, not the maximum the engine is capable of pulling.
2. Install or verify the hitch and tow bar connections
Start at the receiver. A 2-inch receiver with a properly installed hitch is the common setup, and a drop or riser may be needed to line the ball up with the base plate. That vertical alignment is not cosmetic. A tow bar that runs uphill pushes into the base plate under acceleration; one that runs downhill lets the car’s weight rest on the rear of the RV and lifts the front. Either way the brackets take the load they were not designed for, and base plate failure usually starts here. Aim for the tow bar to sit close to level, and if the car mounts high, a hitch riser is the correct fix rather than tilting the bar to compensate.
On the car side, inspect the base plate bolts and the mounting brackets. Torque matters and the manufacturer’s spec is the only number that counts. If a tow bar uses quick-connect arms with locking pins, grease the pins, check for bent hardware, and confirm the pins seat fully and lock. Pins that go in halfway are the classic failure, and they are easy to miss in low light.
Back the RV up straight and slowly. A self-aligning bar will guide the arms into the base plate brackets, but a friction or drop-arm bar has to be lined up by hand. Stop when you feel both arms seat. Then drive forward about five feet and re-check that nothing shifted, then back up again to finish the connection.
Use a qualified installer whenever you are installing a base plate on a car with no factory tow package, drilling into frame rails, or dealing with a vehicle whose rating is ambiguous. Welding and cutting on a unibody or hybrid vehicle is work for a shop, not a weekend. Never attach a tow bar to a homemade bracket or to a tow hook meant for recovery. Those are designed to pull you out of trouble, not to carry a car down the highway.
3. Connect the lights and safety systems
Plug the RV’s umbilical into the socket on the car, then turn on the RV’s running lights and hazards. Check that the car’s markers, brake lights and turn signals all mirror the RV’s, in both directions, with a person standing where they can see the back of the car. A socket that fits but has one dead circuit is common on older harnesses, and you find that out now, not on a downgrade with a line of traffic behind you.
Cross the safety cables under the tow bar and clip them to solid points on both vehicles. Leave a little slack so they never go tight when the rig is straight, but not so much that they can catch something. Then attach the breakaway cable to the tow bar or a safety cable and confirm the switch is armed by pulling it gently; some units give a click or light when they activate.
A battery maintainer keeps the toad’s battery from going flat over a long trip and is widely used, but confirm it connects in the correct polarity and doesn’t feed back into the vehicle’s electrical system. Some manufacturers say nothing either way, and a wiring setup the manufacturer didn’t describe is your responsibility. If it isn’t approved, leave it out and accept a flat battery after a long trip instead.
4. Position and secure the car
Pick a level, well-lit site with room ahead of the RV, because you’ll be walking between the vehicles and reaching under the bumper. Back up in a straight line to a firm surface, which means concrete rather than a soft shoulder where the RV’s tires can dig in and shift the alignment.
Once the arms are seated and pinned, the car has to be put into the exact state the owner’s manual requires. On most approved setups that means the transmission in neutral, the transfer case in neutral if the vehicle has one, the steering column unlocked with the wheels turned straight, the parking brake released, and the ignition in whatever accessory or off position the manufacturer specifies. Leaving the parking brake on is the single most common hook-up error, and it drags a hot tire the entire trip.
Connect the auxiliary brake to its power source and to the breakaway switch, and confirm the unit shows it’s active. On a portable system, check the actuator arm is positioned where it will hit the brake pedal and that the master cylinder reservoir is full. Some systems bleed air after a disconnection and need a couple of pedal pumps before they’ll hold pressure.
If the manufacturer requires wheel restraints or a tow dolly for your specific car, those go on now. Very low ground clearance is the usual reason, and no amount of careful hitching fixes a car whose frame and driveshaft sit close to the road surface.
5. Test the complete setup before moving
Run this same check every time, before you pull away from the campsite or the parking lot. It takes about five minutes and it catches nearly everything that can go wrong.
- Walk the length of the rig. Shake each safety cable and check the hooks are fully closed and attached to solid metal.
- Confirm the tow bar pins are fully seated and locked, and that the bar itself shows no movement at the receiver.
- Look for a level tow bar: the RV and the car should sit at the same ride height relationship with no up or down angle.
- Check clearance on both sides at the receiver, the tow bar arms, and under the RV’s rear overhang through a full lock of the steering.
- With the brake pedal pressed by a helper, verify the auxiliary brake applies pressure and holds.
- Re-test lights and hazards after everything is connected, not before.
- Pull the breakaway switch briefly and confirm the auxiliary brake disables, then reset it. If it doesn’t trip, don’t leave the campsite.
- Check tire pressure cold on the toad, including the spare, at the door-jamb placard value rather than a number from a different vehicle.
- Confirm the RV’s clearance lights, camera view, and that nothing on the RV’s rear overhang hangs low over the car’s roof.
- Roll forward slowly and reverse a foot, then re-inspect everything once. Do not continue into a turn until the rig has settled.
If a light fails, unplug and reseat both ends before changing anything; a bent pin in the RV’s socket is a common and easy fix. If the tow bar sits low at the car, the base plate is mounted too low or the hitch riser is too short, and continuing will load the brackets unevenly.
6. Tow smoothly and park safely when you flat tow a car behind an RV
The rig is now longer, heavier and less stable than the RV alone. Give yourself more room in every dimension: wider turns, longer lane changes, more distance behind at every speed.
Braking distance grows noticeably, especially downhill, because you are stopping two vehicles and the toad pushes forward against the tow bar under decel. Start braking earlier than feels necessary and use the RV’s lowest practical gear on descents rather than riding the brakes. Keep steering inputs smooth; abrupt corrections set up sway that gets worse with each input.
Know your clearance. At a narrow gate or a tight parking spot, have a spotter. And never back up with the toad attached — the jackknife folds the tow bar and can destroy the hardware or the car’s front end in a few feet. If you need to reverse, disconnect first.
Stop and walk the rig after the first ten miles, then again every couple of hours on a long day. Re-check the cable tension, the pins, the tire pressures and the tow bar height, and retighten the brake system if it bled. Watch for the toad wandering in crosswinds or on ruts; a sway-control or anti-sway bar fitted to the tow bar reduces this considerably.
Park on level ground with the tow bar roughly level, and put the transmission and transfer case back into the state the owner’s manual specifies for parking. For long stops, chock the RV’s rear wheels so the rig cannot roll. If you’re leaving the car attached for a few hours, disconnecting is better than leaving a light battery to do.
Unhooking runs the hook-up sequence in reverse: unplug the breakaway and the brake power, unplug the umbilical, chock the car, remove the crossed safety cables, remove the locking pins, then pull the tow bar arms out of the brackets and drive forward. Hand-brake the RV, and never rely on the toad’s parking brake to hold either vehicle.
Common Flat Towing Mistakes and How to Fix Them
Towing a car that was never approved. If the recreational towing section doesn’t list your year, model and drivetrain, stop. You risk a damaged transmission, and a warranty claim is unlikely once you’ve drilled and bolted the car up. A tow dolly or a small trailer solves it without a single compromise.
Wrong ball, wrong receiver, or a mismatched tow bar. Ball size and receiver class are not interchangeable by appearance. Match the bar’s rating to the loaded weight of the car, and check the RV manufacturer allows a tow bar on that hitch position. A hitch riser is for height alignment, never for gaining capacity.
Tow bar pitched up or down. If the bar isn’t close to level, add or remove riser height until it is. Loading a tow bar at the wrong angle is the leading cause of bent base plate brackets and cracked mounts.
Cables run parallel instead of crossed. Cross them underneath the bar. Parallel cables can go slack in a side load and then snap back, which is exactly when you need them.
Lights never tested from behind the car. Stand where you can see the car’s tail. Confirm brake, both turns, running lights and hazards. It’s a thirty-second check that prevents the most common roadside hazard in this whole setup.
Parking brake left engaged. It drags on one tire, overheats it, and shows up as a burning smell and a ruined tire. Release it every single time.
Skip the auxiliary brake on a heavy toad. Single-pressure units feel weak on a car near 4,000 lb at highway speed, which is why experienced towers lean on proportional systems. Match the unit’s capacity to the toad and to your speed.
Ignoring tire pressure. Inflated tires run hotter and wear the shoulders faster, and underinflated ones can overheat the toad’s brake on a long descent. Set them cold at the door-jamb value, and check the spare. Our guide to run flat tires pros and cons covers what to do if the toad runs on air.
Backing up with the toad attached. This is how tow bars and front ends get destroyed. Disconnect first, every time.
Improvised hardware. Fabricated tow bars, welded-on brackets and hitch receivers bolted to bumper steel have no meaningful capacity calculation. On long trips, owners report trouble-free results with properly rated, manufacturer-approved hardware and real problems with everything else. If a component is unknown or damaged, the trip ends there.
Tire trouble on the road. If you get a flat on the toad, deal with it where you are rather than limping. Knowing how to change a flat tire step by step matters more when the car in question is strapped to an RV.
Frequently Asked Questions
Do I need a braking system to tow a car behind an RV?
Yes, on most setups, and it is the item owners most often regret skipping. A car rolling behind a motorhome pushes forward every time you slow down, and a tow bar alone does little to control that. An auxiliary brake adds pressure from the RV’s brakes to the toad’s brakes, cutting stopping distance and reducing sway. Proportional units match the RV’s braking effort, which is why experienced towers prefer them on heavy toads. Check your state or province’s rules too, since several require brakes on any towed vehicle over a certain weight.
Can I flat tow a car with an automatic transmission?
Sometimes, but only when the manufacturer approved it in the recreational towing section. Most modern automatics and every CVT are excluded because the lubrication pump stops with the engine, leaving heavily loaded gears and bearings splash-fed by residual oil. Older two-speed automatics and some manuals were built to tolerate it. Older manual transmissions are not automatically safe either, since the counter shaft relies on oil thrown from the input shaft. When the manual says neutral is required, use neutral exactly as written.
What speed and distance are safe when flat towing?
Stay at or below the lower of the RV’s and tow bar’s rated towing speed, which is commonly posted on the bar itself and in both manuals. Many owners keep to highway speeds to avoid long climbs and descents, because the toad pushes into the tow bar on grades and swings behind you in crosswinds. Extra stopping distance, wider turns and more overtaking room are the real changes to plan for. If a tow bar or brake unit is rated for a lower speed than you travel, treat that lower number as the limit.
Is towing a car behind an RV bad for the car?
For an approved vehicle with correct setup, it adds wear but nothing dramatic. Tires wear faster, especially the toad’s inside tires, and mileage goes up noticeably on grades and in crosswinds. The parts that actually get stressed are the transmission and any bearing that relies on engine-driven lubrication, which is why approval matters more than mileage. Use the manual’s specified transmission state, tow only within weight ratings, and a properly set up toad can log very high mileage without incident.
What tire pressure should I run on a flat towed car?
Use the cold tire pressure listed on the toad’s own door-jamb placard, not a number carried over from the RV or from a similar vehicle. Check all four plus the spare before hooking up, since pressure rises while the car is standing. Inflate to the placard value rather than adding extra, because a hard tire generates more heat at highway speed and wears the shoulders unevenly. Recheck every few hours on a long trip, and again after any stop, because towed tires run hotter than driven ones.
What should I do if the toad separates from the tow bar?
Pull the RV straight into the shoulder as smoothly as you can, brake gently, and stay in control of the motorhome. The breakaway cable should fire and apply the toad’s brakes, but do not rely on that alone. Once both vehicles are fully stopped and the RV’s brake is set, get out on foot only when traffic has stopped, and never stand between or in front of either vehicle. If the tow bar is bent or the car is damaged, disconnect and inspect before reattaching. Replacement parts are usually cheaper than the frame repair a failed connection causes.
Start with the owner’s manual, not with hardware. If your car’s recreational towing section approves your year, model and drivetrain, you are in the business; if it doesn’t, a dolly gets you the same runaround car without touching the transmission.
Once approved, install the base plate, tow bar, cables, wiring and auxiliary brake through a qualified shop if your car has no factory tow package, then learn the hook-up sequence until it takes ten minutes or less. That sequence, a level tow bar, and the five-minute pre-trip check are what separate a rig that rolls quietly for years from one that wanders off the road on the first climb.
If you plan to store the car between trips, move it onto pads that keep flat spots off the tires so the drivetrain and rubber aren’t the reason you regret the setup.