
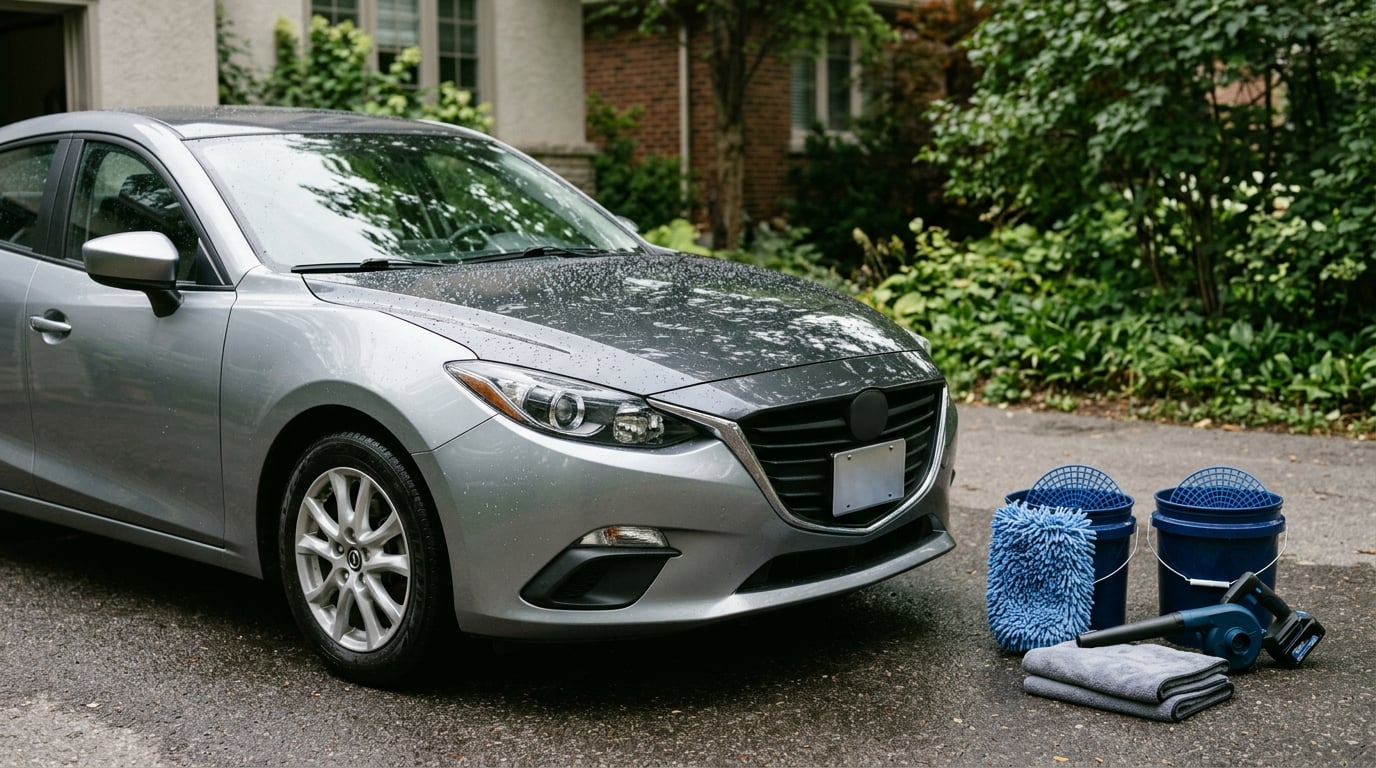
The safest way to wash a car without scratching the paint is the two-bucket method: pre-rinse to lift loose grit, wash with a pH-neutral automotive shampoo and a clean microfiber mitt in straight lines, rinse the mitt between every panel, then dry with forced air and a fresh towel. Set aside 40 to 45 minutes for a sedan.
Most of the fine scratches people blame on parking garages, tree branches, or bad luck actually show up during washing. Road film is abrasive, clear coat is the softest layer on the car, and a mitt rinsed in dirty water turns into a sanding pad on your hood.
Paint color and protection type change the details, not the system. A black car with a ceramic coating runs through the same steps as a white commuter car, just with more patience. This is the routine I would hand anyone who asked me to wash their own car properly.
Table of Contents
- What You Need
- Step-by-Step
- Common Mistakes
- Frequently Asked Questions
- What is the safest way to wash a car without scratching the paint?
- Can I use a sponge instead of a wash mitt?
- Does washing a car in direct sunlight cause scratches?
- Should I use dish soap or automotive shampoo?
- How often should I wash my car to protect the paint?
- Does a pressure washer scratch car paint?
- Conclusion
What You Need
None of this is exotic, and all of it is cheap to replace when it wears out. The two items people skip are the grit guards and the second mitt, and they are the two that do the most work.
- Two buckets around 5 gallons each. One holds soapy water, one holds clean rinse water.
- Grit guards, the plastic grids that sit in the bottom of each bucket and trap rinsed dirt.
- pH-neutral automotive shampoo. Not dish soap, not laundry detergent.
- Two microfiber wash mitts with a long pile. Having a second one lets the first dry while you work.
- A separate wheel brush or wheel mitt plus a wheel-specific cleaner, for brake dust.
- Large microfiber drying towels, one for the body and a separate one for glass and trim.
- A forced-air blower. A leaf blower on its cool setting does the same job.
- Optional: a foam cannon with snow foam for a pre-soak, a quick detailer or spray wax, and a pressure washer with a wide-angle nozzle.
Skip the foam sponge, the bristle brush meant for paint, the chamois, and the single bucket. A foam sponge traps grit in its pores and pushes it across the finish, which is why a top comment on an r/BMW washing thread tells people to avoid them entirely. A chamois only works when you drag it under pressure, and dragging is the exact motion that puts swirls in dark paint.
Keep a separate small brush and bucket for wheels, grills, and door sills too. Those areas collect road tar and brake dust, and mixing that grit into a body mitt is cross-contamination you cannot rinse out later.
Step-by-Step
Seven steps, in this order. The sequence matters as much as the products, because most scratches happen when a clean panel gets dirty water dragged across it.
Step 1: Inspect and Prepare the Car
Park in the shade and let the body cool for ten minutes. Warm paint drinks soap faster and rinses poorly, and it is easier to drag grit across a hot panel.
Walk the car before any water goes near it. Pull off parking tags and tape, note where the bug impacts and bird droppings are, and look for tree sap or anything stuck to the lower doors. Bird droppings are acidic, so they get soaked in the pre-soak and rinsed away rather than scrubbed dry.
Checkpoint: every panel is cool to the touch and no loose debris is sitting on the paint.
Step 2: Rinse the Car Thoroughly
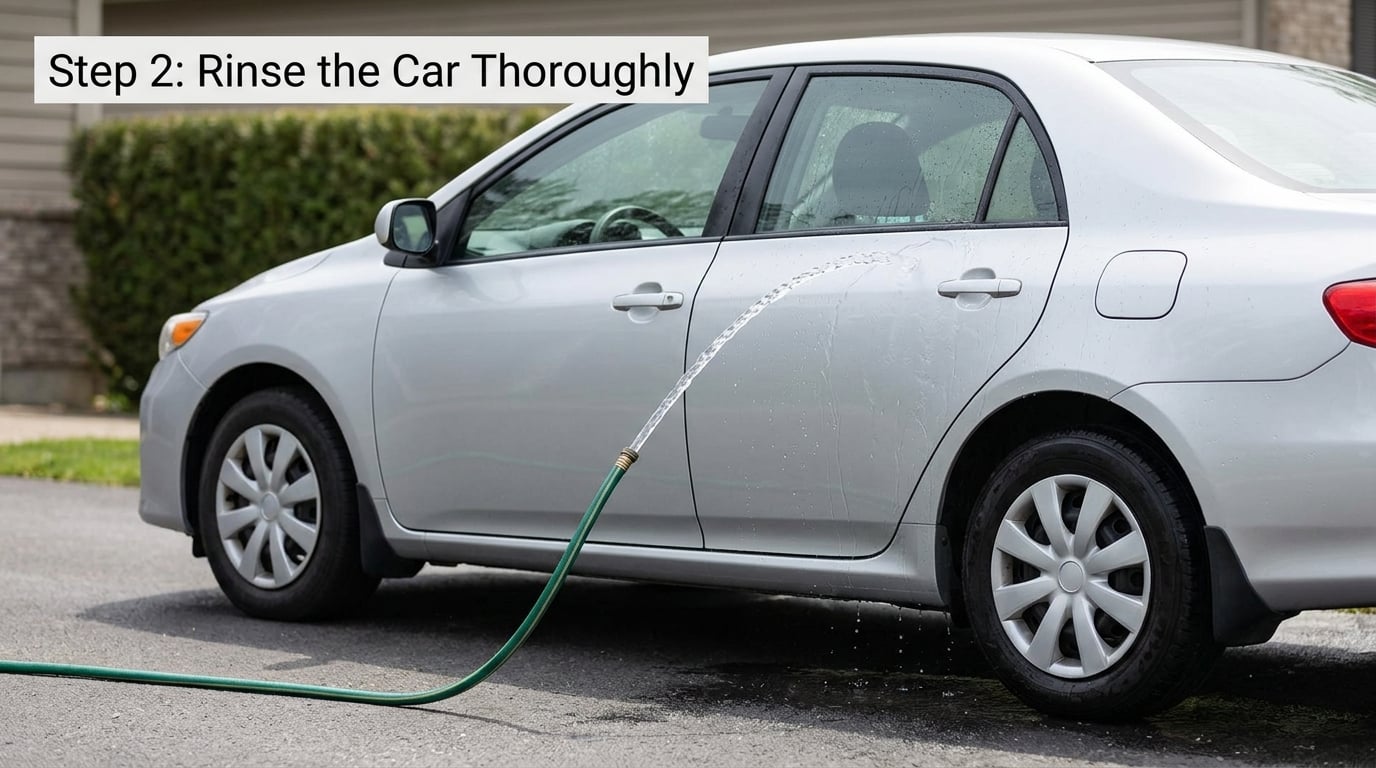
This is the step people rush, and it is the step that prevents most scratches. Start at the lower panels and wheels and work upward, so the runoff carries grit down and off instead of across panels you have not cleaned yet. Then run a full top-down rinse over everything.
Aim the stream so it pushes dirt off the surface rather than blasting into it. Most road film disappears under a steady stream before any mitt touches it.
If you use a pressure washer, keep to a 40-degree or 25-degree nozzle, stay at or below roughly 2,000 PSI for the body, and hold the tip at least 12 inches off the paint. Never put a turbo or 0-degree tip on a panel, and never aim into door seals, jambs, the charge port, or under the hood. Those narrow gaps hold water and pressure that you cannot see.
Checkpoint: water runs off the panels clear enough that you can see through the stream, with no gray or brown carrying dirt.
Step 3: Wash from Top to Bottom
Put a grit guard in each bucket. Fill one with clean water and add shampoo until the water feels slippery, not soapy. That lubricity is what lets a mitt glide instead of catch. Fill the other bucket with plain water for rinsing.
Soak the mitt in the soapy bucket for a minute so the fibers fully wet. Start on the roof, then the hood, then the upper doors, working in straight overlapping lines. Never circle. Circles concentrate every bit of grit into one slow track, and straight lines hide the tiny marks that do happen.
Rinse the mitt in the clean bucket after every panel and squeeze it out by pressing down between your hands. Wringing twists the fibers and ruins the pile. Swap to the second mitt when the first one looks dull and gray in the bucket, not when you think it is time.
A clean microfiber mitt on lubricated paint does not scratch. Scratches come from a contaminated mitt or a contaminated panel, which is usually a skipped pre-rinse rather than anything the mitt did wrong.
Checkpoint: the mitt looks clean when you glance at it, and the runoff below each panel is clear.
Step 4: Rinse Panels and Wheels Separately
Rinse the body from the top down again so nothing you loosened gets pushed into a clean section. Then the rocker panels, door sills, and wheel arches, where the worst grit collects.
Handle wheels and tires with their own brush, their own mitt, and their own cleaner, and let the wheel cleaner dwell for 30 to 60 seconds on brake dust before you agitate it. The tools that touch a wheel never go back on a painted panel.
Some people wash the wheels first so brake dust never rinses across a clean body panel. Either order works as long as the wheel tools stay on the wheels and the brake dust rinses down onto the ground, not onto the door.
Checkpoint: the tires are black instead of gray, and no dust film has settled on the paint below them.
Step 5: Dry Without Creating Swirl Marks
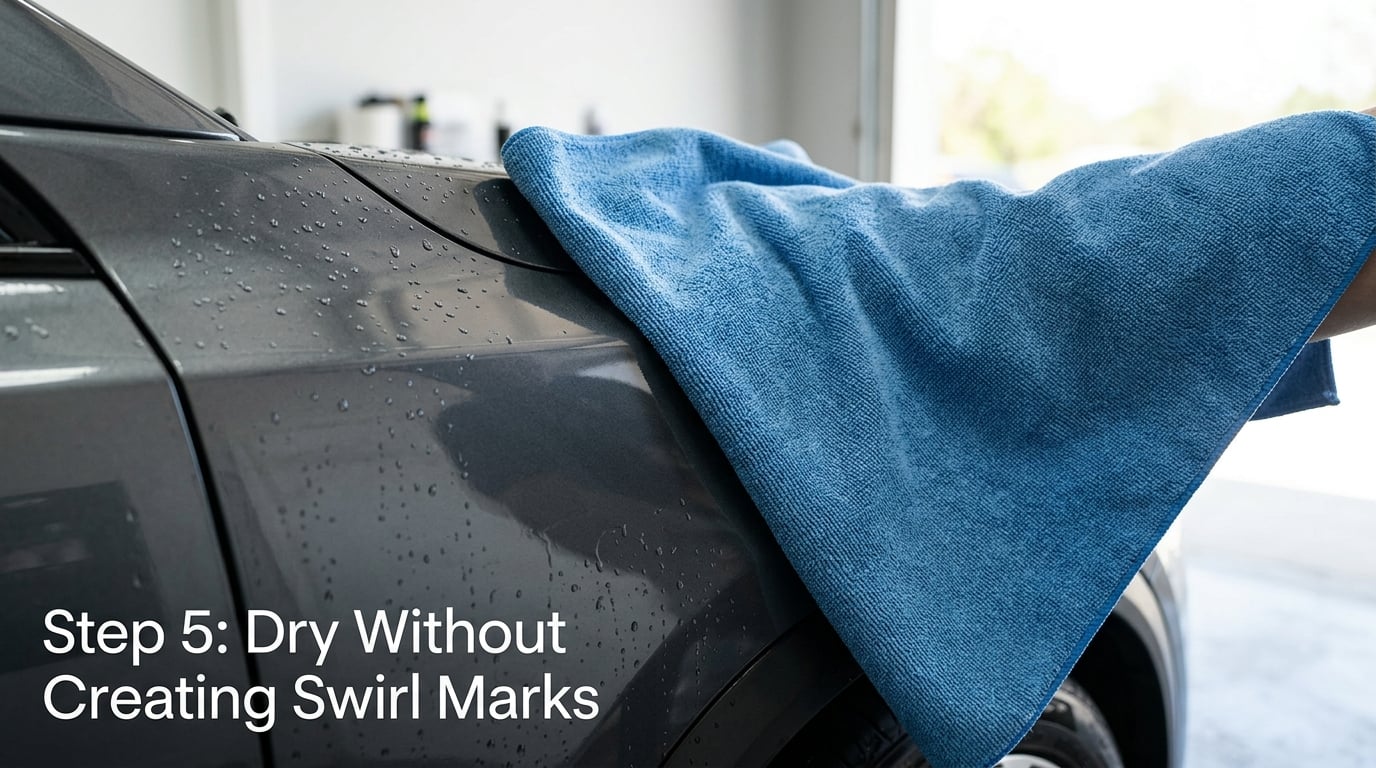
Water spots form when droplets sit and dry in warm air, so dry in the shade right after the final rinse. Start with the blower, low and held back, to push the bulk of the water off the panel and out of the crevices around the mirrors and door handles. Forum regulars reach for a leaf blower for exactly this reason, and it works.
Then the towel. Lay it flat on the panel and pat, or draw it in one long straight pass with light pressure. Do not push the towel ahead of you with your hand on top of it; that is pressure plus friction, which is how swirls get made. Fold the towel to keep four clean faces available, and change it as soon as it goes gray.
Checkpoint: the panel is dry in one pass with no visible grit coming off on the towel.
Step 6: Check for Missed Dirt and Water Spots
With a clean damp microfiber towel or a quick detailer, go over the paint again using light, even pressure in straight lines. This second pass catches the bugs in the mirror housings, the water sitting in the badge, and the drips out of the wheel arches.
Look at the finish from a couple of angles in good light. Direct light from an open garage door or a cloudy sky shows both remaining water spots and any haze that means the towel was dirty when it touched the panel.
Checkpoint: no spotting shows up when you view the car from one side in diffuse light.
Step 7: Protect the Finish
Paint protection is what keeps road film from bonding in the first place, and a hydrophobic surface sheds water so your towel has less to drag. Apply wax, sealant, or a spray sealant only after the car is fully dry and completely clean, and follow the product directions for cure time before you park it.
On ceramic-coated cars, use a coating-safe shampoo and a light spray sealant as a topper. On matte or satin vinyl wrap, skip wax entirely; it leaves a gloss sheen that is difficult to reverse. If the car has paint protection film, wash it the same way and never aim a high-pressure jet at an edge, because film lifts start there.
Checkpoint: water beads on the surface rather than sheeting flat, which is a simple sign the protection is still working.
Common Mistakes
Almost every scratch people regret traces back to one of these.
- Washing a dusty car without a pre-rinse. The dust goes straight onto the mitt and then across the paint. Rinse first, every time, even if the car only looks a little dirty.
- Using dish soap. It strips wax, sealant, and coating toppers, and it is the single most repeated mistake on car forums. A stripped surface holds dirt instead of shedding it. Use pH-neutral automotive shampoo unless stripping is the goal.
- One bucket and one mitt for the whole car. You are rinsing dirt back into the same water. A grit guard and a second rinse bucket cost almost nothing and end the cycle.
- Using a foam sponge. Its pores trap grit and behave like sandpaper. Use a long-pile microfiber or chenille mitt.
- Scrubbing in circles. Concentrates grit into a visible arc. Work in straight, overlapping lines.
- Leaving the mitt in the soap bucket. A rinsed-but-dirty mitt going back into the shampoo recontaminates the whole wash. Rinse and squeeze after every panel.
- Drying in direct sun. Hot panels flash the water and stain before you finish. Work in the shade.
- Dragging a dry towel hard across the paint. Pat first, then one straight pass with light pressure, and swap the towel while it is still only slightly gray.
- Using wheel tools on the body. Keep a separate brush and mitt for wheels, grills, and sills.
Two habits cover most of the above. Wash more often than feels necessary, especially during pollen season or after highway driving, because road film does more damage through repeated washes than one dirty car does through neglect. And when a car is only lightly dusty, a rinseless wash with a clean mitt is fine; the moment you can feel grit on the panel, you are back to buckets and water.
Frequently Asked Questions
What is the safest way to wash a car without scratching the paint?
Use the two-bucket method: one bucket of soapy water, one of clean rinse water, each with a grit guard. Pre-rinse the car, wash top to bottom in straight lines with a long-pile microfiber mitt, rinse the mitt after every panel, and dry in the shade with forced air followed by a clean towel. Never circle, never squeeze, and never skip the pre-rinse.
Can I use a sponge instead of a wash mitt?
A natural sea sponge is one of the worst options. Its pores hold grit that never rinses out, so the sponge works across the paint like fine sandpaper. A top-ranking comment on an r/BMW washing thread puts it plainly: avoid sponges because they embed grit and scratch. Use a long-pile microfiber or chenille mitt, and keep two so one can dry.
Does washing a car in direct sunlight cause scratches?
Not directly, but it causes the two things that lead to scratches. Sunlight heats the paint so soap dries on the surface and grabs the mitt, and it makes water evaporate fast enough to leave mineral spots that you then scrub to remove. Wash in the shade, on a cool panel, and dry before the droplets harden. Evening or early morning is the easiest window.
Should I use dish soap or automotive shampoo?
Automotive shampoo, every time. Dish soap is formulated to cut grease, which means it strips wax, sealant, and ceramic toppers from the paint. Once protection is gone, the surface holds road film instead of sheeting it away, and the next wash picks up more grit. Dish soap is only the right choice when your goal is deliberately stripping protection before applying something new.
How often should I wash my car to protect the paint?
Every two weeks is a sensible baseline for an average driver, and every week if you do a lot of highway or truck traffic, park under trees, or live somewhere with heavy pollen or road salt. The variable that matters most is how long grime sits, not the calendar. Rinse the car with plain water between washes if it is only lightly dusty to keep the film from bonding.
Does a pressure washer scratch car paint?
Used correctly, no. The damage comes from nozzle choice, distance, and pressure. Use a 40-degree or 25-degree nozzle, stay at or below roughly 2,000 PSI for the body, and keep at least 12 inches between the tip and the panel. A turbo or 0-degree tip can etch clear coat very quickly. Never spray into door seals, jambs, the charge port, or the engine bay.
Conclusion
Start with the rinse, because loose grit is the whole problem. Once that grit is off the panel, a clean long-pile mitt, pH-neutral shampoo, straight-line passes, and a rinse of the mitt after every panel keep it off the clear coat. Dry in the shade with forced air first, then pat with a fresh towel.
None of it is complicated, and all of it is cheap next to a paint correction. While the car is clean, it is also the easiest time to check the lug nuts and drain an old oil change properly, as covered in how to drain oil without making a mess and how to remove a stripped lug nut without damage.