
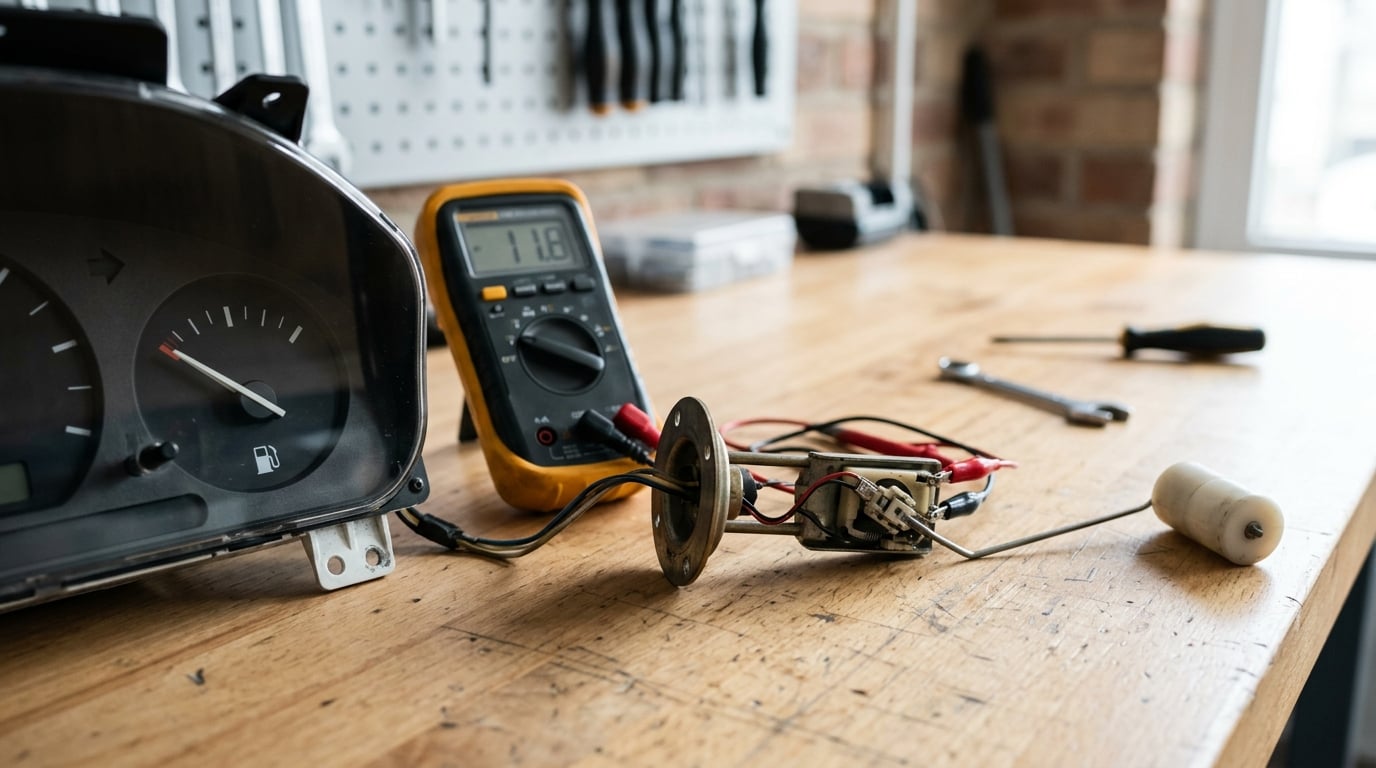
A fuel gauge stops working for a handful of reasons, and most of them are cheap to find. Here is the short version: try the resets and the cluster fuse first, then check the wiring and grounds, and only after that test the fuel sending unit with a multimeter and replace it if the reading never changes. Most cases are settled before anyone touches the fuel tank.
If you have ever seen the needle sitting on full with a dry tank, you already know why this matters. A gauge stuck on empty is annoying. A gauge stuck on full strands you somewhere you did not plan to be, and running the tank dry takes the fuel pump with it.
Below is the order I work in to fix a stuck fuel gauge, cheapest test first. The whole triage takes about an hour with a basic multimeter, and the repair may take considerably longer depending on how your tank is accessed. Last updated October 2026.
A stuck fuel gauge is a fuel level indicator that no longer tracks what is actually in the tank. The usual causes, in order of how often I see them: a bad ground or corroded connector, a blown instrument fuse, a failed fuel sending unit inside the tank, or a needle physically jammed against its full-scale stop pin.
Table of Contents
- What You Need
- Step-by-Step: How to Fix a Stuck Fuel Gauge
- 1. Confirm the Gauge Symptom and Check the Warning Lights
- 2. Check the Fuel Gauge Fuse and Instrument-Circuit Power
- 3. Inspect the Gauge Wiring, Connectors, and Ground
- 4. Test the Fuel Sending Unit’s Signal Wire
- 5. Separate a Bad Gauge Cluster From a Bad Sender
- 6. Repair or Replace the Faulty Part
- 7. Verify the Repair and Prevent a Recurring Failure
- Common Mistakes
- Frequently Asked Questions
What You Need
Start with the documents, not the parts. The owner’s manual tells you which fuse feeds the instrument cluster and whether the sending unit sits under a rear seat access panel or under the tank.
Tools you should have on hand:
- Owner’s manual and, if you can find it for your year, make and model, the service manual wiring diagram
- Digital multimeter (a cheap one reads ohms perfectly well for this job)
- Test light, or the multimeter in place of a test light
- Socket set, screwdrivers and trim tools for the dash and interior panels
- Wire brush, contact cleaner and dielectric grease for connectors and grounds
- Safety glasses, a Class B fire extinguisher, and a ventilated workspace
- 10 mm socket or the fuel line disconnect tool your vehicle needs, once you get to the tank
Replacement parts are a separate category, and you should not buy them until a test points at them. A fuel sending unit, a cluster fuse, a wiring repair kit, and for some vehicles the entire fuel pump module with the sender built into it.
Step-by-Step: How to Fix a Stuck Fuel Gauge
Work the steps in sequence. Every one of them ends with a check, and if the check passes you move down instead of out.
1. Confirm the Gauge Symptom and Check the Warning Lights
Write down what the needle actually does, because the pattern tells you where to look first. Also note whether the low fuel warning light or the check engine light is on at the same time.
| Symptom | Most likely cause | Where to test it |
|---|---|---|
| Stuck on full | Sender wire shorted, bad sender resistor strip, or needle behind the stop pin | Sender connector, then the gauge bezel |
| Stuck on empty | Open sender circuit, blown fuse, or a corroded ground | Instrument fuse and the cluster ground |
| Needle jumps around | Intermittent connector or a float gummed with varnish | Sender plug and float arm travel |
| Drops to empty suddenly | Failed sending unit, usually on an older vehicle | Sender resistance sweep |
| Distance-to-empty works, needle does not | Different signal path, so a gauge or cluster fault rather than a dead sender | Cluster inputs and scan data |
| Reads about a quarter tank always | Stuck gauge motor or a sender that no longer sweeps | Sweep test with the key on |
One more check before anything else: has the fuel level actually changed enough to move the float? If you topped off yesterday, forty miles may not be enough to drop the float out of the top of its travel. A gauge that has not moved because the level has not moved is not broken.
Success check: you can describe the symptom in one sentence and you know whether a warning light is lit.
2. Check the Fuel Gauge Fuse and Instrument-Circuit Power
Open the interior fuse box and look for the instrument, cluster, or fuel gauge fuse listed in your manual. Pull it with the plastic fuse puller and hold it up to the light.
An intact fuse shows an unbroken metal link. A blown one shows a dark gap or a cloudy, discolored body. Then test across the fuse sockets with the key on: you should see battery voltage on one side, and battery voltage on the other side only if the fuse is good.
Do not slide a new fuse in and drive off. A blown instrument fuse means something on that circuit is drawing too much current, and a fresh fuse either dies again or takes the wiring with it. A blown fuel gauge fuse is often the visible symptom of a shorted sending unit or a chewed harness near the tank.
Success check: power at the gauge connector with the key on, and the fuse stays intact when you put it back.
3. Inspect the Gauge Wiring, Connectors, and Ground
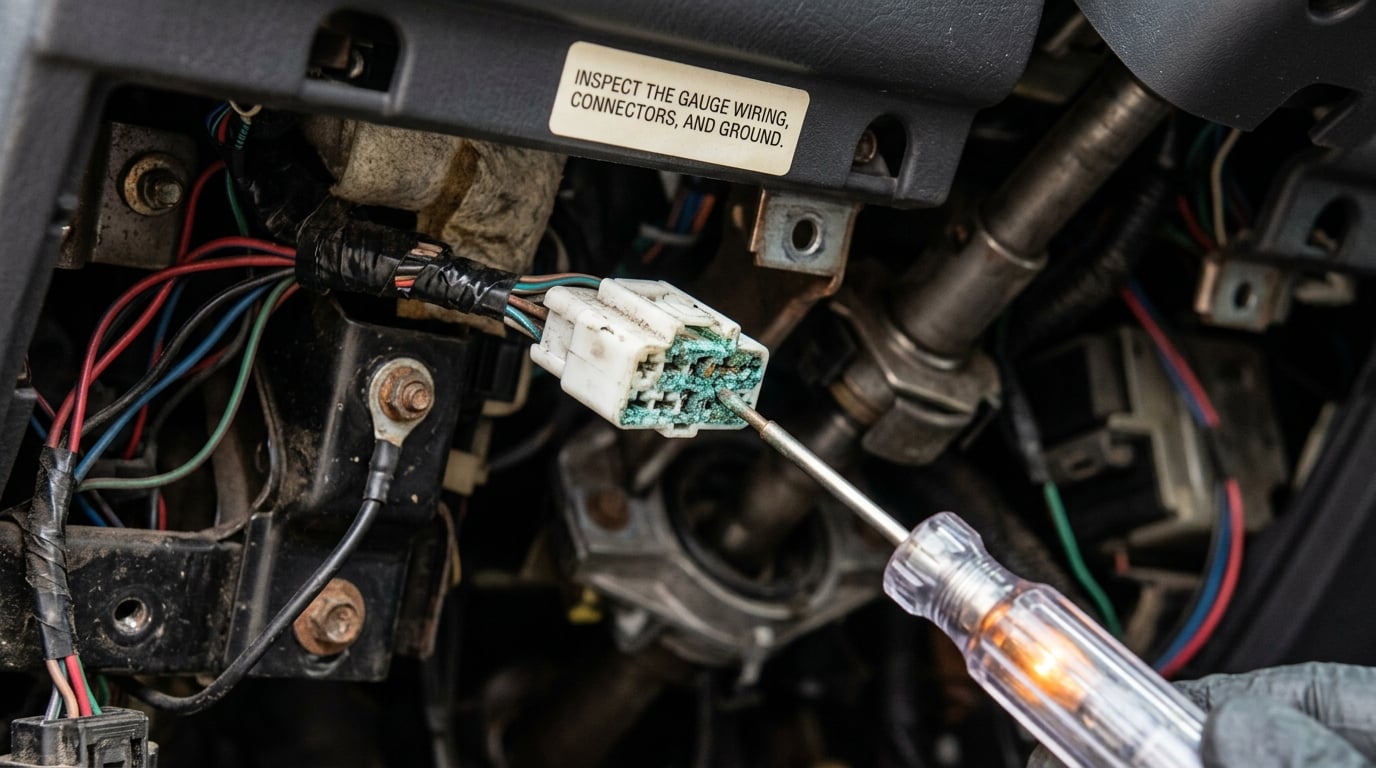
Pull the gauge or cluster connector loose and look at it in good light. Green or white fuzz on the pins is corrosion, and it is the single most common finding on an older vehicle. Clean the pins with contact cleaner and a soft brush, then coat them lightly with dielectric grease when you reconnect.
Follow the harness where it is accessible: around the steering column, down the door sill, and along any run near the tank. Look for chafed insulation where the loom rubs against a bracket, and for a wire that someone spliced years ago with tape and optimism.
Check the ground points too. The cluster ground and the body ground near the sender are easy to miss and expensive to guess at. A ground reading higher than about 0.2 volts under load means the ground is working; higher than that, clean it and tighten it.
Success check: clean metal, tight terminals, and a ground that measures under 0.2 volts.
If the wiring disappears behind the dash and you are not confident with a multimeter, this is the point to hand it to a qualified automotive electrician. Guessing at a short behind an airbag or a body control module costs more than the diagnostic hour.
4. Test the Fuel Sending Unit’s Signal Wire
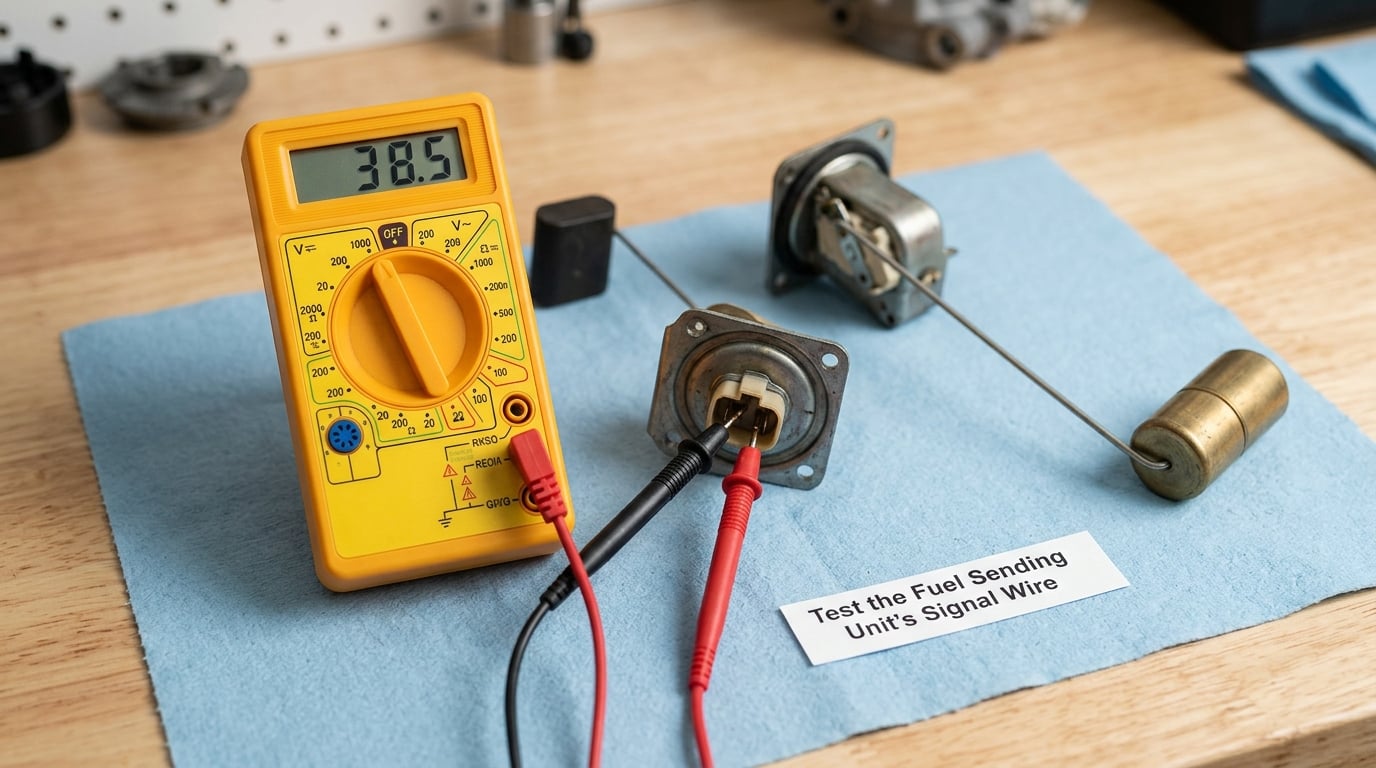
Most vehicles let you reach the sender through a rear seat or trunk access panel, so you can test without dropping the tank. Disconnect the negative battery cable first, then unplug the sender connector.
Here is the bench test, and it is the part that answers most questions in about five minutes:
- Reconnect the battery and turn the key to the on position. With the sender wire disconnected, the needle should read empty on most vehicles.
- Set your multimeter to the 200 ohm range. Plug the probes across the sender’s signal and ground terminals.
- Read the resistance with the float at the top of its travel, then move the float arm slowly by hand from full to empty while watching the meter.
- Compare what you read against the spec for your vehicle. Many resistive senders run from a few ohms at full to somewhere around 70 to 120 ohms at empty, but the numbers are model specific.
- Interpret the result: no change as you sweep the float means a failed resistor strip or a broken float arm. An open circuit on both ends means the unit is dead. Steady, in-spec change means the sender is fine and the fault is upstream.
Always confirm the resistance range in the service manual for your vehicle rather than trusting a general number from a forum post. Capacitive and ultrasonic senders do not behave like resistive ones, and reading them as if they are resistive will send you down the wrong path.
Work with the tank closed as much as you can. No sparks, no smoking, no running engine, keep a fire extinguisher within reach, and move the vehicle outdoors or into a ventilated space before you open anything.
Success check: the meter changes steadily as the float moves, and the change matches the spec.
5. Separate a Bad Gauge Cluster From a Bad Sender
If the sender tested good, the signal is arriving at the cluster and the problem sits in the gauge itself. Two cheap checks settle it.
First, the key-on peg test: with the sender connector unplugged, briefly ground the sender signal wire at the back of the cluster with the key on. If the needle slams to full, the gauge motor and the cluster electronics are alive. The same trick on a Ford-style circuit usually drives it to empty, so watch which way it goes rather than expecting one answer. Wire colours differ between makes, so confirm the sender wire in your diagram before you bridge anything.
Second, scan the car. Many vehicles from the last two decades report live fuel level data and store a fuel system trouble code. An OBD-II reader that shows a plausible fuel level PID while the needle sits still tells you the sending side is working and the gauge is the problem.
This is the point to stop and think before buying anything. A sending unit is an expensive part that sits inside a fuel tank, and replacing it to find out the gauge was dead is an expensive lesson. Do one reversible test first, every time.
Success check: you have a definite answer, gauge or sender, before any part is ordered.
6. Repair or Replace the Faulty Part
Match the fix to the diagnosis, and follow the manufacturer’s procedure and torque specifications for anything you fasten. If you have never checked a fastener properly, our guide to what a torque angle gauge is used for explains the difference between a click wrench and an angle measurement.
- Corroded ground or connector: clean with a wire brush, tighten the fastener, and reseal with dielectric grease. This fixes more stuck gauges than anything else on an old truck.
- Damaged wire: cut back to sound copper, splice with a proper butt connector or solder and heat-shrink, and wrap the loom so it cannot chafe again in the same place.
- Blown fuse: only replace it once you have found and fixed the short or overload that took it out.
- Failed sending unit: through an access panel, unbolt the module and lift it straight out. With no panel, relieve the system pressure, support the tank with a transmission jack, unbolt the straps, and lower it. Always fit new O-rings and never reuse an old seal.
Photograph the connector and the hose routing before you pull anything apart. On modern vehicles the sender is part of the fuel pump module, and the hoses are quick-connect fittings that leak if they are twisted on crooked.
Success check: the new part is seated, the connector clicks home, and nothing is dripping.
7. Verify the Repair and Prevent a Recurring Failure
Turn the key on and sweep the float through its full range by hand. The needle should travel smoothly from empty to full with no dead zones and no jumping, and it should land in the same place each time you pass a point.
Then do a real fill test. Note the odometer, fill the tank to the pump click, drive a known distance, and check the reading against what you used. A gauge that was not calibrated after a sender replacement often reads full or empty until the float has been swept once through its whole range.
Check that no warning light has come on, scan for codes, and inspect your work for a fuel leak. Use a container under the tank and run the pump for a few minutes, then look for wetness at the seams, the lock ring, and the fittings.
One last thing that prevents repeat failures: seal the connector and check that the harness is routed away from sharp edges and heat. Most of these faults come back because water and dirt get back into the same plug.
Success check: the needle matches the actual level across a full tank-to-empty sweep, and there are no new codes.
Common Mistakes
- Replacing the gauge when the sender is the problem. The gauge is the cheap part to blame and the expensive one to buy. Test the sender first.
- Ignoring the grounds. A single corroded ground point can mimic a dead sender or a dead cluster, and cleaning it costs nothing.
- Forcing the fuel pump module out. The lock ring threads into the tank flange and will cross-thread or strip if you lean on it. Turn it square to the flange.
- Misreading a normal resistance range. If the meter moves smoothly and lands in spec, the sender works. Do not keep swapping parts because the number is not what a forum post promised.
- Refusing to believe the needle has not moved because the level has not moved. A float at the top of its travel can sit still through several fill-ups.
- Skipping fuel safety. No open flames, no smoking, battery disconnected, ventilation, and an extinguisher in reach before you open the fuel system.
The pattern is the same on most weekend jobs. Diagnose before you unbolt, and you rarely end up with a part on the bench that you cannot use. Our walkthrough of how to remove a stuck oil filter follows the same order: prove the fault, then pick the least invasive way in.
Frequently Asked Questions
Why is my fuel gauge stuck at empty?
A gauge pinned to empty usually means an open circuit: a blown instrument cluster fuse, a disconnected or corroded sender plug, a bad ground, or a failed sending unit with a broken resistor strip. Start at the fuse box, then pull the sender connector at the tank and check the wiring for corrosion or chafing. With the wire off and the key on, most vehicles read empty anyway, so compare that result against the spec in your service manual.
Can I test a fuel gauge with a multimeter?
Yes, and it is the cheapest way to find the fault. Disconnect the negative battery cable, unplug the fuel sending unit, then set the meter to the 200 ohm range and probe across the signal and ground terminals. Sweep the float arm by hand and watch for a steady, in-spec change. No change means a bad sender; a good sender with no needle movement means the problem is the gauge or its wiring.
How do I know if the fuel sending unit is bad?
The signs are a needle that jumps, freezes at one spot, or drops to empty for no reason, and a sender that reads open circuit or shows no resistance change as you sweep the float. Ground the sender wire at the cluster with the key on as a quick check: if the needle pegs, the gauge is alive and the sender is the fault. Confirm with a resistance reading against the service manual spec before ordering the part.
Should I replace the fuel gauge or the sending unit first?
Test, do not guess. The sender fails far more often than the gauge, and the ground and connectors fail more often than both. A five-minute resistance test at the sender tells you which one you have, and a key-on peg test confirms the gauge is working before you spend money on it. Replace only what the test points at, since a sending unit means dropping into a fuel tank.
Is it safe to drive with a stuck fuel gauge?
A gauge stuck on empty is safe to drive on if you track fuel yourself by resetting the trip meter at every fill-up and knowing your real range. A gauge stuck on full is not, because you cannot trust what you see and you will run the tank dry, which can damage the fuel pump. Treat a reading on full as a warning to fill up now, not as a reason to keep driving.
Why does my fuel needle jump when I fill the tank?
Usually the float is hitting the top of its travel, or there is a broken contact on the resistor strip that the float arm makes as fuel sloshes. It can also be a plug at the tank with corroded pins that makes and breaks contact. If it settles and reads correctly once the level stops moving, watch it. If the jumping continues at steady fuel level, test the sender resistance and clean or replace the connector.
Start with the fuse, the connectors, and the grounds, then run the multimeter sweep on the sending unit. Most stuck fuel gauges are one of the first three, and all three cost almost nothing to check. Save the tank drop for the case where the meter actually tells you the sender is finished.