
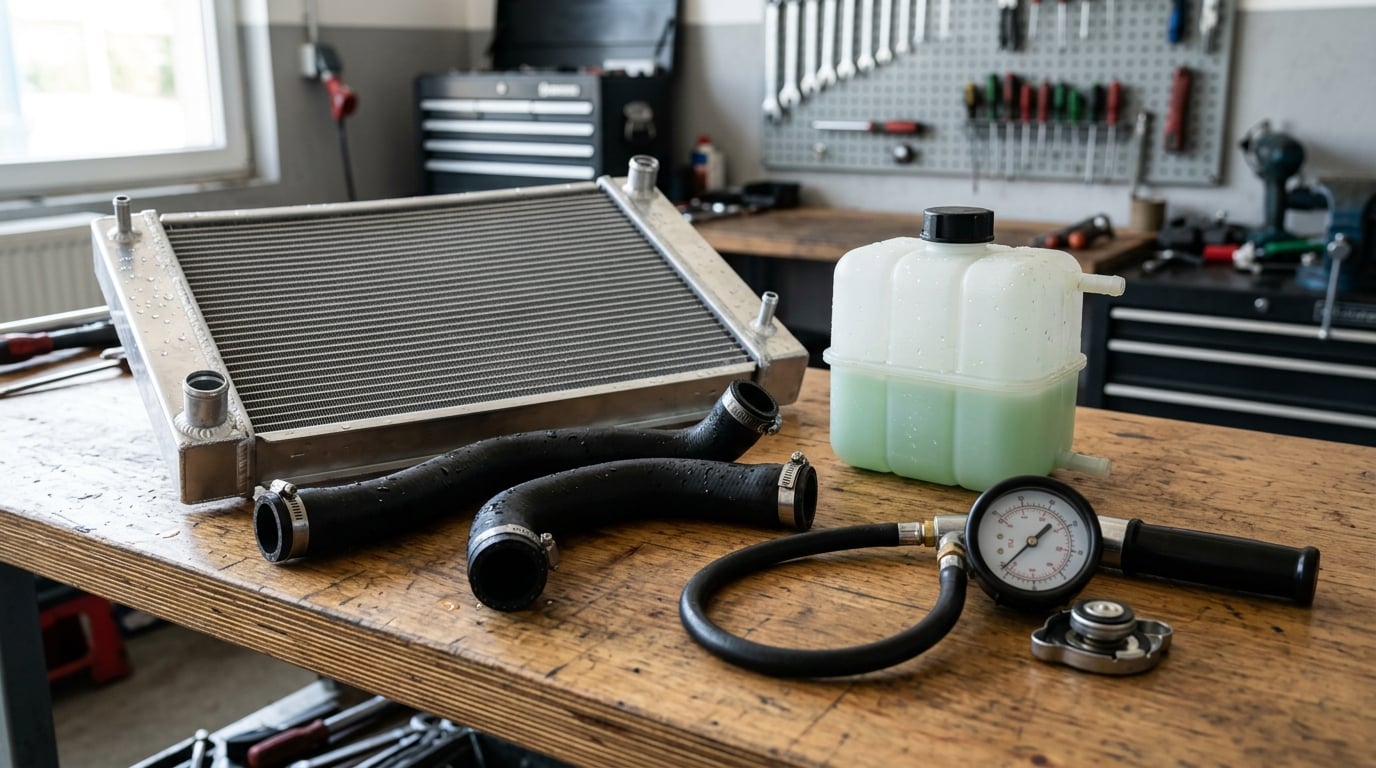
How to find a coolant leak comes down to three passes over the same engine bay: a cold visual inspection, a warm running check, and a controlled pressure test. Do them in that order and most leaks give themselves up in under an hour, because the ones you cannot see when the car is cold usually show up the moment the system is warm and pressurised.
The reason owners get stuck is that a confirmed loss of coolant and a visible drip are two different things. A slow weep at a hose clamp, a crack in a plastic tank, or a seep that runs down the back of the engine and dries before it hits the ground will drop your level every week and leave the driveway bone dry. The seven steps below are the order I would work in, and the last one is where most people replace a part they never needed to replace.
One warning before anything else: never remove a radiator cap or coolant reservoir cap while the system is hot. Pressurised coolant is well above the boiling point of water, and the spray that comes out will scald you. Park on level ground, wait at least 30 minutes after the engine goes off, and test the cap with a rag before you touch it. If you want a refresher on filling the system properly, our guide to topping off coolant correctly covers the cold-level procedure.
Table of Contents
- What You Need
- Step-by-Step
- Common Mistakes
- Frequently Asked Questions
- Can I find a small coolant leak that does not leave a puddle?
- Why does my car lose coolant overnight but show no visible leak?
- Is it safe to use a radiator pressure tester on a BMW?
- How do I find an intermittent coolant leak only when the engine is hot?
- Can coolant residue around the water pump confirm a water-pump leak?
- When should I stop inspecting the cooling system and call a mechanic?
- How to Find a Coolant Leak: What to Do First
What You Need
None of this needs a lift or a shop. You need the owner’s manual for your specific model, a flashlight, basic hand tools, paper towels, a collection container, and either approved coolant or drinking water to top up after a dry run.
The one optional tool that changes everything is a radiator pressure tester with the adapter that matches your filler neck. Most auto parts stores rent one at the counter for a refundable deposit, and a shop will usually run the test for you if you ask. Skip the improvised setups you will find in old forum posts — a bicycle pump against a stripped radiator neck can split a plastic tank and turn a diagnostic job into a parts bill.
Step-by-Step
The sequence below runs from the safest, most obvious checks to the one test that finds what your eyes cannot. Do not skip ahead. Each stage narrows the field, and a leak found at stage two saves you the twenty minutes a pressure test costs.
1. Confirm That the Fluid Is Coolant
Confirm the fluid before you touch anything, because dark oily residue, clear water, and unidentified fluid each send you down a different path. Coolant is usually pink, green, orange, or blue, it is thicker and slightly slippery compared with water, and it leaves a sweet or syrupy smell that is unmistakable once you know it.
Watch where the fluid sits. Coolant comes from the top of the engine bay and runs downward; a brown film that spreads evenly along a valve cover or down the side of the block is usually oil. Clear water with no smell and no colour is condensation, and it is normal on many cars after a cold start. If you cannot identify what you found, clean it up and come back once you have a colour and a location to report.
2. Inspect Obvious Low-Pressure Leaks
Start at the front of the bay and work back with the engine cold. Check the radiator and its plastic end tanks, both radiator hoses and every clamp, the coolant reservoir and its filler neck, the thermostat housing, the water pump housing and its weep hole, and the small-bore metal lines running to a transmission cooler.
You are looking for four things: fresh wetness, a crusty or powdery film, a stain that runs downhill from a joint, and a wet patch on the underside of anything above the source. Coolant evaporates as it travels, so the trail often starts several inches below the actual failure. Follow that trail upward rather than assuming the wet spot is the leak.
Run a finger along each hose end and around each clamp. A clamp that is finger-tight but has a wet film around it usually means the hose is weeping at the seal, not that the clamp is loose. A hose that feels spongy, bulges near the clamp, or shows a chalky crack has failed and needs replacing regardless of what else you find.
3. Check the Signs: How to Find a Coolant Leak Before Inspection
Sometimes the evidence is a symptom rather than a spot. These are the clues worth reading before you take anything apart.
| What you notice | Likely source | Next step |
|---|---|---|
| Sweet smell, warm air, no puddle | Small external weep, or heater core | Pressure test cold, then warm |
| Level keeps dropping, bay is dry | Slow seep running down the back of the engine | UV dye, then overnight cardboard test |
| Drip only after a long drive | Heat-only leak at a clamp or fitting | Recheck hot with the engine idling |
| Damp carpet in the passenger footwell | Heater core | Pressure test with the heater valve open |
| Foam or surge in the reservoir, sweet exhaust | Internal leak, possible head gasket | Stop and get a professional diagnosis |
| Reservoir empty right after a top-up | Large external or internal loss | Do not run the engine, refill and retest |
Two more signs catch owners out. A pressure loss with no visible drip often means the fluid is leaving at a hot fitting, or evaporating from a very slow film on a hot pipe. And if the reservoir looks fine every morning but drops over a two-hour drive, the leak is heat-dependent, and a cold-only inspection will never find it.
4. Clean and Dry the Surrounding Area
Old residue lies. A thin dried film will read exactly like a fresh leak, and you can spend an hour chasing a trace that has been there since the last service.
With the engine cold, wipe down the radiator, hoses, reservoir, water pump area and the accessible engine-bay surfaces. A degreaser or warm soapy water plus a rag works; you do not need to strip anything. Leave the hose clamps and fittings alone while you do it, because a dry fitting tells you nothing and a disturbed one can start leaking on you.
Then put something absorbent under the car. A sheet of cardboard is the classic choice because the wettest spot shows you roughly where the fluid is landing, which is rarely directly beneath the leak. If the puddle forms well away from where you would expect, trace the path back uphill toward the source.
5. Warm the Engine and Watch for New Traces
Fill the system to the cold level marked in the owner’s manual, not to the hot MAX line, and close the cap properly. A cap that is not seated or a reservoir hose that is still collapsed will push coolant out where the leak is not, and you will chase your own tail.
Now start the engine and let it reach operating temperature, with the cabin heater turned up high so the heater core is being worked. Watch the radiator and hoses, the pump area, the reservoir, and underneath the car. Hoses flex with engine movement and with the coolant expanding inside them, and that movement is often the only thing that opens a weeping joint.
Any fresh wet trace that appeared during the warm-up is your answer, and you can confirm it immediately with a dry paper towel pressed against the suspect joint. If the reservoir is still dropping while the bay is dry, move on to the pressure test. Dye tracing works too, and it is the same idea our UV dye walkthrough for oil leaks uses, just in a system that runs under pressure instead of gravity.
6. Use a Radiator Pressure Tester
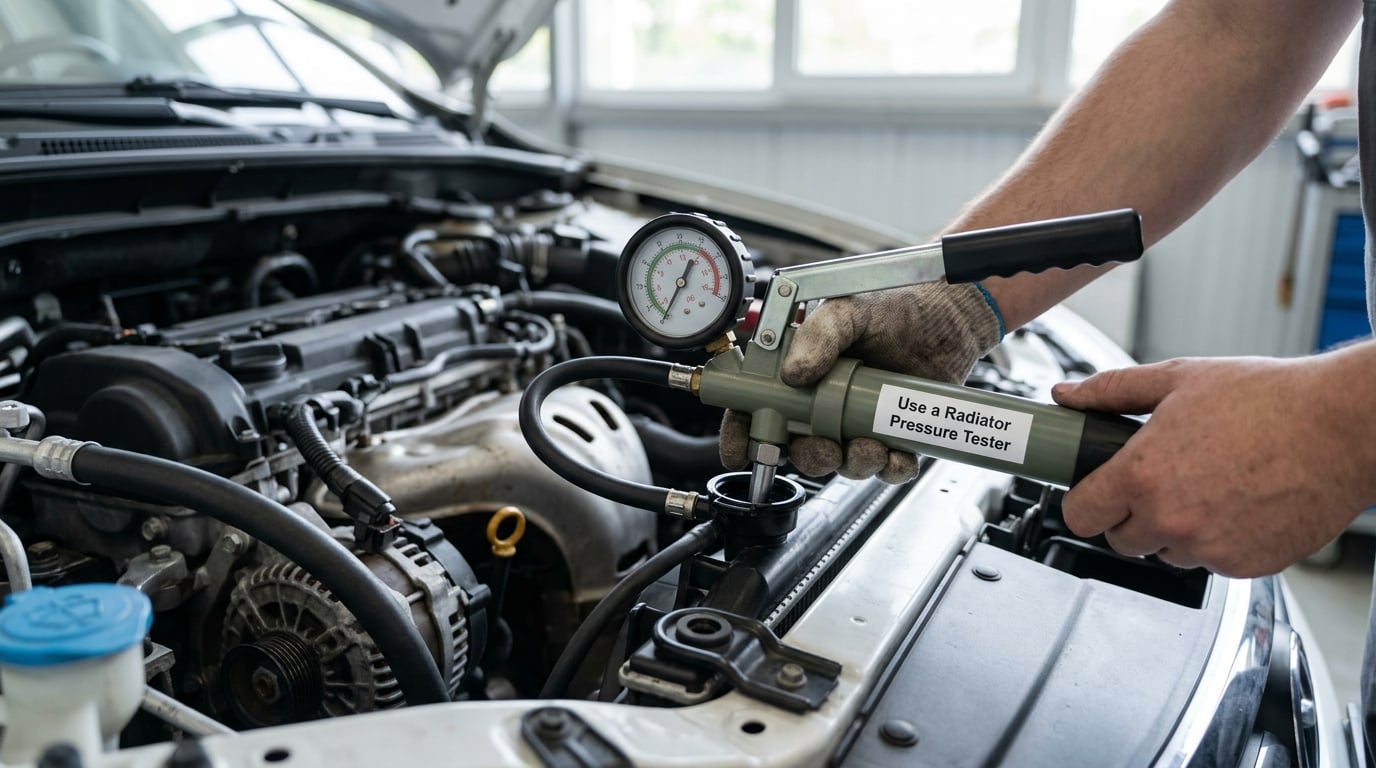
A pressure tester finds the leak your eyes miss. The cooling system runs sealed and pressurised when hot, so artificially raising that pressure with the engine off forces any weak seal to weep exactly as it would on the road.
Set the correct adapter on the filler neck, pump slowly to the PSI stamped on the radiator cap, and stop there. On most vehicles that rating is 13 to 16 PSI, but the cap is the authority, not a rule of thumb. Do not exceed the cap rating, and do not exceed the tester rating. On BMW models, be aware that some components and seals are not designed to hold sustained test pressure, so work gently and stop at the rating.
Watch the gauge and listen. A steady drop in pressure with no hiss tells you there is a leak somewhere. A hiss, a gurgle, or a visible drip at a fitting tells you exactly where. Work your way back down the system in small groups, re-pressurising between checks, until the wet trace appears. If the gauge holds for several minutes and nothing shows, the leak is either very small, intermittent, or on the far side of the engine where it is running into a hot exhaust manifold.
Most parts stores rent these. If you find yourself repeatedly borrowing one, buying it is the cheaper long-term move, and you can put it to work on the rest of the cooling system whenever the car acts up.
7. Confirm the Source and Plan the Repair
Before you order anything, confirm the source in dry conditions. Leave the system pressurised, then wipe each candidate fitting and joint clean and watch it for thirty seconds. The one that weeps first is the source.
Then decide what kind of failure you are looking at. A failed seal — a clamp that is not seated, a hose that has lost its grip, an O-ring that has hardened, a cap that is past its service life — is a cheap part and a straightforward job. A cracked tank, a split radiator seam, or a weep straight from the pump housing means the component itself is done, and on some engines the pump is a labour-heavy job because of everything packed around it.
If the source is internal rather than external, stop here and get a professional diagnosis. Pressurising a system with combustion gases behind it will not tell you anything useful, and you risk cracking a head that is already compromised. If you do spill a meaningful amount while working, our coolant spill cleanup guide covers safe handling on the driveway.
Common Mistakes
Testing a hot system. Removing a hot cap sprays scalding coolant. Let the engine sit at least 30 minutes, then test the cap with a rag before loosening it.
Spraying parts to see what comes out. Aerosol cleaner on a hot fitting is a real burn risk, and a wet fitting afterwards tells you nothing you could not have seen by wiping it. Identify the fluid by colour, location, texture and smell instead.
Mistaking oil for coolant. Oily residue is dark, thin and spread along the top of the engine rather than running down from a joint. Clean it up and recheck; if it returns, that is a different repair.
Looking only at the engine bay. The radiator fan and shroud hide most of the radiator on newer cars, and leaks that run down the back of the engine or the transmission dry before they reach the ground. Use the cardboard test and get underneath.
Over-tightening fittings. Cracking a plastic radiator neck or a tank does not solve anything, and the new crack is harder to find than the original weep. Torque hose clamps to spec and no further.
Replacing parts by guesswork. Caps, clamps, hoses and coolant are cheap, so it is tempting to swap all of them and hope. The pressure test costs minutes and tells you which one actually failed.
A few habits keep small leaks from becoming Sunday emergencies. Check the reservoir level cold once a month, look at the driveway before you start the car, and when a hose is off, lubricate the new O-ring or seal with clean coolant before it goes on. Replace the radiator cap if it is more than a few years old, and keep an eye on clamps that sit near heat sources, which dry out faster than the rest.
Frequently Asked Questions
Can I find a small coolant leak that does not leave a puddle?
Yes, and small seepage is the most common kind. Once the system is warm, the leak runs down hot surfaces and evaporates before it reaches the ground. A pressure test finds it almost instantly because the weak seal weeps under test pressure, and UV dye makes the same seep glow under a black light. Paper under the car helps with larger leaks that simply run down the back of the engine.
Why does my car lose coolant overnight but show no visible leak?
Three things usually explain it. The fluid may be evaporating from a slow film on a hot pipe, it may be seeping into a hose or gasket and staying inside the engine bay, or it may be an internal leak with no external trace at all. A pressure test that holds for several minutes rules out a large external leak and points you toward dye tracing, a heat-only recheck, or a professional combustion leak test.
Is it safe to use a radiator pressure tester on a BMW?
Yes, if you work gently and stay at the rating. Pump only to the PSI stamped on the radiator cap, and never past it, because some BMW components and seals are not designed to hold sustained test pressure. Use the adapter that matches the filler neck, keep the engine off and cold, and stop if you hear anything crackling. Never remove a hot cap to fit the adapter.
How do I find an intermittent coolant leak only when the engine is hot?
Reproduce the conditions. Fill the system cold, run the engine up to full operating temperature with the cabin heater on high, then inspect the hoses, clamps, reservoir and underbody while everything is hot and moving. Dried traces from earlier runs also help, because the stain pattern points to where fluid has travelled. If it only appears under load, recheck on a longer drive rather than a slow lap around the block.
Can coolant residue around the water pump confirm a water-pump leak?
Not on its own. Dried residue shows that fluid passed that area, not that the pump is the source, and it may have run down from a hose or a thermostat housing above it. Wipe the area dry, pressurise the system, and watch whether fresh fluid appears right at the weep hole or housing seal. A drip that forms only where the engine is running and pumping is strong evidence for the pump itself.
When should I stop inspecting the cooling system and call a mechanic?
Stop and get help if the reservoir empties shortly after a top-up, if you see foam or surge in the tank, if the exhaust is white or sweet-smelling, or if the engine overheats with a full system. Those point to an internal leak, and pressure testing will not identify it safely. Bring your notes on when the level drops and a photo of the dry engine bay so the diagnosis is not billed twice.
How to Find a Coolant Leak: What to Do First
Let the engine go completely cold, confirm the fluid you found is actually coolant, clean and dry the bay, then walk the radiator, hoses, reservoir, thermostat housing and water pump with a flashlight. If nothing shows, fill to the cold level, warm the engine, and recheck while the hoses are moving and the system is hot.
When the bay stays dry, put the system under test pressure and watch the gauge. That is the step that finds the leak everyone else has given up on. And if the level keeps dropping with no external sign, if the tank foams, or if the car overheats, stop driving and get a proper diagnosis rather than chasing a cause that has moved inside the engine.