
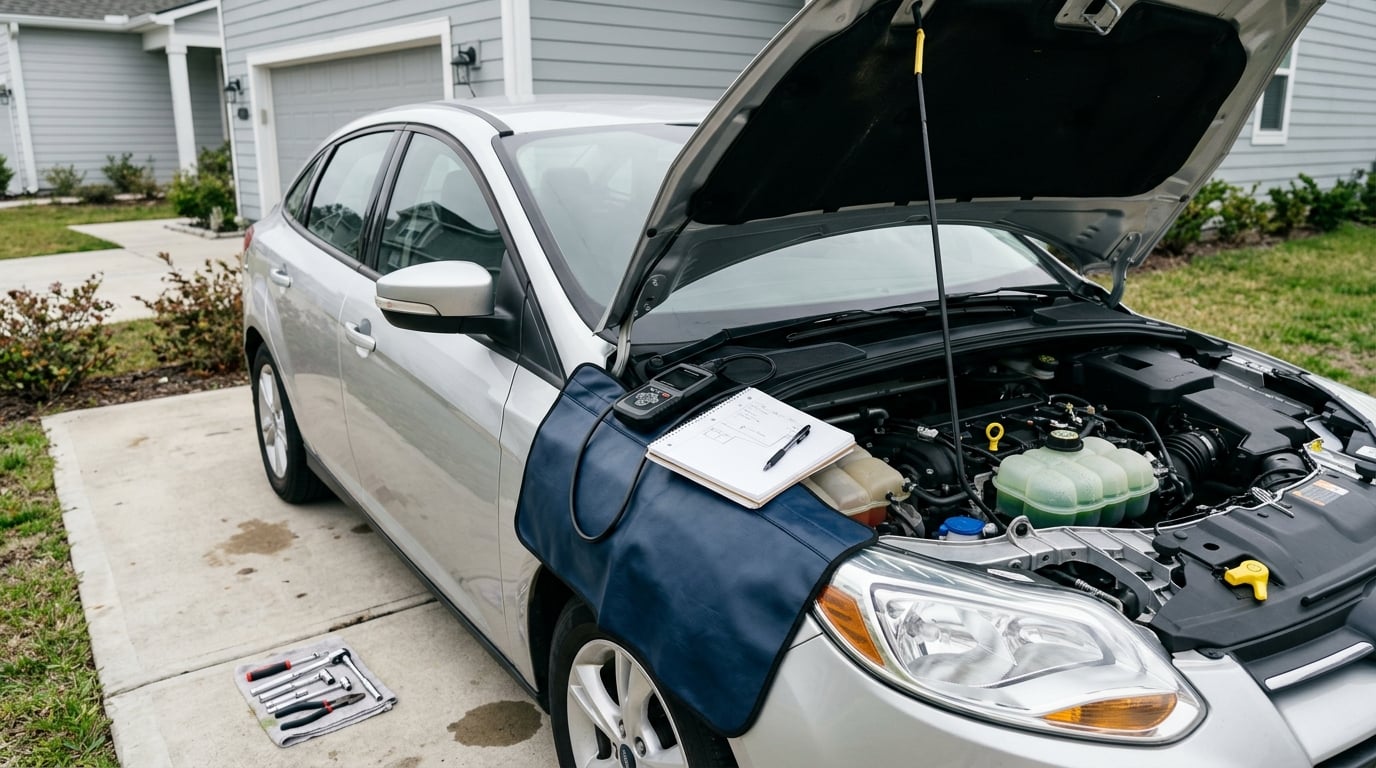
A flashing check engine light means stop driving right away, because each flash points to an engine misfire and the unburned fuel can ruin the catalytic converter. A solid light is usually less urgent. The fastest way to tell the difference is to plug an OBD-II scanner into the diagnostic port and read the codes.
That is the whole job, and it is smaller than it sounds. How to diagnose a check engine light comes down to reading the code, working out which system it names, then testing that system in cost order instead of guessing at parts. This guide walks the whole sequence for a BMW, from checking under the hood for a real leak to proving the repair worked on a road test.
Most of it takes an hour in the driveway with a scanner, a flashlight, and your owner’s manual.
Table of Contents
- What You Need
- Step-by-Step: How to Diagnose a Check Engine Light
- 1. Confirm Why the Engine Light Is On
- 2. Check for an Active Warning or Major Leak
- 3. Read the Stored, Pending, and Permanent Codes
- 4. Identify the System and Likely Fault
- 5. Inspect the Parts Named by the Code
- 6. Clear the Code Only When You Understand It
- 7. Repair the Confirmed Cause
- 8. Verify the Repair and Confirm the Light Stays Off
- Common Mistakes
- Frequently Asked Questions
- Conclusion
What You Need
You need a short list of things, and none of them is a parts catalog.
The owner’s manual. It tells you where the diagnostic port sits in your specific car, what the dash lights mean, and the oil change interval. BMW moved the port around over the years, so the manual saves you crawling around the footwell.
An OBD-II scanner. A standalone handheld reader is the simplest option. A phone with a Bluetooth adapter and an app costs less and shows more detail, but either one reads the same codes out of the same place.
Your phone or a notebook. You are going to write codes down. A code you photograph in a parking lot beats a code you half-remember at the parts counter.
Basic inspection tools. A flashlight, a socket set for a few sizes, a rag, and something to lie under the car on. Add a multimeter if you want to test sensor wiring instead of assuming it.
Recent service records. If the light appeared right after a repair or an oil change, the paperwork tells you what was already ruled out.
One rule before you start: no part gets replaced until the stored and pending codes point at a likely cause. Buying a sensor because a code mentions a sensor is how people end up with a new part in a box and the same light on the dash.
Step-by-Step: How to Diagnose a Check Engine Light
Eight steps, in this order. The sequence matters because each one narrows the next, and skipping ahead is what turns a ten-minute scan into a weekend of guessing.
1. Confirm Why the Engine Light Is On
There are three behaviors, and they mean very different things.
Solid and steady is the common one. A fault has been recorded and the car is usually running in a reduced-power mode to protect itself. Driving to a shop is generally fine.
Flashing is the urgent one. A flashing light means the engine is misfiring, unburned fuel is reaching the exhaust, and the catalytic converter can be damaged in a matter of minutes. Do not drive it.
A brief flicker during startup that goes out is usually the bulb check or a momentary voltage dip as the engine cranks. If it stays on after the engine catches, treat it as solid.
Stop driving and arrange transport if the light flashes, the engine runs roughly, power drops away, or the car will not hold a safe speed. A flashing light is the one case where the damage clock is already running.
2. Check for an Active Warning or Major Leak
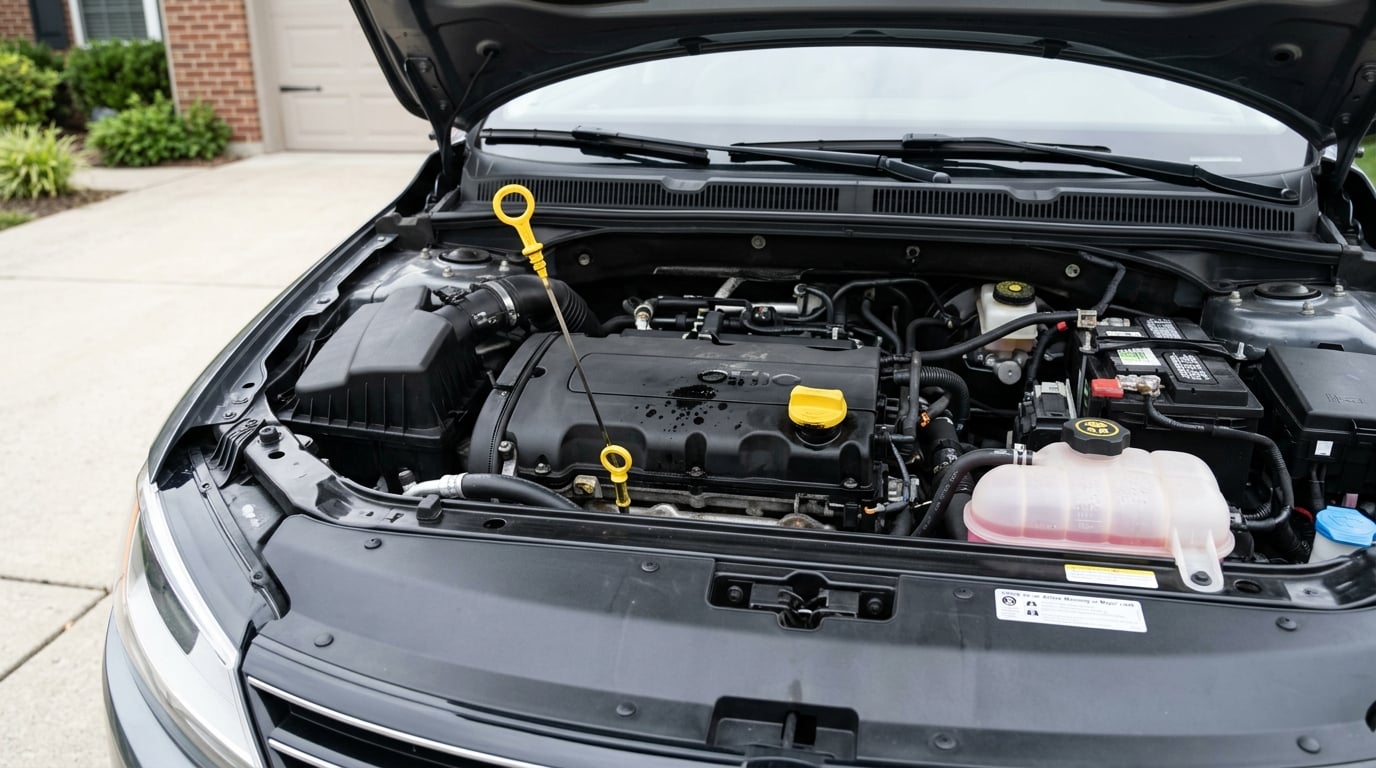
Before the scanner, look at the car. A warning light can be the only symptom of something that is already leaking.
Pull the dipstick and read it against the two marks. A level under the low mark gets topped off before anything else; oil pressure at the wrong level causes misfires and misfire codes that send people shopping for parts. Some cars use an electronic oil level check instead of a dipstick, and our guide to how to check oil on a car with no dipstick covers that case.
Open the coolant reservoir and look at the level and the color. Low coolant or coolant with a film of oil on top needs a different conversation than a code, and what milky engine oil means explains why that color shows up on the dipstick, in the cap, or on the oil filler neck.
Smell for fuel near the tank and filler neck, and look for wet spots under the car. Then take a look at the oil on the dipstick for grit or thickening, which is a different problem with a different fix, covered in how to check for engine oil sludge in your BMW.
Any of these can produce a code that looks inexpensive in isolation while the underlying situation is not. Low oil, overheating, a fuel leak, or contaminated oil all deserve a fix before a single code is cleared.
3. Read the Stored, Pending, and Permanent Codes
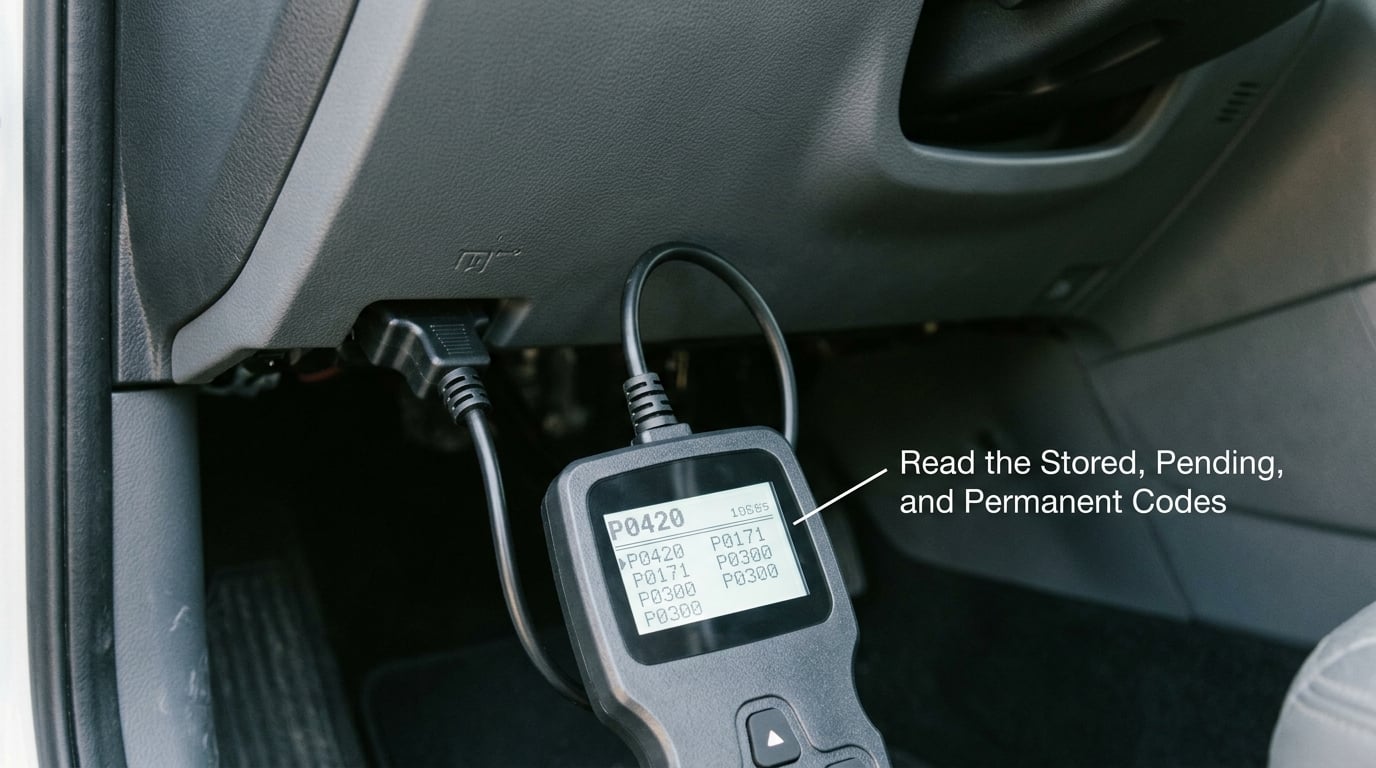
Find the diagnostic port with the ignition off. It is a trapezoidal socket that looks like a wide phone plug, usually under the driver’s side dashboard near the door, though some cars put it in the center console or the glovebox.
Plug the scanner in, turn the key to the on position without starting the engine, and let the scanner talk to the car. Most take under a minute.
Now read all three lists, not just the first one.
Stored codes are faults the powertrain control module confirmed and kept. These are your starting point.
Pending codes are faults seen once or twice but not yet confirmed. A pending code is often the earliest warning you will get, and it usually means a fault is starting to come and go.
Permanent codes are a historical record. They stay until the module sees enough clean driving to declare the repair complete, and they will not clear with a scanner even if the problem is genuinely fixed.
If your scanner offers freeze-frame data, open it. It records engine speed, load, temperature, and fuel trim at the moment the fault was set, which is how you find an intermittent that only appears on hills or at idle. Write down every code and the freeze-frame snapshot before you touch anything.
That note is not optional. Once codes are erased, a shop cannot honor a code they never saw, and you lose the conditions that point at the real fault.
4. Identify the System and Likely Fault
Every code has structure, and the structure tells you where to start looking before you read a single definition.
The first letter is the system: P is powertrain, which covers the engine, transmission, and emissions controls. C is chassis, B is body, and U is network communications between modules.
The second digit is specificity. A 0 means a generic code defined by the SAE standard, so P0171 means the same thing on any car. A 1, 2, or 3 means the manufacturer defined it, so that part of the code is BMW-specific and needs BMW service information to decode.
Here is the trap that catches almost everyone. A generic definition tells you which circuit reported a problem, not which part failed. P0101 says the mass airflow sensor circuit is out of range, and the MAF sensor is a common reason, but a cracked intake duct, a loose connector, or a rodent nest in the airbox will set the identical code. The code is a lead, not a verdict.
Multiple codes from one sensor circuit usually mean one failure, not several. A MAF sensor reporting bad signal can set P0101, P0102, and P0110 at the same time, and replacing three parts would be an expensive way to fix one broken wire.
5. Inspect the Parts Named by the Code
Now you look, with the code in hand. Inspection finds the cause far more often than replacement does.
Air intake and MAF codes (P0100 to P0104 and neighbors): check that the air filter is not packed with dirt, that the intake duct is seated on both ends, and that the MAF connector is fully clicked in and free of oil. A duct hose that came loose is a ten-minute fix that a new sensor will not solve.
Oxygen sensor codes (P0130 to P0135 and P0150s): a code naming a sensor does not identify which one. Check the exhaust pipe ahead of and behind the catalytic converter to work out whether the code is pointing at the upstream or downstream sensor. Look at the wiring for heat damage, oil, and sharp edges on brackets.
Ignition and misfire codes (P0300 to P0304 plus a cylinder number): pull the spark plugs and read the electrodes. A plug that is wet, blackened, or worn to a rounded tip points at ignition or fuel delivery. Check plug boots and wires for corrosion and cracks, and check the coil connectors for oil residue.
EVAP and fuel cap codes (P0440 to P0456): inspect the gas cap seal, the filler neck, and every visible EVAP hose for splits or a disconnected line. A cap that clicks loose is one of the most common causes of a lit light, and it is the cheapest fix in the list.
Lean and rich codes (P0171 to P0174): an unconnected intake vacuum line, a dirty MAF, or a leaking fuel injector all lean the mixture. Check for vacuum leaks at the intake manifold and hoses with the engine running.
Exhaust and catalyst codes (P0400s, P0420, P0430): these are conclusions, not starting points. A catalyst efficiency code usually means something upstream is wrong, so chasing the code to the converter is how people buy the most expensive part in the car.
Mechanical codes (low oil pressure, overheating, knock): treat these as engine conditions, not sensor faults. They are the codes where the correct action is to stop driving.
Whichever family the code belongs to, follow the service procedure for testing that component rather than assuming a failed part. A multimeter continuity check on the wiring and connector can rule out half the suspects in a few minutes.
6. Clear the Code Only When You Understand It
Clearing a code is not a repair. It erases evidence and turns a specific question into a vague one.
Clearing is reasonable in two situations: you have repaired the confirmed cause and want a clean baseline to verify the fix, or a manufacturer bulletin or recall describes a specific code and you are checking whether the fix landed.
Clearing is a bad idea when the cause is still unknown, when the light was flashing, or when the car is about to go to a shop. Mechanics cannot work from a code that was erased, and the pending list that would have warned you about an intermittent goes with it.
There is a second consequence. Clearing resets the emissions readiness monitors, and until the car completes enough varied driving to set them again, an emissions test can fail even on a car that is running perfectly.
On a BMW, plan a proper drive cycle after the repair rather than a lap around the block. Cold start, city driving with stops, some highway, and a mix of both is what the monitors want to see before they will mark themselves ready.
7. Repair the Confirmed Cause
Now fix the thing you found, not the thing the code named.
Compare the code evidence with the symptom. If the code says lean and the car is rich at idle, something in that chain is lying to you and you have not finished the diagnosis.
Test before you replace. On most of these systems, a visual inspection plus a wiring and connector check will point at the real failure, and many sensor codes are wiring codes wearing a sensor’s name.
Follow BMW service information for the procedure rather than a forum shortcut, especially for components that need a specific torque, a specific tool, or software calibration afterward. Newer BMW parts often expect programming at the vehicle, and a part that is not registered with the module can leave you with a new code and the same warning light.
Do one thing at a time, and re-scan between steps. If the light goes out and stays out, the fix was right. If it comes straight back, your diagnosis was wrong and you have a much narrower problem than you started with.
8. Verify the Repair and Confirm the Light Stays Off
Verification is the step that separates a fixed car from a car that feels fixed.
Clear the codes only after the repair is complete, not before. Then run the engine and re-scan to confirm the old code is gone and no new one has appeared.
Drive the car under the conditions that triggered the fault. If the light only came on at highway speed, that is where it needs to be tested. If it followed a specific fill-up or a cold start, repeat that.
Check the pending list on every scan. A pending code that comes back after the repair means the fault is intermittent, and intermittent faults are the ones that send cars back to the shop twice.
Watch the drive itself: steady idle, no hesitation on acceleration, no flicker in the light, no change in the way the engine pulls.
If the light returns, the MIL flashes, the idle gets rough, or power drops, the diagnosis is not finished. What you have now is a car with a repeatable fault and a short list of suspects, which is a much better place to be than a car with a cleared light and no idea whether the converter survived.
Common Mistakes
Ignoring a flashing light. This is the only error that can create a second, much larger bill. Misfire fuel burns the catalytic converter, and a flashing light means the clock is running. Stop.
Replacing parts in the order the codes came in. A list of six codes read from a cheap scan is not a parts order. One failed sensor can set several of them, and the cheapest upstream cause is usually the one worth chasing first.
Clearing codes before recording them. You lose the freeze-frame snapshot, the pending list, and the shop’s ability to work from your car’s history. It is the most common reason a first diagnosis turns into a second diagnosis.
Assuming the named sensor is the failed sensor. The code names the circuit. Wiring, connectors, vacuum, and a nearby failure produce the same code more often than the sensor itself fails.
Skipping the visual checks. Gas cap, air filter, intake duct, spark plugs, boots, and visible fluid leaks are free to inspect and account for a surprising share of codes. The scanner does not look at any of them.
Resetting an emissions monitor and forgetting. Clearing codes sets the readiness monitors to not-ready. You may need several days of mixed driving, or a paid drive, before the car will pass.
Calling it fixed because the light went out. A cleared light is silence, not proof. Only a completed drive cycle, a clean re-scan, and a road test in the conditions that triggered the fault tell you the repair held.
Frequently Asked Questions
Can I drive with the check engine light on?
Usually yes, if the light is solid and the car drives normally, since the powertrain control module has shifted into a reduced-power mode. No if the light is flashing, the engine is misfiring, power has dropped, or the car will not hold a safe speed. Those cases can damage the catalytic converter quickly, so stop and arrange transport instead of driving to a shop.
Is a free parts-store code scan enough?
It is enough for one thing: telling you which codes are stored, pending, and permanent. It is not an interpretation, so you will leave with a string of letters and numbers and no next step. A good shop writes the codes down for you and explains the likely causes, usually at no charge. Read the codes, then research the system each one names.
Why did the check engine light come back after I cleared the codes?
Clearing a code only erases the record, not the fault. The light comes back because the underlying problem is still there, because a pending code confirmed itself, because the fix did not cover the real cause, or because you disconnected the battery and the adaptive values had to relearn. Finish the repair, complete a full drive cycle, and re-scan before assuming anything is resolved.
Do I have to fix a pending trouble code right away?
Not urgently, but do not ignore it either. A pending code means the powertrain control module saw the fault once or twice and has not confirmed it yet, which makes it the earliest warning you will get of an intermittent problem. Monitor it, watch the pending list over a few drives, and address it before it becomes a confirmed code that sets the light.
What if my scanner does not show a code?
That happens for a few reasons. The light may not be a check engine light at all, since the maintenance and tire-pressure lamps look similar and carry different codes. The car may be too new for that scanner, or the module may only store codes in newer drive cycles. Turn the key on twice more and re-scan, then try a different tool or have a shop read it.
Conclusion
If the light is flashing, or you have rough running, low power, overheating, or a fuel smell, stop and get the car transported. Otherwise the sequence is simple: scan it, write down every stored, pending, and permanent code, look at the car before you order anything, and clear a code only after you understand it.
Then fix the confirmed cause and prove it with a drive cycle and a road test. A light that stays off after that is a repair, and a light that comes back is a diagnosis that just got a lot more specific.