
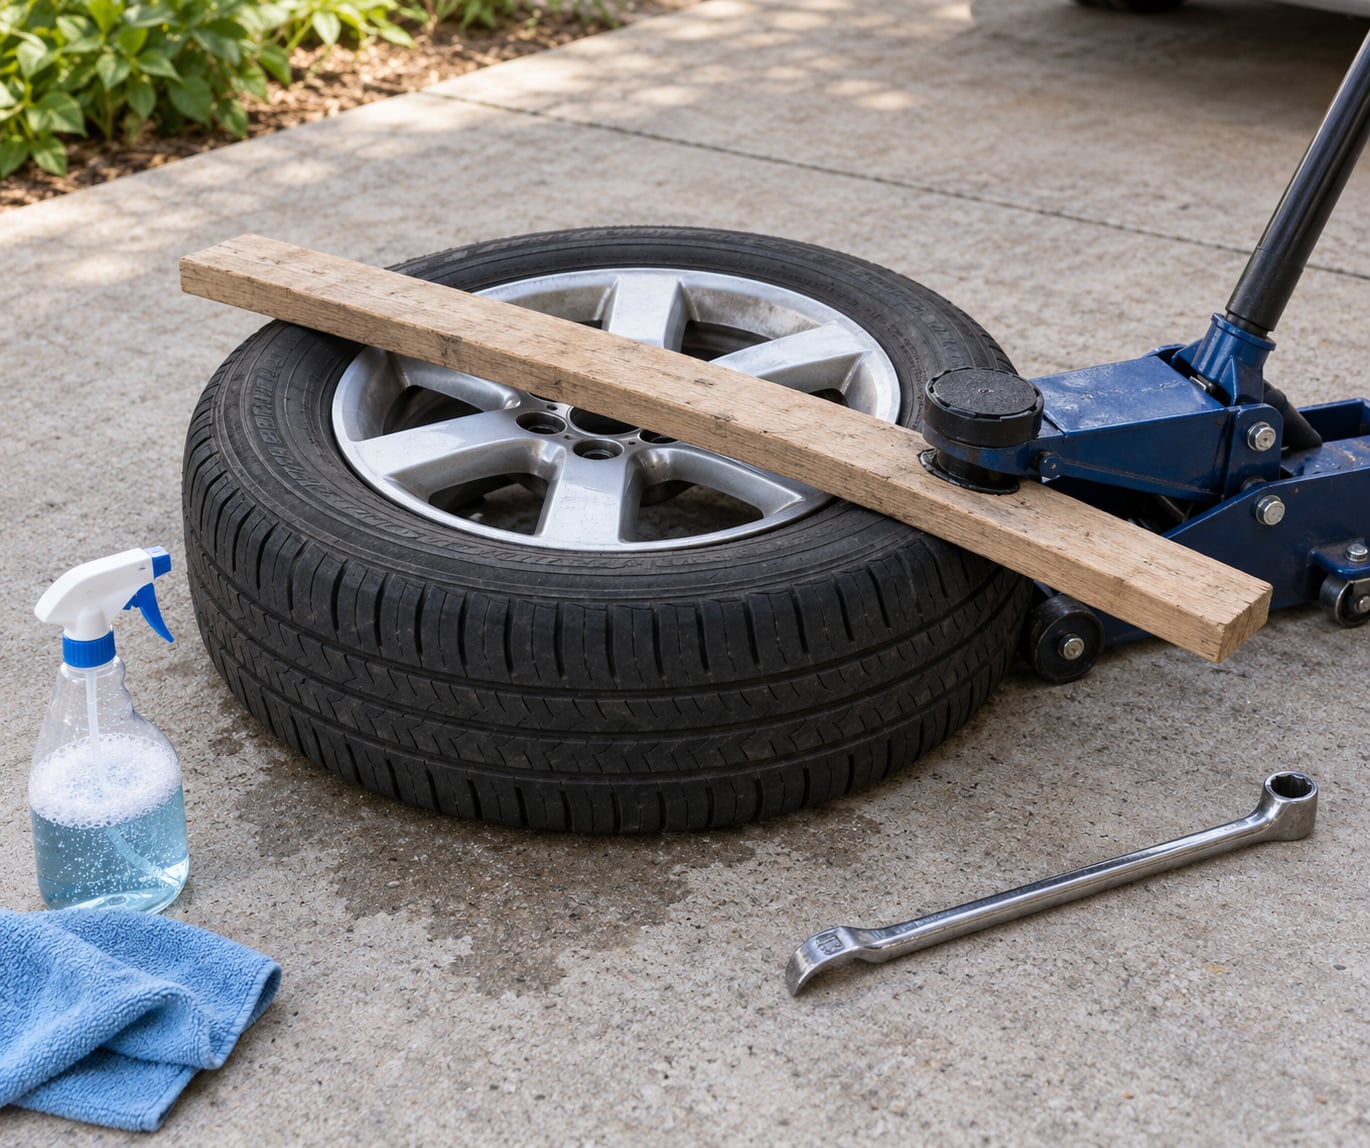
Breaking the bead on a tire at home takes a floor jack, a length of 2×6 board and about twenty minutes, once you know which kind of tire you’re holding. The bead is the reinforced steel-corded edge of the tire that grips the rim, and forcing it out of the flange is the only step that separates rubber from metal without a shop tire machine. On a bicycle tire it’s thumb pressure. On a car or truck tire it’s a few hundred pounds of tension in a sidewall.
Below is the whole job in the order that works: identify the tire, get every bit of air out, support the wheel, break the bead with controlled pressure instead of a hammer, then lever the tire off in small bites. The methods haven’t changed in decades and they’re still what we use in 2026.
Table of Contents
What You Need
The bead is a ring of steel or aramid cord wrapped in rubber that sits inside the rim’s bead seat. Air pressure squeezes the tire’s sidewalls outward into the rim flanges, clamping that ring hard against the seat and holding the air in. Breaking the bead means rolling that ring back out over the flange so the tire can slide off the rim.
Two different things get called a bead. A demounting bead is what almost every bicycle, motorcycle, car, SUV and truck tire has, and it pops out with a few hundred pounds of pressure. A wheel-locking bead, found on beadlock wheels and a lot of off-road and racing setups, is a machined mechanical interlock with bolts or a visible beadlock ring holding it on. You do not break a wheel-locking bead. Those wheels come apart at the bolts.
Tools for the home method
You can get through most passenger tires with this list, and everything on it is available at a hardware store.
- A floor jack rated above the weight of your vehicle, plus rated jack stands if the vehicle goes on a lift.
- A 6-foot length of 2×6 or similar board, long enough to span the whole tire and reach past the rim edges on both sides.
- A valve core remover and a valve reinsert cap or plug, because the last of the air comes out fast.
- Two tire irons or spoons. You need them even on a bicycle tire, and they are your lever for the dismount.
- Bead lubricant, or dish soap and water in a spray bottle. A soap solution is the universal substitute.
- A C-clamp or G-clamp if the tire is on a motorcycle wheel, a bicycle wheel or a mower.
- Work gloves and eye protection, plus a piece of cardboard or a shop rag to protect the rim flange.
Skip the lubricant and the job goes from twenty minutes to an hour of fighting the tire. That is the single biggest reason people think this can’t be done at home.
Which method suits which tire
| Method | Tools | Best tire type | Effort | Rim damage risk |
|---|---|---|---|---|
| Hands and knee | None | Bicycle, go-kart, cart | Very low | None |
| C-clamp or G-clamp | Clamp, cloth | Motorcycle, bicycle, mower | Low | Low if the jaw stays off the rim |
| Floor jack and board | Floor jack, 2×6, tire iron | Car, SUV, light truck | Moderate | Low, the board spreads the load |
| Vehicle weight and board | Rated jack stands, 2×6, vehicle | Stubborn car and truck beads | Moderate | Low, board spreads the load |
| Bottle jack and heavy frame | Bottle jack, heavy stationary object | Tractor, ATV | High | Medium, the sidewall carries the load |
The force difference between tire types is bigger than most guides admit. A tractor tire shop veteran on TractorByNet reports needing well over 3,000 to 4,000 lb of pressure before car and truck beads would release, which is why a small bottle jack alone often fails on passenger tires. Bicycle and motorcycle beads need a fraction of that.
Choose a tire shop instead when
Some tires are not worth the risk at home, and the cost of being wrong is a damaged rim or a bead that can never seat again.
- The tire is a run-flat. Its sidewall is a self-supporting structure, and the bead area is stiff and reinforced. Shops handle these on a machine.
- It’s a low-profile tire on an alloy wheel. The sidewall is short and stiff, so it has to be pushed off with a machine, and a tire iron slipping sideways will gouge the flange.
- The wheel has a wheel-locking bead, or you can see bolts or a beadlock ring around the rim.
- The bead shows cuts, cracks or a visible gap where the cords show through. Reading the sidewall codes tells you what the tire is built for, and that answer usually decides this.
- The tire has been sitting flat for weeks and the sidewalls have taken a permanent set.
Step-by-Step: How to Break the Bead on a Tire at Home
Step 1: Identify the Tire and Check Whether It Is Safe to Open
Read the sidewall before you touch anything. Look at the tire’s size and type code, whether it says TUBE or TUBELESS, and any speed or rating symbols that flag it as a specialty construction. The tire’s overall diameter tells you how much force you’re about to deal with.
Run your hands around the bead on both sides. A tire that has been run at low pressure usually has a visible bulge, a scuffed or gouged section, or exposed cord right at the bead edge. Any of those and the tire should not be levered. It can let go partway around the circumference, and the sudden release is the thing that hurts people.
Step 2: Remove Wheel Weights and Deflate the Tire Completely
Take the clip-on adhesive weights off first if the wheel is off the vehicle. Push each clip inward at the midpoint, not at the end, so it doesn’t pop off toward you. Skip this if the wheel is still on the car and the weights are on the outside.
Now deflate fully. Unscrew the valve cap, press out the valve core with the core remover, and let the air run out. Press the valve stem inward to squeeze out the last of it, then listen. When the tire is truly flat, the sidewall should feel soft and the bead visibly moves when you press the tread near the rim.
If one side still feels firm, air is trapped somewhere else in the carcass. Push the bead toward the rim in a few places and press the tread; it takes the path of least resistance out through the bead.
Spray soapy water or bead lube around the bead while the tire is still just barely holding shape, then finish deflating. Lubricant applied before the air is out gets pulled into the bead interface as the tire goes flat, which is exactly where you want it. Users on Horizons Unlimited have reported that pre-lubricating dropped a pair of stubborn tires down to screwdriver-level leverage.
Step 3: Position and Support the Wheel
Lay the wheel flat on a firm, level surface, or on a piece of plywood on soft ground so the tire can’t rock. If the wheel is still on the vehicle and you’re going to lift it with a jack, support the vehicle on rated jack stands at the factory points and chock the wheels that stay on the ground.
Never work under a vehicle that is held up by a jack alone. Never get your face, hands or knees in the gap between the tire and the board, or in the path the sidewall will move when it releases.
Step 4: Break the Bead
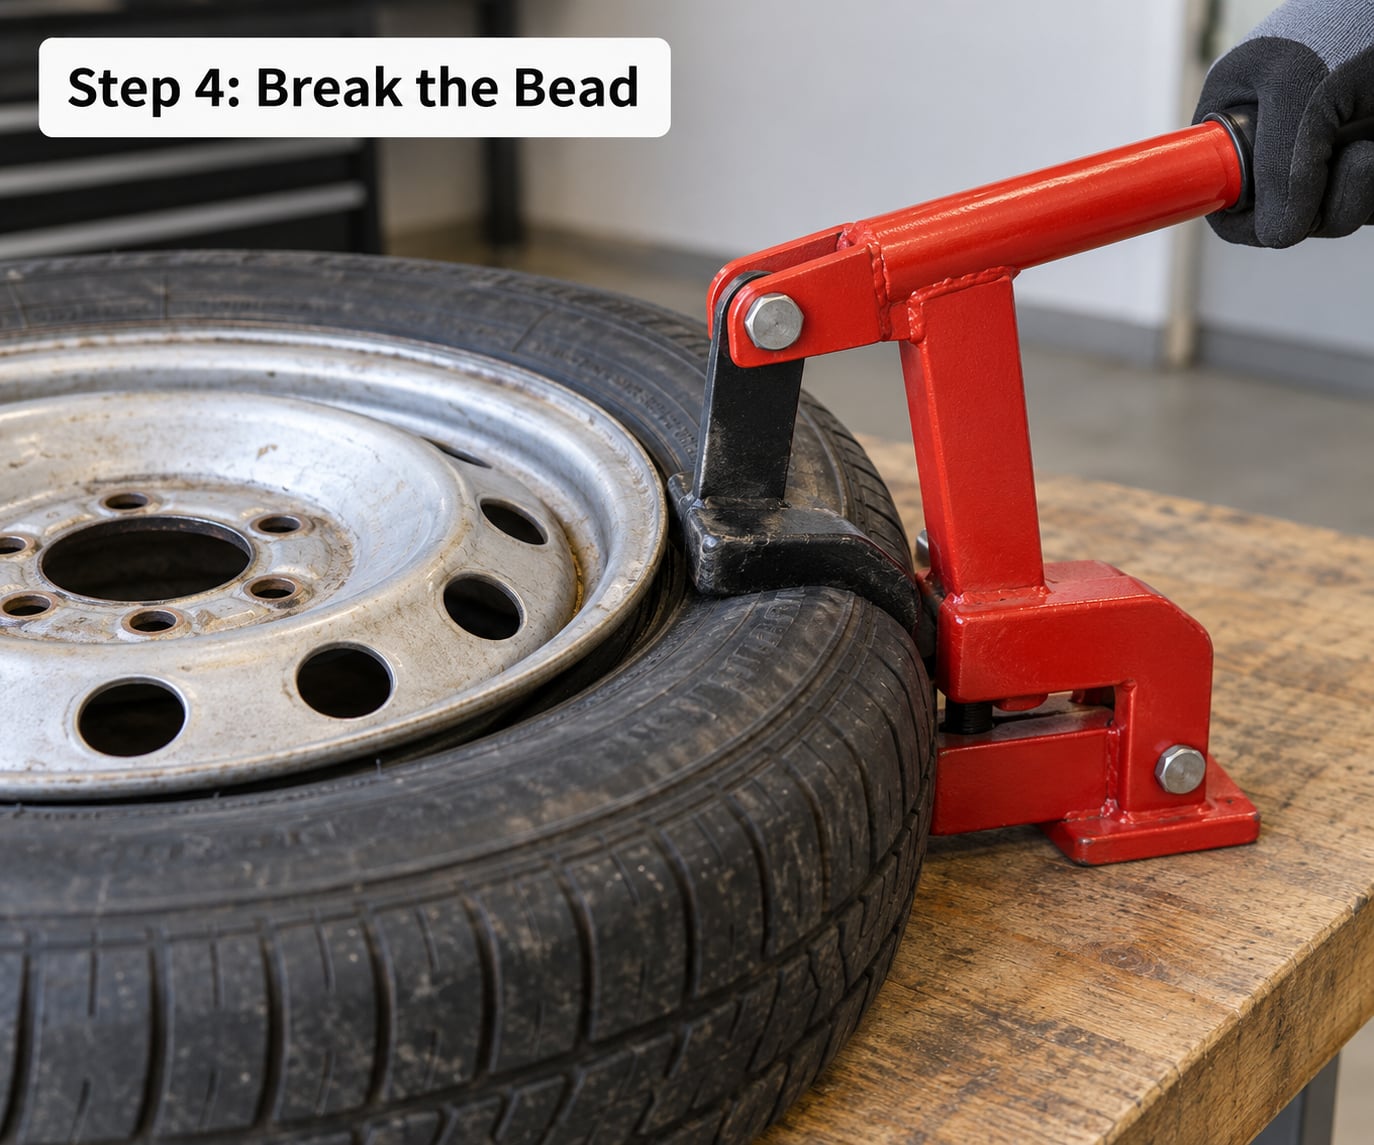
Set the 2×6 board across the top of the tire so it spans the tread and overhangs the rim on both sides. Place the floor jack on the board directly over the bead area you want to work, and pump the handle until the board presses down on the sidewall.
At the same time, set a tire iron on the sidewall about six to twelve inches away from the jack, hook it under the rim flange near the bead, and pry. The jack supplies steady downward force at the top; your iron does the separating. As soon as you hear and feel the bead pop off the flange, move both the jack position and the iron about eight inches around the circumference and repeat.
Work your way around the entire side in this pattern, adding jack pressure a little at a time. The sidewall will balloon in front of the jack and relax behind it, which is normal.
If your jack lightens before the bead gives, you need more force, and this is where the vehicle-weight method comes in. With the vehicle on rated jack stands and the wheels chocked, drive one tire up onto the board laid across the tire’s sidewall so the vehicle’s weight presses the sidewall down against the bead. A shop tire professional described this bottle-jack-against-a-heavy-frame version of the same idea as the reliable method on tractor and ATV tires.
On a motorcycle or bicycle wheel, skip the jack. Put the C-clamp or G-clamp through the spokes so the screw jaw presses on the sidewall beside the bead and the fixed jaw rests on the rim’s inner channel, with a folded cloth under the fixed jaw so it cannot scratch. Several long-term users on Horizons Unlimited report running a standard G-clamp this way for years. Tighten until the bead rolls over the flange, move the clamp around the wheel, and repeat.
Step 5: Check the Bead and Protect the Tire
Run your fingertips around the bead on the side you just worked. It should now sit below the rim flange all the way around, with no section pinched back up into the wheel. Feel for sharp edges in the rubber, and look at the rim flange for bright metal where an iron slipped.
If the bead is only partly loose, do not start levering. Go back to that spot with the jack or the clamp and a little more pressure, and add more lubricant. Forcing a partially seated bead strips the cords, and a stripped bead will never hold air again.
Step 6: Finish the Tire Removal or Move to Repair
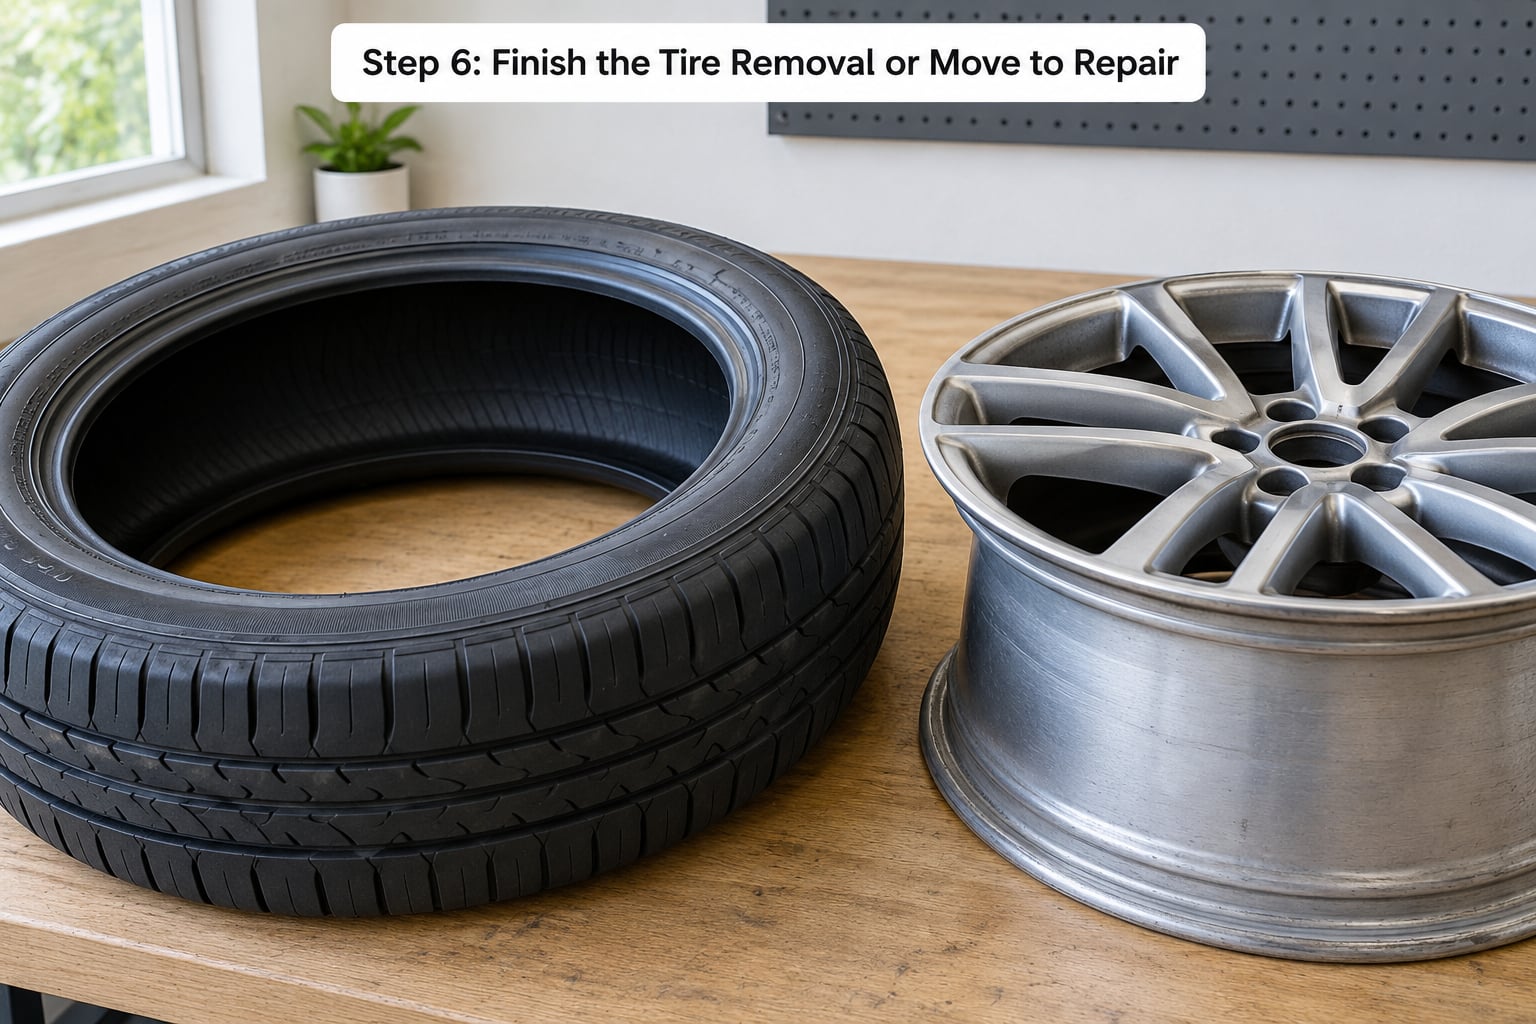
With the bead loose, set the tire iron under the bead opposite the rim’s center channel, inside the wheel so the tip can’t contact the rim. Pry one or two inches, place the second iron ahead of it, and walk the tire around the wheel in small steps.
Keep cardboard or a folded rag between the iron and the flange, and keep your other hand on the tire’s sidewall rather than between the tire and the rim. If the wheel is alloy, the risk isn’t a bend, it’s a chip or a bare scratch that never comes off.
Once the tire is off, run a finger slowly around the inside of the rim on both sides. Any sharp burr, flat spot on the bead seat or crack means that rim is finished, and a tire that will not seat evenly on it is what put you in this position in the first place.
Then decide what you actually wanted. If the goal was a repair, plugging versus patching a tire depends on where the damage is and whether the tire will go back on. Refitting a tubeless tire means getting the bead back inside the flange on both sides, then adding air until it seats with a distinct pop or a long burst at the rim. Plenty of people break the bead off successfully and then end up at a shop anyway because they need that inflation tank.
Common Mistakes
Nearly every failed bead break traces back to one of five things: pressure still in the tire, no lubricant, force in the wrong place, an improvised tool that slipped, or standing where the sidewall travels.
The most common mistakes and the fix for each
- Working a tire that still holds air. The sidewall is a pressure vessel, and it will resist you and then let go unpredictably. Deflate fully, remove the valve core, and press the sidewall to confirm it’s soft all the way around.
- Hammering the tread instead of pressing the sidewall. You want the jack or the clamp pushing down on the sidewall right at the rim edge. Force anywhere else just compresses rubber that has already relaxed.
- Using a pry bar or an improvised lever that can slip. A sharp, unwrapped bar landing on a bead edge cuts it. Tire irons are shaped for this. If you use something else, wrap the contact end.
- Standing over the tire or in front of the jack. Once the bead releases, the sidewall moves fast and the jack can jump. Stay to the side, keep your face back, and wear eye protection.
- Forcing a run-flat or a beadlock wheel. These don’t come off like ordinary tires. Take them to a shop.
Techniques that waste your time
You’ll see these suggested everywhere online. Most of them either damage something or just move the problem.
A sledgehammer on the tread. It’s the most-shared advice and the worst of it. It damages the belts and cords under the tread, and a carcass with crushed internal cords fails later under load, where you can’t see it.
WD-40, chain lube or grease on the bead. Petroleum products attack rubber. Tire shop veterans on TractorByNet are blunt about it: avoid any petroleum lubricants as they will deteriorate the rubber. Use dish soap and water, a dedicated tire soap, silicone-based bead lube, or a non-petroleum oil such as vegetable oil.
Prying the iron against the rim’s outer lip. Every time the iron lands on the flange you shorten its life and risk the tire going on crooked. The iron belongs inside the wheel against the sidewall below the flange, where there is a bead to grab.
Prying a long way in one motion. Small bites beat one hard pull, every time. The iron that works is short, controlled and repeated.
Frequently Asked Questions
Can you break a tire bead with a hammer?
You can, but you probably shouldn’t. Striking the tread with a sledgehammer crushes the belts and cords inside the carcass, and that damage stays hidden until the tire fails under load. Striking near the rim risks cutting the bead outright. A floor jack pressing on the sidewall at the rim edge does the same job with control and no damage.
Why won’t my tire bead come off?
Almost always the same four reasons: the tire still has air in it, there’s no lubricant on the bead, you’re pressing on the tread instead of the sidewall at the rim edge, or the tire is a run-flat or performance tire stiff enough to need a machine. Add soapy water, get the pressure fully out, move the force to the sidewall within an inch of the flange, and try again in a new spot.
Do I need to break both beads on a tire?
For a proper dismount, yes. A tire’s inner bead sits inside the rim well and will not clear the flange, so once the outer bead is off you have to work the tire over the inner bead to finish removing it. A single-sided break is enough if you only need access to the inside of the tire for a patch or sealant check, or if you are only working one side of a tubeless tire.
Can I break the bead on a run-flat tire myself?
I’d leave run-flats to a shop. Their sidewalls are reinforced to carry the car on the rim, so the bead area is stiffer than a conventional tire, and they usually sit on alloy wheels where a slipped tire iron does expensive damage. Low-profile tires on alloy wheels are the same story: machine work is the safe route.
What tool is the safest for breaking a tire bead at home?
A purpose-built bead breaker is the safest, and a floor jack with a long board is the best stand-in. The board spreads the load across the sidewall so nothing contacts the rim, and the jack gives you slow, controlled force you can move around the circumference. Add a tire iron to do the separating, and wear eye protection and gloves.
How do I know if the bead or wheel was damaged?
Run a finger around the bead. Soft rubber that flexes is fine; a split, a hard lump, exposed cord or a rough edge means the tire is done. Then run a finger around the inside of the rim on both sides looking for burrs, dents or a worn groove in the bead seat. A shiny scratch from an iron is cosmetic, but a bend or a flat spot in the seat means new rim.
Conclusion
Start with the first action, not the tool: identify what the tire is, get every bit of air out of it, put soapy water on the bead, and support the wheel on something solid. Then press down on the sidewall right at the rim edge with a jack and a board, and separate the bead with a tire iron in small bites as you move around the circumference.
If it’s a run-flat, a low-profile tire on alloy, a beadlock wheel, or a tire that’s already cut at the bead, take it to a shop. Once you’ve broken the bead and need to reseat it, an air tank makes the job far easier than the removal did, and checking pressure properly afterward is the last step, not the first.