
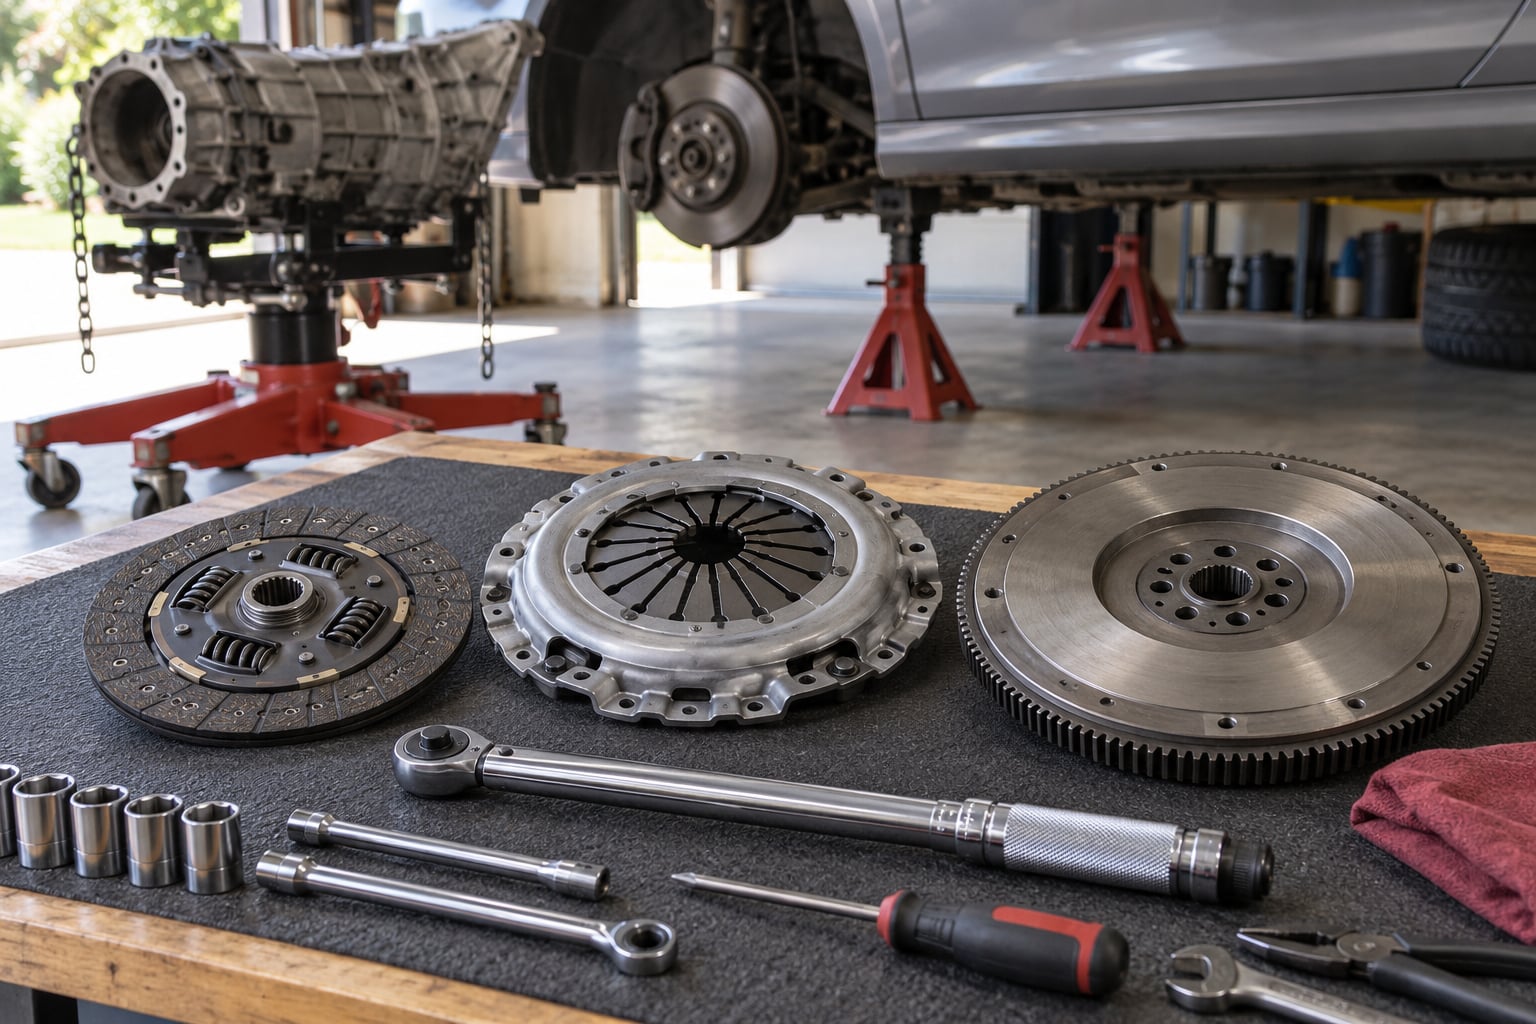
A clutch replacement is a full-day garage job, not a weekend afternoon one, and the transmission has to come out to do it properly. If you have a lift or tall jack stands, a transmission jack and a torque wrench, this guide walks through how to replace a clutch yourself from diagnosis to road test, with the torque sequence, alignment checks and mistakes that cause most failures. Most experienced home mechanics budget six to ten hours for a first attempt; updated for 2026, the steps below are the same ones a shop would run.
Table of Contents
- What You Need
- Step-by-Step: How to Replace a Clutch Yourself
- 1. Confirm the clutch failure and inspect the transmission
- 2. Gather the correct parts and tools
- 3. Disconnect the battery and drain the coolant
- 4. Remove the transmission safely
- 5. Remove the old clutch and inspect the flywheel
- 6. Check or replace the pilot and release bearings
- 7. Install the new clutch and reassemble the transmission
- 8. Bleed, reconnect and test the new clutch
- Common Mistakes
- Frequently Asked Questions
- Conclusion
What You Need
Two separate lists matter here: the parts, and the equipment. Buying the wrong clutch disc is an expensive way to learn that clutch kits are vehicle-specific, so confirm everything against the service manual for your exact make, model, engine, transmission and production year before you order.
Parts and consumables
- Clutch kit — disc, pressure plate and release bearing as a matched set. Buy the complete kit rather than mixing a disc from one brand with a cover from another.
- Flywheel — or a resurfacing service. A dual mass flywheel is a separate decision; see step 5.
- Pilot bearing and guide tube — these wear quietly and are usually cheap to include now.
- Release mechanism parts — clutch fork, fork pivot ball, cable or the master and slave cylinders if the hydraulic system is being opened.
- Transaxle or transmission fluid — the correct grade and quantity for your gearbox. Not all are the same spec.
- Coolant — if the vehicle’s clutch access requires draining it, as many front-wheel-drive cars do.
- New torque-to-yield fasteners — pressure plate and flywheel bolts where the manual specifies one-time-use hardware. Do not reinstall stretch bolts.
- Seals, gaskets, clips and cotter pins — anything single-use goes in the bin, not back on the car.
Tools and equipment
- Hydraulic jack plus four rated jack stands, with enough stand height for working underneath — tall stands are common in this job.
- Transmission jack with a saddle rated for the gearbox weight. This is strongly preferred to improvised support; forum mechanics describe the transmission and the access around it as the hardest part of the job, not the clutch itself.
- Clutch alignment tool — a plastic mandrel that fits the pilot bearing bore and the pressure plate dowels. If it does not slide in and out of the new disc freely, stop and find the right tool.
- Flywheel holder or locking tool so the crankshaft cannot turn while you torque fasteners.
- Calibrated torque wrench in the range the manual specifies, plus a flex head and wobble extension for bellhousing bolts.
- Metric sockets, ratchets, breakers and Allen keys sized to the fasteners on your specific vehicle.
- Brake cleaner and lint-free wipes for cleaning flywheel and mating surfaces.
- Engine hoist or strong lifting device if the powertrain must come down as a unit.
Safety gear and workspace
Gloves, eye protection and a fire extinguisher near the work area, plus a drip tray and absorbent material under the car. Drain fluid into labelled containers and take it to a proper collection point. If your own garage floor is the workspace, cover it — a transmission weighs far more than you want to discover through a dropped jack stand.
Step-by-Step: How to Replace a Clutch Yourself
The sequence below runs from confirming the fault to the first drive. Work through it in order and follow your service manual for every torque figure, since the numbers change with engine and model year.
1. Confirm the clutch failure and inspect the transmission
Before you order parts, prove the clutch is what failed. Rev the engine in neutral against the brake and watch the tachometer: if it climbs without the car moving under load, the disc is slipping. A stiff pedal points at the master cylinder or slave cylinder, while a pedal that feels normal but a car that won’t hold gear usually points at the release bearing or fork.
Check that the clutch cable is intact, properly routed and adjusted, or that the hydraulic system has fluid and no external leaks. A worn throw-out bearing often chirps or rumbles when the pedal is pressed and quiets when released, which is a quick way to tell a release bearing fault from a slipping disc. Then inspect the bellhousing opening for access: if you cannot get a socket and a torch into the space where the transmission bolts sit, stop there and plan the lift properly before buying anything.
A cheap test: with the parking brake on and the clutch out in neutral, put the transmission in a high gear and briefly lift off the throttle. If the engine stalls, the clutch is still holding. If it revs freely, it is not.
2. Gather the correct parts and tools
How to replace a clutch yourself without ending up with a driveline that shudders every time you pull away starts with the parts list. Match the clutch kit to the engine and transmission, not just the model. Verify the disc diameter, spline count and overall height against your manual, and confirm whether the flywheel is a plain or dual mass unit. On a dual mass flywheel, the secondary mass and its needle bearing get noisy with age, so replacing it with the clutch often makes sense.
Plan to replace the throwout components rather than reuse them. Release bearing, pilot bearing, fork pivot ball and clutch cable are all wear items that are inexpensive now and cause expensive damage later. If your vehicle uses a cable, replace it if there is any rust or fray. If it uses hydraulics and the fluid is dark or has particles, the master and slave cylinders and the fluid all go in.
3. Disconnect the battery and drain the coolant
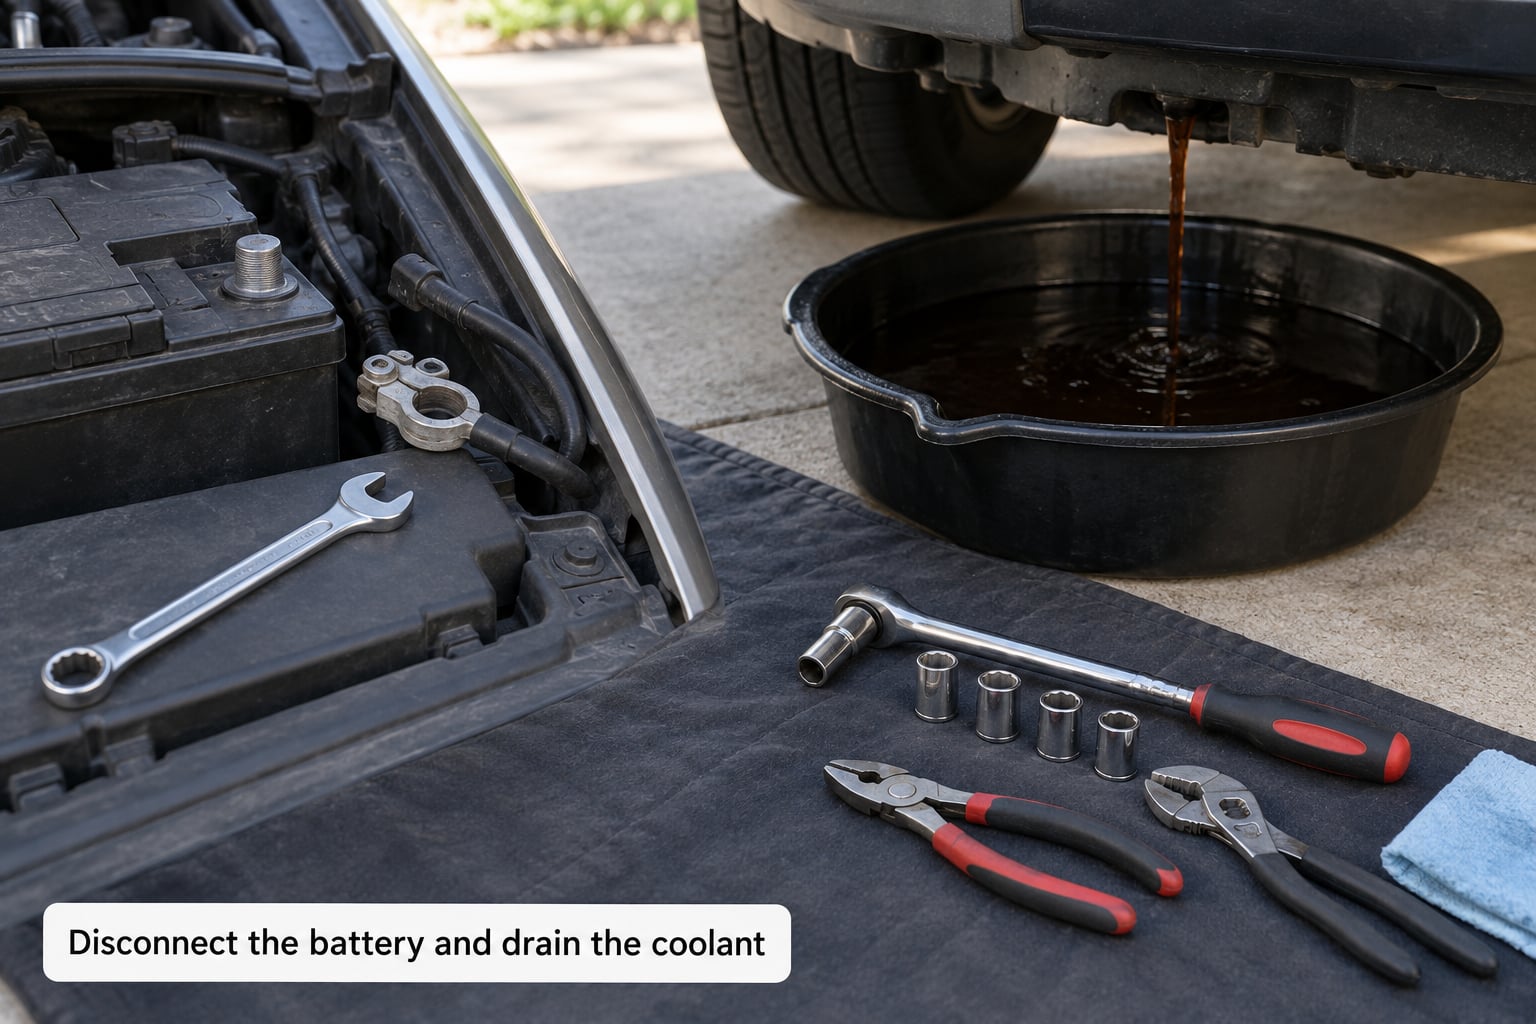
Isolate the battery before any electrical work. Switch off, take the key out, then disconnect the negative terminal first and secure the cable clear of the terminal so it cannot touch it while you work. Our guide to changing a car battery safely covers the terminal-cleaning side of it if yours are crusty.
Drain the fluid your procedure requires. Most front-wheel-drive layouts lose coolant when the transaxle comes out, because the coolant-to-oil cooler sits on the transmission. Put a pan under the drain plug, take a photo of the fluid level on the dipstick or fill port before you start, and match the coolant mix the manual calls for. Dispose of the old fluid properly rather than pouring it down a drain.
While the engine is cold, disconnect wiring and hoses that block access: battery cables, the reverse light wiring, the oxygen sensor connector where it runs to the exhaust, coolant hoses through the bellhousing area and any shift interlock or solenoid connectors. Photograph every connector before you pull it.
4. Remove the transmission safely
Set the transmission jack under the gearbox before you unbolt anything, and make sure it can be raised to bellhousing height. Take weight off the mounts as the manual describes, then work through the connections in this order: driveshaft or drive axles, shift linkage, clutch cable or slave cylinder, starter motor, remaining wiring, and finally the engine and transmission mounts.
On a front-wheel-drive car you will usually need the axles out. Some Volkswagens have the axles bolted to the hub at the transaxle, so they come off at the hub with a large Allen key; others need the axle nut removed and the hub and strut separated to free the stub shaft. Some subframes, sway bars and exhaust sections come out too. If your car uses a MacPherson strut, releasing the lower ball joint follows the same ground rules covered in how to replace struts yourself. Fords often put the clutch and shifter linkage in a bracket on the front of the transmission rather than on the bellhousing, so look there for the cable end.
Support the engine as well as the gearbox if the mounts are both off. Then remove the bellhousing bolts in several passes, crossing the pattern, and gently separate the housings. Pry, do not force — and never use the bolts to pull the transmission into alignment. Keep the transmission level as it comes down and protect the input shaft splines with a bag or a piece of cardboard, because a bent or hooked spline means the gearbox will not slide home later.
5. Remove the old clutch and inspect the flywheel
With the transmission clear, back the pressure plate bolts out a few turns at a time in a cross pattern so the cover releases evenly. Once they are free, the cover comes off with a light tap. Lift out the disc and note which way it was facing if the manual marks it. Pull the release bearing off its guide tube and check the friction face of the disc for heat checking, cracking, glazing or obvious wear.
Look at the flywheel now. Run a straightedge across the friction face and check for hot spots, and read the surface for cracks radiating from the bolt holes, scoring or a step where the friction face meets the outer edge. Worn depth marks on some manual flywheels are machined into the metal; a disc that has run down to them is finished.
Four checks decide the flywheel: scoring deep enough to feel with a fingernail, visible cracking, measured thickness below the service minimum, or a heat spot. Any of those and you replace it or have it machined. On a dual mass flywheel, play in the secondary mass or a rattle that changes with revs is the reason to replace it outright rather than resurface. Remember that thinning the flywheel changes clutch fork pivot distance, which is another reason the manual’s figures matter.
6. Check or replace the pilot and release bearings
The pilot bearing supports the input shaft and the tip of the crankshaft when the clutch is engaged. Spin it by hand: it should be smooth, quiet and free of grit or rust, with no play in the outer race. If it feels rough, pitted, seized or noisy, replace it, and only ever pry against the outer race. Forgetting this bearing is a common and costly mistake, because a damaged pilot works straight into the crankshaft nose.
Do the same for the release bearing. It should spin freely and quietly, and its contact face should be smooth. Replace the clutch fork if the pivot ball is pitted, the fork is worn at its contact pad or the fork is seized in its bore. Grease the fork and pivot lightly on the contact surfaces only — a wet pivot collects grit and causes the stick-then-jump pedal feel. A brand new clutch will not fix a failed release mechanism, so if the bearing, fork or hydraulic slave was worn, replace it now.
7. Install the new clutch and reassemble the transmission
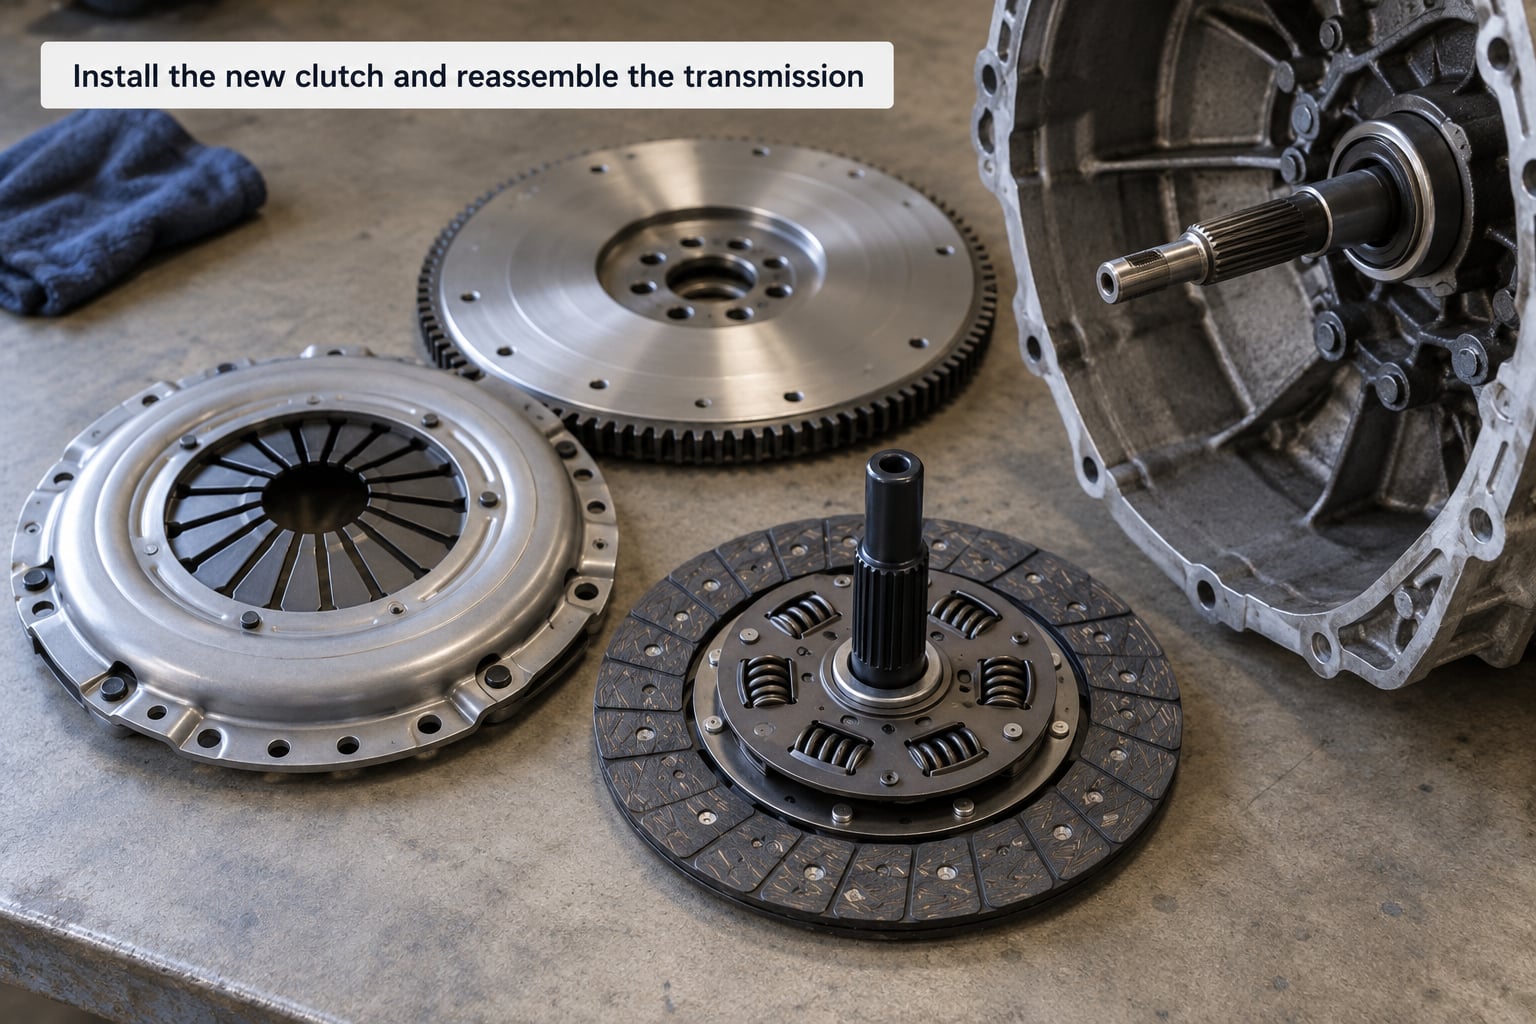
Clean the flywheel friction face and the pressure plate face with brake cleaner and a lint-free cloth. Oil or grease on either surface causes judder the moment the clutch bites, and you cannot fix it without taking the whole assembly apart again.
Fit the clutch alignment tool into the pilot bearing bore, slide the disc onto it with the friction faces facing the flywheel, then lower the pressure plate over the dowels. Check the orientation against your manual: on many applications the sprung hub faces the transmission. The tool must slide in and out of the disc without force. If it binds, you have the wrong tool or a warped disc.
Fit the pressure plate bolts finger-tight, then torque them in a star pattern, usually three or four passes, following the manual’s figures and any specified turn angle. Keep the alignment tool fitted until the transmission is nearly home. Before reinstalling, run a thin film of assembly lubricant on the pilot bore, the input shaft splines and the release bearing contact face where the manual calls for it.
Offer the transmission up to the engine by hand first. The input shaft should enter the pilot bore on its own. If it will not go in by hand, do not reach for the bolts; back it out, check the alignment tool is in place, confirm the mounts are lined up, and inspect the splines for a hook or burr. Mechanically this job is not complicated, but the alignment is unforgiving and the weight is the real problem.
Torque the bellhousing and mount bolts to specification in the pattern given, then remove the alignment tool, install the new clutch slave or fork, and refit the cable or re-bleed the hydraulic system.
8. Bleed, reconnect and test the new clutch
How to replace a clutch yourself is only half finished until the fluids are back in and the pedal feels right. Refill the transmission with the specified fluid and grade to the correct level, and refill the coolant to spec if you drained it. A gearbox running low on oil is the most common complaint reported after a home clutch job, so double-check the level with the car level and the fluid at operating temperature if your manual specifies it.
If your clutch is hydraulic, bleed the system with the transmission in gear and the clutch pedal held down while a helper pumps, then open the bleeder nipple until fluid and bubbles stop. The technique is the same as bleeding brake lines, covered in our brake line guide, and the pedal must end up firm rather than sinking to the floor.
Walk around the car and check everything you disconnected: no oil on the bellhousing mating face, no coolant weeping, no loose connectors. Turn the key. The pedal travel should feel similar to before, with a small amount of free play and then a firm bite point partway up. A sticking or jumping bite point means a fork or pivot problem, not a clutch problem.
Test the engagement in the driveway first, in first gear, at walking pace. Then take a short low-speed road test: ease through every gear, check for grinding on engagement, listen for squeal or rumble, and watch for slip when you ask for acceleration in a low gear. If the engine revs without the car pulling, stop driving and check the clutch and the alignment.
Common Mistakes
Most failed home clutch jobs come down to one of the same handful of errors, and each one has a straightforward fix.
- Fitting an incompatible clutch — wrong disc diameter or height. Confirm against the manual and the old disc’s markings before ordering; a mismatch shows up as slip or immediate grab.
- Reusing a flywheel that needed replacing — a scored or cracked flywheel causes judder no matter how good the new clutch is. Check the four conditions above and replace or machine it.
- Skipping the alignment tool — the disc sits crooked and the car judders under power. If the tool will not fit freely, do not guess.
- Tightening the pressure plate evenly — going around in a star pattern, in stages, to the specified figure and any turn angle. One-at-a-time tightening bends the cover.
- Reusing worn release parts — a free-spinning release bearing today is a scratched fork and a failed slave cylinder next year. Replace the throwout parts.
- Forcing the transmission home — it will not line up, so the cause is alignment, mounts or a damaged spline. Find it rather than tightening the bolts to force it.
- Putting the wrong fluid in the gearbox or forgetting to fill it at all. Use the grade and quantity your manual specifies.
- Skipping the leak and engagement checks — a dry-shifting test after reassembly catches a problem in the driveway instead of on the motorway.
Two more worth naming: not tightening the wheel nuts after lowering the car, which is a simple one, and setting a clutch cable or pedal free play without the manual’s specified clearance. Too little free play keeps the release bearing spinning and wears it out quickly; too much makes the pedal vague and can leave the clutch partly engaged.
Know where to stop. If you cannot support the transmission safely, cannot reach the bellhousing bolts with rated equipment, or your vehicle needs subframe or structural work you have not done before, this is the point to hand it to a shop. The clutch itself is not the hard part. Access and weight are.
Frequently Asked Questions
Can I replace a clutch myself?
Yes, if you have a lift or tall jack stands, a transmission jack, a torque wrench and a clutch alignment tool, and you are comfortable removing a transmission. Experienced home mechanics usually finish in six to ten hours. If your car needs subframe, strut or exhaust work you have never done, or you cannot support the gearbox safely, a shop is the cheaper option.
How long does it take to replace a clutch?
A competent workshop typically completes a clutch replacement in three to four hours, excluding flywheel machining time. Experienced DIYers report six to ten hours for a first attempt once the learning curve and the awkward access are included. Budget the extra time for rusted fasteners, seized axles and a transmission that is not lifting as cleanly as the manual suggests.
What special tools are needed to replace a clutch?
You need a transmission jack with a properly rated saddle, a clutch alignment or centring tool, a flywheel holder so the crankshaft cannot turn, and a calibrated torque wrench with a flex head and wobble extension for the bellhousing bolts. A good torque wrench is worth buying; the alignment tool, flywheel holder and transmission jack can all be rented for a weekend.
Do I need to bleed the clutch after replacement?
Only if your vehicle uses a hydraulic clutch. With the transmission in gear and the pedal held down, have someone pump the pedal while you open the bleeder nipple until fluid flows without bubbles, then repeat. Cable-operated clutches need no bleeding, but the cable still needs adjusting to the free play specified in your service manual.
Should the flywheel be replaced with the clutch?
Inspect it while the transmission is out and decide then. Replace or machine it if the friction face is scored deeply, cracked, heat-spotted, or has worn below the service minimum thickness. Dual mass flywheels are usually replaced with the clutch if the secondary mass is noisy or has play, because machining them is limited and they are a wear item anyway.
Why is my new clutch grabbing or slipping?
An immediate grab or judder usually means the clutch disc was installed backwards, the alignment tool was missing or bent, or oil or grease got onto the friction surfaces. Slipping under load points to a pressure plate or disc that is not clamping fully, often from under-torquing or uneven tightening. Re-check the bolt sequence and the disc orientation before replacing parts again.
Conclusion
To replace a clutch yourself, start by proving the fault is the clutch and not the release system, then order parts matched to your engine, transmission and production year. Support the transmission on a proper jack, align the new disc with the alignment tool, torque the pressure plate in a star pattern to your manual’s figures, and check for leaks and correct engagement before driving away.
Give yourself a full day, keep the service manual open on the torque specifications, and photograph every connector and hose before it comes off. If the bellhousing area is inaccessible or you are not confident supporting and aligning the transmission, have a qualified mechanic handle that part. Once it is in, break the new clutch in gently over the first few hundred miles: light throttle, soft shifts, no hard launches.