
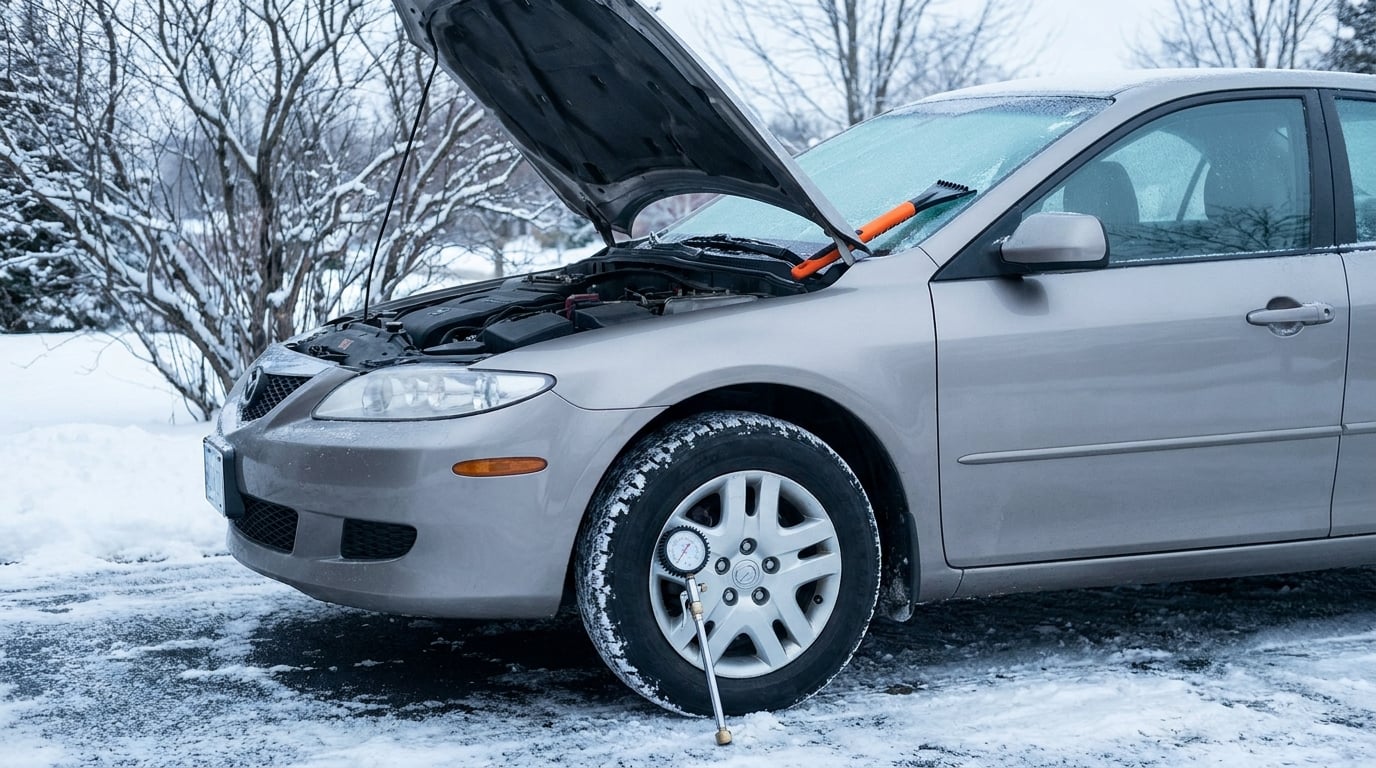
Knowing how to prepare your car for winter comes down to six things: a 12V battery that passes a load test, tires sitting at cold inflation spec with usable tread, coolant and washer fluid rated below freezing, brake pads and rotors with life, every light and wiper working, and an emergency kit in the cabin. Most of it is a Saturday morning of work, and doing it in October rather than during the first storm is the whole difference.
The reason winter breaks cars is simple physics. Cold slows the chemical reaction inside a lead-acid battery, so a marginal battery that started fine in September stalls at minus ten. Air contracts as it cools and tire pressure falls roughly 1 psi for every 10F the temperature drops. Oil, coolant, and washer fluid thicken or approach their freeze point. None of that announces itself, which is why the checks below are about measuring rather than eyeballing.
Do these in order. Battery first, because a dead battery is the failure most likely to strand you and the one least likely to warn you. Tires second, because they are the only contact patch you have. Everything else follows.
Table of Contents
- What You Need
- Step-by-Step: How to Prepare Your Car for Winter
- 1. Inspect and Check Winter Tires
- 2. Check Battery Health and Charging
- 3. Inspect Brakes, Steering, and Suspension
- 4. Check Fluids, Oil, and Weather Protection
- 5. Inspect Tires, Underbody, and Exterior Components
- 6. Make the Cabin Safer and More Visible
- 7. Prepare an Emergency Kit and Roadside Plan
- 8. Run a Final Cold-Weather Test
- Common Mistakes
- Frequently Asked Questions
- How early should I prepare my car for winter?
- Do I need winter tires if my car has all-season tires?
- How do I know whether my car battery is ready for cold weather?
- What car fluids should I check before winter?
- Should I wash road salt off my car during winter?
- What should I keep in my car for an emergency during a snowstorm?
What You Need
Most of this list costs less than a single shop visit, and most items live in a garage drawer already.
- A tire pressure gauge rated for the range your tires run in, plus a tread depth gauge or the quarter and a penny
- A digital multimeter or a battery tester with a load test
- A socket set and a wrench for the battery terminals and wheel fasteners
- Wire brush or terminal cleaner, baking soda, and rubber gloves for corrosion work
- Winter-rated windshield washer fluid and a funnel
- An engine oil dipstick and the owner’s manual for your exact vehicle
- An ice scraper, a stiff snow brush, a small LED flashlight, gloves, and a reflective vest
- Jumper cables or a portable jump starter, a first-aid kit, water, and a charged phone
- A notebook or your service records, so you know when the battery, belts, and fluids were last replaced
Two numbers matter more than any tool. Find the cold tire pressure on the driver’s door jamb sticker, not on the tire sidewall, and find the coolant specification and oil viscosity in the owner’s manual. If the manual specifies a synthetic blend or a specific coolant chemistry, follow the manual over anything generic in a parts store aisle. For long-term storage or a garage you are worried about, our guide to keeping a garage from freezing in winter covers the building side of the same problem.
Here is the short version, so you can see the whole shape before the detail:
- Test the battery and clean the terminals, because cold cranking demands more power than a tired battery can give.
- Set cold tire pressure to the door jamb spec and measure tread depth on all four.
- Confirm the coolant mix protects to at least 20F below your expected low.
- Switch to washer fluid rated for deep cold and check the oil weight against your manual.
- Look at pads, rotors, brake fluid, and steering response together.
- Replace worn wiper blades and clean every light lens.
- Build the emergency kit and confirm roadside coverage before the first storm.
- Recheck pressure monthly and recheck the whole list after the first hard freeze.
Step-by-Step: How to Prepare Your Car for Winter
1. Inspect and Check Winter Tires
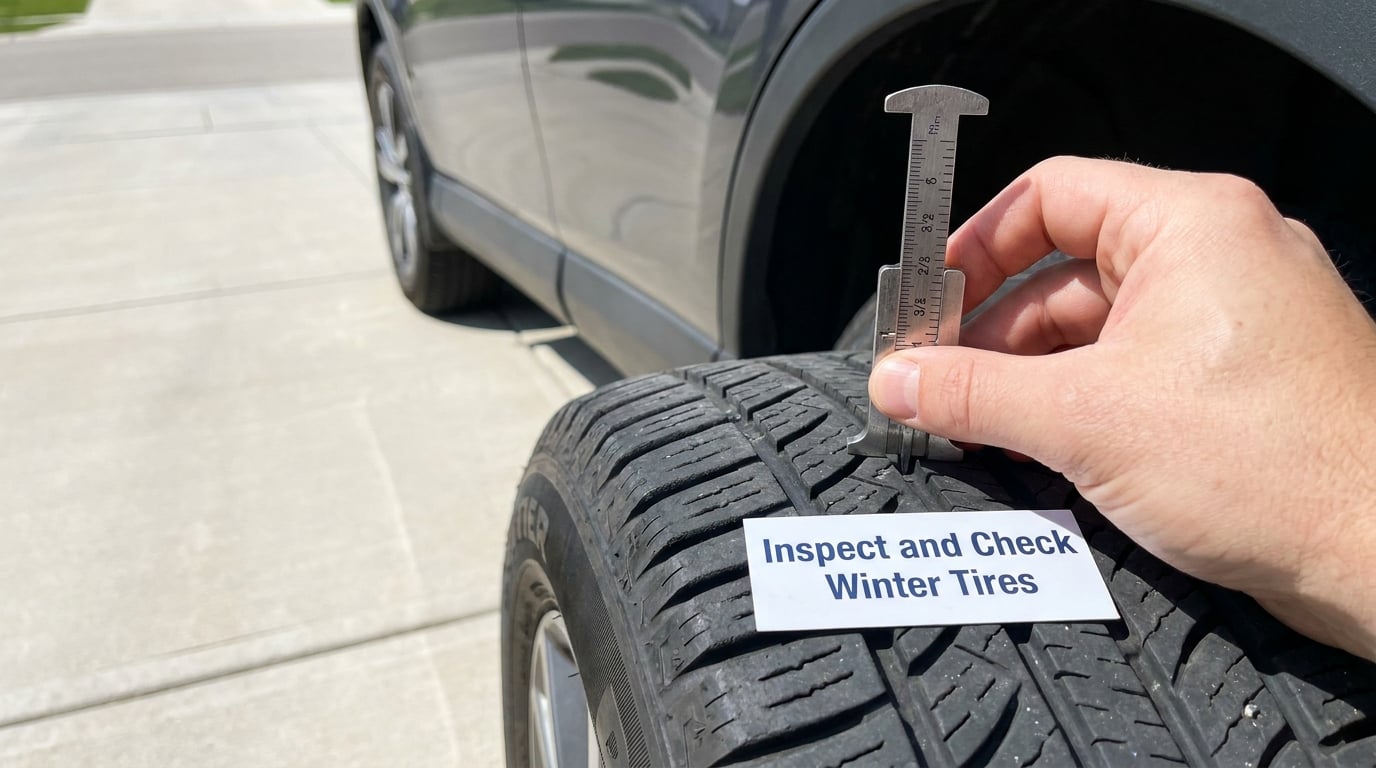
Read the cold inflation spec on the driver’s door jamb and set every tire to it, because the sidewall number is a maximum, not a target. Pressure drops about 1 psi per 10F, so a car inflated to 35 psi on a 70F September afternoon can sit near 28 psi on a freezing January morning. Low pressure changes the contact patch and the way the tire heats up under load, and it is the quiet reason a tire that passed inspection in October feels vague by December.
Measure pressure cold, before driving at least three hours, and check all four plus the spare. The 30-60-90 rule is the simple version of the physics: 30 psi is the usual starting point, 35 is a reasonable all-around value, and 40 or more suits heavy loads, higher speed, or a tow bar. Your jamb sticker beats every one of those numbers.
For tread, put a quarter in the groove and look at the top. If you cannot see any of George Washington’s head, you are under the usual 2/32 inch legal minimum, and that minimum is not a winter minimum. Aim for at least 4/32 inch if your region sees snow. Winter or all-season tires use a softer compound that stays flexible below about 45F, which is why the same tread depth grips differently in January. Check sidewalls for cuts and bulges, and confirm the tire date code is not more than six or seven years old even if the tread looks new. Rotate according to the manufacturer, and if you expect sustained snow, the widely used 7 7 rule says buy seven winter tires, use them for seven months, and retire them at roughly 7,000 miles.
2. Check Battery Health and Charging
Test the battery, do not just look at it, because roughly half of battery failures happen in cold months and many of those batteries showed nothing wrong in September. A battery older than three years deserves a load test regardless of how it starts, since capacity fades from the inside out.
Start with the terminals. Disconnect the negative cable first, then the positive, brush off the white or green powdery corrosion with a wire brush and a paste of baking soda and water, and reconnect positive before negative. Corrosion raises resistance, and a marginal battery with a crusty terminal can fail to crank on a cold morning for no other reason.
Then measure. With the engine off, a fully charged 12V battery reads about 12.6 volts and should not sag below roughly 10 volts during a brief crank. With the engine running, charging voltage at idle usually sits between 13.7 and 14.8 volts; below about 13.4, suspect the alternator or a voltage regulator. Most auto parts stores will load test for you free, and a printout gives you a record. If a car sits unused for weeks, a battery maintainer on a maintenance setting keeps it topped up without the risk of cooking a battery with a full-size charger.
3. Inspect Brakes, Steering, and Suspension
Look through the spokes at the pads and rotors. Two millimeters or less of pad material, rotors scored or rust-spotted on the braking surface, or a lip forming on the rotor edge all mean a shop conversation before the first freeze, since cold metal contracts and brake response on ice already demands more distance.
Check brake fluid for the dark color and the fluid level in the reservoir. Brake fluid absorbs moisture, and wet fluid gives a longer pedal. If the fluid is clear brown, has grit in it, or the reservoir was never serviced on the manual’s schedule, flushing it is a cheap fix compared with a seized caliper later.
With the car parked and the engine idling, turn the wheel lock to lock and note any play, binding, or clunking. Then drive slowly in a parking lot and listen for grinding, groaning, or a vibration in the pedal. Any noise, any pull to one side, or any fluid spotted on a rotor or under the exhaust is a sign to stop and have a qualified mechanic look at it. I am comfortable with a pad and rotor judgment from a flashlight; I am not comfortable telling you a caliper is sticking based on a driveway.
4. Check Fluids, Oil, and Weather Protection
Pull the dipstick with the engine warm and the car on level ground, wipe it, reinsert, and read it. Then check the oil’s color and smell: dark and gritty with a burnt smell points to contamination rather than simple age, and on a high-mileage BMW-style engine that is worth a closer look, which is what our guide to checking for engine oil sludge walks through.
Consider the viscosity against the manual. Many manufacturers permit or specify 5W-30 for sub-zero driving, and a manual that says so beats habit. Never assume a heavier oil is the winter answer.
For coolant, verify the freeze protection with a cheap refractometer or a dip strip rather than by color, since coolant changes color as it ages and a dark fluid can still be correctly mixed. A 50/50 mix of the specified coolant and distilled water protects to roughly minus 34F, and a 60/40 mix to about minus 62F. Never run 100 percent antifreeze: straight coolant actually has a lower freeze point than a proper mix because water is the part that freezes.
Only open a cooling system when the engine is completely cold. A hot system is pressurized, and cracking the cap sprays scalding coolant across your arm. If the reservoir is low, the level is inconsistent between cold and hot, or you see rust-colored water or a sweet smell in the exhaust, let a shop do it.
Finish by draining the washer reservoir completely and refilling it with fluid rated well below freezing. Then top up power steering and brake fluid to their marks, and check the diesel fuel grade if your vehicle runs on diesel, where wax from the fuel can gell in the lines once temperatures drop.
5. Inspect Tires, Underbody, and Exterior Components
Confirm every wheel fastener is torqued to the manufacturer’s specification with a torque wrench, since a loose wheel is the one winter failure with no warning at all. Have a shop do the retorque if you do not own a torque wrench and the manual gives a number.
Crouch under the car with a flashlight and look along the exhaust pipe and muffler for rust holes, especially at the seams and the catalytic converter, plus any dripping fluids, torn CV boots, or a hanging piece of underbody shield. A leak in the exhaust ahead of the catalytic converter can push carbon monoxide into the cabin when you are driving slowly with the windows up, which is exactly what happens in stop-and-go winter traffic.
Look for road salt and mud caked around the wheel wells, tie rods, and brake lines, and wash that away rather than letting it sit for four months. Salt destroys rubber and steel faster than anything else on a winter road.
6. Make the Cabin Safer and More Visible
Replace wiper blades that streak, chatter, or freeze to the glass. Winter blades have a different rubber compound and usually cost very little; install them before the first storm, not during it. Scrub the windshield with a glass cleaner and a microfiber cloth, since the residue from old wiper blades turns a dirty windshield into a frosted windshield in freezing fog.
Verify the washer nozzles spray and are not aimed at the hood. Then test the defroster: the front defroster should blow air within a few minutes of the fan reaching speed, and the rear window defogger should make its grid visibly warm. A blocked cabin air filter, a plugged heater core, or a sticking blend door will show up as air that blows but never gets warm, and that is a heater core flush rather than a blend of setting changes.
Clean the headlight, fog light, and tail light lenses inside and out, since salt haze cuts output badly. Test every bulb, including the high beams, brake lights, turn signals, and the license plate lamp. Check that mirrors fold out and clear, that every window and door operates freely, and that the door handles and locks are lubricated with a winter-safe product so you are not fighting a frozen handle at seven in the morning.
7. Prepare an Emergency Kit and Roadside Plan
Pack the kit once and leave it in the car. A plastic bin or a duffel in the trunk beats loose items that migrate around on corners.
- Ice scraper and stiff snow brush
- Portable jump starter plus a set of cable clamps, with both charged
- LED flashlight with spare batteries
- Warm gloves, a hat, a wool blanket, and a reflective vest
- First-aid kit, bottled water, and a few high-energy food bars
- Bag of traction material such as kitty litter or coarse salt for putting wheels down on ice
- Small bills and a spare car key
Keep a phone charged and mount it where you can reach it without leaving the vehicle. Confirm your roadside assistance plan is active and note the number somewhere you will not need to search for. If the battery does die, turn on your hazard lights, stay in the vehicle with the exhaust pipe clear, and signal for help rather than standing in the roadway.
Two more preparations with real payoff. A small towel or dedicated snow brush kept in the cabin means you can clear the roof and all four windows and the tailpipe before you pull away, which matters more for other drivers than it does for you. And if your region gets real snow, a block heater on a timer keeps the engine block warm through the night, which cuts fuel dilution, makes the first start far easier, and takes repeated deep cold out of the equation.
8. Run a Final Cold-Weather Test
Sit in the parked car and run through the whole interface in one pass. No warning lights lit on the cluster, and if a light does come on, read it in the manual rather than clearing it and hoping.
Check headlights, hazards, brake lights, horn, and the wipers with washer fluid flowing. Turn the heater and both defrosters to maximum and confirm warm air and a clearing windshield within a few minutes. Check tire pressure one more time cold. Confirm the fuel level sits above half, since a full tank reduces condensation inside the tank and gives you range if conditions close a road. Then start the engine, let it idle without revving, and watch for warning lights that appear at idle and disappear at speed.
If anything in that pass is unreliable, schedule a professional inspection before the first sustained cold. Also write down the date you did the work. Next year you will be glad to know the battery is two years old rather than five, and the coolant has two winters left in it rather than none.
Common Mistakes
Here is what I see go wrong most often, and the correction for each.
Trusting a visual tire check. Tread that looks fine can still be at 4/32 inch and underinflated. The fix is to put a gauge on it, which takes two minutes and catches both problems at once. If you are still working out the right number, our winter tire PSI guide walks through the calculations.
Using the sidewall number as the target. That number is a maximum cold rating. The correct pressure is on the door jamb.
Deferring the battery because it starts fine. A battery passes until it does not, and the failure lands on the coldest, worst day of the year. Testing costs nothing at a parts store.
Refilling the washer reservoir in the driveway in February. If the bottle is not rated for the temperature you are driving in, the fluid freezes and you learn about it on the highway.
Topping off coolant and ignoring the mix. The level matters less than the freeze point. Buy a strip or a refractometer and check it.
Leaving warning lights alone. A tire pressure light means one or more tires are under spec, and a brake warning light means stop and have it looked at, not clear the code.
Driving without a plan for a breakdown. A jump pack, a flashlight, and a reflective vest in the cabin are not paranoia.
Two myths worth clearing out. Idling a modern car for ten to twenty minutes to warm it up is not helpful; it dumps fuel, adds moisture to the exhaust, and on a catalytic converter that has not reached temperature it increases pollution rather than protecting the engine. Drive gently for the first few miles instead. And 100 percent antifreeze is not stronger than a mix. Straight coolant has a lower freeze point than the specified water mix, which is why your manual calls for water mixed in.
Seasonally, the rhythm is simple. Do the battery, brakes, coolant, and oil in early autumn, before the first real cold. Set the tires and swap fluids in late autumn. Run the full pass again after the first hard freeze, because that is when pressure, starting, and defrost problems reveal themselves. Then recheck pressure every month or two through the season, and once a month is a habit most drivers drop by January.
Frequently Asked Questions
How early should I prepare my car for winter?
Start about four to six weeks before your first sustained freeze, which usually means late October in most regions. Do the battery, brake, coolant, and oil work first since those need a shop or a warm afternoon. Set cold tire pressure and swap to winter washer fluid in late autumn, then run the whole checklist again after the first hard freeze, because that is when low pressure, hard starting, and slow defrosting show up. The same schedule works for an early-winter region; a mild climate can compress it to a single pass.
Do I need winter tires if my car has all-season tires?
Good all-season tires with deep tread are a reasonable choice where snow is occasional and streets get plowed. If you drive regularly on unplowed roads, live somewhere that gets sustained snow, or park outdoors through the season, dedicated winter tires are worth it. Their softer compound stays flexible below about 45F, so they grip noticeably better in cold, packed snow and slush than the same tread depth in an all-season. The 7 7 rule is a good benchmark: seven tires, seven months, about 7,000 miles before retirement.
How do I know whether my car battery is ready for cold weather?
Get a load test rather than judging by how the car starts. A healthy fully charged 12V battery reads about 12.6 volts with the engine off and should not fall below roughly 10 volts during a brief crank. With the engine running, charging voltage at idle should sit between 13.7 and 14.8 volts. Clean corroded terminals first, since a crusty connection can cause a no-start on its own. Treat any battery older than three years as a retirement candidate regardless of test results, because cold cranking demands more than a tired battery can deliver.
What car fluids should I check before winter?
Check engine oil, coolant, brake fluid, power steering fluid, and windshield washer fluid. Verify the coolant freeze point with a strip or refractometer rather than by color, and aim for protection at least 20F below your expected low; a 50/50 mix protects to about minus 34F, while 60/40 reaches roughly minus 62F. Match the oil viscosity to your manual, which often permits 5W-30 in sub-zero weather. Open a cooling system only when the engine is completely cold. Never run 100 percent antifreeze, which has a lower freeze point than a proper mix.
Should I wash road salt off my car during winter?
Yes, and more often than you think. Salt attacks rubber, brake lines, and suspension components faster than anything else on a winter road, and caked mud around the wheel wells holds moisture against metal. Wash the underbody and wheel arches before the season starts, then again every few weeks once salting begins. Use car shampoo rather than dish soap, and rinse the underside if your local wash has an undercarriage spray. If you want to keep the film off for a few days, a waterless wash and a good wax or sealant on the paint and trim helps noticeably.
What should I keep in my car for an emergency during a snowstorm?
Keep an ice scraper and stiff brush, a portable jump starter or charged cable clamps, an LED flashlight with spare batteries, warm gloves, a reflective vest, a wool blanket, a first-aid kit, water, and a small bag of traction material such as kitty litter. Add a few small bills and a spare key. Store it in a closed bin so nothing slides around, confirm the jump starter is actually charged, and make sure your roadside assistance number is current. Clear the entire roof, all windows, and the tailpipe before pulling away.
If you only remember four things, remember these: load test the battery and replace it if it is older than three years, set all four tires plus the spare to the cold pressure on the door jamb, verify the coolant freeze point with a strip rather than by eye, and put a jump pack and ice scraper in the cabin. Everything else on this list is worth doing, but those four cause most of the winter problems and take the least time to fix. Do them in that order, then work down the list at your own pace.