
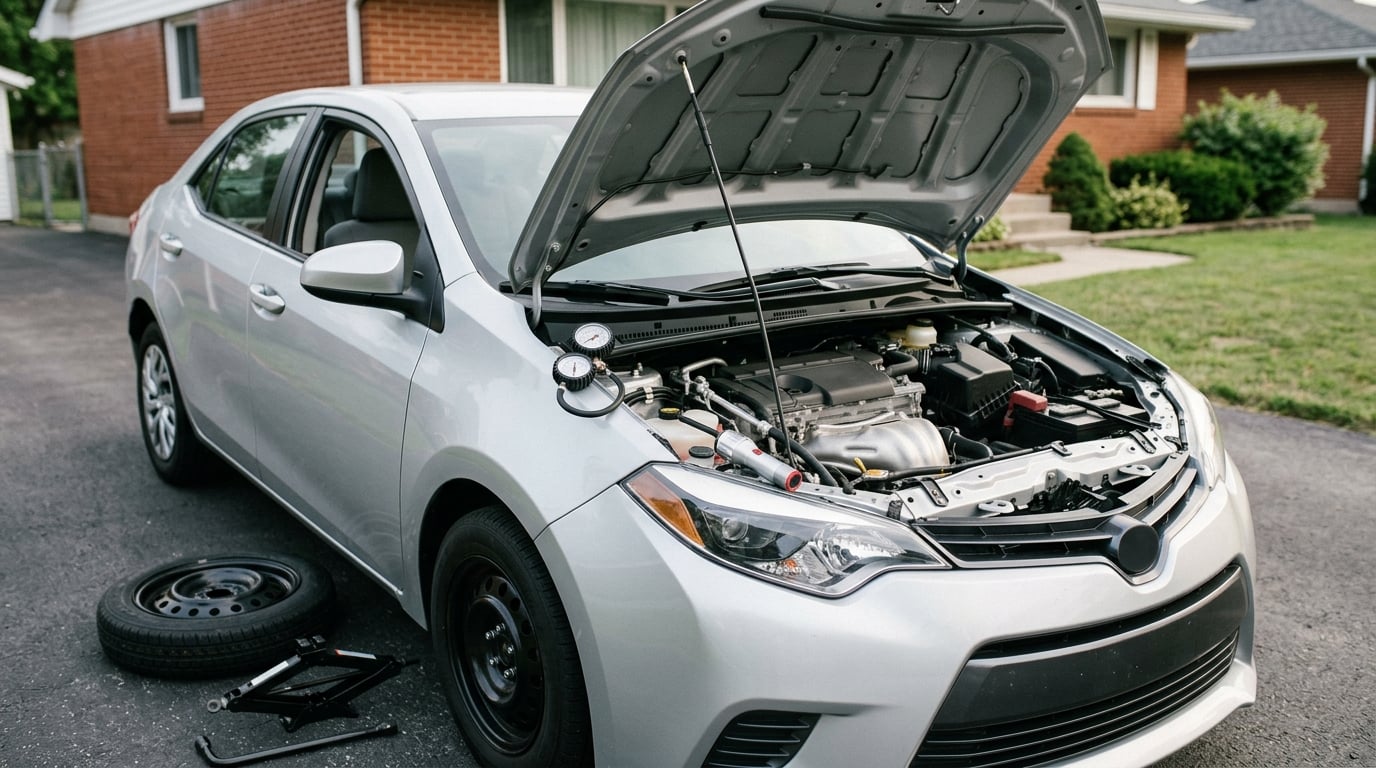
A road trip car inspection checklist should cover five things before anything else: tires, fluid levels, brakes, the battery, and lights. Everything past that, from the spare to the fuel door, is a smaller item that takes seconds once you know where to look. Most of it takes 25 to 40 minutes in your own driveway, and doing it a week out gives you time to fix whatever it turns up.
I run this walkaround before every long drive, and the reason it works is that it forces me to look at things I normally ignore until they make noise. The car tells you about most of its problems early, but only if you are close enough and paying enough attention to notice.
Below is the full road trip car inspection checklist, ordered the way I do it: outside first, then under the hood, then the cabin, then the load. Each item states the warning sign that matters and whether that failure should stop your departure.
Table of Contents
- Road Trip Car Inspection Checklist at a Glance
- 1. Inspect Tire Pressure, Tread, and Damage
- 2. Check Brake Pads, Rotors, and Fluid
- 3. Verify Engine Oil, Coolant, and Fluid Levels
- 4. Look for Leaks, Loose Parts, and Fluid Smells
- 5. Test the Battery, Charging System, and Starter
- 6. Confirm Lights, Indicators, and Reflectors
- 7. Examine Wipers, Glass, and Washer Fluid
- 8. Inspect the Steering, Suspension, and Wheel Bearings
- 9. Check the Exhaust and Gasoline Smell
- 10. Verify the Hood, Doors, Trunk, and Fuel Door
- 11. Assess the Spare, Jack, and Roadside Tools
- 12. Inspect the Cabin for Safety and Comfort
- 13. Load Luggage Without Overloading the Car
- 14. Complete a Final 10-Minute Roadside Recheck
- Frequently Asked Questions
- How early should I inspect my car before a road trip?
- Should I follow my car’s tire-pressure label or the number printed on the tire?
- Which warning lights mean I should not start or continue the trip?
- What should I inspect specifically on a BMW before a long drive?
- Can I drive a long distance if the check-engine light is on?
- Do I need a mechanic to complete a pre-trip inspection?
- Conclusion
Road Trip Car Inspection Checklist at a Glance
| Area | What to check | Warning sign | Stops the trip? |
|---|---|---|---|
| Tires and wheels | Pressure, tread, sidewalls, spare | Tread near 2/32 inch, bulge, exposed belt, uneven wear | Yes |
| Brakes | Pad wear, rotor surface, fluid level | Squeal, grinding, soft pedal, fluid below MIN | Yes |
| Fluids | Oil, coolant, washer, power steering | Level below MIN, dark or gritty oil, low coolant | Yes for oil and coolant |
| Leaks | Puddles, drips, wet spots, hoses | Puddle overnight, fresh fluid on hot exhaust | Yes |
| Battery and charging | Terminals, swelling, cranking | White or green crust, swollen case, slow crank, clicking | Usually |
| Lights | Head, brake, signal, hazards, plate lamp | Any lamp out, flickering, dim at night | Yes for brake and signal |
| Wipers and glass | Blade condition, washer spray, cracks | Torn blade, no spray, crack spreading from an edge | No, but fix before rain |
| Steering and suspension | Play, loose nuts, wear pattern, noise | Clunk over bumps, growl turning, steering slop | Yes for a clunk or growl |
| Exhaust and fuel smell | Leaks, loudness, odor | Gasoline smell, loud exhaust, hanging shield | Yes |
| Closures | Hood, doors, trunk, fuel door, locks | Anything that does not latch, fuel door left open | Yes for the fuel door |
| Spare and tools | Spare pressure, jack, lug wrench, key | Flat spare, jack that will not lift, missing wheel key | Yes |
| Cabin | Belts, mirrors, horn, airbag light, defrost | Seat belt will not latch, airbag lamp stays on | Yes for safety items |
| Luggage | Payload, weight placement, tie-downs | Over payload, loose bags near the driver, blocked view | Yes if over payload |
| Final recheck | Post-load walkaround, lights, documents | Any new fluid spot, tire pressure shifted after loading | Yes |
Four of those fourteen should never leave your driveway unresolved: tire damage, brake problems, low oil or coolant, and a gasoline smell. The rest can often be handled the evening before or on the road at a fuel stop, depending on the weather and how far you are going.
1. Inspect Tire Pressure, Tread, and Damage
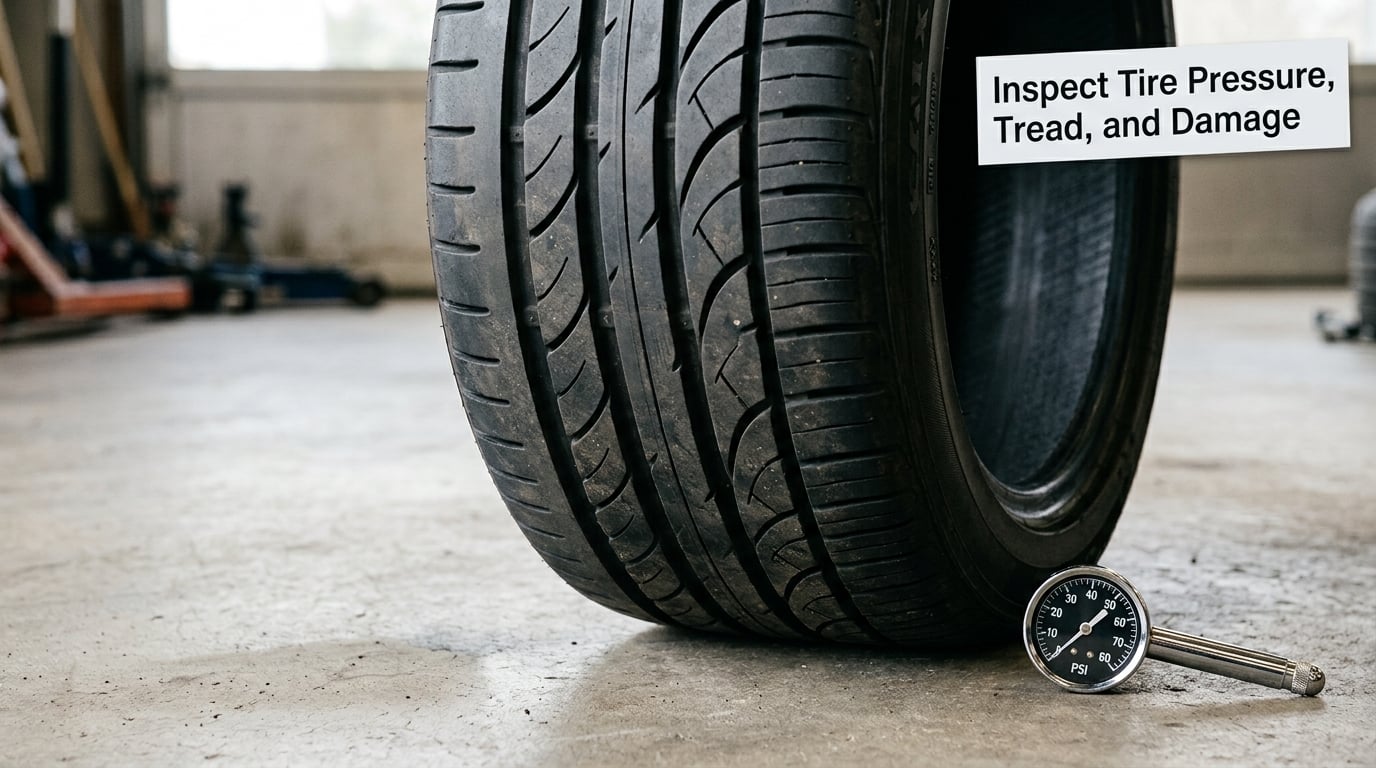
Read the recommended cold pressure from the placard on the driver’s door jamb, not from the number molded into the tire sidewall. The sidewall figure is a maximum rating, and running near it on a loaded car is how people end up with a blowout in the desert.
Check all four tires cold, before you drive more than a mile or so. A tire can lose a few PSI overnight from temperature changes alone, so an underinflated reading in the morning is not a fluke. Add air to the placard number, then recheck the spare, which is the tire most often left soft or empty.
For tread, look for the wear bars molded into the grooves. When tread reaches the top of those bars you are at roughly 2/32 inch, which is the legal minimum in most states and a poor number for highway rain. A US quarter stood on edge in a groove gives you a rough second opinion.
Run your hand along each sidewall. A bulge means the tire is being run underinflated or damaged and should be replaced, not topped up. Cracks, cuts, cords showing through the rubber, or a bubble in the sidewall are all stop signs. A tire that is worn flat on one edge while the other side still shows tread points to an alignment or suspension problem, not a tire problem.
2. Check Brake Pads, Rotors, and Fluid
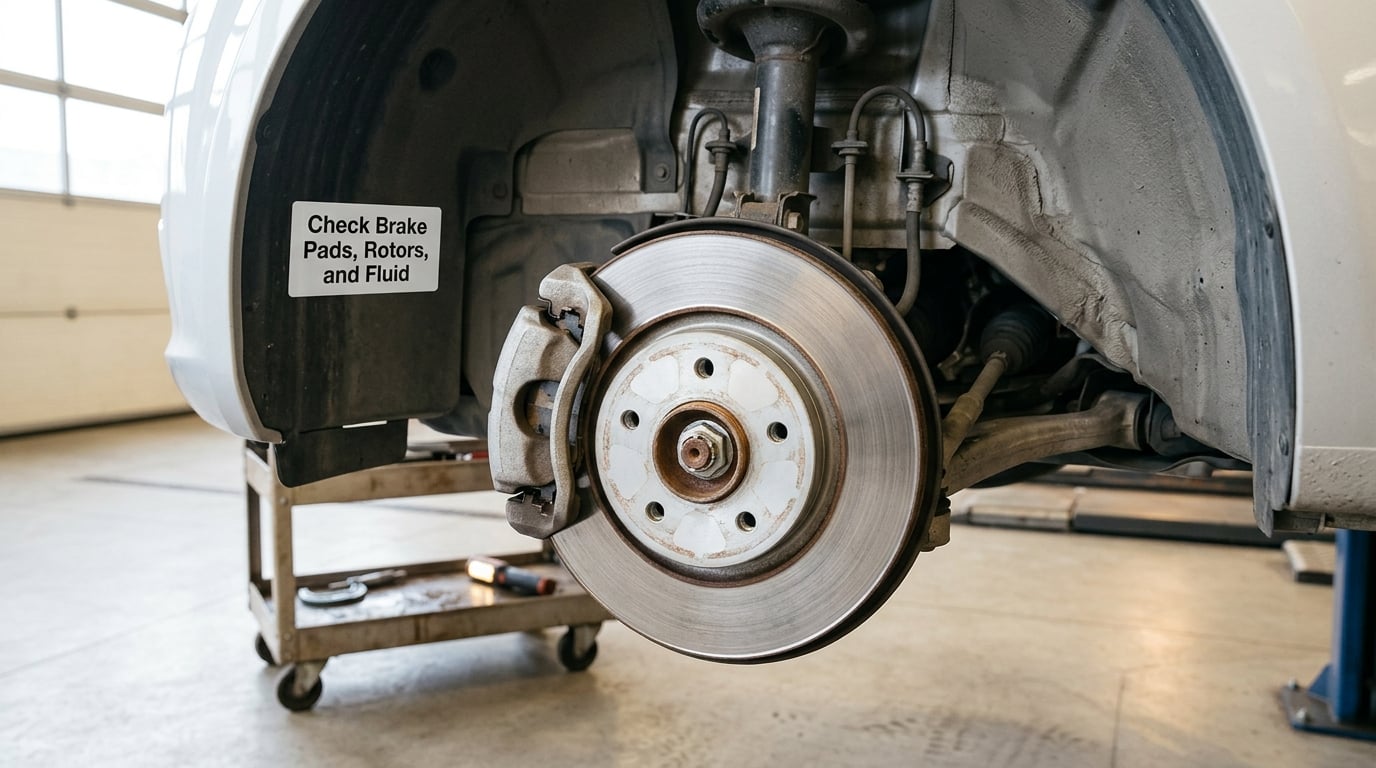
You can look at your brakes, but you cannot fully judge them from a driveway. What a visual check gives you is early warning: a pad worn close to the metal, a rotor with a deep groove or a rust line, a caliper with visible weeping.
Look through the spokes at the rotor face and run a finger across it. A smooth surface with light surface rust is normal on a car that has been sitting. Deep scoring, a hot spot, or a rotor with a visible crack is a mechanic job. A squeal that stops when you brake is usually a wear indicator telling you the pads are close to done.
Check the brake fluid reservoir level, which usually sits near the top of the engine bay on the driver’s side. Fluid low enough to reach MIN, or dark and cloudy rather than clear amber, needs attention before a long drive. Fluid that drops between service visits means a leak somewhere.
Feel how the pedal behaves. Firm pedal travel that stays firm is what you want. A pedal that goes soft, sinks toward the floor, or pulls to one side under braking is not a driveway problem, and neither is a grinding sound. If any of those show up, have a qualified mechanic look before you load the car.
3. Verify Engine Oil, Coolant, and Fluid Levels
Check fluids on a cold engine, before the first start of the day. Pull the dipstick, wipe it, reinsert it fully, then pull it again and read it between MIN and MAX. On most engines a reading near the middle is fine for a long loaded drive.
Look at the oil in the dipstick window and on the filler cap. Grit, a milky look, or a smell of fuel means something is wrong with the oil itself, not just its level. Dark oil on a high-mileage engine is not automatically bad either, so use the service history and the color chart on your container as a guide rather than color alone.
Open the radiator cap when the engine is cold and confirm coolant sits between MIN and MAX in the expansion or overflow reservoir. The level is cold-engine only, so judging it on a hot day at a rest stop will scare you for no reason. Make sure the cap is the correct pressure rating for the vehicle, since a wrong cap can fail at temperature.
Top off windshield washer fluid to the point where the fluid hits the windshield’s wiper sweep. Power steering fluid only applies on vehicles that have it, and again it is a cold check against the MIN and MAX marks. A reservoir a few ounces low is worth topping up; one that runs dry between trips is a leak you want a shop to find.
4. Look for Leaks, Loose Parts, and Fluid Smells
Start the engine, wait a minute, and look under the car while someone watches from a distance. A fresh puddle that grows, a steady drip, or a wet sheen on a subframe all mean something is moving that should not be.
Common locations are the radiator hose and the clamp at the upper radiator, the water pump weep hole near the front of the engine, the oil filter gasket, the transmission pan, and the front differential on rear-drive and four-wheel-drive vehicles. Clear fluid is usually coolant, dark fluid is oil, and sweet-smelling dark fluid is transmission fluid.
While the engine runs, listen for ticking, chirping, or a rising hum. Then check belt and hose condition with the engine off and cool. Look for fraying, cracking, gloss, or a hose that feels hard and cracked where it bends. A radiator hose that feels spongy or has a bulge is being replaced, not watched.
Check for loose fasteners and a rattle from loose shields or a heat shield. Never reach near hot exhaust parts or anything moving; if you cannot inspect something safely, that is a job for a shop. A new fluid spot on a hot exhaust component can mean coolant or oil is hitting something very hot, which is a serious fault rather than a top-up item.
5. Test the Battery, Charging System, and Starter
Open the hood and look at the battery before anything else. White or pale green crust on the terminals is corrosion, and a battery case that bulges or splits along the sides has failed. Either one deserves a replacement rather than a trip-long gamble.
Confirm the hold-down clamp is tight and that the terminals are firmly attached. Corroded terminals can be cleaned with a battery brush and a solution made for batteries, then dried and re-tightened. Disconnect the negative terminal first when working on a battery, and keep metal tools away from both posts at the same time.
Turn the key and listen. A slow, dragging crank, a repeated click without the engine starting, or headlights that dim noticeably while cranking all point to a weak or failing battery rather than a charging fault. Turn the engine on and watch the warning lights go out within a few seconds.
Most batteries last three to five years, so if yours is at the end of that range, a long trip is the wrong time to find out. A portable battery tester or a multimeter gives you a reading in a minute and removes the guessing. If the engine runs but the battery still reads low, the charging system is likely the culprit, and that is professional diagnostic territory.
6. Confirm Lights, Indicators, and Reflectors
Walk around the car with the engine running and go through every lamp one at a time. Low beams, high beams, parking lights, brake lights, front and rear turn signals, hazards, reverse lights, fog lights, and the license-plate lamp. Most take a minute and a half of clicking.
Ask someone to stand behind the car while you press the brake pedal, and swap the turn signal lever left and right to confirm each side flashes. Turn on hazards and check that both front and both rear blink together. If you are alone, back up to a wall or garage door so you can read the reflection in the paint.
Check the rear reflectors or side marker lights required on your vehicle, and confirm there is no fogged, cracked, or missing lens hiding a bulb. A headlight that is merely dim at night often means a yellowed lens rather than a bad bulb, and it is worth replacing before a route full of unlit roads.
A failed brake lamp or turn signal is the kind of defect I fix before leaving, because other drivers cannot see the problem and a stopped vehicle in the dark is a real hazard. A missing fog light or plate lamp can wait for a shop visit if the drive is short and daylight-heavy, but write it down so it does not get forgotten.
7. Examine Wipers, Glass, and Washer Fluid
Lift both wiper arms and inspect the blades edge-on. Look for fraying, splits in the rubber, a stiff or wobbly arm, or a blade that leaves streaks on a damp windshield. A torn blade smears grit across the glass, which is exactly what you do not want in rain, sleet, or bug season.
Run the washers and confirm fluid arcs onto the windshield rather than shooting over the roof or missing the glass. Clear a blocked nozzle with a straightened wire or a needle, and never use anything larger that could damage the plastic. Fill the reservoir until fluid reaches the top of the wiper sweep.
Look through the windshield for chips, cracks, and long scratches, especially anything spreading from the edge. A crack that runs from the edge inward is the one that grows, and glass repair is far cheaper before it becomes a replacement. Check the side and rear glass too, and clean any frost or grime that limits your view.
Adjust and clean both mirrors as part of the same job, and confirm you can see the full flanks of the vehicle from the driver’s seat. On tall vehicles or roof-box loads, mirror position matters more than usual, since a loaded roof box can change what you see out the side windows.
8. Inspect the Steering, Suspension, and Wheel Bearings
With the car parked and the engine off, turn the steering wheel gently from lock to lock and watch the tires. If they barely move, or they move at wildly different times, the steering or suspension needs a look. What you are looking for is play in the wheel itself, which points at a worn joint or bushing.
Push and rock the vehicle at the front and rear and listen. A single clunk over a bump usually means a worn sway bar link or shock mount. Continuous rattling over every bump usually means shocks or struts are done, and on a long drive that shows up as a much worse ride and worse braking.
Look for a tire that humps, cups, or feathers as it rotates. Those patterns are caused by worn components or an alignment issue, and swapping tires will not fix the cause. With the vehicle raised, a wheel should not have perceptible play at the hub; any that does points to a wheel bearing or hub assembly.
A steady growl that changes with speed or a hum that rises through a corner usually means a wheel bearing is failing. If you suspect one, slow down and get to a shop, because a bearing that fails at highway speed ends the trip. A click or rattle from a single corner that only appears over certain bumps is less urgent, but still worth a look before you load the car.
9. Check the Exhaust and Gasoline Smell
Start the engine and listen to the exhaust note. A change in pitch, a new rattle, or a noticeably louder car than last week means a leak somewhere in the system, often a loose shield or a cracked flex pipe. Neither is a reason to cancel a trip, but both are cheap to fix.
Look under the car with the engine running and listen for a hiss or a puff that comes and goes with engine speed. Do this from behind the vehicle and never while the exhaust is hot. A hanging heat shield can bang against the pipe on rough roads, which sounds alarming and usually is not serious.
A smell of gasoline in the cabin or at the rear of the car is a different matter. Shut the engine off, move away from anything that could ignite it such as a fuel dispenser or a cigarette, and do not keep driving. Do not smoke near the vehicle, do not switch electrical accessories, and arrange professional help to find the leak.
An exhaust smell of sulfur that fades after a few minutes is often just a catalytic converter that has gone cold. A smell that persists, or a burning smell anywhere, is not. If you smell something you cannot place, that is a question for a shop, not for the highway.
10. Verify the Hood, Doors, Trunk, and Fuel Door
Open and close the hood, each door, and the trunk or hatch. Every one should latch on the first try and stay shut when you press firmly on the nose or the door corner. A latch that needs two pulls to catch has a cable or a latch mechanism stretched, and it can open on a rough road with a loaded car.
Check the gas struts or hinges while you are there. A hood that will not stay up on its own means a failed strut, and a hood that bounces against the windshield on a washboard road cracks trim. A door or hatch that sags in its opening usually means a hinge or check strap has been bent by a low parking space.
Test every door lock and the interior lockout. Test the fuel door as well, and confirm it closes fully and latches. On a vehicle with a locking fuel door, leaving it open may allow the filler cap to fall out or permit fumes into the cabin, and it is a fast ticket, so make it a habit to close it as soon as you fuel up.
Look at how the cargo sits with the doors shut. A bag that can shift into the driver’s footwell or toward the front seat is a projectile in a hard stop, and the fix is a tie-down or a barrier, not optimism.
11. Assess the Spare, Jack, and Roadside Tools
Most people own a spare and a jack they have never used together. Verify the spare is actually inflated, matches the tire size of the car, and has no cracks or bulges. A space-saver spare is fine for getting to a shop, but it is slow and rough, so plan around that if you have one.
Work the jack handle through a full stroke and confirm the lifting point on your vehicle is the reinforced jacking point, not a rocker panel or a pinch weld. Practice loosening and tightening one lug nut so you know whether the wheel-lock key is required, because that key is usually in the glove box and is the difference between a five-minute fix and a tow.
Confirm the lug wrench fits the lug nuts rather than only looking similar, and check that the car has the wheel-lock socket if your vehicle uses locking lugs. Put a small amount of grease or anti-seize on the threads if it helps the wheel come off cleanly, which is a habit worth building before you need it in a gravel lot at night.
Carry a flashlight with fresh batteries, a rag, a tire pressure gauge, and a jack that works. Owners of vehicles with a factory storage well under the cargo floor should check that well is present, because a replacement jack from a parts store may not fit the original storage point.
12. Inspect the Cabin for Safety and Comfort
Fasten and unfasten the driver’s seat belt, then check the passenger belts too. A belt that will not latch, will not retract, or frays at the shoulder should be replaced before the trip. Confirm every belt retracts fully and that the retractor keeps the shoulder strap in place.
Adjust the seat, the seat back, and the steering wheel to where you can reach the pedals and see over the hood comfortably. Then adjust the interior and exterior mirrors. Test the horn, both window controls, all door locks, and the power or manual child-seat anchor access if you are traveling with kids.
Check the airbag indicator lamp on the dash or in the seat. A warning that stays on after you start the car needs a code read before departure, since it often means the passenger sensing system or a belt sensor is not reporting correctly. While you are on the dash, look for any oil pressure, coolant temperature, brake, or check-engine light and note what the car is telling you.
Run the heater and the air conditioning for a minute and confirm both defrost and fresh-air vents blow. Check the cabin air filter if it is accessible, and make sure nothing stored loose can reach the driver’s feet, block the mirrors, or shift in a sudden stop. Ratchet straps or a heavy bag laid across unsecured gear is a cheap and effective restraint.
13. Load Luggage Without Overloading the Car
Find the payload figure on the driver’s door placard or in your manual, and treat it as a ceiling, not a target. That number includes passengers, cargo, and anything in a roof box. Exceeding it does not make the car faster, but it does lengthen stopping distance and hurt how the car behaves in a fast lane change.
Put the heaviest items low, forward against the seat backs, and near the center of the car. A heavy suitcase on the rear seat over the axle keeps weight where the suspension expects it, while the same weight in the roof raises the center of gravity and makes the car feel nervous in crosswinds. Distribute side to side so one side is not noticeably lighter.
Secure everything. Ratchet straps through tie-down anchors, bags in the trunk, small loose items in a closed bin. Keep the rear view through the back window and both side mirrors unobstructed, and never stack luggage where it can slide forward into the cabin during hard braking.
Once loaded, recheck tire pressure. Tire pressure is a cold reading, so a car that sat in the sun all morning will read high and a car that has been loaded and sat will read differently than it did empty. Add air only to the placard number, and only go above it if your manual specifically says the car is meant to be inflated for full load.
14. Complete a Final 10-Minute Roadside Recheck
Once everything is loaded, do one more pass in this order. Walk the full perimeter of the car, then under it, then open the hood and look at the fluid spots you found earlier. A fresh puddle that appeared while the car sat at a fuel stop or a rest area is new information.
Sit in the driver’s seat, start the engine, and confirm every warning light that was on at the start of the day is off now. Then work the lights, the wipers, and the washer one more time, and recheck tire pressure with the load in place.
Test each closure again, in case loading changed how the doors sit. Confirm the spare, jack, and lug wrench are in the car and not sitting in a driveway, and that the fuel door is latched.
Last, confirm you have the registration and proof of insurance, your roadside assistance number or insurance card, a phone and a working charger, water, and a basic first aid kit. This is a documents and gear check, not a repair session, and if something here turns up a defect that returns you to the shop, the trip waits for the fix.
Frequently Asked Questions
How early should I inspect my car before a road trip?
Start about a week out. A week gives you time to order parts, get a shop appointment, and have an oil change or tire rotation settle before you load the car. A day before, repeat the tire pressure, fluid, and light checks so nothing changed overnight. The morning of departure, do the ten-minute recheck after loading. If you find a defect a week out, you have options; if you find it the night before, you have a shop closing time.
Should I follow my car’s tire-pressure label or the number printed on the tire?
Follow the placard on the driver’s door jamb or in the owner’s manual. The number molded into the tire sidewall is a maximum the tire is rated for, not a recommended running pressure, and inflating to it on a loaded car increases heat and blowout risk. Measure cold, before driving more than about a mile, and check all four tires plus the spare.
Which warning lights mean I should not start or continue the trip?
Do not set off with the oil pressure warning light, the coolant temperature light, the brake system warning light, or the charging system light illuminated. Those indicate an immediate fault that gets worse with every mile. A check-engine light is different: it can be a sensor or emissions issue, so have the code read rather than guessing, and treat repeated flashing as a stop condition.
What should I inspect specifically on a BMW before a long drive?
On a BMW, give extra attention to the battery and charging system, the cooling system, and the tires. Many models show tire pressure only through a menu rather than a door placard, so read the setting in the instrument cluster and reset it after every change. Check coolant at the expansion tank when cold, confirm the electric water pump is quiet at idle, and inspect the rear brake lines and suspension components, which on some models sit in the wheel area.
Can I drive a long distance if the check-engine light is on?
It depends on why it is lit. A steady light usually means a stored code from an emissions or sensor fault, and a long drive may be fine, though fuel economy can suffer. A flashing light means the engine is missing combustion cycles and can damage the catalytic converter, so stop and have the code read. Either way, have it scanned before a trip where you would be far from a shop.
Do I need a mechanic to complete a pre-trip inspection?
No. Most of the checklist, including pressures, tread, fluid levels, lights, and the spare, is a driveway job with a tire gauge, a flashlight, and your owner’s manual. You do need a qualified mechanic whenever a check cannot be answered with confidence: brake or rotor concerns, a suspected wheel bearing, an electrical fault, a fuel smell, or anything over your head. Paying a shop for a pre-trip inspection is also reasonable on a high-mileage vehicle.
Conclusion
Start with tires, brakes, fluids, and warning lights, in that order. They cause most of the breakdowns that end a trip, and each one has a clear pass or fail line you can judge in your own driveway. Fix anything safety-critical before you load the car rather than after, and if a check raises a question you cannot answer, a qualified mechanic is the cheaper option compared with a tow and a lost weekend.
Everything else on this road trip car inspection checklist takes a few minutes once you are in the habit. If the car is going to sit for months beforehand, the same walkaround makes a good starting point for how to store a car for six months.