
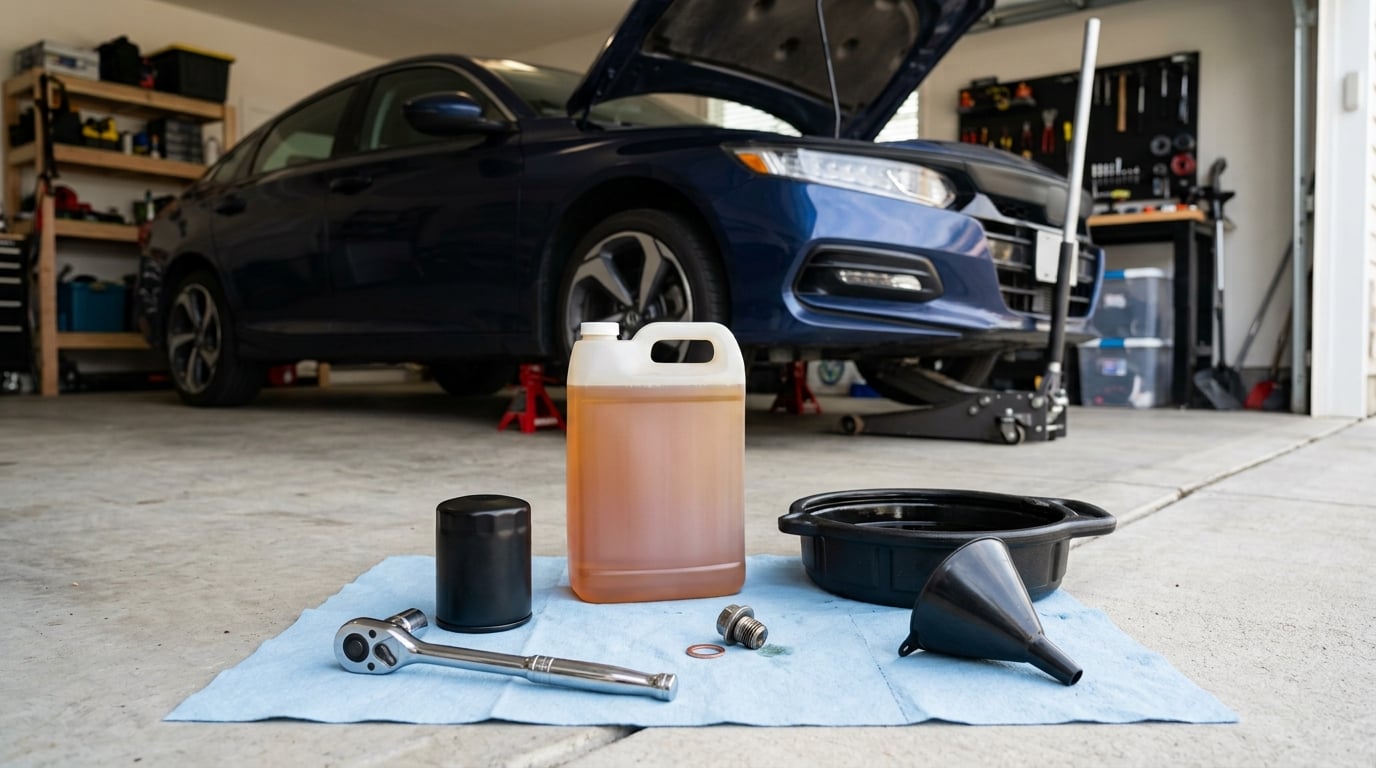
Changing your own oil step by step is four jobs in order: lift the car safely, drain the old oil out of the pan, swap the oil filter, and fill the engine back up to the level your owner’s manual specifies. Most beginners get through it in 45 to 90 minutes the first time, and 30 minutes once the shield is off and the plug comes out. You need a jack, jack stands, a drain pan, a filter wrench and about five quarts of oil.
That part everybody warns you about is the oil spec. Get the viscosity, the oil standard and the quart capacity for your exact engine before you open anything, because a bottle of 5W-30 that is correct for one car is wrong for the one parked next to it. The rest of the job is mechanical and forgiving.
I have watched a lot of first attempts, and the same three things stop people: the underbody shield is hiding the drain plug, nobody owns a drain pan good enough to catch the first two quarts, and the plug gets cross-threaded because it was cranked in at an angle instead of started straight. Everything below is written to avoid those three.
Table of Contents
- What You Need
- How to Change Your Own Oil Step by Step
- How to Change Your Own Oil Step by Step: Confirm the Correct Oil
- Check the Car and Warm the Engine
- Position the Car Safely
- Drain the Old Oil
- Replace the Oil Filter
- Check the Drain Plug and Clean the Area
- Add the Correct Amount of New Oil
- Start the Engine and Check for Leaks
- Recheck the Level, Reset the Indicator, and Record the Service
- Common Mistakes
- Frequently Asked Questions
- Do I need to change the oil while the engine is warm?
- Should I fill the new oil filter before installing it?
- What should I do if the oil drain plug is stuck?
- Why is my drain plug leaking after an oil change?
- Do I have to replace the oil filter every time?
- Do I need a lift or special tools to change my own oil?
- Conclusion
What You Need

Here is the full kit. Nothing on this list is exotic, and everything here is cheap to replace if a neighbor loans it to you.
- Owner’s manual for your year, make and engine, in print or on your phone. It carries the oil viscosity, the oil standard, the capacity in quarts, the filter part number and usually the drain plug torque.
- Engine oil in the exact grade and quantity the manual calls for. Buy the full stated capacity, not less, because you cannot buy top-up oil at 10pm.
- Oil filter matching the part number in the manual. Note whether your engine uses a spin-on canister filter or a cartridge in a housing, because the swap procedure is different.
- Drain plug washer, also called a crush washer. New, matched to the plug, and cheap. Many manuals specify a new one every change.
- Jack and a pair of jack stands rated for your vehicle’s weight, or a set of ramps rated for the same.
- Wheel chocks, one per wheel on the wheel that stays on the ground.
- Oil drain pan with enough capacity for the full drain plus your worst-case mess. A shallow tray under an oil pan guarantees a stained driveway.
- Oil filter wrench for a spin-on filter, or a filter cap wrench for a cartridge housing.
- Ratchet and socket set that fits the drain plug, plus a breaker bar for a plug that has been in place since the last change.
- Funnel or spout that fits your oil filler neck, and a small empty bottle to catch the first splash.
- Rags, paper towels and latex gloves. You will get some on you.
- Optional but useful: a torque wrench, an LED work light, a drain hose to direct oil into the pan, a small inspection mirror, a magnetic parts tray, a bungee cord to hold the shield out of the way, and a cardboard box to keep the car body clean while you work.
Two things are worth checking before you start, because they cost nothing now and a lot later. First, look up the drain plug torque specification. Numbers like 25 to 30 foot-pounds or 20 newton-meters are common, and a plug torqued to “as tight as I can get it” is the single most common way to strip threads or crack an aluminum oil pan.
Second, confirm the oil standard, not just the number on the jug. A manual that says 0W-20 usually also wants a specific specification such as GF-6A, SP or a manufacturer’s approval, and the back of the bottle lists it. Buying the right viscosity with the wrong standard is still wrong.
How to Change Your Own Oil Step by Step
How to Change Your Own Oil Step by Step: Confirm the Correct Oil
Open the manual and find the engine oil section. You are looking for four numbers or codes: the viscosity grade, the oil standard or approval, the capacity, and the filter part number. Write them down on paper and leave them on the fender. Working from memory is how cars end up with the wrong oil.
Identify the engine first, because one model can carry several. A badge or trim level is not the same as an engine code, and on many models the oil spec changed mid-production. The door jamb sticker, the VIN plate and the manual’s engine list will settle it.
As a worked example: a BMW 3 Series with the N20 or N52 four-cylinder is a common case people search for. Depending on year and market, those engines take either 0W-20 or 5W-30 synthetic or synthetic blend, with a filter that sits in a cartridge housing under a plastic cap rather than a spin-on canister. Capacity is typically somewhere around 5 quarts, but the manual for your specific year is the only source that counts, and the 6-cylinder in the same car takes a different grade and a different capacity. Same badge, different oil.
How to know it worked: you have a viscosity, a standard, a quart capacity and a filter part number written down, and you have bought all four things before touching a tool.
Check the Car and Warm the Engine
Before draining, look underneath the car while it is still low. Put a flashlight on the ground and look up at the oil pan, the filter and the bellhousing area. Fresh oil running down the side of the pan, a wet filter gasket or a steady drip on the driveway means you have a leak worth finding with our UV dye guide before you add a fresh charge and lose track of it.
Pull the dipstick, wipe it clean, push it fully back in, pull it again and read it. If the level is above the maximum mark, you have too much oil going in and you should bring it down to the correct range before going further. If the engine has a dipstick, read it with the engine off, on level ground, and cold or after a five-minute shutdown. A reading taken while the engine is running or on a slope is meaningless, and a dipstick that is not pushed all the way in reads high and fools people every time.
Warm the engine by running it for five to ten minutes, or take a short drive. Oil that is cold and thick drains slowly and clings to the pan walls, and you end up with a gallon of leftovers that go straight into your waste container. Long enough to thin out, not long enough to overheat. Then shut it off and park on level ground.
How to know it worked: the engine is warm, shut off, parked level, and the dipstick reading is understood rather than guessed at.
Position the Car Safely
Safety rule, no exceptions. Never get under a car held up by a jack. A jack is for lifting only. Support the vehicle on jack stands placed at the manufacturer-specified points, or use properly rated ramps, and chock the wheels that stay on the ground before the jack goes anywhere near the car.
Park on a level, legal surface with enough room to work. Concrete driveway, level garage floor, nowhere that slopes toward a neighbour’s yard.
Set the parking brake and leave the transmission in Park for an automatic or first gear with the parking brake set for a manual. Engine off is the position you want the vehicle in when the stands go under, unless your manual specifically says otherwise for that model.
Chock the rear wheels on a rear-wheel-drive car, or the front wheels on a front-wheel-drive car, and keep the chock on the side that stays down. Then jack the car up at the front and rear jacking points, swing the stands underneath, lower onto them, and pull the jack. If you use ramps, back the car up with someone watching the alignment, and creep. Straight-line at walking pace, no corrections.
Most cars need roughly 45 to 90 minutes for a first-timer’s full job, less for an experienced hand. Our breakdown of how long an oil change takes breaks that down further if you want to plan the afternoon.
How to know it worked: the vehicle sits level on stands or ramps, the jack is out from under it, the chocks are in place, and you have not gone under anything supported by a jack.
Drain the Old Oil
Set your drain pan under the plug, offset slightly so the plug can clear the rim. Most underbodies have a splash shield, undertray, skid plate or a combination of the three, and on a modern car this cover is the main reason a first attempt stalls. Expect a combination of plastic push clips, T25 or T30 Torx heads, and the occasional body-color plastic screw that looks structural and is not. Pull the clips out, work around the perimeter, and hang the shield on a bungee cord or lay it on cardboard. Check the manual for the fastener pattern.
With the plug visible, put the pan in place, then remove the plug. Take the old washer off if it is there; it crushes flat and is meant to seal once. Loosen the plug by hand as far as it will go before you ever touch a wrench. Once you break it loose, back the wrench off, spin the plug out by hand the rest of the way. Keeping the plug in your hand the whole time is how people lose it into the pan.
Let the oil run. It comes out fast and hot for a few seconds, then slows to a trickle. Ten to fifteen minutes with the plug out usually drains most of what will drain; the last bit clinging in the pan is normal. Do not pour hot oil down a drain or into a container that cannot take heat.
How to know it worked: the flow has slowed to a drip and the pan is nearly full, and the plug is sitting in your hand where you can see its threads and its washer seat.
Replace the Oil Filter
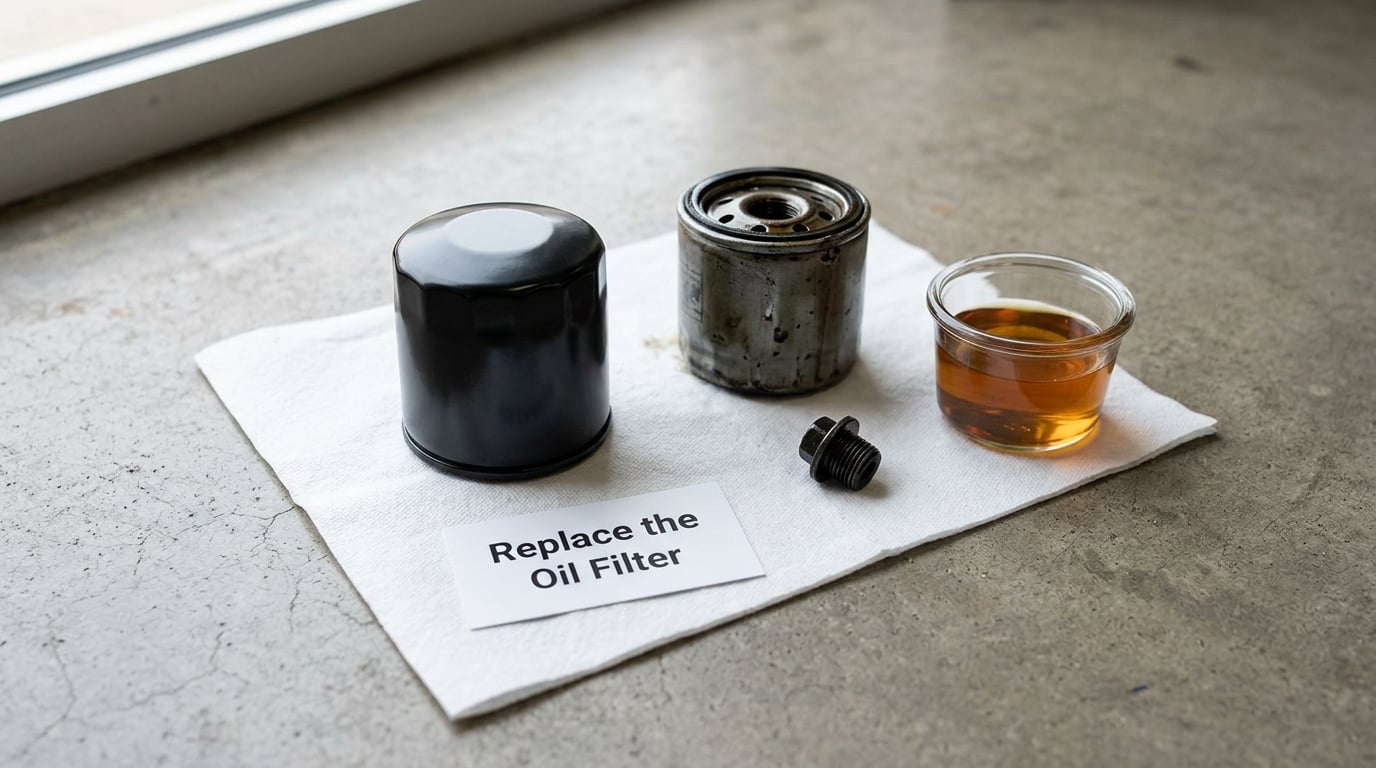
Find the filter. On most cars it is on the side of the engine, a spin-on canister you can see. On many others, especially German and some Japanese engines, it sits under a plastic or metal cap in a housing on top of the engine, and you need a filter cap wrench to open it. The manual tells you which, and this is the difference between a five-minute task and an afternoon.
For a spin-on filter, place a drain pan under it, run the engine off if you prefer, and turn the filter counter-clockwise by hand. The gasket will break the seal, so expect a small surge of oil as it comes free. Wipe the mounting surface clean. Check the old filter’s gasket and the threads on the stud, then compare the new filter to the old one to confirm it is the right part.
Wipe a fresh dab of clean engine oil onto the new filter’s rubber gasket. It only needs a light film. A dry gasket is the most common cause of an oil filter that weeps, and the fix costs nothing.
On a cartridge filter, dab oil on the housing’s O-ring or gasket, fill the new cartridge with clean oil if the manufacturer calls for it, slide it in, and hand-tighten the cap until the gasket contacts the housing. Some cartridges are spring-loaded and just seat; others screw in and get a quarter turn after contact. Follow your manual rather than generalising, and never use a wrench on a plastic cap.
How to know it worked: the new filter threads on smoothly with no force, the gasket is wet with a light film of oil, and the mounting face is clean and dry.
Check the Drain Plug and Clean the Area
Clean the old oil off the plug threads with a rag and run your fingers along them. If they feel rough, gummy or torn, the plug is the reason your last change leaked. Hold it up to a light and look at the washer seat and the sealing face. Then put a new crush washer on if the manual specifies one, or a new one as standard practice. The washer is a consumable item that costs very little and prevents one of the most annoying post-service leaks.
Thread the plug in by hand, straight, until it seats in the threads before you put any torque on it. A plug that starts at an angle will cross-thread, and the fix is a thread repair or a new pan. Once it is hand-seated, tighten it to the specification from the manual using a torque wrench if you have one.
Wipe up the oil that ran down the side of the pan and the splash shield. Slide the shield back into place, start the push clips by hand, then press them to the first detent, and refit the T30 or T25 screws snugly. Most shields go on one way, and a shield installed backwards is an expensive rattle.
How to know it worked: the plug seats without resistance, the shield is back on with all clips and screws present, and there is no standing oil under the car.
Add the Correct Amount of New Oil
Open the new oil. Most bottles come with a built-in spout, but if yours does not, use a funnel. The filler neck is usually on top of the engine under the hood, and on some engines it is under the oil cap with a flip-up door, so find it before you start pouring.
Pour in stages rather than all at once. Add roughly half the stated capacity, then stop and check. This gives you a margin and lets you catch a wrong assumption about capacity before you have a puddle under the car.
Pull the dipstick, wipe it, reinsert it fully, pull it again and read it against both marks. The level should sit between MIN and MAX, nearer the middle. If you do not know the capacity with confidence, add a quart at a time and keep checking. Overfilling is the classic beginner error: the extra oil that does not go to the oil pan gets pushed into the intake or thrown off as foam, and aerated oil loses its protection exactly when the engine is working hardest.
Fit the oil filler cap firmly. An unsecured cap over a rough road is a genuine engine-damage risk, not a formality.
How to know it worked: the dipstick reads between MIN and MAX, the filler cap is on and locked, and nothing has spilled.
Start the Engine and Check for Leaks
Start the engine and leave it idling. Watch the gauges, not the road. The oil pressure light may stay on for a second or two while the oil circulates and pressure builds; that is normal. If it does not go out within a few seconds, or the light comes back on at idle, shut the engine down rather than continuing to drive it around the block.
Get your head under the car again and look at the drain plug, the filter seam and the front of the pan. A new filter should be dry or at most damp. A running drip from the plug means the washer is missing, the plug is under-torqued, or it was cross-threaded. A weeping filter seam means the gasket was installed dry or the filter was screwed on crooked.
Shut the engine off after a couple of minutes. It takes a minute of running for oil to travel up to the filter, and that is when most of the sealing happens. Then look at the parking spot you drove off from and note the size of any stain, so the next check has a reference point.
How to know it worked: the pressure light went out within a few seconds, the plug and filter seam are dry, and the car is not leaving a trail.
Recheck the Level, Reset the Indicator, and Record the Service
Park on level ground, shut the engine off and wait five to ten minutes. Cold oil drains back down into the pan from the cylinder walls, the filter and the intake ports, so the reading straight after the change is high and the reading after settling is the real one. This second reading is the one that matters, and skipping it is the most common miss in the whole procedure.
Add oil if the settled reading is below MAX. A small top-up after a change is normal because engines hold a pint or so in the filter and the oil film. Never correct a low reading by adding a big pour, and never add oil above MAX.
Reset the oil life monitor or maintenance indicator if your vehicle has one. The procedure is usually hold the trip button and press the brake or the trip reset, or press and hold a button on a fuel-range display, but the exact sequence is in the manual. On some vehicles the monitor only resets at a stop with the ignition on. If you skip this, the car will keep telling you it is overdue the next time you start it.
Record the job. Note the date, the mileage, the oil specification and quantity, the filter part number, and the date and mileage of the next change. A photo of the empty bottles and the receipt in your glove box is enough, and it settles the argument the first time a shop tells you the last change was never done.
Now deal with what came out. Most auto parts stores take used oil and used oil filters back at the counter with no charge, and the same goes for many quick-lube shops and municipal collection sites. Your state or provincial environmental agency lists a used oil recycling location. Do not pour it down a storm drain, down a sink, into a gutter, into a storm sewer, or into the regular trash. One quart of used motor oil can foul a municipal water treatment system, and storm drains usually lead straight to a waterway.
How to know it worked: the settled dipstick reading is between MIN and MAX, the oil life indicator reads normal, the service is written down somewhere you will find it, and the old oil is in a container ready for recycling.
Common Mistakes
These are the ones that actually happen. Each has a straight correction.
- Using oil the manual did not specify. The most consequential and most common mistake. If the car calls for a specific standard or approval, a jug of the right viscosity without that standard is not the right oil. Confirm both before you buy, and never top up between changes with a different weight than what is already in the engine.
- Leaving the drain plug loose. It will not fail immediately, which is what makes it dangerous. You get a slow weep that looks like normal seepage until the level drops. Torque it to spec every time.
- Overtightening the plug. Strips aluminium threads, cracks the pan, or shears the plug head. Hand-seated, then snug to spec. You never need body weight on a drain plug.
- Reusing the drain plug washer. Crush washers are flattened and work-hardened after one use and seal far less reliably. Fit a new one, or the sealing washer your manufacturer specifies.
- Cross-threading the plug. Start it by hand, straight, until it catches. If it will not start by hand, back it out and start again. Cross-threaded plugs leak, break, and turn a five-minute job into a repair.
- Forgetting the oil filter. Old oil keeps circulating through the new charge and the new oil loses half its value on day one. Install the filter before the plug, every time.
- Poor dipstick technique. Not wiping it, not pushing it back in fully, reading it on a slope, or reading it while the engine runs. Any one of those gives a wrong number and leads to under-filling or over-filling.
- Overfilling. Extra oil cannot be compressed out of the way. Aeration, foaming and possible intake carry-over follow, and the resulting pressure dip is not harmless.
- Driving off with the filler cap loose or the shield off. A loose cap can throw an oil mist that leaves a mess and, over time, an oil-slick plug area. A shield left off lets road salt and debris into the underbody.
- Disposing of the oil improperly. Down the storm drain, into a driveway, or into household trash. Take it to a recycling point, which in most places costs nothing.
- Not rechecking after the oil settles. The first reading is high. Check again after five to ten minutes, level, engine off.
- Not resetting the oil life monitor. The car will nag you forever, and some drivers end up ignoring real maintenance prompts because of it.
One more thing worth knowing. How often the oil actually needs changing depends on how the car is used, not just the mileage. A car that sits with short trips and never reaches highway temperature collects fuel and water in the oil and ages far faster than the odometer suggests. Our guide to oil changes for a car that sits covers that in detail. When in doubt, follow the shorter of the manual’s interval or the oil life monitor.
Frequently Asked Questions
Do I need to change the oil while the engine is warm?
Yes, warm is the target, not hot. Run the engine for five to ten minutes or take a short drive so the oil thins out and drains faster, then shut it off and wait a few minutes before opening the plug. Cold oil clings to the pan walls and leaves a gallon behind. Running it hot enough to trigger the cooling warning is a different mistake entirely, and gives you a hot plug and hot oil right where you do not want them.
Should I fill the new oil filter before installing it?
It depends on the type. Spin-on canister filters normally go on empty with a light film of clean oil on the gasket, and the engine fills them within seconds of starting. Cartridge filters in a housing are different: many manufacturers want the cartridge filled with fresh oil so it does not take a gulp on start-up, and the housing O-ring gets a dab of oil too. Check your manual, because getting it wrong on a cartridge housing can mean a dry start.
What should I do if the oil drain plug is stuck?
Do not go to it with an oversized wrench or a breaker bar on a stripped head. Apply penetrating oil to the threads, leave it for a few hours or overnight, then try again with the correct socket. If the plug is seized, or if it turns and then backs off, the threads are damaged and you need a thread repair, a new plug with a new seat, or a shop. Forcing a seized plug usually turns a small job into a damaged pan, which is the most expensive outcome of this entire procedure.
Why is my drain plug leaking after an oil change?
Four causes cover nearly every case. The washer was reused, crushed or left off entirely. The plug was under-torqued, common on aluminium threads. The plug was cross-threaded, so it is not fully seated even though it feels tight. Or the old washer came loose and the plug backed out a fraction of a turn during the drive home. Check the plug by hand for full engagement before anything else, and always fit the sealing washer your manual specifies.
Do I have to replace the oil filter every time?
For almost every car, yes. A used filter holds used oil, and a fresh charge going through it is picking up contamination from the first minute, which defeats much of the point of the change. The cost difference between changing the filter every time and changing it every other time is small. The main exceptions are a few heavy-duty and commercial applications that run extended drain intervals under a documented programme, so check the manual if your vehicle is one of those.
Do I need a lift or special tools to change my own oil?
No lift required for most cars. A jack and a pair of properly rated jack stands, a wheel chock, a drain pan, an oil filter wrench, a ratchet with sockets and a few rags cover almost every passenger car. You do need a funnel or a spout that fits the filler neck, and for engines with a cartridge filter you need a filter cap wrench. If your car has a deep undertray or a skid plate that comes off awkwardly, plan more time for that step, or a shop can remove it cheaply.
Conclusion
Changing your own oil step by step comes down to doing the specification part carefully and the mechanical part patiently. Confirm the viscosity, the oil standard and the quart capacity for your exact engine, buy the filter and the drain plug washer to match, support the car on stands with the wheels chocked, then drain, swap, refill and let the oil settle before you read the dipstick again. Reset the monitor, write the date and mileage down, and take the old oil to a recycling point.
Start now by pulling up the engine oil page in your owner’s manual. That one page removes almost every mistake people make on a first attempt, and it takes about ten minutes to read.