
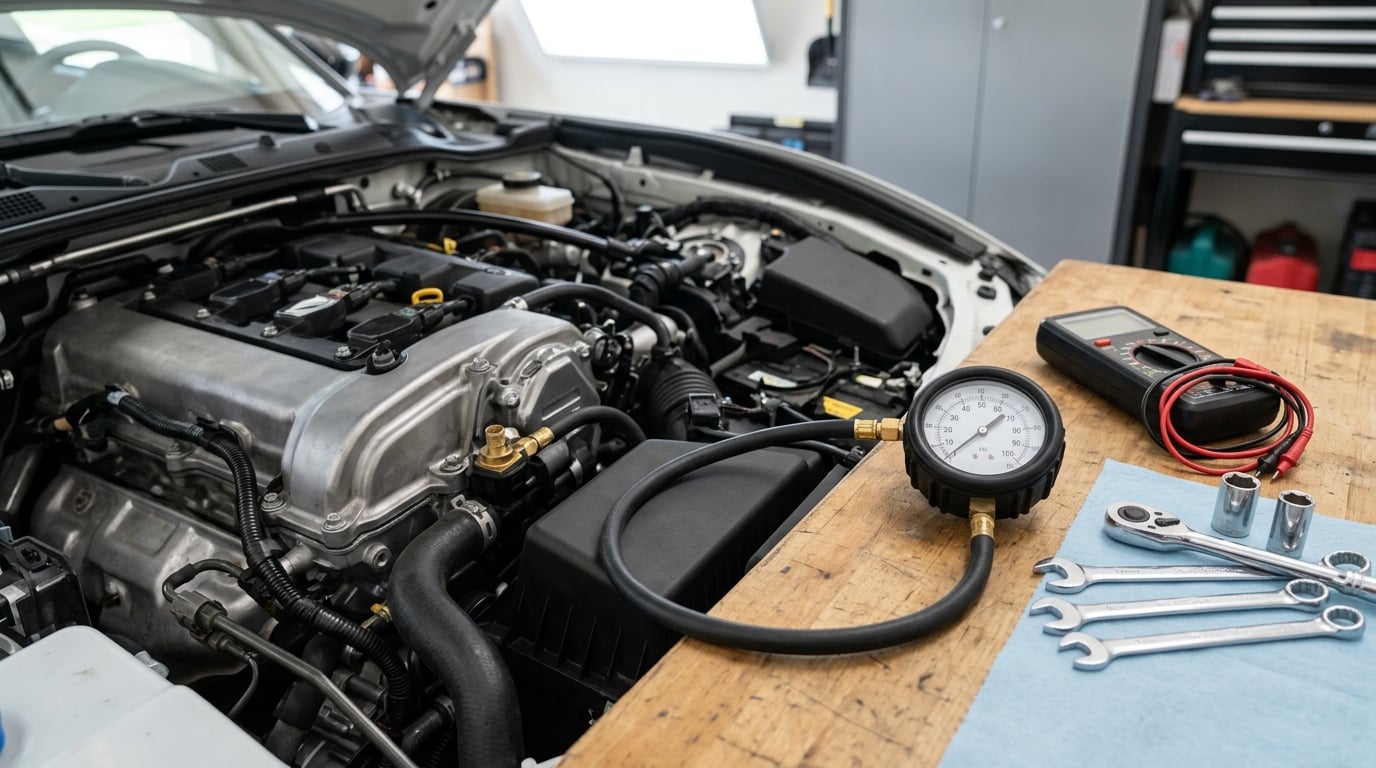
A fuel pump problem is a loss of fuel delivery, and you can usually confirm it three ways: listen for the pump prime when you turn the key on, check the fuses, relays, power and ground feeding the pump, then gauge fuel pressure at the rail. Do those in that order and most owners never buy a part they didn’t need.
Here’s the honest reason to test first. On most cars the pump lives inside the fuel tank, so replacing one means dropping the tank, draining fuel, and pulling a module full of fittings. That is hours of labor for a part that, in plenty of cases, was never the fault. A dirty ground, a tired relay, a clogged regulator or a failed fuel-pressure-safety switch will produce identical symptoms on the road, and every one of them is cheaper to fix.
Work through the eight steps below in order and stop as soon as the answer explains the symptom. The whole sequence runs about an hour for a careful first-timer with basic tools, plus whatever the gauge rental costs you for the weekend.
If you want the short version before you start, the two checks that catch the most are the key-on prime sound and a rail pressure reading under load. Everything else narrows down which of those two is lying to you.
Table of Contents
- What You Need
- Step-by-Step: How to Diagnose a Fuel Pump Problem
- Step 1: Confirm the Symptom and Rule Out Other Causes
- Step 2: Inspect the Fuel System for Leaks and Blockages
- Step 3: Test the Fuel-Pump Fuse, Relay, and Control Signal
- Step 4: Measure Fuel Pressure
- Step 5: Check Pump Voltage, Current, and Ground
- Step 6: Determine Whether the Pump Is In-Tank or External
- Step 7: Check the Fuel Filter, Tank, and Fuel Quality
- Step 8: Make the Diagnosis and Choose the Next Repair
- Common Mistakes
- Frequently Asked Questions
- Conclusion
What You Need
Gather these before you start, because a mid-test trip to the parts store is how small jobs turn into Saturday-long ones.
- The service information for your vehicle. The owner’s manual tells you where the test port, fuse and relay live. A repair manual or the manufacturer’s service data gives you the specified fuel pressure in psi, which is the number every other reading is judged against. Without that spec you are guessing.
- A mechanical fuel pressure gauge with a hose and adapter. A dial gauge is easier to read than a scan tool reading while the engine runs. Most auto parts stores rent them, and the rental is usually the cheapest part of the whole diagnosis. Bring the adapters your test port needs, since that fitting is the detail that trips people up.
- A digital multimeter. You need it for a voltage drop test at the pump connector, which is the only reliable way to spot a corroded connector or a tired ground.
- A scan tool, or the free engine-data app for your car. Live data shows commanded versus actual fuel pressure, fuel pump load, and stored codes such as P0130 (fuel pressure sensor circuit) or P0087 (low fuel rail pressure). Even a cheap code reader narrows this down a lot.
- An amp clamp or inline ammeter if you want to measure how much current the pump draws while it runs.
- Basic hand tools, a fuel-safe container, and rags. You will be opening a fuel line at some point unless the diagnosis ends early.
- Eye protection, a fire extinguisher, and ventilation. A fuel-rated extinguisher, not a water one.
One safety note before anything else: fuel systems hold pressure after the engine is off, and a diesel high-pressure system holds a great deal more. Work outdoors or in a ventilated garage, keep the ignition sources away, and never crack a fitting that still holds pressure. The steps below flag the exact point where that matters.
Step-by-Step: How to Diagnose a Fuel Pump Problem
Step 1: Confirm the Symptom and Rule Out Other Causes
Start by writing down exactly when it happens, because a fuel pump rarely fails the same way twice in a row. Does it crank but not start, stall when hot, hesitate on acceleration, surge at idle, or blow black smoke? Cold-start-only trouble points somewhere different from trouble that appears after twenty minutes of highway driving.
Then rule out the cheap imitations. A weak or failed fuel level sending unit can make the car run out of fuel. A vacuum leak or a dirty mass airflow sensor leans the mixture out and produces a lean stumble that reads like starvation. A failing ignition coil or spark plug under load looks exactly like fuel starvation at high rpm.
Two more deserve a mention. A restricted catalytic converter often gets blamed on the pump, especially on a car that will rev fine but will not pull at steady speed. And on a car that will not start right after fueling, the evaporative emission system venting a pressure that never equalises is a known culprit.
Read codes and live data before you touch anything. A stored fuel rail pressure code is a strong starting signal; no codes at all across several drive cycles pushes you toward a mechanical restriction or a low-flow pump that never trips a threshold.
This table maps the most common complaints to the cheaper causes that get mistaken for the pump, and to the check that settles it.
| What you notice | Other likely cause | How to confirm it |
|---|---|---|
| Stalling, hesitation or a stumble on hard acceleration | Ignition coil or spark plug failing under load | Swap the coil or plug and drive the same road; watch the misfire count drop |
| Engine runs lean and bogs at part throttle | Vacuum leak, cracked intake hose, or a dirty mass airflow sensor | Smoke the intake, then watch commanded versus actual fuel trim in live data |
| Will rev freely but will not pull at steady speed | Restricted catalytic converter | Check for a hot shield or a blockage, and compare commanded versus actual oxygen sensor readings |
| Hard starting right after filling up | Evaporative emission system not venting the tank | Inspect the vent and purge valves and look for a fuel-cap fault code |
| Engine dies as soon as fuel runs low, gauge reads empty early | Failing fuel level sending unit | Check resistance at the sender and compare the dash reading to the measured level |
| Check engine light with a low rail pressure code | Rail pressure sensor or its wiring, not the pump | Watch live rail pressure and compare it with an external gauge reading |
| Starts and runs normally when cold, dies once warm | Relay, ground strap, or an ECM that has cut the command | Check for a command signal at the pump with the engine hot and at fault |
Step 2: Inspect the Fuel System for Leaks and Blockages
Before the tools come out, get your eyes on the whole fuel path: the supply lines from tank to engine, every fitting and connector along the way, the fuel filter, the area around the tank, and the vapor lines. Look for dampness, staining, corrosion, kinks in a flexible line, or a crimped area where something rested against the underside of the car.
A weeping fitting at the fuel rail will show up as a wet film or a smell sharp enough to notice. Fuel odour inside the cabin is a reason to stop driving the car, not a reason to keep testing it.
On the tank side, look underneath for a puddle and check whether the evap lines are connected. If a rollover or leak-detection valve has tripped, fuel delivery can be cut even though the pump itself is fine. Owners on the BMW and Ford forums hit this repeatedly: a leak-detection switch, not a failed pump.
Whatever you find changes the diagnosis, so document it. If the line is damaged, that is your fault and the pressure test later will only confuse you.
Step 3: Test the Fuel-Pump Fuse, Relay, and Control Signal
Use your service information to find the fuel pump fuse and relay rather than guessing from a diagram someone posted for a different year. Check the fuse with a test light across both terminals, not just a visual look, because a fuse can look perfect and still be open.
Next, listen for the relay clicking as the key goes on. On many cars you can swap in a known-good relay and see whether the symptom changes, which is a fast and cheap way to test one. On some designs the relay lives inside a fuel pump control module, and on some Fords and GMs the pump is fed through a fuel pressure safety switch that cuts power the moment a leak is detected or the vehicle rolls over.
Then confirm the pump is actually being commanded. With a scope or a meter on the negative side of the pump motor, you should see a pulse-width-modulated negative signal on key-on. No signal at the pump connector means the computer never asked for fuel, and the problem is a relay, a fuse-safety circuit, a wiring break or a fault code sitting in memory. That is a completely different repair from a dead pump.
Signal present, pump silent or barely spinning moves you straight to step 5, where the wiring and the motor get separated.
Step 4: Measure Fuel Pressure
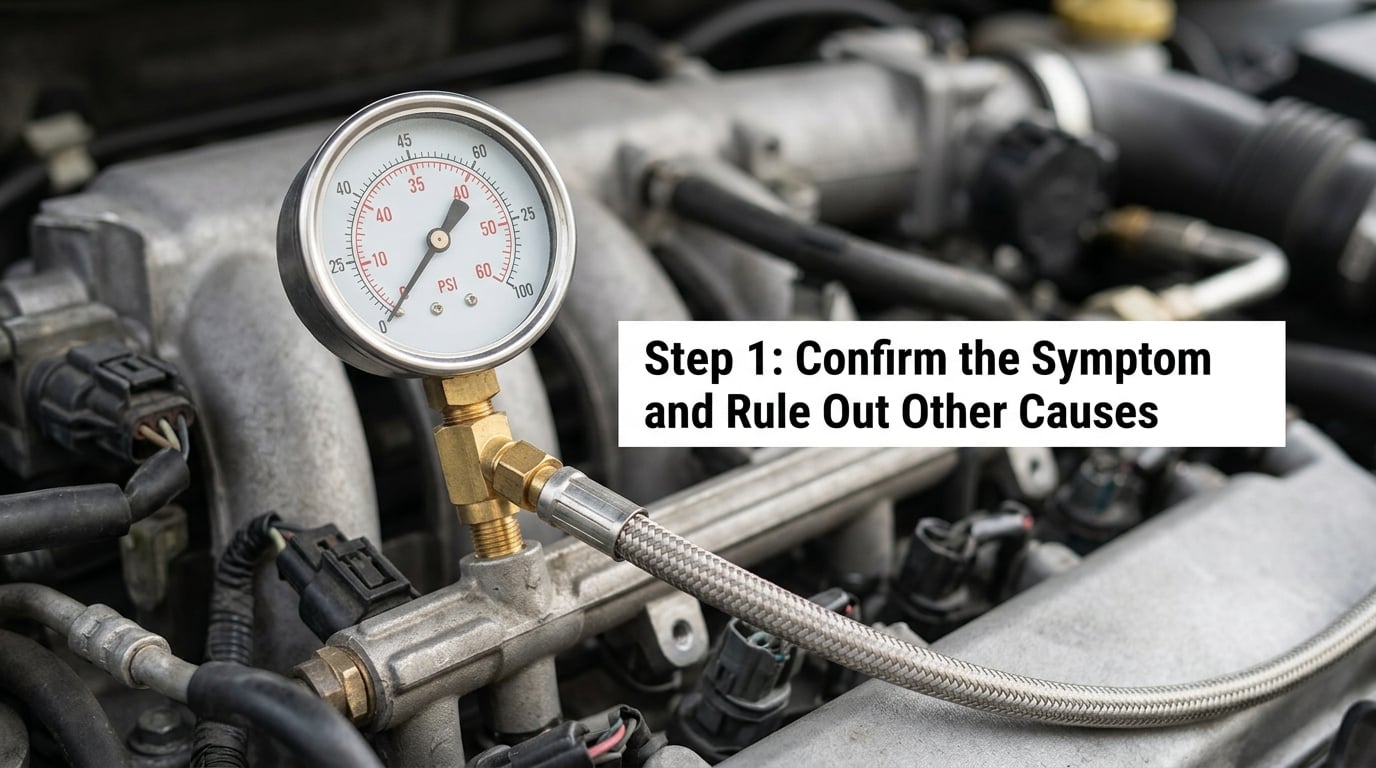
This is the test that decides most cases, and it is the one owners skip. Connect the gauge to the fuel rail test port with the engine off, using the correct adapter. On a returnless system, relieve rail pressure through the test port before loosening anything.
Take three readings, because each one rules out a different failure:
- Key-on, engine off. The pump primes and the gauge should jump to the specified static pressure and hold it while the pump is running. Some systems shut the pump off at key-on, so check your service data before concluding anything from a dead gauge here.
- Engine running at idle. Pressure should sit at or near the same value, or at the running value your manufacturer lists. A reading that is far below spec here points at a weak pump, a blocked supply, a clogged filter, or a regulator stuck shut.
- Key-off residual, immediately after shutdown. Pressure should hold for a few seconds before bleeding down. Rapid decay means a leak downstream, a worn check valve, or an injector dripping into the cylinder. That is a different fault from a pump that cannot make pressure.
Then do the part that catches most guides out. Take a fourth reading while you load the engine, either by gently applying the throttle in gear or by taking a fast road loop. A worn pump often holds correct static pressure and cannot supply volume when you ask for it. Pressure that holds at idle but collapses under load is the clearest evidence of a dying pump.
Do not crack a live fuel line to see if fuel is flowing. That is how fuel gets on a hot exhaust and how people get hurt. Gauge it properly.
| Fuel system type | Typical key-on prime | Typical running pressure | Key-off residual |
|---|---|---|---|
| Port injection, return-type (many older and classic gasoline engines) | Low, roughly 3 to 6 psi | About 2.5 to 6 psi | Holds a moment, then bleeds to the prime value |
| Port injection, returnless (most modern gasoline engines) | Rises to the rail value, often 35 to 60 psi | Roughly 35 to 60 psi, controlled by the regulator | Should hold for several seconds, then decay |
| Direct injection gasoline, returnless | Rises to the rail value, commonly 40 to 70 psi | Commonly 40 to 70 psi | Holds briefly, then decays |
| Returnless with vacuum-reference regulator | Same as fixed regulator | About 5 to 10 psi higher at full vacuum, dropping as manifold vacuum falls | Holds briefly |
| Diesel low-pressure lift pump | Builds pressure under the injection pump | Typically 30 to 60 psi depending on the system | Check against the maker’s minimum |
| Diesel high-pressure injection pump | No rail reading from a standard gauge | Commonly 1,600 to 2,600 psi measured at around 2,000 rpm | Use a gauge rated for the system and the maker’s hold time |
Treat every number in that table as a range, not a spec. Your service manual gives the exact value for your engine, and a gauge that reads 42 psi on an engine meant to see 58 psi is a failed test even though the needle looks healthy.
Step 5: Check Pump Voltage, Current, and Ground
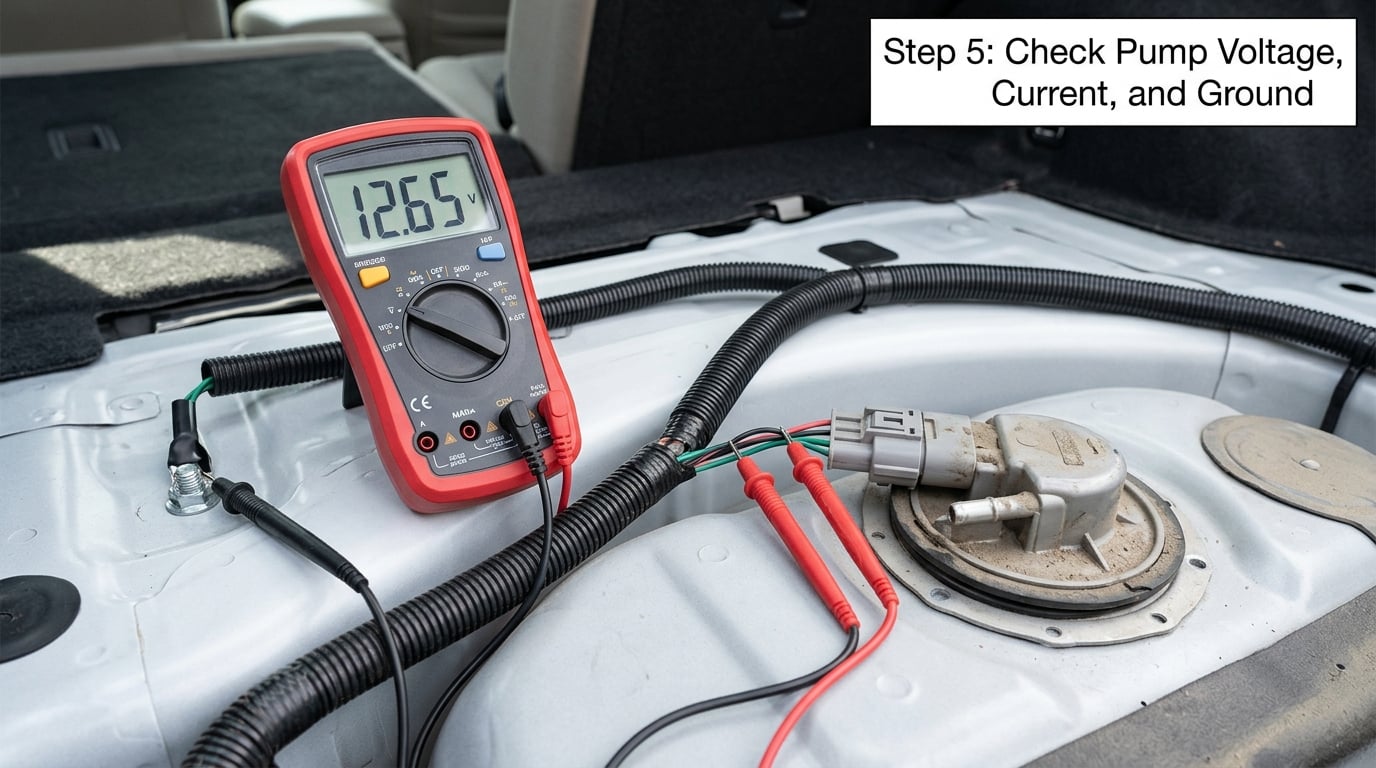
A healthy pump runs on close to battery voltage. Anything less at the connector under load means the wiring, connector, or ground is stealing the pump’s power, and a replacement pump installed into that wiring will fail the same way the old one did. This is the single most repeated finding in owner threads: someone replaces the pump, still sees low pressure, and the real fault was voltage at the connector.
Run a voltage drop test rather than trusting a meter reading at the battery. With the engine cranking or the pump running, place one probe on the positive terminal at the pump connector and the other on battery positive. The difference between the two readings is your voltage drop, and it should stay under about half a volt. Do the same on the ground side, probe to battery negative, with the same limit. Then wiggle the connector lightly while you read; a drop that jumps when you move it points at corroded pins.
Next, measure current draw with the clamp. A typical in-tank pump on a gasoline engine pulls somewhere in the region of 3 to 8 amps while running. Far below that and the pump is starved of power or worn; far above it and you are looking at a binding motor or a short. Compare the number against the service data for your model rather than a generic range.
Step 6: Determine Whether the Pump Is In-Tank or External
Location changes your access and your next test, so establish it before you plan the repair. An in-tank pump module combines the pump, the fuel level sending unit, the strainer sock and often the pressure regulator in one assembly, reached through an access panel under the back seat or through the fuel filler neck. An external lift pump sits in the fuel line or in a tunnel on many European and diesel cars, which makes it far easier to reach.
If the module is in-tank, the tank comes down to swap it, so any test that can be done from outside should be done first. A key-on prime, an amp clamp on the pump circuit, and a rail gauge together usually settle the diagnosis without touching the tank at all. If the pump is external, you can often split the line, bench-test the pump, and check the regulator or the filter in the same hour.
Diesel owners get a different version of this. The high-pressure injection pump is driven by the engine and can fail without any pressure at all, so the low-pressure side must be proven good before you blame it. Diesel owners on the forums report having to test at around 2,000 rpm to read those high-side values properly.
Step 7: Check the Fuel Filter, Tank, and Fuel Quality
A blocked filter or a sock strainer sitting in debris will starve a pump that is perfectly capable of making pressure. On a system with a serviceable external filter, changing it is cheap and often resolves low-pressure complaints outright. On many in-tank modules the strainer is part of the assembly, which is another reason to rule it out before ordering the module.
Look at the fuel condition too. Dark, varnished or contaminated fuel, water in the tank, or a tank that has been empty and left open to air will all produce hard starting, rough idle and stalling. An air lock shows up as pressure that comes and goes and a pump noise that rises and falls with it.
On a vehicle that uses the tank as a charcoal canister, a restricted or failed purge valve can starve the engine under load. Owners routinely mistake that for pump failure because the stumble appears exactly when the fuel demand is highest. Reading live data while watching the commanded and actual rail pressure side by side separates an air or vapor problem from a mechanical one quickly.
Step 8: Make the Diagnosis and Choose the Next Repair
At this point the evidence lines up on one of a few paths.
Good power and good ground, no command signal at the pump. The computer is not asking for fuel. Look at the relay, the fuse-safety circuit, the inertia switch on older designs, and any stored codes that stopped the command. The pump is probably fine.
Good command signal, low voltage at the pump under load. This is a wiring, connector or ground problem, and it must be fixed before any pump is installed or the new one will be destroyed in short order.
Full voltage, correct ground, low pressure at idle, further drop under load. That is the pump failing on volume. This is the case where replacement is the right call, particularly on a high-mileage in-tank module where labor dominates the cost.
Pressure in spec at idle but bleeding off fast after key-off. The pump is making pressure. Look for a downstream leak, a worn check valve, or leaking injectors instead.
Pressure correct at idle, drops when the engine is loaded, rail pressure reading normal but a lean code appears. Suspect the pressure regulator, a vacuum hose to it, or a supply restriction rather than the pump.
Be honest about the point of diminishing returns. A high-mileage in-tank pump on a car with rust underneath it may not justify a full weekend diagnosis, and a shop will do a pressure test in twenty minutes for a service fee that is far less than the job you were about to start. What is never a good use of time is ordering a pump on the strength of a noise alone.
Common Mistakes
Replacing the pump before measuring pressure. This is the expensive one, and it is where most online answers send you. A pressure reading takes five minutes and tells you whether you needed the part at all.
Treating an intact fuse as proof the circuit is healthy. The fuse only protects the wire. A corroded connector, a chafed harness or a degraded ground can sit behind a perfect fuse and starve the pump.
Opening a line that still holds pressure. Fuel mist plus a hot exhaust is a serious fire risk. Relieve pressure through the test port on a returnless system, and never loosen a fitting on a running or recently run engine.
Ignoring the ground. A voltage reading at the pump that is good at idle can collapse the moment the engine actually needs fuel. Always run a proper voltage drop test on the ground side under load.
Reading a code as a verdict. A fuel pressure code records a condition, not a part. Codes get set by a starved pump, a bad sensor, a leak, or a wiring fault with equal ease. Read live data and confirm with a gauge.
Testing on a nearly empty tank. A pump that has been running dry or sucking in debris may show low pressure for reasons that have nothing to do with the pump itself. Fill it properly and retest before you condemn anything.
Forgetting the diesel case. A standard gauge on a high-pressure diesel system is both useless and dangerous. Use a gauge rated for the system and follow the maker’s test rpm.
One last safety habit: keep a fire extinguisher rated for flammable liquid within reach, work outside if you can, and give the fuel system time to vent after a run. Nobody regrets those three things.
Frequently Asked Questions
What are the most common signs of a bad fuel pump?
The usual signs are trouble starting when cold, a whine or squeal from the rear of the car, hesitation or surging on acceleration, rough idle, stalling under load or at idle, and a check engine light with a low fuel pressure code. Engines that run fine cold and die once hot usually point at a pump that has worn internally or a ground that cannot carry the load when everything else is switched on. Confirm any of it with a rail pressure reading before buying parts.
How do I know if my fuel pump has low pressure?
Hook a mechanical fuel pressure gauge to the fuel rail test port and read it at key-on, at idle, and again while you load the engine. A returnless gasoline system typically wants roughly 35 to 60 psi, so a reading well below that at idle, or a reading that holds at idle but sags when you apply load, means the pump cannot supply enough volume. Compare your result against the pressure listed in your service manual, since the range varies by engine.
Can a bad fuel pump make a loud whining noise?
Yes, and a rising whine from under the car or the rear seat area that follows engine speed is normal on many vehicles. What matters is change: a new high-pitched squeal, a grinding or buzzing sound, or a noise that gets louder as the tank empties usually means a worn bearing or a pump struggling against a restriction. A pump that goes silent with a pressure warning is failing in the other direction. A noise alone is a clue, never a diagnosis.
Is it safe to test a fuel pump yourself?
The listening, fuse, relay and multimeter tests are perfectly safe if the engine is off or idling in a ventilated space. Opening the fuel system is where care matters: relieve pressure through the test port, never crack a live line, keep flames and sparks away, and have a fuel-rated extinguisher close. Follow your owner’s manual for the specified pressure, and hand the job to a technician if a result does not make sense to you.
Why does my BMW have a fuel-pump code but still run?
Most BMW petrol models use an electronic fuel pump control module that can drive the pump at variable output, and a stored code often records a condition that cleared itself. The pump may still deliver enough fuel for gentle driving while failing under load. Other codes point elsewhere entirely, such as the fuel level sender, the pressure control valve, or the vent valve. Clear the code, then watch commanded versus actual rail pressure under load rather than trusting the code alone.
Should I replace the fuel pump or the fuel filter first?
Always test before replacing either, and if you do need parts, start with the filter because it is far cheaper and far less work. A blocked filter or a strainer full of debris can starve a healthy pump, and it can also make a weak pump look worse than it is. Change the filter, then re-run the pressure test under load. If pressure still collapses, you have a real pump result and can buy the pump with confidence.
Conclusion
The safest first move costs nothing: turn the key to on, listen for the prime, then look at the fuse and the relay. If those look right, put a gauge on the rail and read it at key-on, at idle and under load, and compare the numbers to your service manual. Correct power, correct ground and pressure that collapses under load together are the only combination that truly condemns the pump.
Do not drive the car if fuel is leaking or you are getting strong evidence of a restriction, and do not open a line that still holds pressure. If the readings do not make sense to you, a shop pressure test is a quick, cheap way to find out where you went wrong.
Good luck with it, and update this guide in 2026 as the tools and layouts change.