
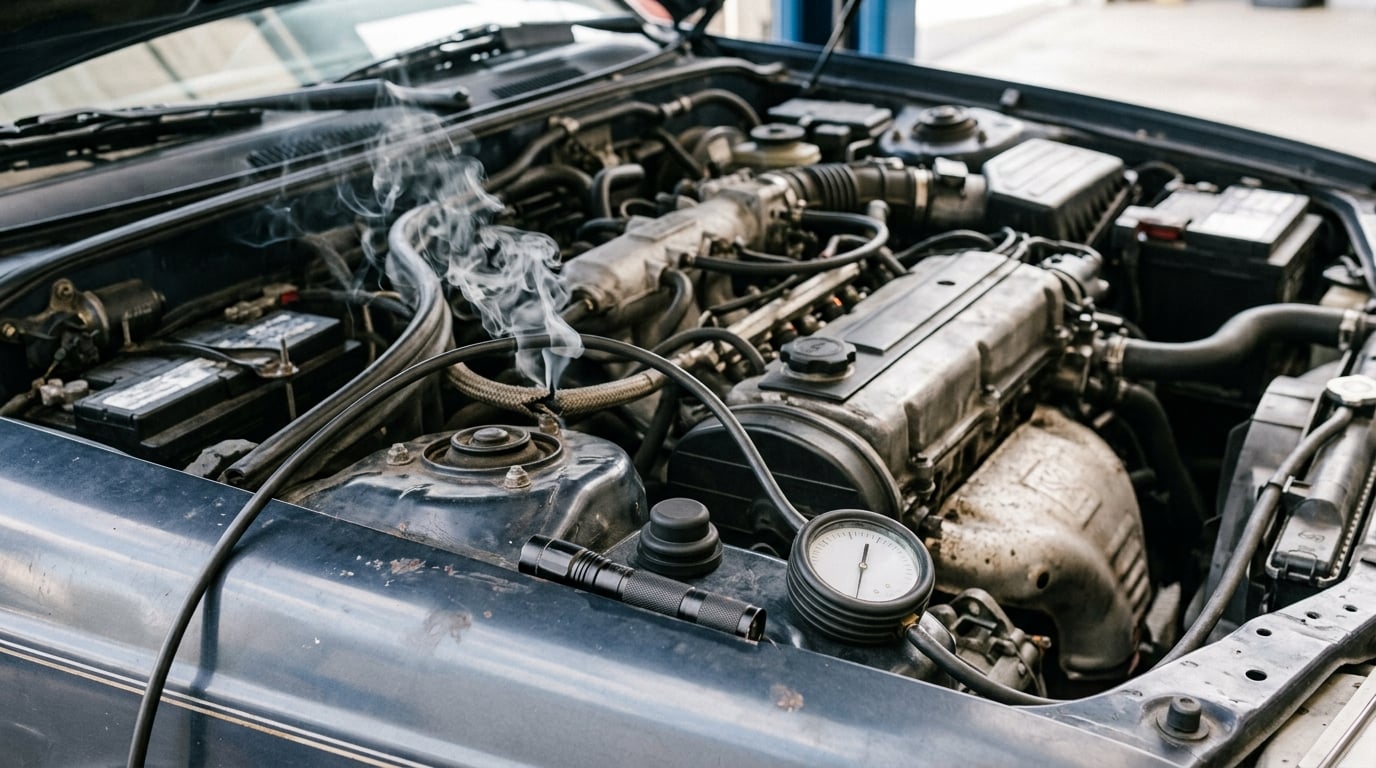
To find a vacuum leak in an engine, start with a visual inspection, then use a smoke machine or a vacuum gauge to pin it down, and confirm it with a carb cleaner spray that makes the idle change. Most owners find the leak in under an hour once they stop guessing and follow a fixed order.
A vacuum leak is any gap after the mass air flow sensor where air slips into the engine unmeasured. That extra air has no fuel with it, so the mixture runs lean, and the ECU tries to correct by adding more fuel. The result is a rough or wandering idle, a hissing sound from the engine bay, and often a lean trouble code such as P0171.
It is worth separating one term from the other before you start. A vacuum leak and an intake leak are the same physical fault, and people use the words interchangeably. An EVAP leak is different: that is fuel vapor escaping from the gas cap, charcoal canister, or evap lines, and it will not make your engine run lean. If your check engine light is a lean or misfire code, you are hunting an intake leak, not an EVAP fault.
This guide is for weekend mechanics working in a driveway or garage. The order below matters, because each step costs a little more time and money than the one before it, and jumping straight to buying a MAF sensor is how a lot of people end up with a new sensor and the same rough idle.
Table of Contents
- What You Need to Find a Vacuum Leak in an Engine
- Step-by-Step: How to Find a Vacuum Leak in an Engine
- Common Mistakes That Send You Down the Wrong Path
- Frequently Asked Questions
- What are the most common signs of an engine vacuum leak?
- Can I use a smoke machine to find a vacuum leak safely?
- What vacuum reading should a healthy engine show?
- How do I check for a vacuum leak without a smoke machine?
- Is a brake-booster hose a common vacuum leak location?
- When should I take my vehicle to a mechanic for a vacuum-leak diagnosis?
- Conclusion
What You Need to Find a Vacuum Leak in an Engine
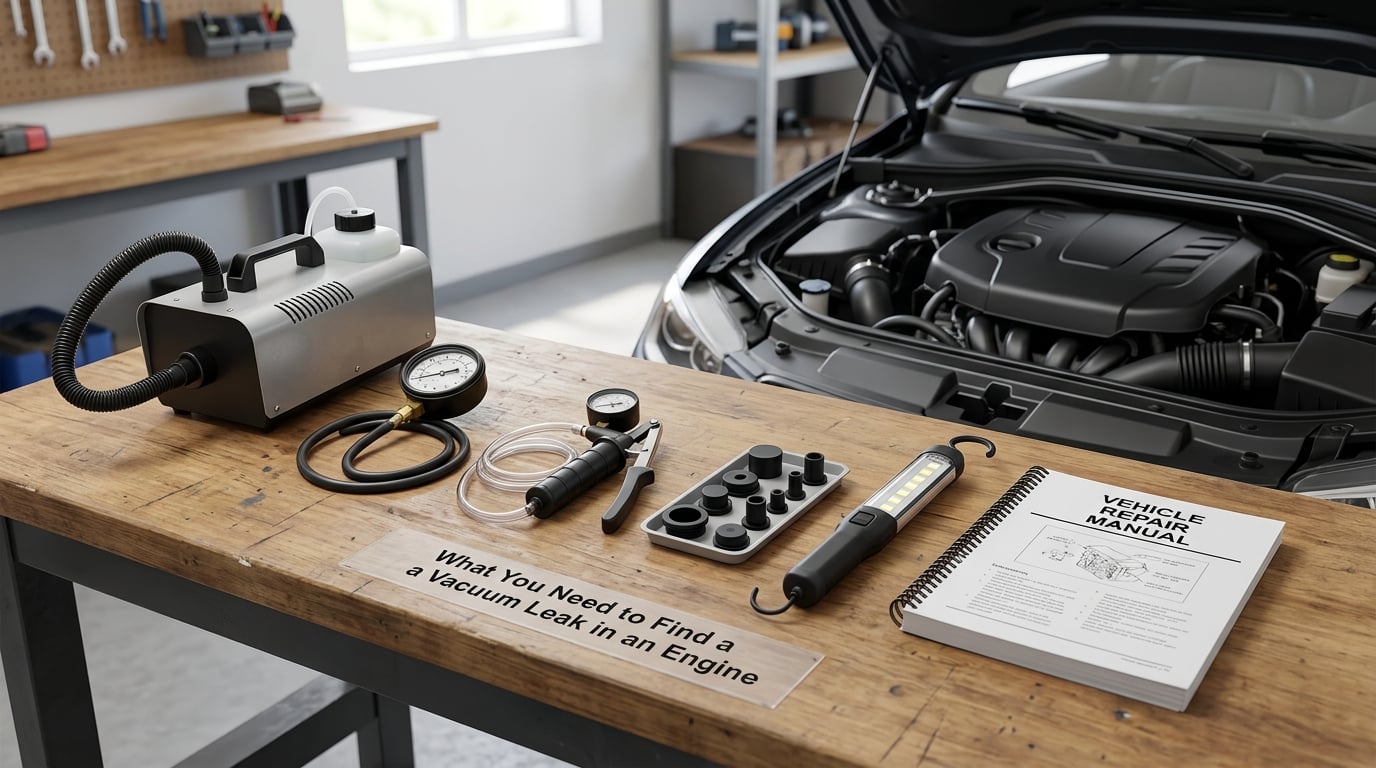
You need very little to start, and most of the diagnostic tools are cheap or already in the garage. The full kit is a vacuum gauge, a smoke machine, a can of carb cleaner, an inspection light, an OBD-II scanner, and a set of plugs or blanking adapters to seal ports while you test.
Here is what each one is for.
- Service information for your engine. A vacuum hose diagram or a labelled under-hood decal saves an hour of guessing at which line does what.
- Inspection light and hand tools. Small flashers and a ratchet set let you see behind the intake and reach hoses without pulling the engine apart.
- Blank plugs and adapters. These let you seal a suspect port on purpose so you can watch what changes.
- Vacuum gauge. A gauge with both inHg and kPa scales reads manifold vacuum and shows reserve, which tells you if a hose is holding.
- Hand vacuum pump. A small hand pump with a gauge lets you test a single hose or fitting in isolation.
- Smoke machine or approved smoke source. This is the fastest way to see where air is escaping, and it works on hoses and gaskets alike.
- Carb cleaner or brake cleaner. Used as a spray, not a cleaner, in the RPM-change test.
- OBD-II scanner. Any code reader will show P0171, P0174, and misfire counts, plus short and long term fuel trims.
Plenty of people find a leak with nothing but their ears and a flashlight. A vacuum leak is audible once it is big enough to matter, and a few feet of garden hose held against the suspect area will pull the sound in close enough to trace. That is a real technique, not a joke, and it costs nothing.
Two working conditions matter. Let the engine cool to a comfortable working temperature, because a hot exhaust manifold will burn you and a cold engine may not pull a stable reading. And follow your vehicle manufacturer’s instructions where they differ from anything here, particularly for diesel and turbocharged engines where the vacuum plumbing behaves differently.
Step-by-Step: How to Find a Vacuum Leak in an Engine
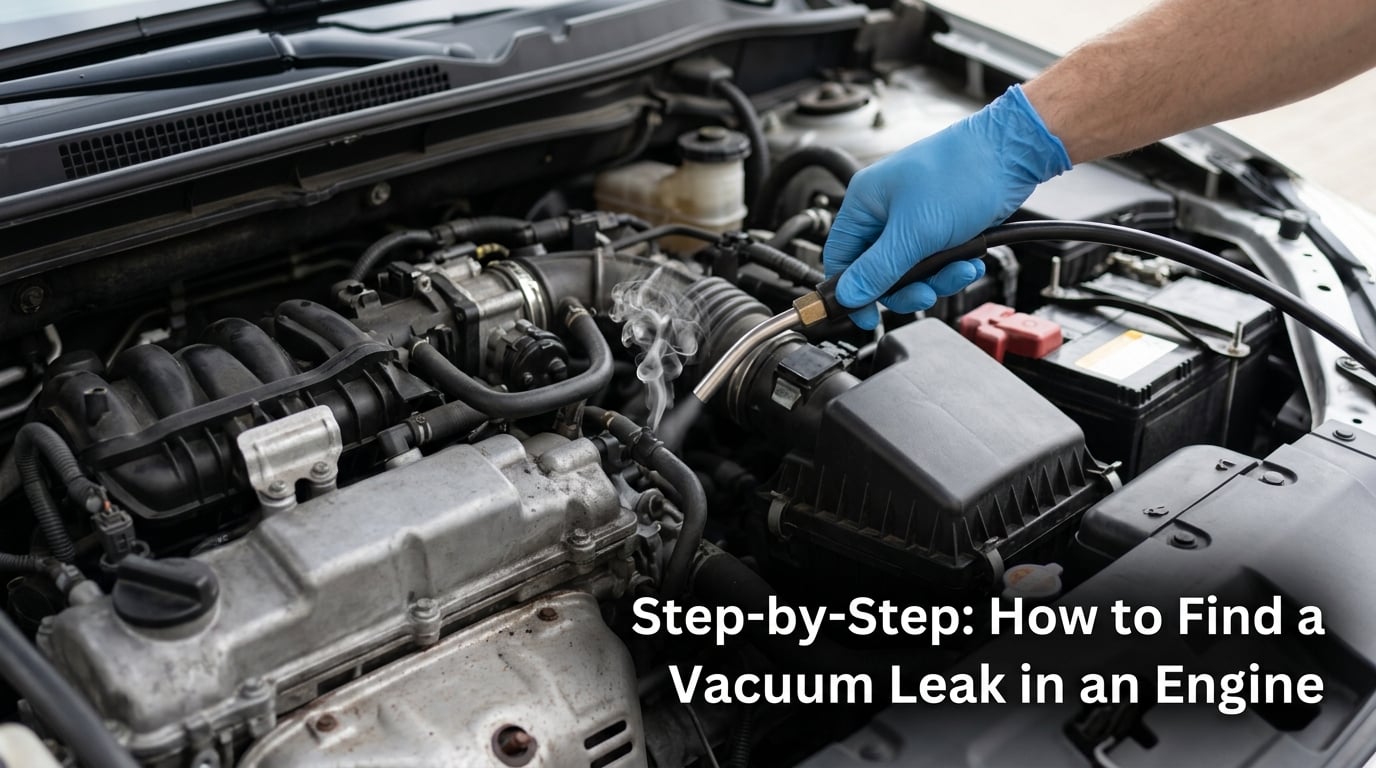
Run the five steps in order. Each one narrows the search, and stopping at the first clear signal saves you from tearing into an engine that never needed it. A rough idle that only shows up when the engine is warm is normal for some cars, so a hunt done on a cold engine can send you chasing a fault that is not there.
1. Perform a visual inspection of the vacuum system
Start by looking, because the majority of vacuum leaks are visible to anyone who bends over the engine. You are checking for hoses that are disconnected, cracked, split, softened, flattened by a clamp, or melted where they pass near the exhaust manifold.
Work the same route every time so nothing gets missed. Follow each hose from one end to the other, looking at both fittings, then look at the components the hoses connect to: the intake boot where the ducting meets the throttle body, the intake manifold seams, the valve cover gasket rails, the brake booster, the PCV valve, and every vacuum solenoid and EGR valve on the engine.
Rub a finger along each hose. A healthy rubber vacuum hose feels firm and matte, with no give. A bad one feels spongy, has a soft spot under pressure, or has a hairline crack you can feel but barely see. If a hose is shiny, sticky, or has a fuel or oil film on it, replace it rather than trying to clean it.
What worked: you found a hose end hanging free, or a clamp that was never torqued. Fix it, clear the code, and the idle settles. The visual pass alone solves a surprising share of cases, and it costs ten minutes.
2. Compare vacuum readings across the hose connections
A vacuum gauge turns a guess into a number. Connect the gauge to a known good reference point first, which on most engines is the vacuum port at the intake manifold, then read the value at idle with the transmission in park and everything at operating temperature.
A healthy gasoline engine at a warm idle typically pulls somewhere around 17 to 22 inHg. The number matters less than the comparison, so record it and use it as your baseline. The engine will pull different readings at different times, and a straight comparison is what keeps you from chasing normal variation.
Now tee the gauge into the hose feeding the brake booster and read it again. A reading within an inch or two of the manifold reading means that line is holding. A large drop, or a needle that wanders and never settles, points to a leak somewhere between the two points.
Reserve tells you whether the engine can hold vacuum. Watch the needle while you briefly raise the rpm to about 2000 and then snap the throttle shut. If the needle stays up near its high reading and falls slowly, the engine holds vacuum and the leak is small. If it drops like a stone the moment you close the throttle, you have a significant leak or a bad check valve.
What worked: the booster line reads well while the manifold reference also reads low. That combination usually means a leak ahead of the booster, in the intake or the manifold gasket, not in the booster hose itself.
3. Use smoke to locate the leak
Smoke is the most reliable visual method, and it works because the engine is actively pulling air through the leak while you watch. Hook the smoke machine to a vacuum port, or to the intake if you have removed the air intake ducting, and do the engine-off test first.
With the engine off and the key on, most vacuum systems hold a mild vacuum. Pump a short burst of smoke and watch the hoses, the intake boot, and every gasket seam. Escaping smoke points straight at the fault, and you can often find several small leaks in one pass. Then crack the throttle by hand with the key on to make the manifold pull harder, which will reveal leaks that only show up under load.
For the engine-running test, start the engine and let it idle. Bring the smoke up to a hose and listen. If the engine idles steady and does not draw the smoke, that hose is sound. If the smoke gets pulled straight in and the idle speeds up, roughens, or the engine almost dies, you have just found the leak. That reaction is the same one the spray test uses, which is why the two methods agree with each other.
Keep the smoke volume low and the session short. Thick smoke in a closed garage is unpleasant and hard to see through, so crack a door or run the test outside.
What worked: smoke appears at the lower intake manifold seam on one side only. That is a failed manifold gasket, and you have narrowed the repair to removing the intake rather than replacing half the fuel system.
4. Check the common vacuum-leak locations
When smoke does not find it, work through the usual suspects in this order, because they are ordered by how often they turn out to be the culprit.
- Intake boots and ducting. A split boot or a loose clamp past the MAF sensor is the single most common intake leak and takes seconds to check.
- Intake manifold gasket seams. Especially on high-mileage engines, and especially along the lower edge where oil runs down and attacks the gasket. Look for a wet or oily sheen along the seam.
- Throttle body and idle air control connections. The throttle body gasket, the IAC hose, and any stepped idle plate or idle air control valve that moves with the throttle.
- PCV and crankcase ventilation hoses. The breather hose, the valve cover grommets, and the crankcase vent lines are cheap to replace and a very common find on older engines.
- Brake booster hose and the check valve. A failed check valve is often mistaken for a normal hiss. If the pedal goes hard when the engine stalls or you brake at idle, that is the booster line and it matters for safety.
- EGR valve and its vacuum hose. EGR valves seize open and leak just as well as they stick shut.
- Vacuum solenoids and check valves. Small valves with a vacuum line to them, common on emissions equipment, leak at the diaphragm or the hose.
- Aftermarket equipment. A cheap intake, a custom intercooler pipe, a carburetor spacer kit, or a hydroboost adapter that was never properly sealed. Owners who have added something tend to forget to look there.
You can also section the intake into zones to halve your search area. If the smoke test shows nothing, block off half the intake with a rag or a plate so the leak is either hidden inside that zone or eliminated from consideration. Then unplug one hose or block one port at a time and watch the idle. Each isolation narrows the field without any guesswork.
What worked: unplugging a single vacuum hose at the intake made the rough idle disappear. A hose that reads fine but is not seated correctly, or an o-ring that has flattened, will do exactly that.
5. Confirm and repair the suspected leak
Never replace a part on a suspicion. Confirm first by temporarily sealing or plugging the suspect port with a blanking plug or a clamped-off hose, then watch the idle and the gauge.
If the idle evens out, the smoke no longer gets drawn in, or the vacuum reading jumps back up, the leak was there and only there. That is your confirmation. If nothing changes, you have eliminated that line and you keep going, which is why the test is worth the five minutes.
Now repair it. A cracked or hardened hose gets replaced with new hose of the same diameter and the correct material, routed so it cannot chafe against a bracket or run next to the exhaust. Check that the new hose is seated fully on its port and clamped properly. A failed check valve, solenoid, or PCV valve gets replaced with a new one. An oily or leaking gasket, an intake boot, or a manifold seal gets cleaned, inspected for flatness, and either resealed or replaced.
Then retest. Clear the codes with your scanner and recheck fuel trims at idle and at 2500 rpm, then run the smoke test again. A leak that comes straight back usually means a clamp was left off, a new hose was routed into the same pinch, or a second leak was already there. If the idle is still rough with no leak in sight, clear the codes, watch the trims, and read the trouble codes properly before buying anything.
What a vacuum leak is not
Before you buy a part, know what the leak is not. A dirty or failed MAF sensor reads wrong, which mimics the symptom, and replacing it does nothing for a real leak. Weak injectors and ignition faults can also cause a lean code and misfires. The difference is that a genuine intake leak makes the fuel trims go strongly positive and often makes the rpm change when you spray a suspect area. Pull the vacuum numbers, the trims, and the misfire counts together before you spend a cent.
Common Mistakes That Send You Down the Wrong Path
Most failed vacuum leak hunts fail on method, not on effort. Here are the mistakes I see repeated, and the correction for each.
- Treating normal hose collapse as a leak. Thin hoses often flatten slightly at idle and spring back. Correction: squeeze the hose and release it. A hose that fully recovers was not your leak.
- Confusing PCV flow with a leak. A crankcase vent hose carrying a light oily mist is doing its job. Correction: a PCV system that pulls strong vacuum at idle is working.
- Overfilling the bay with smoke. Thick smoke hides the escaping wisps you are looking for. Correction: short bursts, engine off first, and open the garage door.
- Ignoring the brake booster check valve. A hissing booster that also pulls vacuum for the brakes is a leak, not ambience. Correction: test the check valve by clamping the hose at the booster and checking whether the pedal firms up.
- Replacing the wrong hose. Several hoses look identical and sit right next to each other. Correction: trace the line to both ends before pulling anything, and unplug fittings rather than slicing hoses in place.
- Testing a hot engine. Working over a 900 degree exhaust with aerosol spray in your hand is how people get hurt. Correction: let it cool, and do the first pass engine off.
- Skipping the retest. Replacing a hose and driving away is how the code comes back in three weeks. Correction: clear codes, recheck trims, and smoke test again before you call it done.
- Throwing parts at the problem. MAF sensors, throttle bodies, and plugs get swapped out on a hunch. Correction: confirm the leak first, and let the gauge and the trims decide.
A few safety rules come with this job. Do not spray starting fluid or propane anywhere near a hot exhaust, a hot intake, or an ignition source, and do not use an open flame to find a leak. Aerosol propellant is flammable, so keep sprays away from the exhaust and apply them in short bursts while the engine idles. If the brake pedal goes hard or the booster hisses loudly, stop driving the car until it is fixed, because half your brake assist is gone. Work in a ventilated space, keep your hands clear of fans and belts, and use wheel chocks if the vehicle could move.
Frequently Asked Questions
What are the most common signs of an engine vacuum leak?
The classic signs are a rough or wandering idle, an idle that hunts up and down, a hissing or whistling sound from the engine bay, and a check engine light with a lean code such as P0171 or P0174. You may also see misfire counts, a backfire when you lift off the throttle, and fuel economy that drops. A vacuum leak on the brake booster line adds one more clue: a brake pedal that feels unusually hard while the engine idles.
Can I use a smoke machine to find a vacuum leak safely?
Yes, a smoke machine is the safest and most precise method, and most are built for this exact job. Do the engine-off pass first with short bursts of smoke, then repeat it with the engine idling to confirm a suspect line. Work in a ventilated space so the smoke does not build up, keep the machine away from hot exhaust parts, and unplug or blank ports one at a time so you can see which hose reacts.
What vacuum reading should a healthy engine show?
A healthy gasoline engine at a warm idle typically pulls about 17 to 22 inches of vacuum, and the exact figure varies a little by engine. The number alone tells you less than the comparison does. Take a reading at a known good manifold port, then read the same gauge at the brake booster line. If the two match within an inch or two, that line is holding. If the booster line reads far lower, the leak is upstream of it.
How do I check for a vacuum leak without a smoke machine?
Start with a visual inspection, squeezing every vacuum hose along its length to find soft spots and cracks. Then use a vacuum gauge to compare a known good reference port against the brake booster line. The RPM-change test works too: idle the engine, spray a short burst of carb cleaner at a suspect hose, and watch the tachometer. A sharp rise, a stumble, or a stall means air was being drawn through that line. A garden hose held to the area also narrows down a loud leak.
Is a brake-booster hose a common vacuum leak location?
It is common enough that you should check it early, and it is one of the few leaks that is a safety issue rather than just a driveability problem. A failed check valve or a cracked booster hose pulls vacuum away from the engine and can leave you with reduced brake assist. You will notice a hissing sound near the firewall and a brake pedal that feels harder than usual while the engine idles. If the pedal goes hard, stop driving until it is repaired.
When should I take my vehicle to a mechanic for a vacuum-leak diagnosis?
Stop and hand it to a shop if the leak is behind the intake manifold, if the hoses are routed through a firewall or under the carpet where you cannot reach them, if a gasket or boot needs the manifold removed, or if you have already replaced hoses and the code keeps coming back. Diesel and turbocharged engines are also worth taking in, since their vacuum plumbing behaves differently and the wrong test can mislead you. The good news is that most hoses, check valves, and PCV valves are cheap parts to replace once found.
Conclusion
Look first, then measure, then smoke, then confirm. A visual pass and a vacuum gauge comparison cost almost nothing and catch most leaks, smoke gives you the exact spot, and a temporary plug proves the fault before you spend anything on parts.
Work on a cool engine, keep spray away from the exhaust and ignition sources, and treat a hissing brake booster as a stop-driving item. Follow the service information for your vehicle, and if you have replaced the obvious hoses and the code keeps coming back, that is the signal to get a second set of eyes on it.