
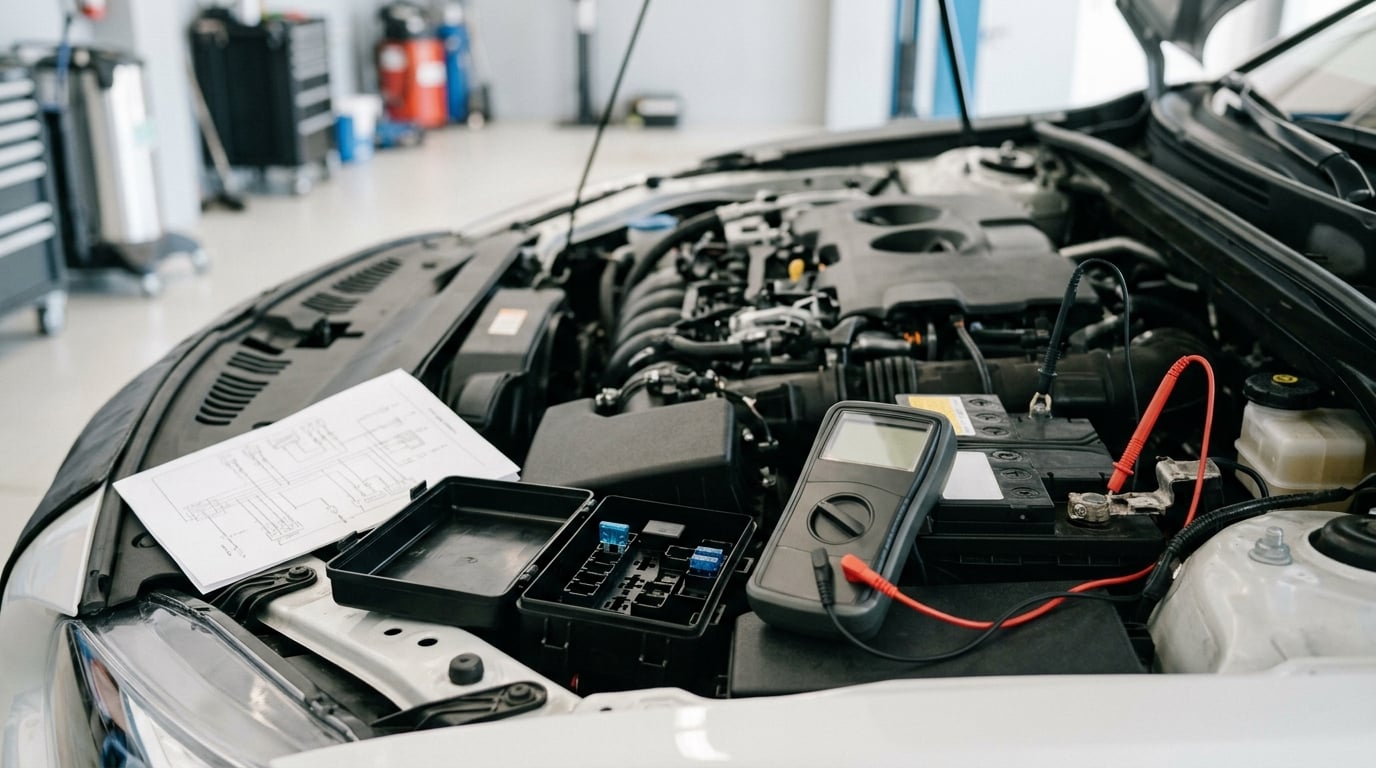
A parasitic battery drain is any circuit that keeps pulling current from the battery after you shut the car down. Knowing how to diagnose a parasitic battery drain takes one tool and about an hour: set a digital multimeter to DC amps, connect it in series at the negative battery terminal, wait 20 to 45 minutes for the modules to sleep, then pull fuses one at a time until the reading drops below 50 milliamps. Most of that hour is waiting.
The reason to do this before buying another battery is simple: a healthy battery dies within a week if something stays awake, and swapping cells on a car with a real drain just means buying batteries until you run out of patience. Forum owners on r/MechanicAdvice tell story after story of three replacements on the same vehicle before anyone checked current draw.
Below is the sequence that avoids wasted time and false conclusions, in the order that matters.
Table of Contents
- What You Need
- Step-by-Step
- Confirm the Battery Is the Problem First
- Put the Vehicle to Sleep Before You Measure
- Measure Baseline Battery Draw at the Negative Terminal
- Check for an Active Wake-Up Condition
- Pull Fuses One at a Time
- Identify the Circuit, Then Isolate the Load
- Verify the Culprit and Repair the Circuit
- Confirm the Battery No Longer Drains
- Common Mistakes
- Frequently Asked Questions
- How much current draw is normal after a car sleeps?
- Why does my BMW battery drain overnight even after replacing the battery?
- Can a parasitic battery drain damage the alternator or control modules?
- How long should I wait before measuring battery draw on a modern BMW?
- Does disconnecting the battery erase radio codes or vehicle settings?
- When should I take a parasitic drain problem to a mechanic?
- Conclusion
What You Need
You do not need a scan tool or a shop clamp to do this properly. You do need a meter that can read small currents accurately, and a fuse diagram for the specific vehicle.
- Digital multimeter with a DC amps setting and at least 0.01 amp resolution on the 10A range. Entry-level meters work fine for this job; the procedure is forgiving as long as the display can show milliamps.
- Test leads or a clamp lead. Standard leads are simplest. A clamp lead that breaks the negative cable without fully removing it saves time on tight battery terminals.
- Battery terminal adapter if the post is smaller than the meter lead, plus a ring terminal crimped to the loose lead.
- Fuse pullers. The small plastic ones from the fuse box lid, or insulated pliers in a pinch.
- Socket set and trim tools for battery retention hardware and interior trim clips.
- Fuse box diagram from the owner’s manual or service information. You need to know what each fuse powers before you start pulling.
- Battery charger so the test starts from a known full charge.
- Optional: a memory saver to keep radio codes and clock settings, and a 12V test lamp as a meter-free alternative.
Two documents matter more than the tools. The owner’s manual has the battery disconnection procedure for your exact vehicle, including whether the alarm or radio settings survive it. The fuse index tells you which circuits are downstream of each fuse, which is what turns a number into a part.
Step-by-Step
Confirm the Battery Is the Problem First
Check battery condition and charging behavior before you blame a parasitic load. A fully charged 12V battery should rest near 12.6 volts with the engine off, and a load test tells you whether the plates still hold a charge.
If the battery fails the load test, it is finished, drain or not. Then check the alternator output with the engine running. A charging system that never reaches roughly 13.5 to 14.5 volts will kill batteries no matter what you find on the parasitic side.
You want to know whether the battery died because it is old, because the charging system is weak, or because something ate it overnight. Those three problems look identical from the driver’s seat.
Put the Vehicle to Sleep Before You Measure
Normal shutdown runs a sequence: modules finish their tasks, relays drop out, the body control module powers down its outputs, and the infotainment system goes dark. Only after that does the small legitimate load remain, clock memory, alarm standby, keyless entry receivers.
Lock the vehicle, close every door, the trunk and the hood, and leave it alone. Then wait 20 to 45 minutes. On some vehicles the timer starts when the doors latch; on others it starts at key-off, so the full wait is the safe choice.
Any accessory left on changes the reading. Phone chargers, radar detectors, interior lamps, cargo lights, an open glove box, an active phone key in the cabin. Clear all of it before you begin.
Measure Baseline Battery Draw at the Negative Terminal
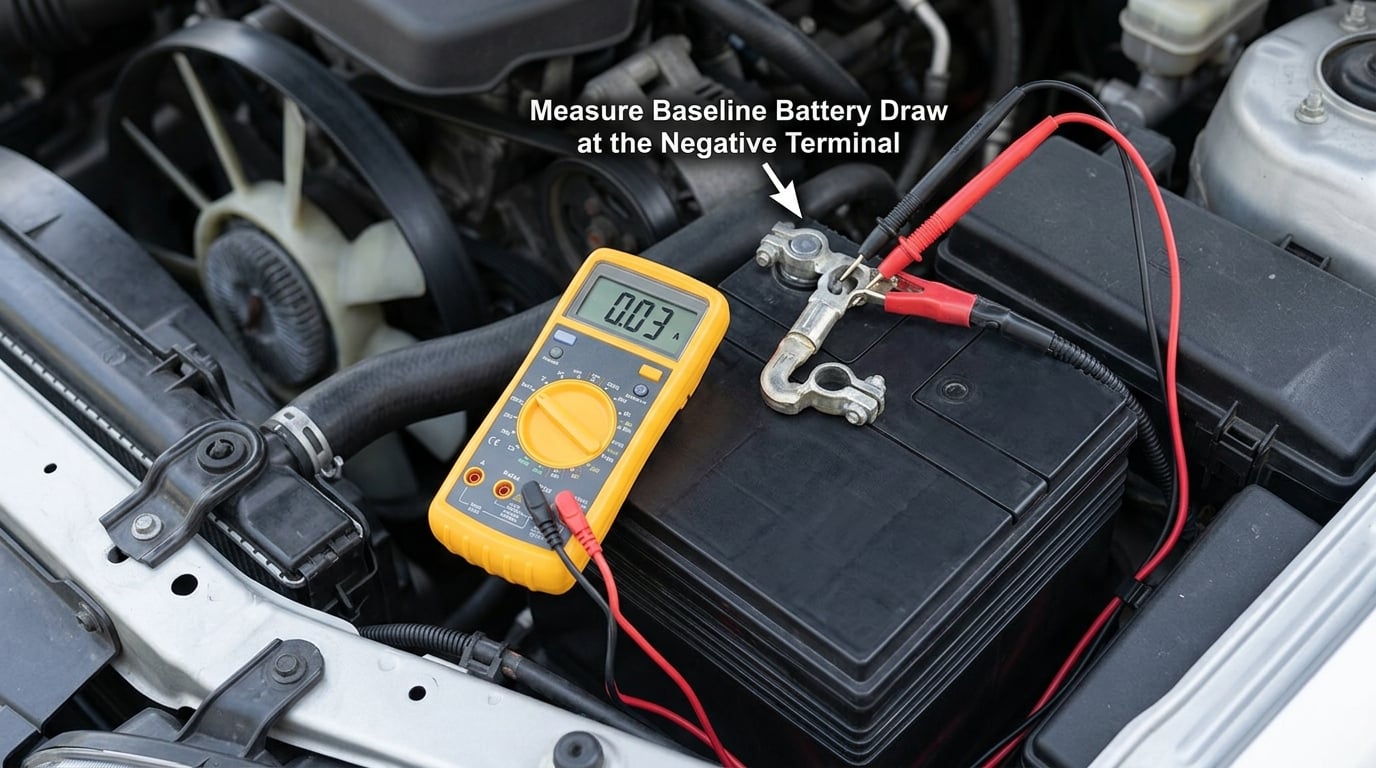
Connect the meter in series at the negative battery terminal: negative cable to the meter COM or 10A input, meter lead to the battery post. Working at the negative side keeps a dropped tool from arcing across the battery posts.
Start on the highest amperage range, 10A or 20A, so the meter’s internal fuse survives an accidental short. Close the connection and read the value, then convert to milliamps. A display of 0.048 A is 48 mA. Most meters also read milliamps directly on a 200mA range, which gives better resolution once you are under half an amp.
Here is how to read what you see:
| Reading | What it means | Next move |
|---|---|---|
| Under 20 mA | Very low, healthy | No action |
| 20 to 50 mA | Normal clock, alarm and keyless entry load | No action on a healthy battery |
| Above 50 mA sustained | Excessive key-off current draw | Start pulling fuses |
| Several hundred mA or more | Something never went to sleep | Check for an open door, trunk or lit switch first |
| Spikes when a fuse goes back in | The module on that circuit just woke up | Wait and re-read before believing it |
| Reading collapses to near zero | That fuse feeds the offending circuit | Work down that circuit only |
One number helps put the drain in perspective. A group 45 battery holds roughly 45 amp-hours, so a constant draw translates to days before it will not crank.
| Constant draw | Approximate time on a 45 Ah battery |
|---|---|
| 50 mA | About 37 days |
| 100 mA | About 18 days |
| 250 mA | About 7 days |
| 500 mA | About 3 to 4 days |
| 1 amp | Under 2 days |
Real life is harsher than the math because cold mornings and a few failed crank attempts come out of the same reserve, so treat these as upper bounds.
Check for an Active Wake-Up Condition
Before touching a fuse, rule out the conditions that legitimately keep circuits powered: a door or trunk not fully latched, a hood ajar on vehicles with a hood switch, an illuminated courtesy or glove box lamp, a switch in the middle of its travel, a connected USB charger or phone, an aftermarket alarm, or an infotainment head unit that never finished shutdown.
Watch the meter for a minute after closing everything. If the number drifts as you open and close a door, you have found it without any fuse work at all. w-body forum members point out the same thing: a reading that changes with the door is just an interior lamp circuit responding.
For a vehicle where you must open a door to reach the interior fuse box, wedge a block of scrap wood against the door switch so the lamp circuit stays asleep while you work.
Pull Fuses One at a Time
Work in the order that gives you the most information: lowest amp rating first, moving up to the high-current fuses last. Remove one fuse, watch the meter, note the change, and put that fuse back in its exact original socket before touching the next one.
Here is the trap that trips up nearly everybody. When you reinstall a fuse you interrupt power to a module, and the body control module re-initialises that circuit, which produces a spike. ClubLexus GS owners were told by experienced members that a jump from 0.11 A to a higher number on reinsertion is simply a module waking and going back to sleep. Wait 30 seconds and re-read before you call it a fault.
A meaningful drop, not a small wobble, is your signal. If removing a 10A interior fuse takes the meter from 300 mA to 45 mA, that circuit is the drain.
On BMW and other vehicles with block-lift style battery management, the current stays elevated for up to half an hour after a wake event, so give the number time to settle before you trust it. If you cannot pull every fuse, a clamp meter around the negative cable plus a scan tool’s module current readings will get you close, but the fuse method is the definitive one.
Identify the Circuit, Then Isolate the Load
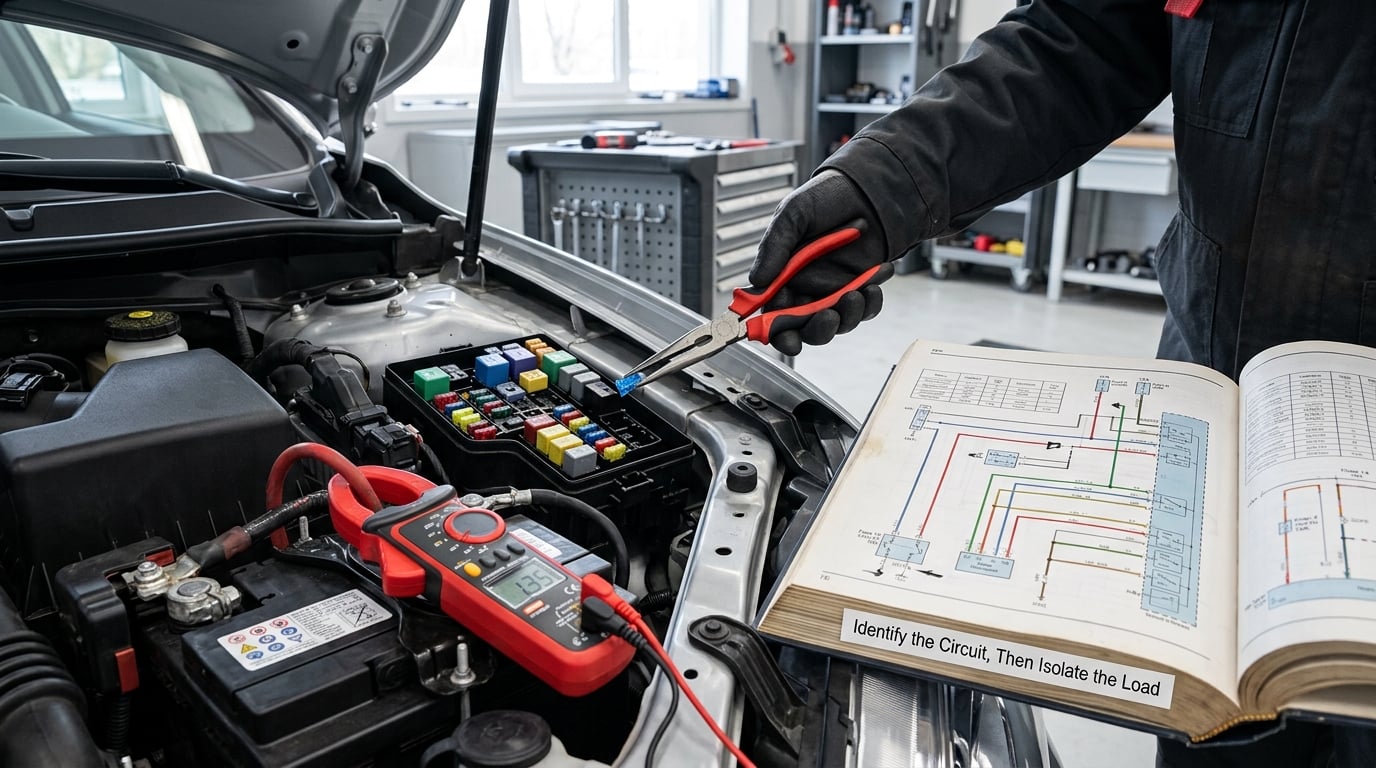
With the circuit identified, look up that fuse in the index. Knowing a fuse is labeled interior lights is much less useful than knowing which modules share that power path: the body control module, a door latch switch, the infotainment head unit, a glove box lamp, or a trailer module.
Knowing how to diagnose a parasitic battery drain comes down to this evidence-based sequence: unplug the suspect module and watch the meter, pull a sub-fuse or check a junction block, then measure voltage drop across sections of the circuit while the module is active. A measurable drop narrows you to a specific wire or connection, which matters because a corroded ground can look exactly like a module failure on the meter.
Vehicle-specific patterns help. r/MechanicAdvice and ClubLexus threads keep pointing at the MPX-B multiplex door latch circuit, which carries power windows, locks, the remote and the theft deterrent. An Escape owner was pointed toward the rear wiper motor, and BimmerFest regulars discuss B+ distribution and ground points on the models they own. The takeaway is not that your car has the same fault, but that the door latch circuit is worth checking early because so many of these faults live there.
Verify the Culprit and Repair the Circuit
Confirm before you order parts. Disconnect the suspect module, or remove its dedicated fuse, and check that the reading drops to baseline. If it does, you have a verified load. Then decide between repairing the wiring or ground, replacing the failed switch, module or relay, and moving on.
Some cases resist a clean fix. Faulty body modules, battery monitoring sensors and multiplex door latch assemblies need programming or coding on some vehicles, and post-collision wiring faults mean tracing every damaged conductor. That is the point to hand it to a qualified automotive electrical shop with a current clamp and the service wiring diagrams.
Confirm the Battery No Longer Drains
Put every fuse back in its original socket, reconnect the negative terminal, and restore the settings the disconnection cleared. Re-register any battery management or registration data the vehicle needs without erasing codes you still need for diagnosis.
Then repeat the test exactly as you ran it before: full charge, locked vehicle, closed doors and hood, the same wait, the same connection point. A confirming reading under the manufacturer specification is the only proof the repair worked.
Readings vary by model and by what is plugged in. Compare the before and after numbers on the same car rather than against someone else’s car.
Common Mistakes
Measuring Drain While the Car Is Still Awake
Reading the meter two minutes after key-off catches modules mid-shutdown, and that number can be several amps. The fix is simple: lock the car, close everything, and wait out the full sleep timer before connecting. Measuring early sends people hunting for a fault that is not there, and sometimes into a second battery purchase.
Leaving Several Fuses Out
Pulling a handful of fuses at once looks faster and tells you nothing. You cannot attribute the change to a single circuit, and removing high-current feeds while the meter is connected risks damage. Take them out one at a time, confirm the socket is empty before inserting the next, and return each fuse to the exact socket it came from. A fuse back in the wrong position can take out a window motor or a tail lamp circuit on the drive home.
Using the Wrong Meter Mode or Range
Voltage and resistance modes do not measure current, and resistance mode on a live circuit gives meaningless numbers. Always start on the highest amps range so the internal fuse protects the meter if a tool bridges the terminals. Confirm the leads are in the correct input jack before you reconnect the battery, and never work around the meter with the cable removed, since that puts battery voltage straight into the leads.
Disconnecting the Battery Incorrectly
Follow the owner’s manual for your vehicle, work on the negative terminal first, and protect the terminal from damage. Disconnecting power erases stored codes, clock and radio settings, and adaptive memory on many cars, and on some models it also triggers a charging or registration warning that clears only after a drive cycle. A memory saver keeps the essentials, but it never keeps diagnostic codes. Work inside a well-ventilated area and keep metal tools away from the positive post.
Once the fault is fixed, the habits that keep it fixed are boring: pull off any USB charger and unplug the trunk-mounted radar detector, make sure the glove box and cargo lamp switches are in their normal position, and close doors firmly so latch switches register. If the drain only shows up after a week of storage, a battery monitor that logs draw overnight can capture an intermittent fault you will never catch in the driveway.
Frequently Asked Questions
How much current draw is normal after a car sleeps?
Most modern vehicles settle between 20 and 50 milliamps once every module is asleep, which covers clock memory, alarm standby and keyless entry receivers. Forum consensus treats anything persistently above 50 mA as worth investigating, and readings under 20 mA are unusually low. Older vehicles with less electronics can sit at the bottom of that range.
Why does my BMW battery drain overnight even after replacing the battery?
Because the new battery did not fix the cause. If a circuit stays powered after shutdown, it drains any battery you install within days, and the replacement makes the pattern look like a battery problem. On BMWs, watch door latch and trunk circuits, after-market trackers, and battery management wake-ups, then run the meter test rather than swapping cells again.
Can a parasitic battery drain damage the alternator or control modules?
The drain itself stresses the battery more than the alternator, and a weak battery makes an alternator work harder on every start. The bigger risk is the underlying fault, such as a shorted module or damaged wiring, which can damage the module itself and the components on that circuit. Finding the drain early protects the battery and everything downstream of it.
How long should I wait before measuring battery draw on a modern BMW?
Allow 20 to 45 minutes with the vehicle locked, doors, trunk and hood closed, and all accessories unplugged. Battery management systems on newer models can hold circuits awake for half an hour after a wake event, including a block lift following key-off. Measuring before the timer expires produces a reading several times higher than the real steady-state draw.
Does disconnecting the battery erase radio codes or vehicle settings?
On most vehicles it does. Disconnecting the battery clears stored diagnostic trouble codes, clock and radio settings, window and seat memory, and sometimes adaptive values, and some cars show a charging or battery registration warning until they see a drive cycle. A memory saver keeps the settings you care about but never preserves diagnostic codes, so read them before you disconnect.
When should I take a parasitic drain problem to a mechanic?
Stop and hand it to a shop when the drain is intermittent and only appears after storage, when the fault sits in a body or battery management module that needs programming, when wiring was damaged in a collision or repair, or when you locate the circuit but cannot isolate the component. Shops with a current clamp and service wiring diagrams resolve those faster than a driveway diagnosis.
Conclusion
Start with three things, in this order: confirm the battery and charging system are healthy, let the vehicle sleep fully for 20 to 45 minutes, then measure current draw in series at the negative terminal. That baseline number tells you whether you have a fault before you pull a single fuse.
When you fix the circuit, take one more reading the same way you took the first. If the after number sits under the manufacturer’s specification on the same car, on the same setup, you have closed the case and can put the battery back in and drive.