

Learning how to test a starter motor takes about an hour and costs nothing beyond a multimeter and a set of jumper cables. A starter is only guilty after the battery, the cables, the grounds and the control circuit all check out, because every one of those can produce the same click, hum or grind you are hearing right now.
Most complaints turn out the same way. Corroded terminals, a tired battery, or a switch that stopped sending the signal are far more common than a dead motor, and a new starter will not fix any of them.
Here is the short version: start from the battery and work toward the motor, so each test confirms the one before it.
- No sound at all when you turn the key: check the S terminal for signal voltage before anything else.
- One click, then silence: measure cranking voltage, then run a loaded ground test.
- Repeated fast clicks: voltage drop test both the positive and the ground side.
- Slow, lazy crank: a load test on the battery, then a bench test of the motor.
- Grinding or scraping: bench test it and look at the flywheel ring gear.
Table of Contents
- What You Need
- Step-by-Step: How to Test a Starter Motor
- Common Mistakes
- Frequently Asked Questions
- What does it mean if my starter motor clicks but does not turn the engine?
- Can I test a starter motor without removing it from the car?
- What tools do I need to test a starter motor at home?
- Does a bad starter always make a clicking sound?
- How long should a starter motor crank the engine during one test?
- Why does my starter motor work when the engine is warm but not when it is cold?
- Conclusion
What You Need
The core tool is a digital multimeter set to DC volts. A cheap meter is genuinely fine for voltage work, and that is where most of the diagnosis happens. What a budget meter cannot do is catch a fast voltage dip while the engine cranks, so read the number while the starter is turning rather than after it stops.
- Digital multimeter with DC volts and amps, and ideally a hold or min/max function.
- Insulated jumper cables with clamp ends, not the thin booster cables with alligator clips that live in the trunk.
- Battery charger or maintainer so a marginal battery does not distort every reading.
- Wrench and socket set, plus a trim tool or panel screwdriver for battery access panels.
- Wire brush or terminal cleaner and a rag for the battery posts and the ground strap.
- Safety glasses and gloves. Not optional, and more on that below.
You also want the vehicle information, meaning the year, make and model, before you start. Starter location, access clearance, mounting bolt torque and terminal layout all differ, and the service manual for your specific car is the only reliable source for them. On a longitudinal engine the starter usually bolts to the bell housing with a clear approach. On many transverse engines it sits under the intake manifold or behind the transmission tunnel, which can turn a twenty-minute job into an afternoon.
Before you touch a terminal: park on level ground, in park or neutral with the parking brake hard on, and switch off the engine. Read the battery disconnect procedure for your car first, because some vehicles need the negative cable off and a ten-minute wait before you unbolt anything. Expect sparks whenever a wrench bridges a battery post to the body, and keep metal tools and jewelry clear of the battery. Never crank for more than ten seconds at a time.
Step-by-Step: How to Test a Starter Motor
Step 1 – Check the battery and the connections first
Start here every time, because a weak battery makes a healthy starter look dead. With the engine off and the key out, measure DC volts across the battery posts.
At 12.6 volts or higher the battery is fully charged. Around 12.4 volts is borderline and worth watching. At 12.0 volts or lower it is flat or sulfated, and nothing you learn from the starter is trustworthy until that changes.
Then watch the meter while the engine cranks. Cranking voltage is the number at the battery posts during startup, and it is the single most useful reading in this whole procedure. Above 9.6 volts while cranking, the starter is being fed properly. Below that, the motor never sees full voltage, and a slow crank on a healthy starter or a healthy motor is still a battery problem.
Mechanics on r/Cartalk are consistent about this one: run a load or conductance test on the battery before you condemn a starter, because a weak battery produces identical symptoms and costs a fraction as much. If the car cranks fine on a charger, the battery is the verdict and the starter is not the verdict.
Before moving on, clean both battery posts and check the ground straps. Corrosion on a post looks obvious; corrosion under a ground strap that runs from the engine to the body hides underneath where nobody looks. A ground that has turned to paste will cause every symptom in this article.
Step 2 – Confirm the solenoid is getting a signal
The ignition switch does not push the solenoid. It only sends a few amps down a small wire to the solenoid terminal marked S, and the solenoid closes heavy contacts that dump the real battery current into the motor. If that small wire is dead, a perfectly good starter does nothing.
Set the meter to DC volts, put the positive probe on the S terminal and the negative probe on the battery negative post. Have someone turn the key while the starter is engaged. A healthy reading sits within about half a volt of battery voltage, roughly 12 volts on a charged car.
Almost no voltage means the fault is upstream: the ignition switch, the neutral safety switch or the control wiring. That is where a lot of expensive starters go to die, replaced by someone who assumed the motor was the problem.
A test light on the S terminal works as a quick confirmation if you do not have a meter. It also explains a symptom that confuses people. On r/MechanicAdvice, users regularly report that jumping the top solenoid post produces a loud click. That click proves the solenoid is receiving power and the contacts are closing, which means the motor, the ground or the ring gear is the actual fault.
Step 3 – Voltage drop test the main cable and the ground
Voltage drop is simply the volts lost between where the current starts and where it arrives. A cable can look perfect, be flexible and show no corrosion, and still add resistance that steals the amps the starter needs. This is why reading voltage at the battery during crank tells you almost nothing. The battery looks fine because the battery is fine. The loss is somewhere downstream.
Set the meter to DC volts. Put the positive probe on the battery positive post and the negative probe on the starter input post. Have someone crank the engine. A healthy main cable shows a drop of 0.5 volts or less. Anything above that is a corroded clamp, a stretched cable or a bad connection, and you fix that before judging the starter.
Now the side most guides skip. Put the positive probe on the battery negative post and the negative probe on the starter case ear or the mounting bolt, again while cranking. Under 0.5 volts means the ground path is solid. More than that is a ground fault, and it explains a starter that cranks slowly with a new battery fitted.
Technicians on tractor and Ford forum boards measure exactly this pair of volts between the battery post and the cast starter body during crank. It is a simple two-probe test and it finds faults that a general electrical check misses completely.
How to Test a Starter Motor With a Bench Test
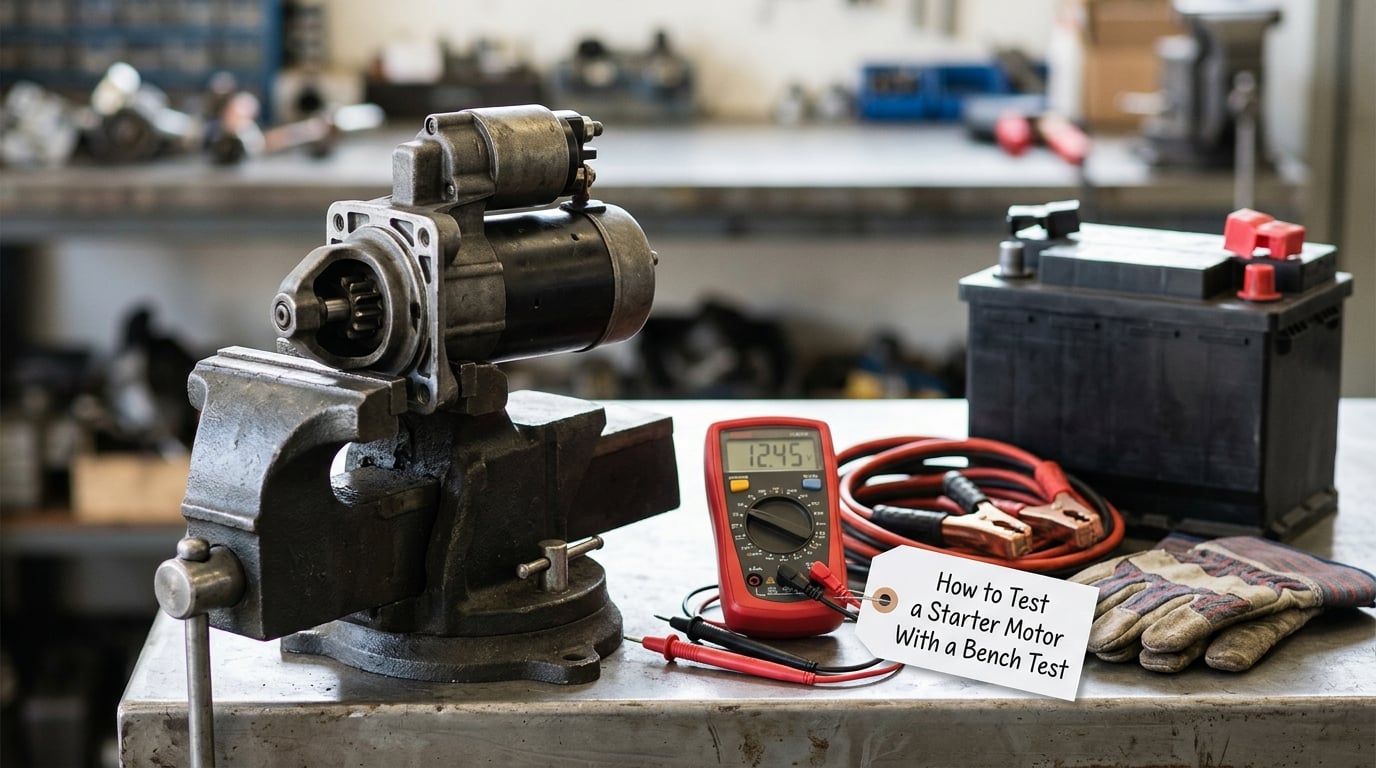
A bench test tells you whether the motor and solenoid work away from the car. It is worth doing once the steps above pass, because it is the only way to separate a dead motor from a bad ring gear, and the only way to check a used or rebuilt starter before you install it.
Remove the starter following your service manual, and support the engine properly before you pull the bolts. Clamp the starter body in a bench vise so it cannot move. Keep the pinion clear of the bench edge, and clear of anything the pinion can reach, because a starter that jumps out of the vise while it is spinning is a very bad day.
Use a battery you have already tested. A weak bench battery produces a starter that hums and quits, which tells you nothing.
- Run a heavy cable from the battery negative post to the case ear on the starter, which is the ground the starter uses to complete its own circuit.
- Run a second heavy cable from the battery positive post to the motor stud, the large threaded terminal on the motor itself.
- Touch the free end of the positive cable to the solenoid’s S terminal. The solenoid energizes, drives the pinion out, and the motor runs.
- Watch the meter on the motor stud while it runs. It should hold 10 to 11 volts.
- Stop at ten seconds and let it cool.
Now read the result honestly. The pinion must extend and retract cleanly, the motor must run at a steady speed rather than labing, and the case should not get hot enough to smell within a few seconds. Current draw on a healthy starter usually falls in the 150 to 250 amp range, and that is the number a driveway test cannot give you.
That last point is the one forum users argue about most. On r/AskAMechanic, people keep asking why a parts store machine prints FAIL on a starter that visibly spins. The answer is that a spinning starter only proves rotation. The bench machine also measures current draw and torque against a specification, and a starter with worn brushes, a glazed commutator or a weak magnet can spin cheerfully while pushing nowhere near the force it needs to spin an engine.
How to Test a Starter Motor While It Is Installed
Most starter faults show themselves with the starter still bolted in, and this is the test to run first. Match what you hear to what it means.
| What you hear | What it usually means | Test to run |
|---|---|---|
| Nothing at all | No control signal: ignition switch, neutral safety switch, fuse or open wire | Signal voltage at the S terminal |
| One click, then silence | Solenoid engages, motor does not turn: weak battery, bad ground, or a dead motor | Cranking voltage, then the loaded ground test |
| Rapid repeated clicks | Same chain, with a high-resistance connection somewhere in it | Voltage drop on both sides while cranking |
| Slow steady crank | Weak battery, worn brushes, or a partially seized engine | Load test the battery, then bench test the starter |
| Grinding or scraping | Pinion not engaging, or a damaged flywheel ring gear | Bench test and inspect the ring gear |
| Works only after a jump | Battery or ground fault, not a starter fault | Battery load test and both voltage drops |
Once the control circuit is proven, you can power the starter directly. Connect a heavy jumper cable from the battery positive post to the solenoid’s large terminal and hold it. The engine should crank. If it cranks this way but not from the key, the starter and solenoid are fine and the problem sits in the switch, the neutral safety circuit or the control wiring.
That direct-feed test is the same technique people mean when they search for how to trick a starter to work. It is a legitimate diagnostic step with one condition: eye protection on, the negative cable disconnected if the procedure calls for it, and a firm grip on the clamp. A battery can throw a flare of acid mist from an unseated post, and the sparks are bright enough to hurt.
Pay attention to how the crank behaves rather than only whether it happens. A starter that pulls the engine over weakly and slowly, with no grinding, points to worn brushes or a low-charge alternator that cannot keep up. One that spins fast and never catches is a fuel, timing or compression problem, not a starter problem. One that is intermittent when cold but fine once the engine is warm is usually a heat-sensitive fault in the brushes, the commutator or the solenoid contacts.
You will hear the hammer tap recommended almost everywhere, including in search summaries that rank above real guides. My advice is to skip it. Striking the body of a starter with a hammer can crack the long-pole laminations inside the armature and can ding the solenoid or the nose cone. It worked on starters built decades ago, and on a modern one it is a gamble that occasionally turns a slow starter into a completely dead one.
If the starter has been out of the car, a useful extra check is whether it is free-spinning. A starter with a bent armature or damaged bearings will grind or bind when you spin it by hand with the pinion removed from the flywheel. With the pinion meshed in a ring gear, it should not rotate freely at all, and that is correct.
Finally, remember what the starter is not responsible for. A starter that does not turn the engine is also not guilty if the engine cannot start once it turns. Spark, fuel and compression come next.
Reading the results
| Reading | What it means | Verdict |
|---|---|---|
| Battery at rest 12.6V or higher, holds above 9.6V while cranking | Battery and main connections are doing their job | Keep going |
| Battery at rest 12.6V but drops to 9.5V or below under load | Battery is weak or sulfated | Battery, not the starter |
| Cranking voltage fine, drop above 0.5V on the positive side | Corroded cable, loose clamp or stretched lead | Clean and retest |
| Drop above 0.5V between battery post and starter housing | Ground-side fault in the strap, block or case | Fix the ground path |
| Both drops under 0.5V and the crank is still slow | The starter is not making torque | Starter is the likely fault |
| Full battery voltage at the S terminal during crank | Control circuit is healthy | Fault is downstream |
| Little or no voltage at the S terminal | Ignition switch, neutral safety switch or control wiring | Trace the control circuit |
| Bench test: 10-11V at the motor stud, 150-250A, pinion extends and retracts | Motor and solenoid are healthy | Pass |
| Bench test spins but draw is far above range, or torque is weak | Worn brushes, rough commutator or worn magnets | Fail |
| Bench test grinds, or pinion will not extend | Mechanical damage or solenoid failure | Fail |
Common Mistakes
Almost every wasted starter replacement comes down to one of these.
- Testing with a weak battery. You will blame the starter for something the battery is doing. Measure cranking voltage before any other test and get it above 9.6V.
- Calling one click a dead starter. A click is the solenoid working. The fault is usually the battery, the ground path or the ring gear, none of which a new starter fixes.
- Jumping over safety circuits. Bridging the neutral safety switch or the ignition switch to force a crank can leave the vehicle in gear-start mode with no gear selected. Use the direct-feed test on the solenoid terminal, not across a safety switch.
- Hammering the starter. The most repeated piece of bad advice in this topic. It works sometimes, and it can permanently damage the armature laminations on the ones where it does not.
- Holding the key for 30 seconds. Starter windings cook quickly, and a starter you overheat while testing can fail the following morning and look like a false result.
- Replacing parts before the electrical tests. A new starter, a new solenoid and a new battery installed in the wrong order still leaves the car dead. Follow the chain: battery, cables, ground, control circuit, motor.
- Using a continuity or resistance setting on a starter. A starter is a motor, not a switch. You cannot meaningfully test it for resistance, and a beeping multimeter tells you nothing useful about brushes.
- Leaving a bench starter loose on a bench. Unclamped, an energized starter is a projectile. Vise it, keep the pinion clear of the bench edge, and stay out of the arc.
- Trusting a driveway bench test too much. Spinning proves rotation. It does not prove current draw or torque, which is exactly what a parts store machine measures and why a starter can spin and still print FAIL.
One more that catches experienced hands: skipping the free parts store bench test. Counter staff will test a removed starter on a proper machine at no charge, and that machine reports current draw, rotation speed and torque together. It is the closest thing to a definitive answer and most people do not know it exists.
Frequently Asked Questions
What does it mean if my starter motor clicks but does not turn the engine?
A click means the solenoid engaged and pushed the pinion into the flywheel, but the motor never received enough current to turn the engine over. On an otherwise healthy car that points at the battery, the main cable or the ground path rather than the starter. Confirm it with a cranking-voltage reading and a voltage drop test on both sides before you buy any parts.
Can I test a starter motor without removing it from the car?
Yes, and you should start there. With the starter installed you can check battery and cranking voltage, measure voltage drop on the positive and the ground side, confirm signal voltage at the S terminal, and see whether a direct jumper to the solenoid cranks the engine. That covers most starter complaints. Only a removed starter tells you about worn brushes or a seized armature.
What tools do I need to test a starter motor at home?
A digital multimeter set to DC volts is the core tool, plus insulated jumper cables with clamp ends, a battery charger, a basic wrench and socket set, a wire brush or terminal cleaner, and safety glasses. Add an inline ammeter if you want a current reading on the bench test. A cheap meter handles voltage work fine, it just cannot capture a fast dip while the engine is turning.
Does a bad starter always make a clicking sound?
No. A worn starter can hum, grind, or crank slowly and steadily, and a partially seized engine produces a lazy crank with no clicking at all. Clicking is one symptom rather than a diagnosis, and it usually points at power delivery or the solenoid rather than worn brushes. Matching the noise to the first test in the table above sorts it out far faster than swapping parts.
How long should a starter motor crank the engine during one test?
Ten seconds maximum, broken into two five-second attempts with a pause between them. That is long enough to see a healthy starter catch and to read your meter, and short enough that you do not cook the windings. Keep the probes connected the whole time so you capture cranking voltage and the drop readings. A starter that only cranks with a long hold is not a starter worth keeping.
Why does my starter motor work when the engine is warm but not when it is cold?
A cold engine needs more torque to turn over, and heat actually lowers the resistance in the windings, so a tired starter can feel better once it warms up. If yours only works warm, look at heat-sensitive faults: worn brushes, a rough commutator, a weak battery that recovers after the first try, or a solenoid that struggles when cold oil is thick. All four show up in the voltage drop and bench tests.
Conclusion
Start by confirming the symptom and listening, because what the car is doing tells you which test to run first. Then test the battery, clean the terminals and check the ground straps, since that is where most bad starters are falsely blamed. After that, check the control circuit at the S terminal and voltage drop both sides of the starter while cranking. Only when those readings are clean is it worth removing the starter for a bench test or taking it to a parts store machine.
Following the chain in order is the whole job. A starter that has been proven to work gets replaced last, not first.