
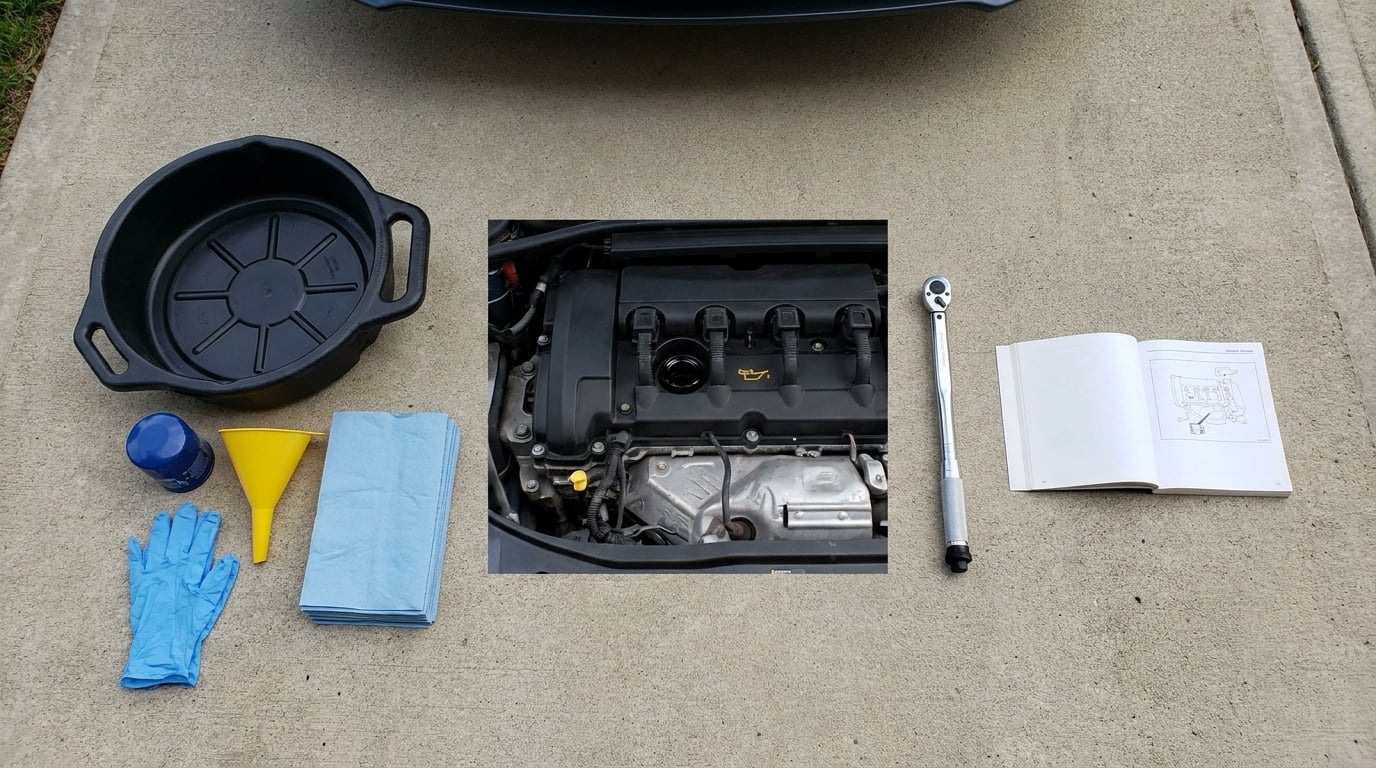
Yes, you can do it yourself, and learning how to do an oil change on a BMW comes down to preparation. Most owners manage the job in a driveway with a floor jack, jack stands and a drain pan: warm the engine, lift it safely, remove the underbody shield and drain plug, swap the filter element and its seals, refill with oil meeting BMW’s Longlife specification, then start the engine, check underneath for leaks and reset the oil service indicator. Budget one to two hours, most of it draining.
It is more fiddly than a Japanese coupe, mainly because the parts live in tight spots and the drain plug tool is not what the video showed. If you are still deciding whether a shop should do it, our guide to how long an oil change takes puts a realistic number on the two options.
Table of Contents
- What You Need
- Step-by-Step
- Step 1: Confirm the oil and filter for your BMW
- Step 2: Prepare the engine and work area
- Step 3: Drain the old engine oil
- Step 4: Replace the oil filter
- Step 5: Install the drain plug and add fresh oil
- Step 6: Prime the system and check the oil level
- Step 7: Reset the service indicator and record the change
- Common Mistakes
- Frequently Asked Questions
What You Need
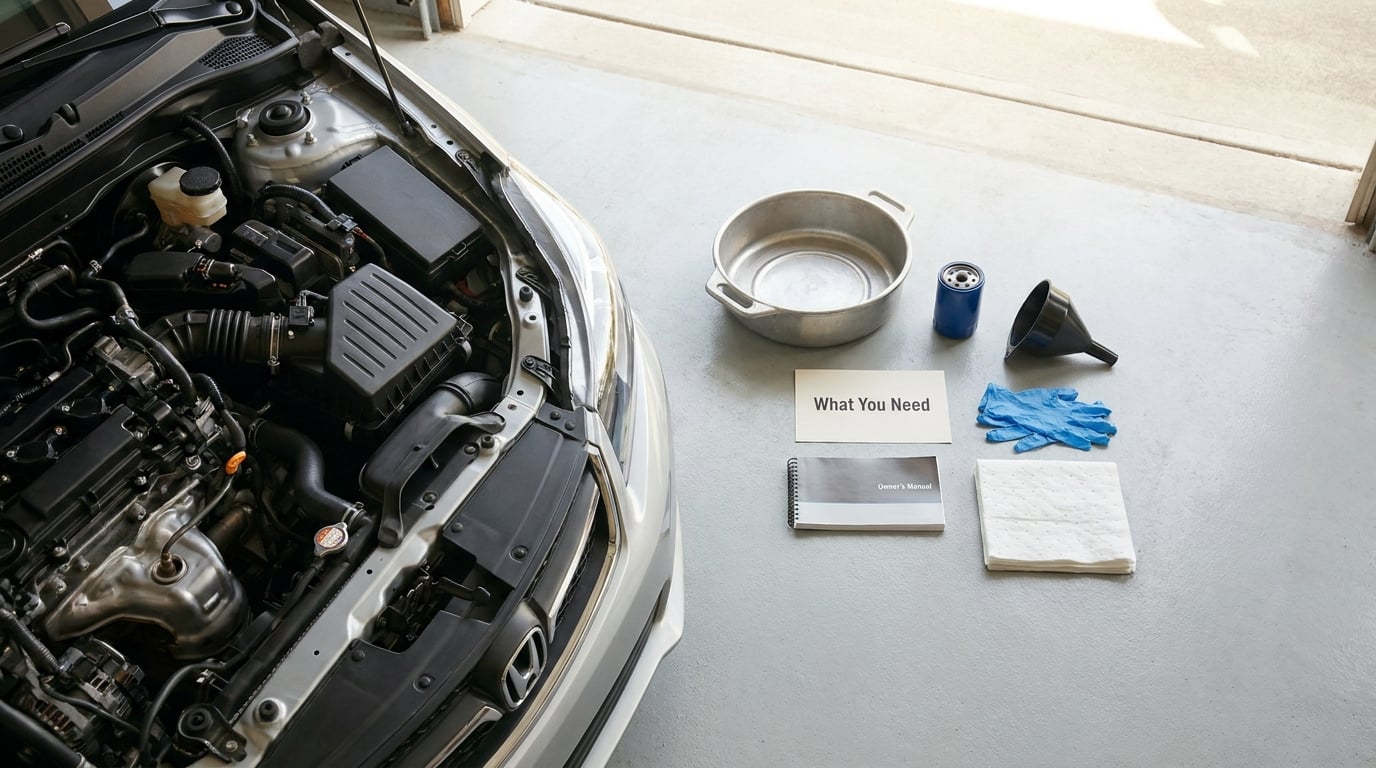
Confirm the oil specification and filter part number for your exact model, engine and model year before anything else. BMW engines run a spread of Longlife approvals, and a bottle that satisfies one engine can fall short of another. A generic full synthetic marked “meets API SP” is not the same thing as a Longlife-01 approval, and that difference is exactly what the tighter tolerances, the turbochargers and the VANOS variable valve timing are relying on.
Here is the kit list, with the notes that actually matter.
| Tool or material | What it is for | Note |
|---|---|---|
| Owner’s manual | Oil spec, capacity, torque, filter part number | The only authority for your car |
| BMW Longlife oil | Refill | Match the approval and viscosity your manual lists |
| Spin-on filter and cap seals | Filter replacement | Do not reuse a filter from another engine family |
| Crush washer or plug seal | Drain plug sealing | Replace every single time |
| Floor jack and jack stands | Lifting the car | Never work under a car on the jack alone |
| Oil drain pan, 8 qt | Catching the oil | A low-profile pan helps on slammed cars |
| 17mm socket, or 8mm Allen key | Drain plug | See below, the tool is not universal |
| Torque wrench | Drain plug | Aluminium pan threads strip easily |
| Funnel, clean rags, gloves | Refill and cleanup | Keep grit out of the filler neck |
The drain plug is where most first attempts go wrong. Many N-series and B-series engines take a 17mm socket, while older M54 and S62 units use an 8mm Allen key. A BimmerFest member followed a video showing a socket, reached for one, and found his plug needed the Allen. Look your engine up before you buy the socket set.
Working underneath a car carries real risk. Park on level ground, set the parking brake, chock the rear wheels, and support the car on stands at the manufacturer-specified points before you slide underneath. If the sill or pinch weld is rusted through, that is a job for a shop, not a driveway.
Step-by-Step
Step 1: Confirm the oil and filter for your BMW
Identify the engine first. The same badge has carried a four-cylinder, a six-cylinder and, in some markets, a different six again, and the oil quantity changes with it. Read the VIN plate or the engine code, then match it to the oil specification, the approved viscosity and the fill volume listed for that engine.
You are looking for a Longlife approval, not a viscosity alone. Longlife-01 and Longlife-04 typically cover 0W-40, 5W-30 and 5W-40 grades, while Longlife-14 is a lower-sulphur 0W-20 or 5W-20 spec used on some newer and cold-climate models. A bottle can carry two approvals at once, so read the back label, not the shelf tag.
For the filter, use the part number listed for your engine. Cartridge-style housings and spin-on cans are not interchangeable, and neither are the sealing O-rings. The work is finished when you can say out loud which approval code and which part number you are using, and why.
Typical fill volumes sit between roughly 4.5 and 7 quarts depending on the engine, so measure against your own manual rather than against a forum post. Owners on r/BmwTech regularly measure what actually came out of the pan, which is a useful habit, especially on a car with an unknown service history.
Step 2: Prepare the engine and work area
Start the engine and let it run for five to ten minutes until the oil is warm and flowing, then shut it off and park on level ground. Warm oil drains faster and carries more of itself out of the filter. If the car has been sitting for months or years, changing that old oil before you drive it again is still the right call, since it ages in place. Our piece on oil change intervals for a car that sits covers that case in more detail.
Lift the car, support it on jack stands, and slide the drain pan under the plug before you touch a fastener. On many layouts the filter housing sits on the passenger side while the drain plug is at the rear of the engine on the driver’s side, which is the detail that catches out first-timers. It worked when the pan was in place and the level was right, and nothing dripped.
Lay out a rag or cardboard under the car, because the plug opening and the filter neck both drip a little no matter how careful you are.
Step 3: Drain the old engine oil
Remove the plastic underbody splash shield fasteners, then take the drain plug out with the correct tool. Let the oil run until the flow slows to a trickle and stops, usually five to ten minutes. Ten minutes of patience is what keeps a quart of oil out of the pan instead of on the driveway.
Look at the plug and the sealing surface as you go. If the plug does not free up smoothly, stop and check the threads rather than forcing it. On an aluminium pan, a cross-threaded plug is a real repair bill, and stripped threads there mean replacing the pan, not just the plug.
The absence of immediate flow can mean the plug opening is not lined up with the pan, or that the plug loosened before it cleared the threads. Back it out slightly and reseat it. The step worked when the pan holds roughly what your manual says your engine takes, minus what stays in the filter and the housing.
Step 4: Replace the oil filter
Reach the filter housing, which is usually a cap held by a large plastic or metal knob. Turn it counter-clockwise and lift it out slowly, since oil drains out of the housing the moment the seal breaks. Tip the old element out and wipe the housing clean.
This is the moment most guides skip, and forum threads keep coming back to it: the sealing O-ring often separates from the cap and stays stuck in the housing, or drops onto the engine. Pull it out with a pick or a small screwdriver, keeping the groove free of grit. A leftover O-ring means a slow leak you will find weeks later, after the service is long done.
Compare the new filter with the old one so the part numbers match, then fit a fresh O-ring and smear a film of clean oil on the gasket. Spin the cap on until it seats and tighten it firmly, without leaning on it. The step worked when the cap seats level, the O-ring sits evenly in its groove, and nothing drips when you tip the housing.
Step 5: Install the drain plug and add fresh oil
Clean the drain plug, fit a new crush washer or O-ring if your engine uses one, and reinstall the plug by hand until it is seated before you take a wrench to it. Tighten to the torque in your manual, which is commonly around 25 Nm on many BMW engines. A torque wrench costs less than a stripped pan, and hand-tight plus a click is not the same thing as a spec.
Pour the measured oil through a clean funnel. Add roughly the manual’s figure minus what the filter and housing will hold, then top up once you have run the engine and rechecked. Pouring in the full quantity on the first pass is the most common overfill, and an overfilled engine aerates, foams, and can throw a false low reading on a level gauge.
Close the filler cap and tidy the rags before the next step, because you will want to see under the car with the engine running.
Step 6: Prime the system and check the oil level
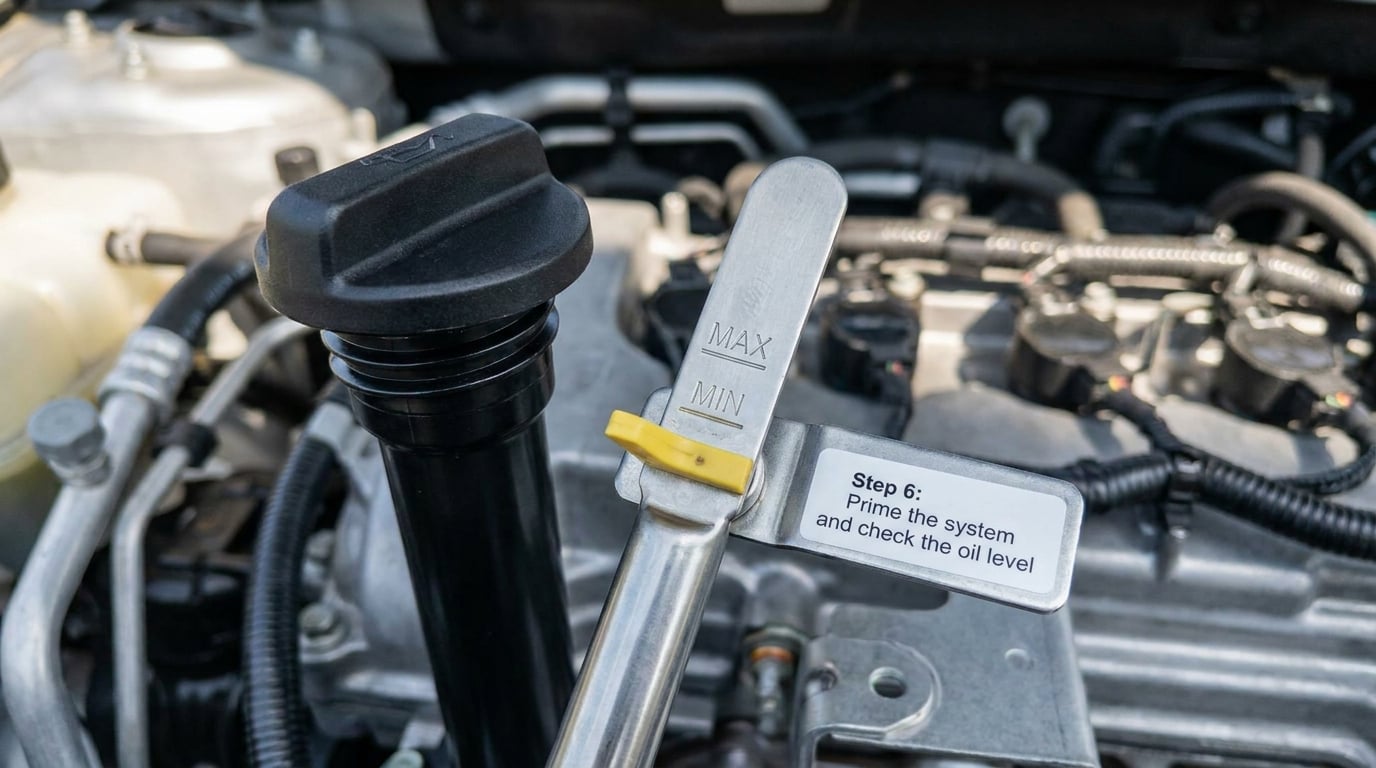
Start the engine and let it idle for a minute or two. Oil pressure should come up within a second or two, and you want to look underneath and at the filter housing for a running leak while the engine is turning. Shut it off, wait the settling period, and only then read the level.
Here is the part that trips people up: most modern BMWs have no dipstick. You check the level with the dipstick built into the filler neck on some engines, with a level gauge in the engine bay on others, or with the electronic readout in iDrive on the newest ones. Owners on the BMW forums constantly correct each other on this, and the manual for your car is the only way to know which one you have.
The level should sit between the minimum and maximum marks, which is the middle of the range, not the maximum. If the reading is low, add a small amount in stages and recheck rather than dumping in a quart. If it reads high, siphon a little out with a hand pump. Getting the level right is how you know the job is finished properly, so spend the extra five minutes on it.
Step 7: Reset the service indicator and record the change
With the car on level ground and the engine warm, clear the oil service message using the documented path for your model. On cars with a conventional cluster the trip odometer button is held while the ignition is on. On cars with iDrive, the path runs through the vehicle status or service menus, where you can select the oil service option and confirm the reset.
Be aware that a Condition Based Service warning on some newer models will not clear from the steering wheel buttons alone. Owners describe needing dealer-level diagnostic software, or a tool that talks to the car, to release it. If the message persists after a correct reset, that is why, and it is not a sign the oil change failed.
Then write it down: date, mileage, oil specification and quantity, filter part number, and whether you replaced the plug seal. That record is what turns a home service into a documented one at resale, and it is the difference between “serviced” and “believed to be serviced”.
Common Mistakes
Almost every avoidable BMW oil change failure falls into the same short list, and each one has a simple fix.
- Wrong oil specification. A non-Longlife oil is the most consequential mistake here, because the engine was designed around low-sulphur oil meeting that approval. Fix: verify the approval code on the bottle against your manual before you start.
- Reusing the old drain plug seal. A crush washer is a consumable, not a reusable gasket. Fix: fit a new one every time.
- Overtightening the drain plug. More is not better, and aluminium pan threads strip easily. Fix: use a torque wrench and the manual figure.
- Cross-threading the plug. Forcing a stiff plug is the usual cause. Fix: start it by hand, and back it out if it will not drop in freely.
- Losing the plug into the drain pan. A small magnetic tray or a socket on a ratchet keeps it where you can see it.
- Leaving the filter O-ring behind. It separates from the cap and stays in the housing more often than people expect. Fix: clean the groove and fit a new seal.
- Overfilling. A full first pour plus top-ups is how engines get aerated. Fix: add slightly under the manual figure, then top up after the level check.
- Checking the level with the engine running or straight after shutdown. Both give a false reading. Fix: level ground, engine warm, then wait before reading.
- Skipping the service reset. The interval keeps counting down and the car will nag you at the next service. Fix: run the documented reset and record the service.
For torque values, locking procedures and any filter the manual calls out by part number, go back to the manual for your car. That is the last word, and it costs nothing.
Frequently Asked Questions
How much oil does my BMW need for an oil change?
Most BMW engines take between roughly 4.5 and 7 quarts, with four-cylinder engines at the low end and six-cylinder engines at the top. The exact figure depends on the engine code, not the model badge, and the sump volume is not the same as the fill volume. Check your owner’s manual or the sticker on the filler neck, and add slightly less than the listed amount first so you can top up.
What type of oil should I use in my BMW?
Use oil carrying the BMW Longlife approval listed for your engine, such as Longlife-01, Longlife-04 or Longlife-14, at the viscosity your manual specifies, commonly 0W-40, 5W-30 or 5W-40. These are low-sulphur specifications written for tight tolerances, turbochargers and VANOS valve timing control. A bottle that only meets a generic industry standard is not the same thing as one that carries the Longlife approval.
Do I need to replace the oil filter every time?
Yes, always replace the filter at every service, and use the part number listed for your engine rather than a visually similar can. A used filter holds used oil, so leaving it in defeats the point of the service. If your engine uses a cartridge in a housing cap, replace the cap O-rings at the same time, and check the housing groove for the seal that sometimes separates and stays behind.
How tight should the BMW oil drain plug be?
Many BMW engines specify around 25 Nm, but the figure varies, so use the value in your manual for your engine. Thread it in by hand until it is fully seated before applying a wrench, and stop there. Overtightening can strip the threads in an aluminium oil pan, which turns a routine service into a pan replacement. A basic torque wrench is the cheapest insurance on the job.
How do I reset the oil service light after an oil change?
On cars with a conventional cluster, hold the trip odometer button with the ignition on until the reset prompt appears, then confirm. On cars with iDrive, the reset runs through the vehicle status and service menus, where you select the oil service entry and confirm. Some newer models with Condition Based Service need dealer-level software to clear the warning, so a message that persists may be a tooling issue rather than a failed service.
Is it normal for some old oil to remain after draining?
Yes. A quart or so stays in the oil filter, the filter housing, the sump walls and the engine passages, and it only reaches the pan during running. That is why the refill figure in the manual is usually slightly under the total sump volume, and why the level check after running the engine is the step that decides whether the job was done correctly.
Start at your VIN, not at a video. Confirm the Longlife approval, the filter part number and the fill volume for your engine, then the job itself is about an hour of careful work. Everything else in this guide is detail on those three numbers, and the level check after running the engine is what tells you it went right.
Take your used oil to a recycling centre or a shop that accepts it rather than letting it into a storm drain. A container left curbside for a few days and picked up with a token is the easy way to do it.