
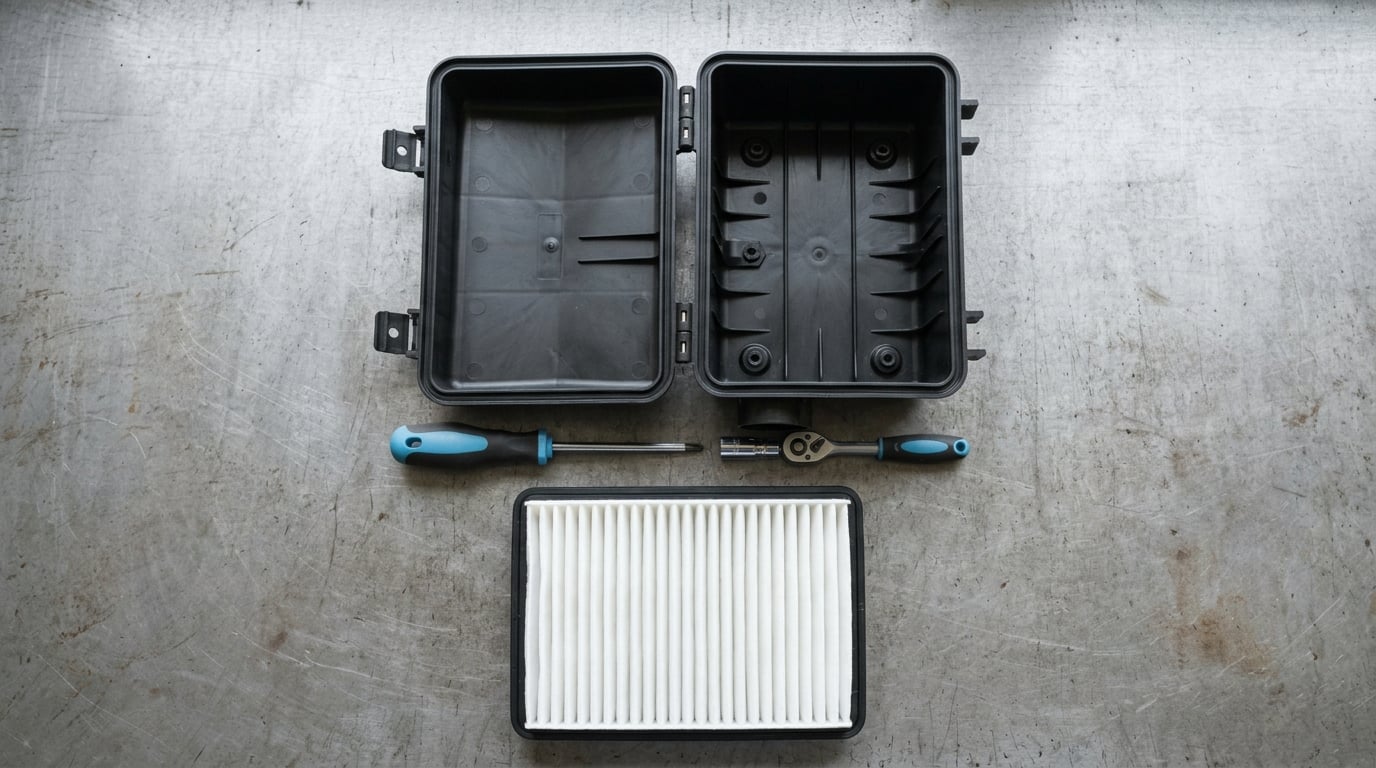
Yes, you can absolutely change an air filter yourself. Learning how to change an air filter yourself takes about 30 minutes for both the engine filter and the cabin filter, and it needs nothing more than a screwdriver, maybe one small socket, and a new element.
The work is simple because there is almost nothing to disassemble. Open the box, lift out the old element, drop the new one in the same way it came out, close the lid. The mistakes that trip people up are tiny ones: a reversed filter, a torn element, a cover that will not latch.
This guide covers the engine air filter under the hood first, then the cabin filter behind the glove box. Both are beginner-level jobs, and doing them in the same session is the efficient move.
Table of Contents
What You Need
Almost every air filter job needs the same short list. The engine filter is the one under the hood, and the cabin filter is the one behind the glove box that you pull down or pry out.
- The replacement filter. Match the part number printed on your old element, or look it up by year, make and model. Filter shapes differ, so a panel element will not drop into a cylindrical housing.
- Your owner’s manual or the vehicle spec sheet. It confirms the part number, the replacement interval, and the location on some cars. If your car has unusual access, the manual diagram saves an hour of guessing.
- A Phillips and a flat-blade screwdriver. Most covers use one or the other.
- A socket set, commonly 7mm and 8mm. Plenty of air cleaner housings use wing nuts, T-bolt clamps or 8mm bolts instead of screws. A socket is quicker and less likely to strip the head than a wrench.
- A clean shop towel or paper towels. You will want to keep dust off the fresh element and wipe your hands.
- A vacuum or a can of compressed air. Optional, but it is how you clear leaves and grit out of the housing.
- A flashlight and nitrile gloves. Optional. The flashlight matters more than the gloves on a cramped housing.
Before you remove anything, confirm two things: the part number, and the airflow arrow direction marked on the new element. Once the old filter is out, that arrow is much harder to read, and the box on many cars does not tell you which way air travels.
While the car is apart, it is a decent moment to catch up on the other basics. If your car has been sitting for months, how often to change oil in a car that sits is worth a look, and how long an oil change takes will tell you whether to bundle the two jobs into one afternoon.
Step-by-Step: How to Change an Air Filter Yourself
Run the engine for a few minutes, then shut it off and let everything cool before your hands go anywhere near the intake. Work with the vehicle off and the key out of your pocket.
1. Locate and Identify the Air Filter
Engine air filters usually sit in one of three places: a round or rectangular black plastic box bolted to the engine, a housing at the rear of the engine bay, or a can-shaped element mounted in a metal tube under the fender.
Trace the air intake duct from the front of the engine toward the firewall. The housing is the first rigid box in that path. If you see a snorkel, follow it until it ends at a bolted lid or a set of spring clips.
Identify the part by what you find, not by guesswork. Read the part number stamped or printed on the old element before it comes out, check the label on the housing lid if there is one, or look up your year, make and model. When the part number matches, the shape and the gasket seating will match too.
2. Remove the Air Filter Housing Cover
Release whatever is holding the lid. That is usually spring clips around the edge, two or four wing nuts, Torx or Phillips screws, or on some cars a single T-bolt clamp at the mouth of the intake duct.
Release the fasteners in a crisscross pattern rather than working one corner at a time, so the gasket does not get pinched. If the cover has an intake duct attached to it, support the duct with one hand as you lift, or unbolt the duct first at the sensor flange. Pulling a cover by its duct can crack the sensor port.
One clip is usually hidden. Before you force anything, run your fingers around the whole perimeter of the lid, especially the far corner away from you, and count the fasteners you found against the ones the manual lists. It is a ten-second check that saves a stripped clip. If the cover resists, it is almost always a clip you have not found yet.
You will know the cover is free when it lifts straight up with no resistance and you can see the edge of the old element.
3. Take Out the Old Filter and Inspect the Housing
Lift the element straight up and out. Panel filters are packed in flat, so pull them vertically rather than sliding them sideways, and do not drag an edge along the housing lip. That scraping is what tears the media, and the torn fragments get pulled straight into the intake.
Hold the old filter up to a window before you bin it. A healthy used filter is grey to charcoal, with pleats still distinct. If the pleats have flattened, the paper is going soft, or light comes through the media, it has been overdue for a while.
Look inside the housing with a flashlight. Vacuum out leaves, pet hair, grit and the grey dust that cakes the floor. Check the rubber gasket around the rim for cracks, flattening or a tear, and check the housing itself for a split. Moisture, especially with a green or white film on the old element, can point at a coolant or oil leak nearby, and a new filter will not fix that.
4. Install the New Filter in the Correct Direction
Air enters through the intake duct and travels to the engine, so the airflow arrow printed on the new filter must point toward the engine, away from the front of the car. On panel elements the arrow is molded into the plastic frame or printed on the side edge. On a cylindrical element, the closed rubber end usually faces the engine and the open end faces the intake.
That is the whole orientation rule. Get it backwards and the engine pulls against a restricted face, and the element can be crushed or knocked out of shape by airflow.
Slide the element in straight, keeping it level, and let it rest evenly on the floor of the housing. Do not force a cover closed on a tilted element. If the lid will not latch, the filter is not seated, or a corner is pinched, that is the housing telling you something is wrong.
Seating a panel element on a flat gasket is the easy case. On a cylindrical element seated on a rubber ring, the ring has to sit in the groove all the way around with no gaps. On a housing with an integrated sealing lip, the filter frame presses against that lip, and a gap anywhere along the edge means unfiltered air can be pulled past the element instead of through it.
Check the fit before you reach for the fasteners: the element should sit flat, parallel to the housing rim, with the gasket visible as an unbroken line all the way around.
5. Reassemble and Check for Leaks or Loose Parts
Set the cover back on, press down evenly until the clips snap over the lip, then tighten wing nuts, bolts or the T-bolt clamp until they are snug. Do not crank them down hard; the plastic threads and the gasket do not need more than firm.
Reconnect any intake duct you unbolted, and check that the mass airflow sensor or connector is fully seated and screwed home. Give the cover a firm shake by the duct, and if anything rattles, the clip or bolt is not caught.
Take a quick drive around the block, then park and look back at the housing while the engine is still off. Nothing should be visibly unseated, and no unfiltered air should be audible at the cover seam. Any noise you hear on the drive is not proof of a bad filter, so treat it as a reason to recheck the seal rather than a diagnosis.
Bag the old element and put it in household waste, or drop it at a recycling center if your area accepts automotive filters. If your car uses a washable reusable element, skip the bin: wash it in warm soapy water, rinse it, let it dry fully, and lightly oil it with the filter maker’s own treatment before it goes back in. A wet element that gets sealed back up is how a housing ends up with mildew.
On most cars the cabin filter takes another five minutes while you are already in the mood. The housing behind the glove box drops down on two side catches or a pair of screws, the old element slides straight out of its slot, and the new one slides in with the airflow arrow facing up toward the air outlet. Doing both filters in one session is what turns two jobs into a single afternoon.
Common Mistakes
Buying the wrong filter type. A high-flow panel element and a stock paper element are not interchangeable on a car that uses a molded panel. The frame has to be rigid enough to seal against the housing lip. Check the shape, the gasket style and the part number before you buy, not after.
Installing it backwards. The airflow arrow points toward the engine. On a cone or cylindrical element the closed end faces the engine side. Reversed, the engine pulls against the restrictive face and the element can deform.
Tearing the old element on removal. Wiggle it gently straight up instead of yanking or levering it. If it crumbles, vacuum the housing thoroughly afterwards, because those fragments go straight into the intake, and check for a torn corner you might have missed.
Leaving the cover loose or overtightened. An unlatched cover lets unfiltered air in and can rattle itself off. An overtightened plastic wing nut cracks the housing thread. Snug is the target.
Skipping the housing clean. A fresh element in a dirty box is a fresh element with a shorter life. Vacuum it, check the gasket, and look for evidence of a leak while you are there.
Confusing the cabin filter with the engine filter. The cabin filter sits behind or under the glove box, is usually a thin pleated rectangle, and is changed with no tools at all. The engine filter sits under the hood in a rigid housing and is the one that affects how the engine breathes. Doing both in one session takes about 30 minutes.
Forgetting the hidden clip. Count the fasteners around the lid before you lift. A cover that will not come free is a clip you missed, not a cover that needs more force.
Frequently Asked Questions
How often should I change my engine air filter?
Most manufacturers say every 12000 to 15000 miles, or about once a year, whichever comes first. Change it sooner if you drive in dusty conditions, on construction sites, along unpaved roads, or in stop-and-go city traffic. A filter that is visibly grey, matted or flattened should go out early rather than waiting for the interval. If you drive very little, change it yearly anyway, since filter media degrades with time and moisture.
Which way does an air filter go in?
The airflow arrow printed on the filter must point toward the engine, away from the front of the car. On a panel element the arrow sits on the plastic frame or side edge. On a cylindrical element the closed rubber end faces the engine and the open end faces the intake. If the cover will not close, the filter is tilted rather than misaligned, so reset it flat and try again.
Can I clean and reuse my air filter?
Only if it is a washable reusable element. Disposable paper or fibre elements are one-use: washing them collapses the media and lets unfiltered air through. For a reusable element, wash in warm soapy water, rinse thoroughly, let it dry completely, then apply a light coat of the filter maker’s own treatment before reinstalling. Never seal a damp element back into the housing.
Is it cheaper to change the filter myself or at a shop?
Doing it yourself costs only the price of the element. A dealer or independent shop adds labour on top of the part, and that labour is what makes the invoice sting for a job this small. Many parts retailers will install the filter you buy from them at no charge, so the honest comparison is the part alone versus the part plus shop labour. If you are not comfortable opening the housing, the free install is the sensible middle ground.
What do I do if the old filter is severely contaminated?
Vacuum the housing out completely, including the lower corners and any area behind the sensor. Check for a torn or missing gasket and for cracks in the housing itself. Green, white or oily residue on the element, or a grit film on the housing floor, suggests a leak or moisture intrusion that needs a look before the new element goes in. Install the new filter, then recheck the housing after a short drive.
Conclusion
Start with the part number and the airflow arrow, before a single clip comes off. Read both while the old element is still in the housing and the lighting is good, then the rest of the job is short.
Take the cover off gently, lift the old element straight up, vacuum the housing, seat the new one flat with the arrow facing the engine, and close the cover until every clip snaps home. That is the whole procedure, and it fits comfortably into the same afternoon as priming a new oil filter or an oil change.