
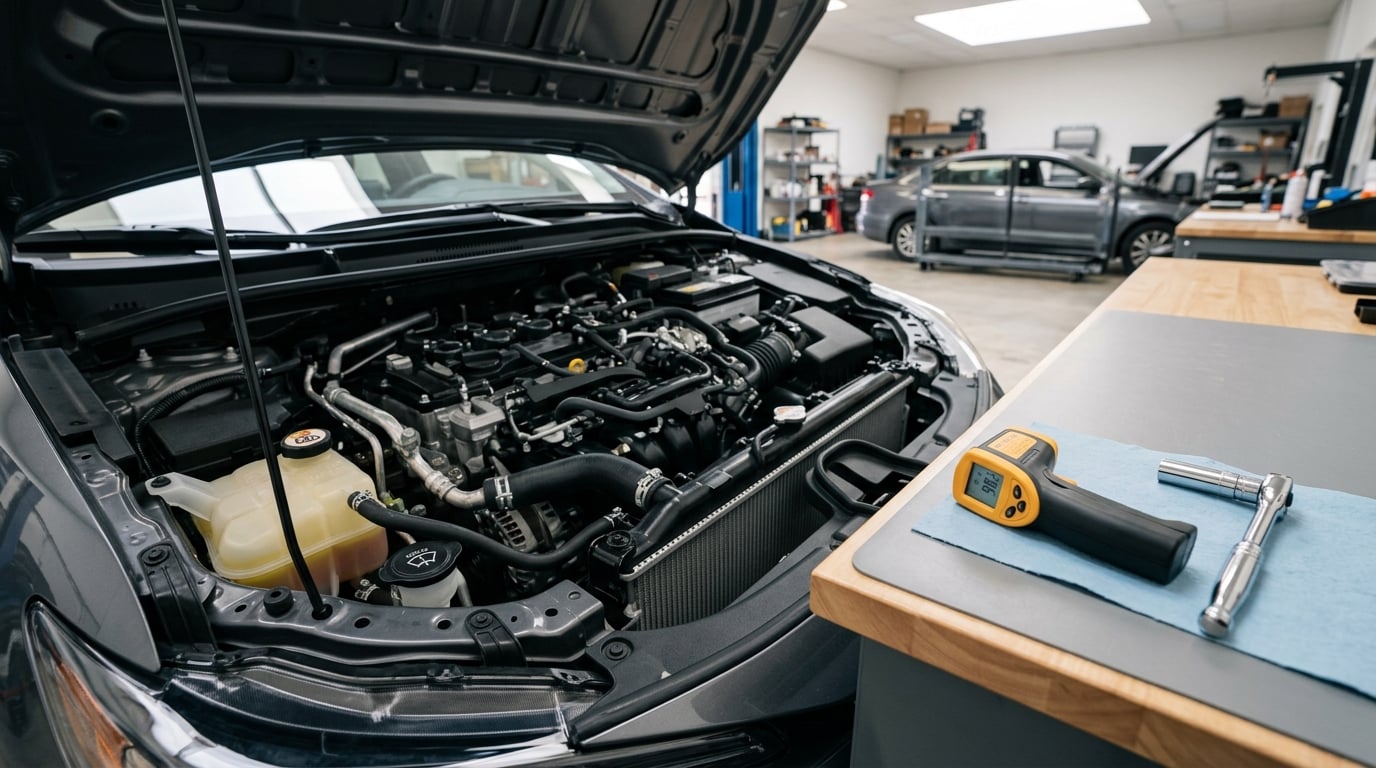
An overheating engine is nearly always a cooling-system fault, and most of them are fixable at home: low coolant, a leaking hose or cap, a stuck thermostat, a dead cooling fan, or a failed water pump. This guide walks through how to fix an overheating engine safely, starting with the roadside steps that stop the damage and ending with the repair and the check that proves it worked. Once the engine is fully cold, most of these jobs take an hour or two, and the diagnosis itself costs nothing but patience.
A single brief overheat usually does no lasting harm. A long one, or a second one, can warp the cylinder head, burn the head gasket or crack the block, and that turns a cheap part swap into a full engine job.
One thing to know before you start: topping off the reservoir is not a fix. If the level dropped in the first place, something is leaking, and filling the tank just buys you a few more miles before the same thing happens. Find the leak first.
Reviewed for accuracy in 2026. Procedures, coolant types and fill procedures differ by model, so check your owner’s manual and service information before opening anything.
Table of Contents
- What You Need
- Step-by-Step
- Step 1: Confirm the overheating warning and stop driving
- Step 2: Check for obvious coolant leaks and engine damage
- Step 3: Check the coolant level and condition
- Step 4: Test the radiator fan and temperature sensors
- Step 5: Check the thermostat and cooling-system pressure
- Step 6: Replace the failed part and refill the system properly
- Step 7: Verify the repair before returning the car to service
- Common Mistakes
- Opening the radiator cap while the engine is hot
- Topping off without finding the leak
- Using the wrong coolant or mixing incompatible types
- Overfilling the expansion tank
- Bypassing the thermostat or the fan to stop the warning
- Ignoring an intermittent warning
- Driving on after the temperature rises
- Pouring cold water on a hot engine
- Frequently Asked Questions
What You Need
Gather everything before you start, because halfway through a cooling-system job you cannot leave the car to go and find a tool.
- Your owner’s manual and service information. The coolant specification, the bleed procedure, the fill points and the pressure cap rating all come from here, not from guesswork.
- Manufacturer-approved coolant in the specified type and mix ratio. Some cars want a 50/50 premix, some want concentrate and distilled water, and some are HOAT-only. Do not assume a universal green coolant is correct.
- A coolant drain pan, a funnel and a drain hose, plus several empty jugs if the old coolant has to be caught.
- Basic hand tools: socket set, wrenches, pliers, screwdrivers and a ratchet. Hose clamps and a cap wrench if the cap is old and stiff.
- A good flashlight. Half the leaks you will find are behind a shield you cannot see by daylight.
- Rags, nitrile gloves and eye protection.
- Optional but useful: an infrared thermometer and an OBD-II scan tool with live engine temperature data.
- Jack stands if you need to work underneath the car.
Safety first, and there is one rule that matters more than the rest: the engine must be completely cool before you open the cooling system. A radiator or expansion tank cap on a hot engine holds pressure, and releasing it sprays scalding coolant. The consensus on the Team-BHP forum is the same as the consensus in every owner’s manual: wait at least 15 minutes, and in real terms 30 minutes or more, before opening the hood or touching a cap. Nothing else in this guide matters if you skip that.
Coolant is also toxic to pets and children and tastes sweet on purpose. Keep it away from them, and dispose of it at a proper collection point rather than pouring it down a storm drain.
Step-by-Step
Step 1: Confirm the overheating warning and stop driving
Confirm it is really overheating before you start working. The temperature gauge climbing past its normal mark into the red zone is the clearest sign, and a needle that keeps rising after you have eased off the throttle is just as serious even if it never touches red.
Other signs: steam or vapor from under the hood, a sweet coolant smell inside the cabin, a coolant puddle under the car after it has been parked, a check engine light, a rough or misfiring idle, and a loss of power under load. A gauge that reads normal while the engine is actually hot is possible too, because the dash gauge and the engine’s own temperature sensor are two different circuits, and one of them can fail while the other keeps telling you everything is fine.
Then: pull over somewhere safe, off the road and out of traffic. Turn the air conditioning off, because the A/C compressor puts a big load on the engine while it is hot. Turn the heater to its maximum with the blower on, which dumps heat from the engine into the cabin through the heater core and genuinely cools the coolant faster. Switch the engine off and wait. Do not open the hood, and do not open any cap.
You know this worked when the warning clears, the gauge settles back to its normal range and the engine starts cleanly on the next attempt. If it cranks but will not fire, or fires and dies, that is a different problem and the answer is towing.
Step 2: Check for obvious coolant leaks and engine damage
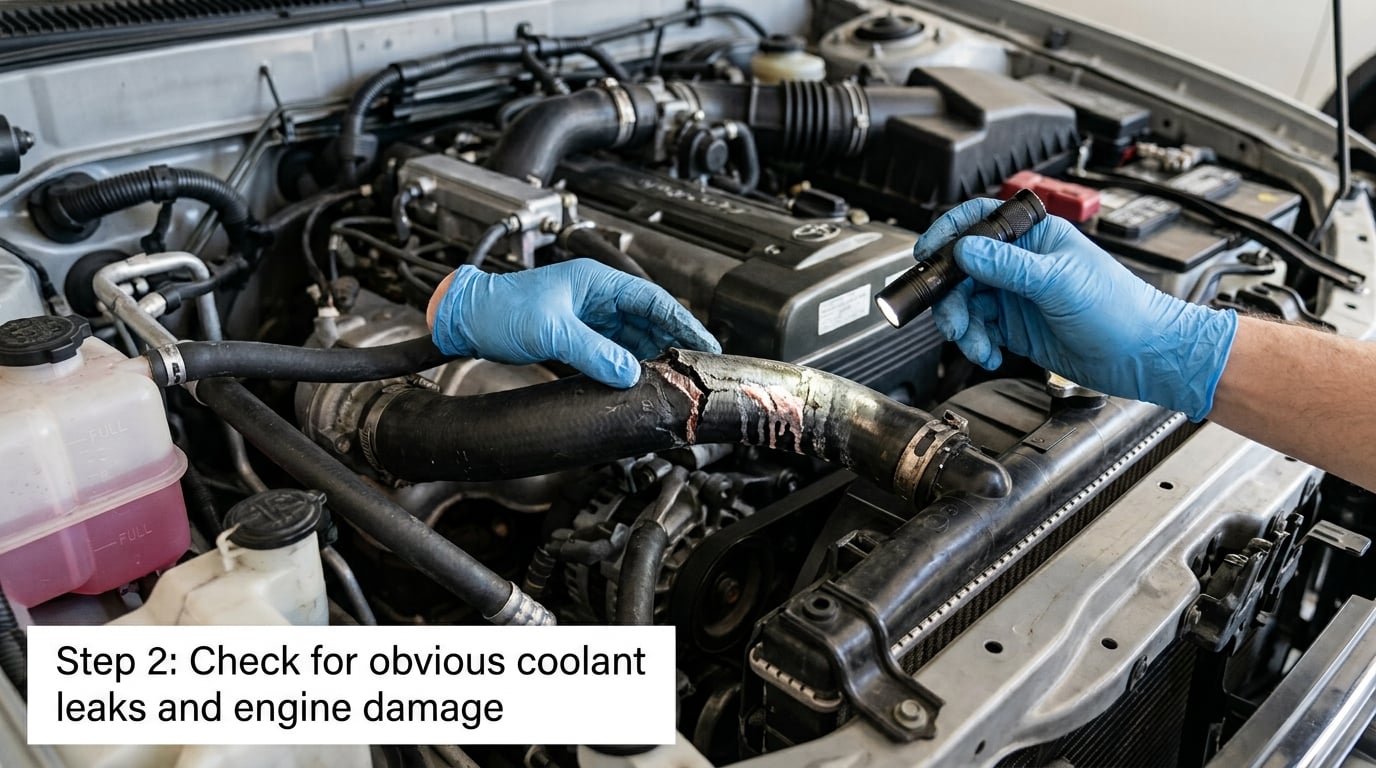
Only once the engine is stone cold, look for where the coolant went. Start at the radiator and its end tanks, then work along every hose and clamp, then the overflow reservoir or expansion tank and its plastic neck, which cracks with age at the hose connections more often than the metal parts do.
Look at the water pump area, where a weep of coolant or a faint whirring from a failing bearing is the giveaway. Check the freeze plugs on older engines, and check the underside of the car and the ground under the radiator for a stain. Look for a wet or bulging hose, crusty dried coolant residue at a joint, a green or white stain on a belt or a bracket, or a puddle that spreads while the car sits still.
Any visible split, bulge, crust or fresh stain means repair before filling. A hose that is dry but soft and swollen will fail next time it gets hot, and replacing it while the engine is apart costs almost nothing extra. On r/StupidCarQuestions, owners chased a thermostat before finding the real fault at a hose connection after a radiator replacement, and on BimmerPost owners of older cars point to a tired fan clutch and a slow seep at the hose, radiator or expansion tank as the realistic culprits rather than something dramatic.
This step is done when you can point at the failure. If you cannot find anything and the fluid is disappearing anyway, keep looking: an internal leak or combustion gases in the coolant do not leave a stain on the ground.
Step 3: Check the coolant level and condition
Check the level cold, on level ground, with the engine off. Most reservoir tanks have a COLD or MAX line and an ADD line, and on cars without a visible tank you look into the radiator through the cap or at the sight glass in the radiator itself.
The judgement you are making is between normal and sudden. A level a little below the line after a year of normal driving usually means small evaporation losses and topping up with the correct coolant is a legitimate fix. A reservoir that was full last week and is now near empty is a leak, and the difference between those two situations is the whole diagnosis.
Look at the coolant itself. It should be clean and coloured as the manufacturer intends. Rust-coloured or milky-brown fluid means rust or contamination, thick sludge means years of neglected coolant, a film of oil on the surface means oil is getting in from the gasket side, and a strong fuel smell means combustion gases are in the system. If the dipstick or the oil filler cap turns milky too, that is a different diagnosis, and what milky engine oil means covers it in detail. If you pull the cap and feel pressure, or see bubbles moving in the radiator, that is the combustion-gas test owners on the Subaru Outback forum describe, and it points at a failed head gasket rather than anything in the cooling loop.
Only ever add the coolant the manual specifies. Use distilled water for the concentrate mix if the manual calls for it, never tap water, and never mix incompatible coolant types: doing so produces a sludge that blocks the small passages and can end a new radiator on day one. If the old coolant is contaminated, a full flush is better than a top-off.
You are finished with this step when the tank is full to the correct line, the fluid is clean, and the type matches the specification in your manual.
Step 4: Test the radiator fan and temperature sensors
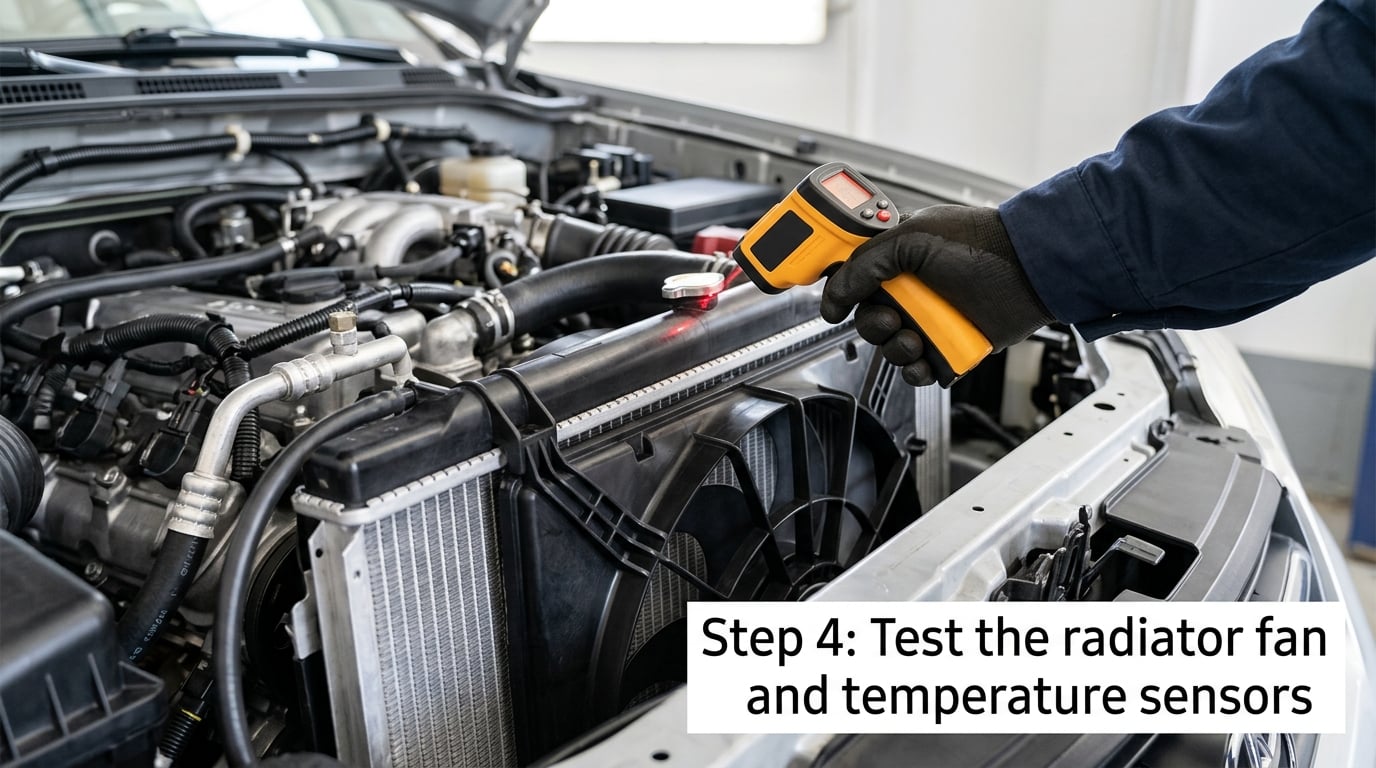
At idle there is no airflow through the radiator, so the cooling fans are the only thing keeping the coolant in range. Test them with the engine cold and the key on: switch the air conditioning on to maximum. On most cars that request brings the electric fans up straight away, and if you do not hear them, you have found your fault.
If the fans stay silent, work through the circuit in order: the fuse, the relay, the resistor or control module, the wiring and connectors, and only then the fan motor itself. An owner on r/AskAMechanic had a car whose fans engaged partway up the temperature range and then stopped entirely at the top, which points at a relay, a resistor pack, or a motor that fails once it is hot. A fan that works cold and not hot is exactly that, not a mystery.
Compare temperatures with an infrared thermometer. Check the upper radiator hose and the radiator face as the engine warms; a large gap between a hot upper hose and a cool lower one is a strong hint toward the thermostat. A scan tool with live engine temperature is even better, because it compares what the engine sensor reports against reality, and it will show a gauge working while the engine cooks. Do not test the fan by bridging the wires or forcing it to run continuously; that can burn the motor and the relay you are trying to protect.
Fan clutch, on older cars with a mechanical fan, is checked by feel: with the engine hot and idling, the fan face should be noticeably hot. If it is cool while the engine is hot, the clutch has slipped. The iH8MUD forum makes the same point from the other direction: overheating that appears only at speed implicates airflow through the radiator, which points at the fan clutch or a restricted radiator rather than the thermostat.
Step 5: Check the thermostat and cooling-system pressure
The thermostat is a valve that blocks coolant from reaching the radiator until the engine reaches temperature. Stuck open, the engine runs cold and never warms up. Stuck closed, the engine overheats within minutes of starting. There is a nastier version where the valve sticks partway open, which gives the slow, confusing overheat that only shows up in traffic.
The quick test is the hose comparison from Step 4. A hot upper radiator hose with a cold lower hose, or with the radiator staying cool while the engine runs hot, points at a thermostat that is not opening. The opposite pattern, a warm engine with both hoses cold, points at coolant that is not reaching the engine at all: a failing water pump or a blocked passage.
Pressure is the part most people miss. The radiator cap is not a lid, it is a spring-loaded valve that holds system pressure so the coolant boils at a higher temperature. A cap with a weak spring, or the wrong cap, lets the system lose pressure and boil at the wrong point, and the engine overheats with a completely full reservoir. Replacing the thermostat is not the answer to every overheating complaint, which is why a cap swap is a legitimate cheap thing to try in the same session as a thermostat replacement.
A proper cooling-system pressure test needs the correct cap, the right equipment and a service procedure, and it belongs in a shop. It is the correct next step when the level is good, the fan works and the thermostat is right, and something is still running hot.
Step 6: Replace the failed part and refill the system properly
Replace what failed, following the procedure in your service information rather than a generic guide. Hoses, the thermostat, the radiator, the water pump, the fan assembly, the cap and temperature sensors are all in reach for a competent owner, but access varies enormously between a front-engine transverse layout and a longitudinal engine with the transmission in the way. For BMWs in particular, verify the part numbers, the coolant specification and the fill and bleed procedure in the service information before starting; how to check for engine oil sludge in your BMW is worth a read on the same cars, because neglected coolant is what produces it.
Trapped air is the number one reason a car overheats immediately after a repair, and it is the reason owners on the VW Vortex forum report a car overheating straight after a thermostat change. A pocket of air sits at the high point of the system and the water pump pushes coolant around it instead of through the engine. Small bubbles also make the gauge jump around, which gets misread as a cooling fault that has not actually been fixed.
Bleed it deliberately. Fill slowly in small amounts and watch the reservoir rather than dumping it in, open the cabin heater to maximum so the heater core drains, and work the engine through a couple of cycles: warm it until the thermostat opens, shut it off for a few minutes, then repeat. Many engines have a dedicated bleed screw or a fill port on the radiator for exactly this, and some need the level topped up after the first hot cycle because the coolant expands and pushes air out. Never overfill: the reservoir needs room for the expansion it is designed to catch, and a full tank on a hot engine pushes coolant out of the overflow neck and creates the “coolant everywhere, no visible leak” panic described on the Subaru Forester forum.
Dispose of the old coolant properly, and never mix the old fluid back in.
Step 7: Verify the repair before returning the car to service
Let the engine run to full temperature at idle and watch the gauge. A stable needle at the normal mark, steady blower airflow, and no new puddles, stains or smells means the fix held. If the needle still creeps upward, stop the engine and go back to diagnosis rather than topping off.
If the engine did run hot, pull the dipstick while it is still warm and look for a milky film or grit in the oil. Anything metallic in there changes the conversation, and what metal in engine oil means covers how to tell wear debris from a failed bearing.
Then recheck the level cold, the morning after. A small drop is normal because some coolant is pushed through the overflow neck and consumed as it expands and contracts. A reservoir that needs repeated filling is a leak, and you have not finished.
Finally, take a short drive in stages: a few minutes around the block, then a longer run that reaches full operating temperature and normal road speed. If the temperature climbs on the road, the warning returns, or you cannot verify the repair safely, do not drive on. Get it towed to a shop.
Common Mistakes
Opening the radiator cap while the engine is hot
A hot cooling system is pressurized, and the cap releases that pressure as a spray of near-boiling coolant. It is the single most common way a cooling-system emergency turns into a burn injury. Wait 30 minutes minimum after shutdown, and open the cap slowly with a rag over your hand if you must.
Topping off without finding the leak
A full reservoir is a reading, not a diagnosis. If the level fell, something removed coolant, and refilling resets the symptom without touching the cause. Prevention tip: find the stain before you fill, every time.
Using the wrong coolant or mixing incompatible types
Wrong coolant fails to protect against freezing and boiling, and mixing two incompatible chemistries creates sludge that clogs the small passages and heater core. Prevention tip: read the specification in your manual, and stick to one brand and type.
Overfilling the expansion tank
The reservoir has to have room for the coolant that expands as it heats. An overfull tank pushes coolant out of the overflow neck when warm, and owners chase a leak that does not exist. Prevention tip: fill to the cold line with the engine cold, then leave it alone.
Bypassing the thermostat or the fan to stop the warning
Jumpering a cooling fan or removing a thermostat does lower the temperature at the gauge, and it does it by destroying the cooling system. The engine runs either dangerously hot or never warm, and wear goes up dramatically. Prevention tip: fix the part instead of deleting the sensor.
Ignoring an intermittent warning
An overheating engine that comes back to normal is a cooling system that is failing intermittently, which usually means air in the system, a marginal fan motor or a cap that only leaks when hot. It is the cheapest stage to fix and the most expensive to ignore. Prevention tip: treat a single warning light as a reason to check the level cold, not as a quirk to forget.
Driving on after the temperature rises
Continuing with a rising needle is how a small leak becomes a warped head. Pull over and let it cool, then diagnose. Prevention tip: learn the difference between a normal warm-up reading and a climbing one before you need it.
Pouring cold water on a hot engine
It works as an emergency on a radiator-capless car and it is wrong on a pressurized one. Cold water on a hot casting can crack a head or a block, and the rapid steam can scald. Prevention tip: use the air conditioning off, the heater on full, and patience.
Frequently Asked Questions
Can I drive my car if it is overheating?
Only for the shortest possible distance, and only if the gauge has settled back to normal. Once the needle is climbing or in the red, stop, switch off the engine and let it cool. If the temperature comes back at all, the fault is still there, and the drive to a shop risks warping the head. Towing costs less than a head gasket.
Can an overheated engine be fixed?
Almost always. Low coolant, a leaking hose, a bad cap, a stuck thermostat, a dead fan motor and a failed water pump are all ordinary parts with ordinary fixes. The exception is an engine that ran badly overheated: a warped head, a burned head gasket or a cracked block is a much bigger job. Fix the cause, then assess the damage rather than guessing in advance.
Why is my car overheating but the coolant is full?
A full reservoir rules out one cause, not all of them. Trapped air after a recent repair, a thermostat stuck closed, a radiator cap that no longer holds pressure, a cooling fan or relay that has failed, and a blocked radiator core all overheat a full system. Check the fan with the air conditioning on maximum, compare upper and lower hose temperatures, and test the cap before replacing anything.
Why does my car overheat when stopped but not while driving?
That pattern is airflow, not coolant. At road speed, air moving through the radiator cores does most of the cooling, so a blocked core or a slipping fan clutch is masked. Sitting in traffic or at a light, the only airflow is what the fan pushes. On r/MechanicAdvice this is the single most common overheating pattern owners describe. Check the fan first, then the radiator core.
Why is my car overheating after I replaced the thermostat or radiator?
The most common answer is an air pocket trapped in the system during the refill, which stops coolant from reaching the engine. Owners on the VW Vortex forum describe exactly this after a thermostat change. Fill slowly and in small amounts, run the cabin heater on maximum, cycle the engine from cold to hot twice, and recheck the level after the first hot run. An incorrectly installed thermostat or a missing bleed screw comes next.
Is my engine ruined if it overheats?
One brief overheat rarely does damage. A long one, or repeated ones, can warp the cylinder head, burn the head gasket or crack the block, and then the repair stops being a small job. Signs of real damage are white exhaust vapour, bubbles in the coolant, a milky film on the oil filler cap, coolant in the oil or a strong fuel smell in the reservoir. If the engine will not restart, assume internal damage and tow it.
Start with the level, cold, and look for where the coolant went. If the reservoir is fine, the fan is the fastest thing to test, and a gauge that climbs at idle but settles at speed is telling you it is an airflow problem, not a coolant one. When you reach the point where the fix cannot be verified, tow it rather than adding coolant and hoping.