
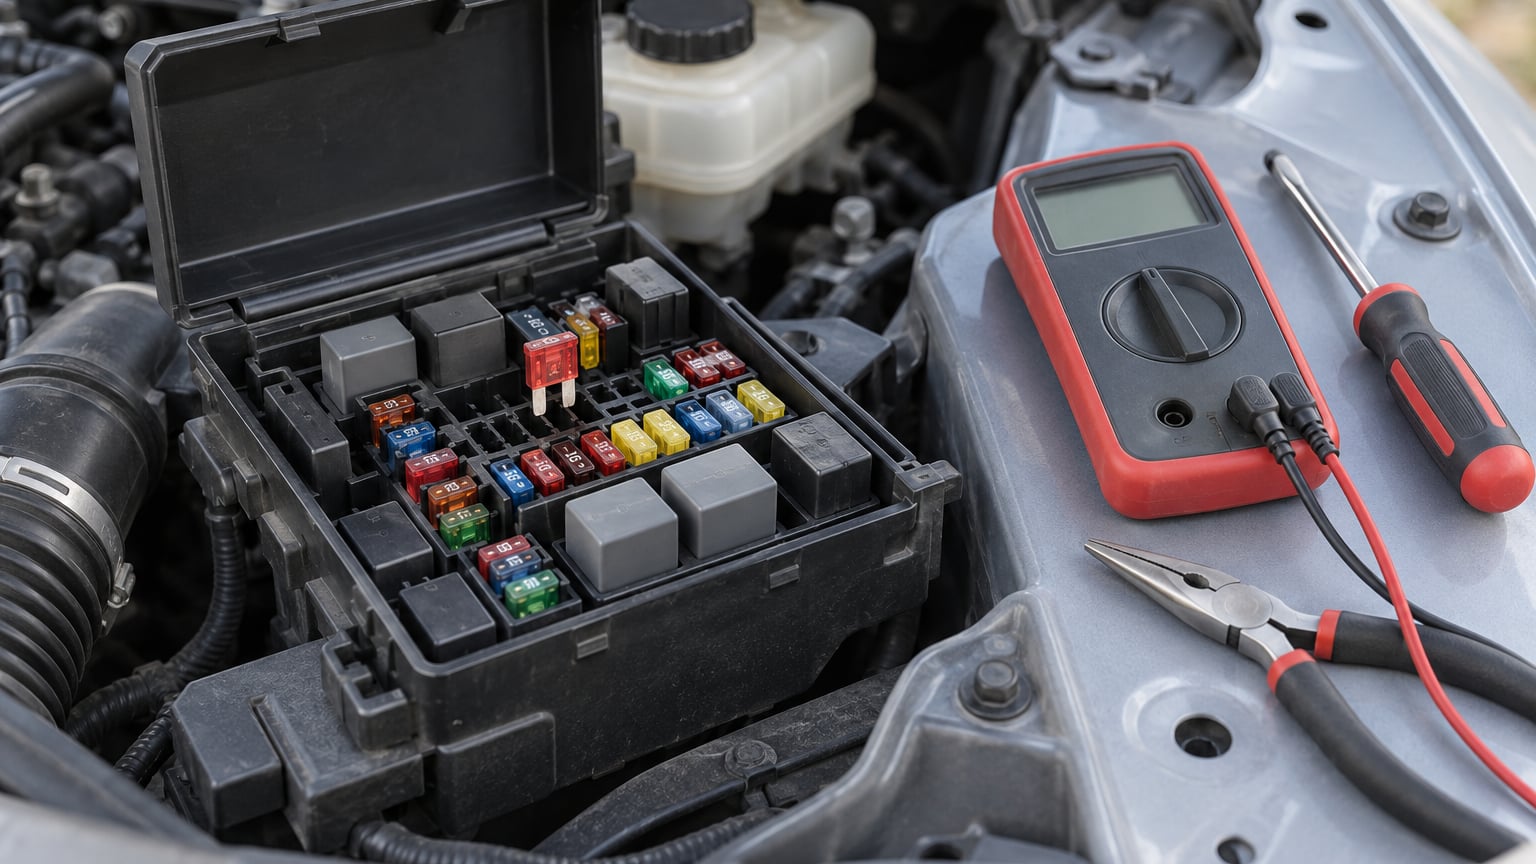
A car horn that does not work is almost always a simple circuit problem, and most of the time the fix takes under an hour with a multimeter and a fuse puller. The circuit runs from the battery through a fuse to a relay, out to the horn, and back to chassis ground, and the horn button only completes a ground-side circuit at the relay. Check the horn fuse first, then battery voltage, then the relay, then the wiring, and you will find the fault.
Most dead horns trace back to a blown fuse, a failed relay, a dead horn, or a corroded ground. Far fewer are the steering wheel button or the clock spring, even though those get blamed a lot, because they are the hardest parts to reach and therefore the usual suspects.
This guide walks through the same order a technician would use: easiest and cheapest checks first, electrical testing in the middle, and component replacement last. Most repairs need nothing more than the tools in your driveway.
Table of Contents
What You Need
Start with the basics. You will want a flashlight, a fuse puller or pair of needle-nose pliers, a multimeter, hand tools for whatever fasteners guard the horn or relay, and terminal cleaner or a wire brush.
- Multimeter. Any model with DC volts, continuity, and ohms functions covers every test in this guide. Auto-ranging meters are easier to use if you have never worked with one before.
- Fuse puller or small needle-nose pliers for pulling the horn fuse without chipping the plastic holder.
- Owner’s manual for the fuse box layout, the horn fuse location and rating, and the relay position. Vehicle wiring diagrams for the horn circuit are usually in the same manual or behind a manufacturer service site.
- Terminal cleaner, dielectric grease, and a small brush for cleaning grounds and connector faces.
- Replacement parts to have on hand: the correct fuse in the rated amperage, a relay that matches the original part number, and a horn with a matching voltage and mounting style.
Before you touch anything, park on level ground, switch the ignition off, and remove the key. Open the hood and set the negative battery terminal cable aside if the vehicle is one where the manual calls for a battery disconnect. Not every horn job needs it, but it costs nothing and it eliminates accidental shorting while you work.
One safety note that matters: if your car has a driver airbag in the steering wheel, disconnect the battery and wait at least ten minutes before you remove the steering wheel or work anywhere near the column. The airbag is a stored-energy device and improper handling is genuinely dangerous. If the fix requires pulling the wheel, most people are better off handing that part to a shop.
Finally, check what else the car is doing. A horn that quits at the same time as slow cranking, dim lights, or a clicking sound when starting is a battery problem wearing a disguise, not a horn problem. Fixing the battery restores the horn and a dozen other complaints at once.
Step-by-Step: How to Fix a Car Horn That Does Not Work
Work the steps in order and stop as soon as the horn sounds. Each one is cheaper and faster than the one below it.
1. Confirm the Horn Failure and Check for Warning Signs
Have someone stand in front of the car while you press the horn button, and confirm there is genuinely no sound. A horn that is dead is silent; a horn that is weak gives a thin, raspy beep; a horn that is intermittent works sometimes and not others; a horn that clicks but never honks usually means the button and relay are working and the problem is downstream at the horn, its connector, or its ground.
Try both the steering wheel button and any center-console horn pad. If the console pad works and the wheel does not, the fault is in the wheel button, its connector, or the clock spring. If neither works, the problem is upstream in the fuse, relay, or power feed.
Also note the timing. A horn that died right after steering wheel service, an alarm install, or an LED lighting upgrade points at a connector that was disturbed rather than a failed component. Write the date down; it becomes useful later.
A horn that is silent every single time means you can work this sequentially and stop at the first fix. One that comes and goes needs a different approach, so plan for an intermittent fault hunt instead of a straight-line test.
2. Locate and Inspect the Horn Fuse
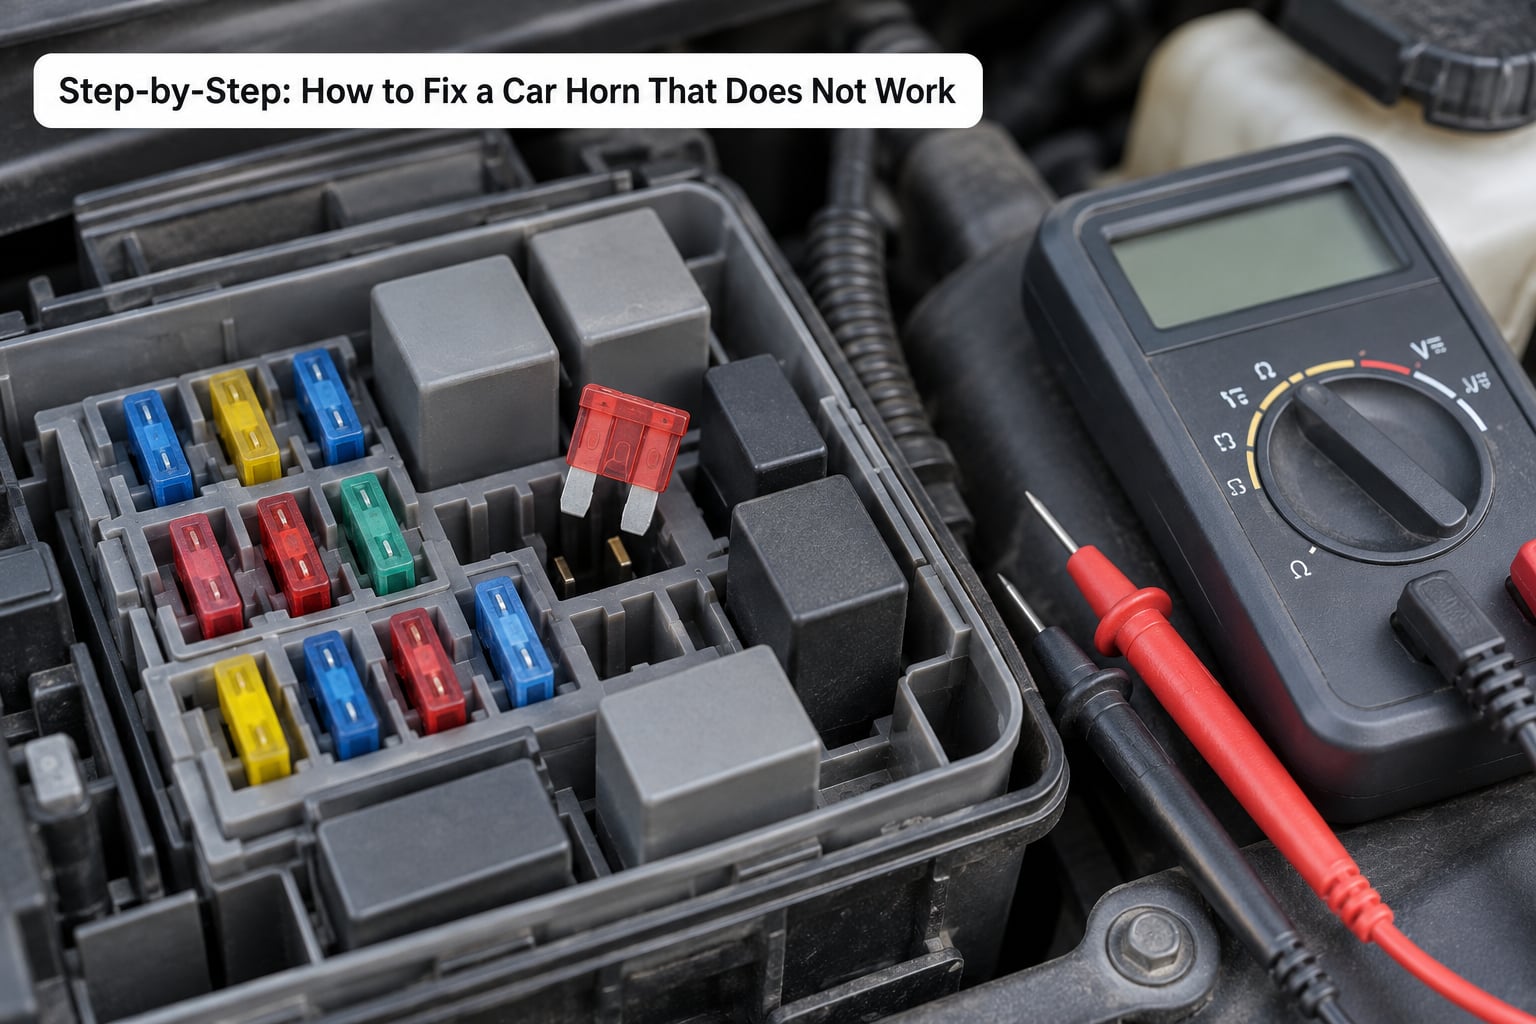
Most cars put the horn fuse in one of three places: the under-hood fuse box, the interior fuse panel near the driver’s knee or glove box, or a dedicated relay/fuse block on the battery or body. The owner’s manual lists it; the plastic cover on the box usually has a printed diagram with a horn icon.
Pull the fuse with the puller and hold it up to a light. A blown fuse shows a broken metal strip inside, and the filament often looks darkened or the plastic is browned. That is your answer, and it is the cheapest possible fix.
Set the multimeter to continuity and touch the probes to the two terminals on top of the removed fuse. A healthy fuse beeps continuously, meaning near-zero resistance. No beep means the fuse is open and needs replacing. On a fused circuit you can also measure voltage on both ends with the key on and the horn pressed; full battery voltage on one side and zero on the other is the same diagnosis.
Fit the replacement with the exact amperage printed on the fuse body. Never bridge the fuse slot with wire or fit a higher-rated fuse to stop it blowing, because the fuse is protecting the wiring downstream, not the horn.
A blown fuse that stays good after replacement points to a short somewhere in the horn circuit, so keep going through the battery and ground checks before fitting anything else. A fuse that blows again on the same circuit is a stop-and-investigate condition, not something to keep replacing.
3. Check Battery Voltage and Ground Connections
Set the multimeter to DC volts, connect it across the battery terminals with the engine off, and read the resting voltage. A fully charged battery sits around 12.6 volts. Read it again while the horn sounds; the reading should stay close to 12 volts, and a deep dip points at a weak battery or a bad connection.
Engine running, the charging system should hold roughly 13.7 to 14.7 volts. Anything much lower and the horn is a symptom of a bigger problem. Our guide to how long a car battery lasts by type covers what a reading like that means for the battery’s remaining life.
Next, clean the battery terminals and check the engine-to-chassis ground straps. Scrape off corrosion, tighten the clamps, and coat them with dielectric grease. Body grounds behind the front bumper and near the engine block are common, and a green crust on a strap hides a voltage drop that no amount of relay swapping will fix.
Do not jump-start the car to test the horn. Cranking voltage is the lowest point in the entire electrical system, and a horn tested under those conditions tells you nothing useful. If the battery is weak, charge or replace it first, then retest.
If the battery reads healthy and the terminals are clean, power is ruled out and you can move to the relay with confidence. If the voltage sags when the horn sounds, stop buying horn parts and fix the electrical supply first.
4. Test the Horn Relay or Fuse Box Control
Newer vehicles often have no separate horn relay. The body control module or a fuse box with integrated electronics handles it instead, which means there is nothing to pull and swap. The owner’s manual tells you which arrangement your car uses.
On a car with a real relay, the fastest field test is the swap. Pull the horn relay, then pull an identical relay from the same box, usually the wiper relay, and put it in the horn socket. Press the horn button. If it sounds, the original relay is the fault; if it stays silent, the relay was good and the fault is elsewhere. Put both relays back the way you found them.
For a direct check, set the multimeter to continuity and test the relay on your bench. Touch the probes across the coil terminals, normally pins 85 and 86, and expect a beep in the 50 to 150 ohm range. Nothing at all means a blown coil. Then check across the contact terminals, normally 30 and 87, which should not beep with the relay lying flat.
To watch it operate, put the meter on DC volts, connect it across the coil terminals, and press the horn button. Voltage appears only while the button is held, which confirms the button, the column wiring, and the clock spring are all making contact.
No voltage at the coil while you press the button sends you to the switch and column wiring. Full coil voltage with no sound at the horn sends you straight to the horn, its connector, and its ground.
One caution from people who chase these faults for years: a relay can measure fine in a socket check and still fail once it heats up under load. If every reading is correct and the horn stays silent, treat the relay as suspect even though it tested good.
5. Check the Horn Switch and Steering-Wheel Circuit
On most cars the horn button does not carry horn current. It completes a low-current ground path through the relay coil, which is why a button can look fine, feel fine, and still leave you with silence.
To test the circuit without tearing into the wheel, unplug the horn connector at the base of the steering column, reachable from under the dash on most vehicles, and briefly ground the horn-side spade connector with a short wire while the ignition is on. If the horn sounds, the switch, the clock spring, and the column wiring are fine, and the fault is downstream. If nothing happens, the fault is in that column circuit.
The clock spring is a ribbon cable inside the steering column that carries the horn button, and often the audio controls, through the rotating hub. It fails by losing continuity, sometimes only at certain wheel positions, which produces an intermittent horn where the other steering wheel buttons still work. There is no reliable DIY test for a failed clock spring, and replacing one requires special tools to prevent the airbag from deploying.
A horn that sounds with the connector grounded points away from the steering wheel entirely, which saves you from pulling a wheel you did not need to remove. A silent horn on that same test puts the fault squarely in the column circuit, and that is the dividing line for most DIY jobs: if the test comes back that way, take it to a shop.
6. Inspect the Wiring and Horn Connector
Horn wiring runs through the front crossmember or inner fender, often in a clip-lined channel where it collects water and road salt. Pull the connector off the horn and look at it. Green corrosion, a warm or melted terminal, a loose spade, or a wire that breaks when you move it all point the same direction.
Check the horn’s ground: many horns ground through their mounting stud and bracket, so a loose bracket bolt or a painted mounting surface is a classic dead-horn cause. Scrape the paint back to bare metal before tightening.
For a voltage test, set the multimeter to DC volts, probe the positive terminal at the horn connector, and have someone press the button. Near 12 volts means power is reaching the horn, so the horn itself or its ground has failed. Zero volts means the fault is still upstream, and you go back to the relay and column circuit.
Do the same probe on the ground side. While the button is pressed, the horn ground should sit within about 0.2 volts of the negative battery terminal. A reading of 2 volts or more on the ground side points at a corroded ground path, and that is your fix.
Power present with a weak ground points at the ground. Power present, ground solid, and still no sound points at the horn. No power at all sends you back upstream to the relay and fuse.
7. Test and Replace the Horn
Most horns are a 12-volt unit drawing somewhere around 4 to 5 amps, though specs vary. Disconnect the connector, then attach your meter leads or heavy jumper leads directly to the horn terminals and give it battery power. The meter in series lets you read actual current draw, which tells you whether the horn is drawing normal load or shorting internally.
Apply only the voltage specified for your horn. Most automotive horns are 12-volt, so a vehicle electrical system is correct, but check the marking on the old unit before you assume. If the horn beeps and draws normal current on direct power, the horn is good and the fault is upstream. Dead silence, a crackle, or a far-too-high current reading means the horn has failed internally.
Replace it with a unit matching the original voltage, current draw, physical size, and mounting style. Re-terminate the spade or bullet connector properly, add a dab of dielectric grease, secure the horn to its bracket so the ground stud bites bare metal, and route the wire away from sharp edges and moving parts.
Press the button and confirm a full-volume sound from outside the car. Then replace the fuse, clear the tools, and reconnect the battery if you removed it.
If the new horn works on direct power but not from the button, you have not finished the upstream circuit yet, so go back to the relay and voltage checks rather than assuming the new part is bad.
Common Mistakes
Testing the wrong fuse. Fuse boxes label positions, not circuits, and owners guess based on a diagram they misread. Confirm the fuse rating and location in the manual before pulling anything.
Fitting a higher-rated fuse. A fuse that keeps blowing is telling you there is a short. Upgrading the rating removes the protection from the wiring and risks a fire. Find the fault instead.
Ignoring grounds. Cleaning a ground strap is free and fixes a surprising share of dead horns, yet it is usually last on the list. Do it before you buy any parts.
Reading the relay in one direction only. A relay that passes a continuity check on the coil can still have burned contacts. Confirm both sides, then judge it by its behavior under load.
Forcing a steering wheel or airbag connector. The E46 community traced one silent horn to a spade connector on a newly installed airbag that looked connected but was wedged and never seated. Horns are far cheaper than airbags, and a light connector is usually the fix.
Matching voltage but not current draw or mounting. A horn that is physically too large may not seat, may not reach its ground stud, or may overdraw the circuit.
Replacing parts in the wrong order. Grounds first, then the fuse, then the relay, then the horn. The order runs from free to expensive, and it saves money when the real fault is a corroded strap.
A few habits prevent repeat failures. Clean and protect every ground you touch, and fit the correct fuse rating every time. If the fuse blows again within days, the short is still there, and repeated replacements only bury the evidence. For an intermittent horn, log every odd electrical event in a notebook with the date, the weather, and what was running, because a technician cannot chase a fault they cannot reproduce and that log is often what makes the difference.
While you are under there, it is worth confirming the rest of the electrical system still behaves. If the same weak connections are behind dim headlights or a slow starter, our guide to what a clicking sound when starting means walks through those symptoms. And if the cabin has been cold lately, how car air conditioning works covers the compressor side that shares the same engine-bay space.
Frequently Asked Questions
Why does my car horn work intermittently?
An intermittent horn usually points to a connection that only fails under movement or vibration. Common culprits are a corroded ground strap, a loose spade connector at the horn, a frayed wire in the front crossmember, or a clock spring in the steering column losing contact at certain wheel positions. Heat also matters, since a relay or horn that works cold can fail once warm. Test the ground and the connector first, then check for voltage at the horn connector while the button is held, and record when the fault happens so you or a technician can test under the same conditions.
Is it safe to replace a car horn fuse?
Yes, replacing a horn fuse is safe as long as you install the exact amperage printed on the old fuse and the circuit is off. A fuse that blows once now and then is normal. A fuse that blows again within days means a short exists in the horn circuit, and replacing it repeatedly masks the fault and leaves the wiring unprotected. Do not bridge the socket with wire or fit a higher rating, since the fuse exists to protect the wiring, not the horn. If it keeps blowing, work through the ground and wiring checks before fitting another one.
Why does only one of my horns work?
Most vehicles run two horns in parallel off the same relay, so one working means power is reaching the circuit and the problem is isolated to the dead horn, its connector, or its ground. Test the dead horn with a direct battery connection. If it beeps, the horn is fine and the fault is in its wiring or mounting ground. If it stays silent, replace it with a matching unit. On some European cars the two horns are wired in series, where a single failed horn silences both, so confirm your layout in the wiring diagram before buying parts.
Can I drive my car without a working horn?
Requirements vary by state, province, and country, but a functioning horn is a legal safety device in most jurisdictions and a dead horn will fail a vehicle safety inspection. Beyond the paperwork, the horn is how you warn other drivers and pedestrians, and drivers who cannot signal often contribute to rear-end collisions. Fix it before you need it, since a horn failure usually signals a fuse, relay, or ground problem that can affect other circuits. If you must drive the car in the meantime, treat it as a short-term gap and not a permanent solution.
How do I know if the horn relay is bad?
The fastest test is a swap. Pull the horn relay, install an identical relay from the same box, usually the wiper relay, and press the button. If the horn sounds, the original relay is faulty. You can also check it on a bench: set the multimeter to continuity and expect roughly 50 to 150 ohms across the coil terminals and no continuity across the contact terminals. For a live check, measure DC volts across the coil while pressing the button. No voltage means the fault is upstream of the relay, not in the relay itself.
When should I stop diagnosing and call a mechanic?
Stop and take it to a shop when the fault points into the steering column. Working around a driver airbag means disconnecting the battery, waiting for the capacitor to discharge, and handling the wheel correctly, and a failed clock spring is not something to improvise. Also stop if the horn fuse keeps blowing, since tracking down an intermittent short is slow work best done with a wiring diagram and time on the bay. A shop can also log the fault over several drives, which is the only real way to catch a fault that appears once every few weeks.
Conclusion
Start by reproducing the failure, pulling the correct horn fuse, and checking the battery voltage and the ground connections. Those three steps cost almost nothing and rule out the majority of dead horns in a few minutes.
From there, follow the vehicle wiring diagram rather than guessing at the layout, and test each component rather than swapping parts at random. If the diagnosis ends up in the steering column, that is where a shop earns its keep.