
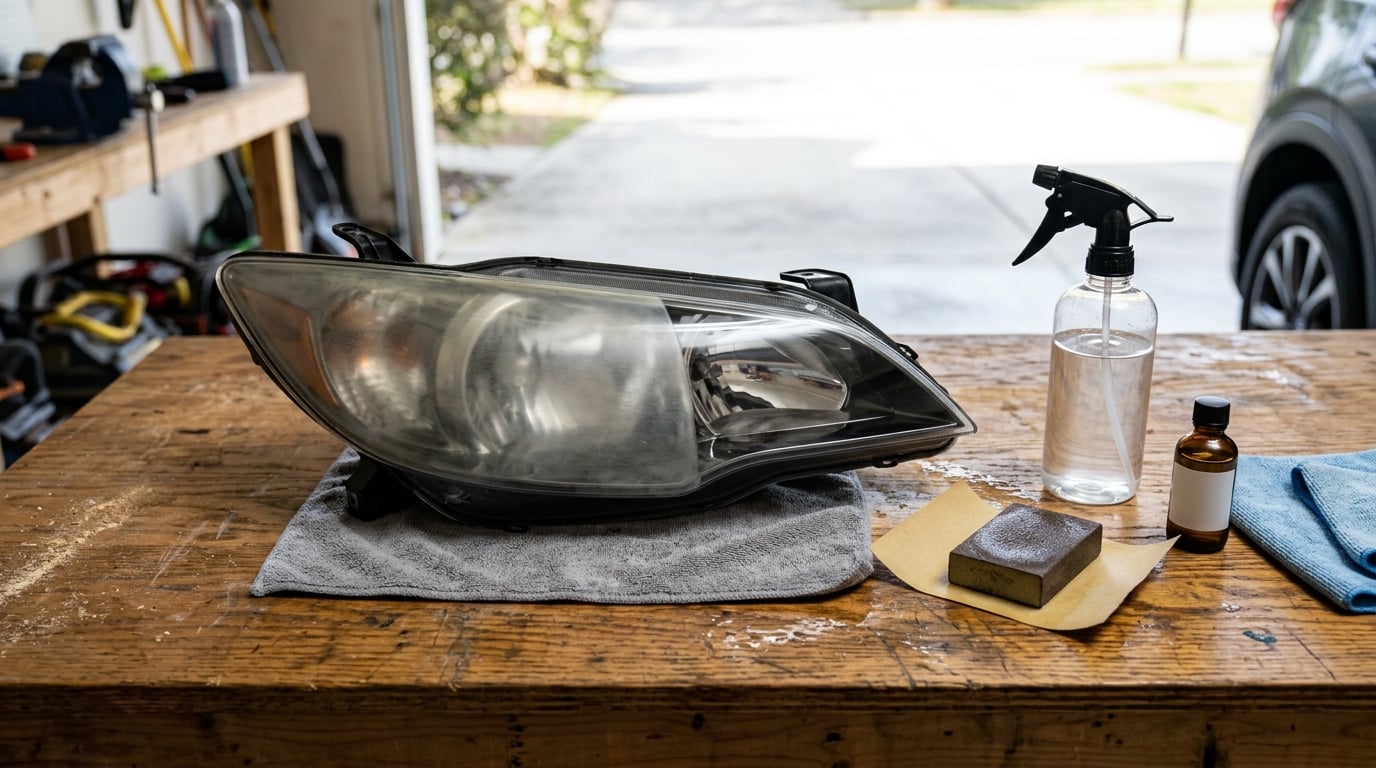
Foggy headlights are polycarbonate lenses whose clear UV coating has broken down under sunlight, road salt and grime until the surface scatters light instead of passing it through. To restore foggy headlights you wet sand that oxidized layer away in stages, polish out the sanding haze, then seal the bare plastic with a UV-resistant coating so it stops clouding again.
Before you touch sandpaper, here is the short version that works for mild haze on most lenses:
- Wash and dry the headlight, then tape the paint around it so no abrasive touches the bodywork.
- Work an abrasive paste in circular motions for 5 to 10 minutes if the haze is light.
- For real UV oxidation, wet sand wet with 1000 grit, then 2000, then 3000.
- Polish the lens until the water-sanding haze disappears.
- Seal it with automotive wax or a UV headlight sealant and let it cure.
The full method takes 2 to 3 hours for both headlights and is beginner-level work. The scary part is sanding a plastic part, so the first section below is about telling whether your lens is even a candidate for restoration.
Table of Contents
What You Need
You can do this in a driveway with a hose, a cardboard box and a few paper towels. The essentials:
- Wet-dry sandpaper in 1000, 2000 and 3000 grit, plus 400 or 600 grit for heavy yellowing
- A spray bottle and a clean bucket for keeping the paper wet and rinsing
- Painter’s tape to mask the bumper, hood edge and painted trim
- Microfiber cloths and isopropyl alcohol for degreasing before and after
- Polishing compound made for plastic, or a dedicated headlight polish
- UV headlight sealant or clear coat, plus a soft applicator pad
- A marker and a spare strip of tape to label one lens so you do not mix up the grit sheets mid-job
Optional but useful:
- A dual-action (DA) polisher with a foam pad, which is the setup most detailers reach for. A sponge pad on a drill at low speed works too, just keep it off the high setting.
- A sanding block or a few coins wrapped in tape, so the paper follows the curve of the lens instead of digging in at the edges.
- A headlight restoration kit, 3M being the most widely sold, if you would rather not buy grit sheets piecemeal.
Safety gear matters more here than people expect. Nitrile gloves because isopropyl alcohol dries skin out, eye protection because wet grit slurry gets everywhere, and a dust mask or a respirator if you work somewhere enclosed. Work in shade or indoors. Direct sun dries the surface faster than you can lubricate it, and dry polycarbonate sands like drywall.
The grit ladder: what each step does
- 400 to 600 grit — heavy yellowing and deep oxidation from years of UV damage. Reach for it only if light yellowing is still visible after a full 1000-grit pass.
- 1000 grit — takes off the bulk of the oxidized coating. Move on once the cloudiness looks even across the lens instead of patchy.
- 2000 grit — erases the scratches left behind by 1000. Move on when water sheets across the surface rather than beading.
- 3000 grit — clears the fine haze and micro-scratches. Stop when the lens looks flat and slightly dull rather than white.
Experienced detailers usually say you need fewer steps than guides imply, and they are right for most lenses. 1000, 2000, 3000 is a sensible middle path. Skip 400 and 600 unless the lens is genuinely yellow, and skip steps only if you are moving forward, never sideways or backward.
Step-by-Step: How to Restore Foggy Headlights
1. Inspect the headlight and identify the damage
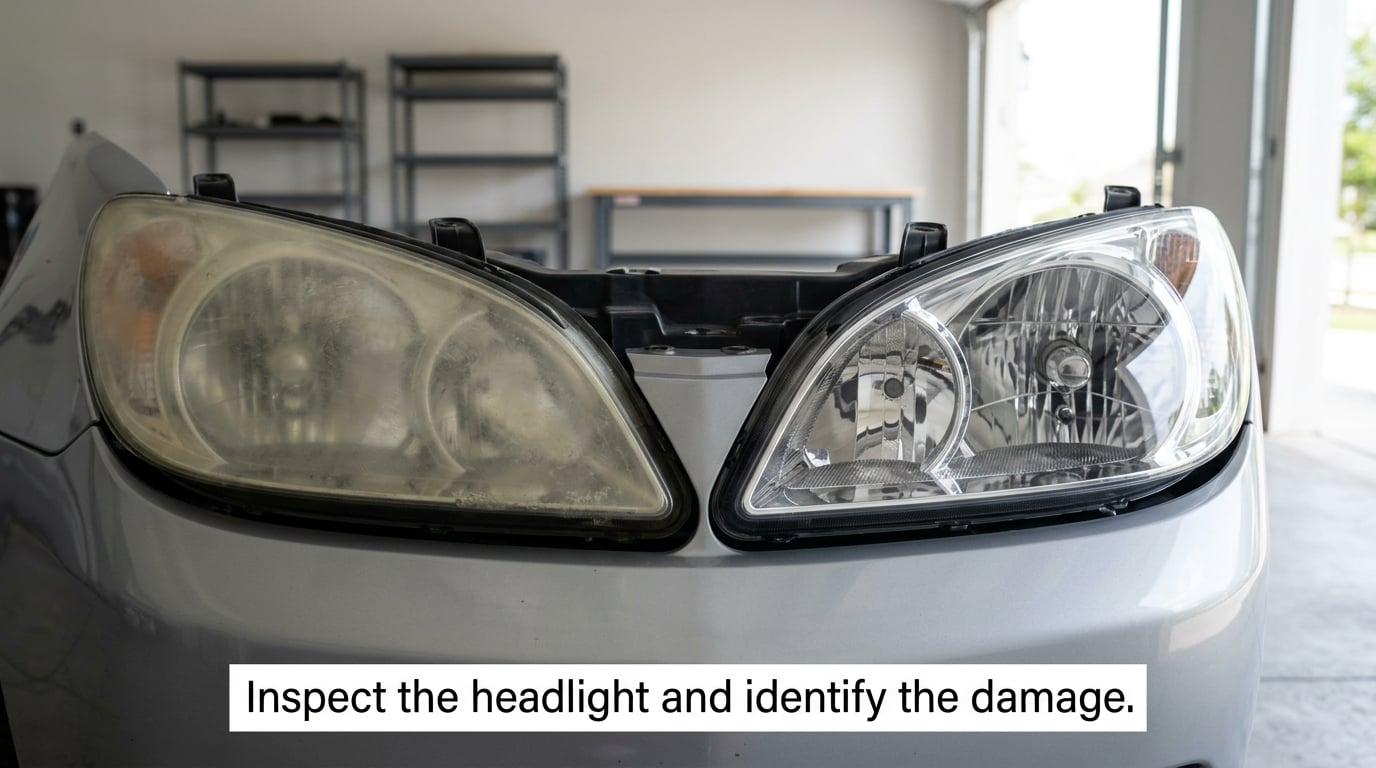
You need to know which of two problems you have before you start, because only one of them can be sanded. Oxidation lives on the outside of the lens and wipes off in streaks with a finger, feels chalky and gets worse over months. Condensation lives inside the housing, sits behind the clear plastic, and looks the same at a glance.
Two checks separate them. Park the car in the dark and switch the headlights on: if the fog is uniform you are probably looking at oxidation, while condensation usually shows a distinct edge, a waterline or droplets that do not clear at all. Then run the lens under water: external haze smears under your thumb, internal fog does not move at all.
Also look at the physical condition. Hairline cracks spreading from the mounting bolt, a lens yellowed on the inside, or a housing that has visibly separated from the lens are all cases where sanding makes things worse. If moisture sits behind a cracked lens, the only fix is replacing the assembly. Details on that in the FAQ.
If the housing has genuine vents, check them while you are there. Blocked or broken vents are the usual reason moisture gets in and cannot get out.
2. Clean and protect the surrounding area
Wash the lens with car shampoo and a sponge, then dry it fully. Degrease the surface with isopropyl alcohol on a microfiber cloth and let it evaporate. Any polish you leave behind will turn into abrasive slurry the moment you add water.
Mask the area next to the lens before anything else. Tape the bumper, the hood edge, the grille and any painted trim or reflector edges, and tuck the tape edge under the plastic lens if you can so grit cannot run onto paint. Cover the wiring connector and unplug it if the harness is in the way, since water and grit play badly with copper.
Work somewhere shaded with decent airflow. A folded cardboard box makes a good sanding platform, and a drop cloth under the car catches everything.
3. Wet sand the lens to remove the oxidized layer
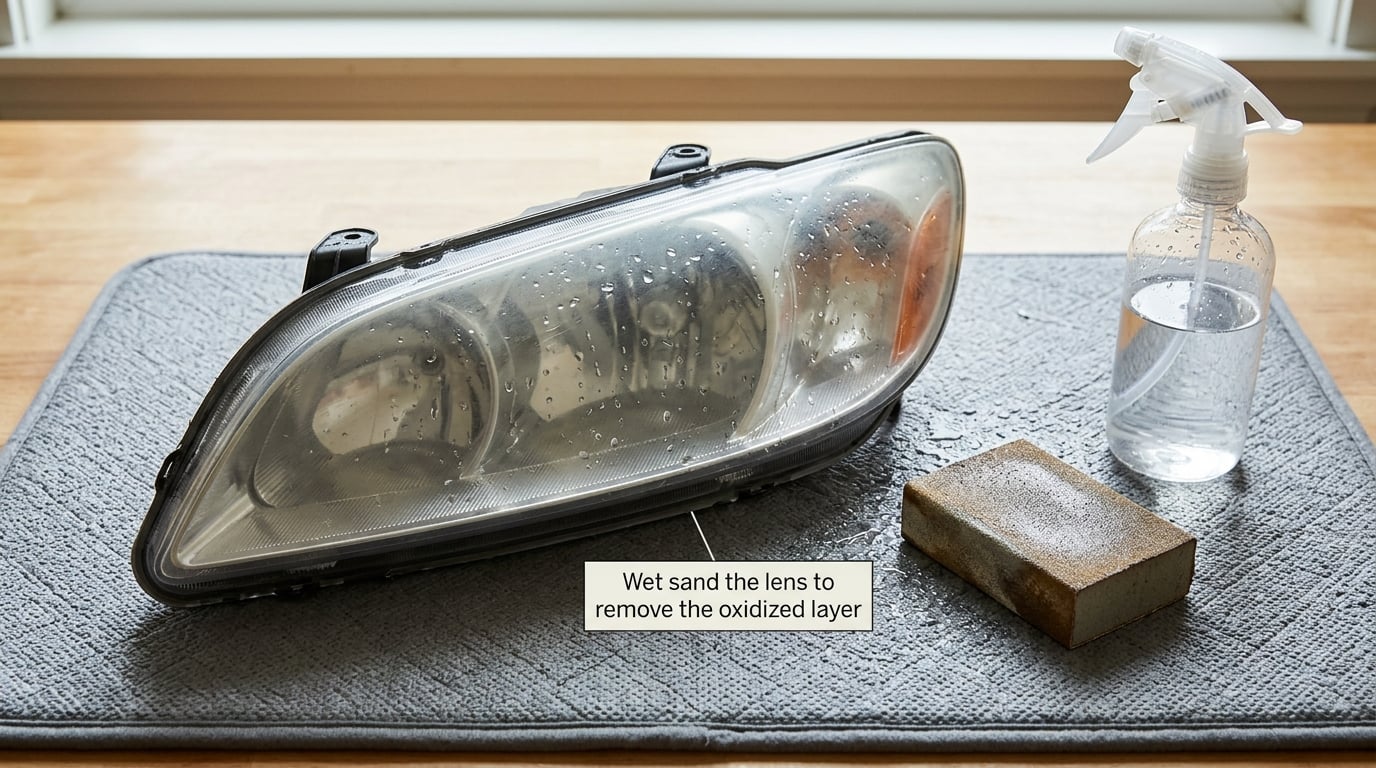
Soak the 1000 grit paper for a few minutes, then start with the surface fully wet. Keep a spray bottle in your other hand and re-wet constantly. You are looking for long, even strokes following the curve of the lens, light pressure, and about 10 to 15 minutes per grit step.
Rinse the lens and the paper often. Grit trapped under the sheet is what causes the deep scratches that turn a lens into orange peel, and it is the single most common reason people end up worse off than they started. A puddle of grey slurry means you are moving too fast.
Move to 2000 grit, then 3000, wetting between every pass. Feel the lens with a clean fingertip between steps: smooth means go up a grit, still gritty means spend longer on what you have. You are never aiming for glass, only for an even, chalky-free surface that will polish up.
Stop and reassess if the lens develops deep gouges, feels noticeably thinner at the edges, or the water starts pooling in channels you cannot sand out. At that point a clear coat will magnify the flaw rather than hide it.
4. Polish away sanding marks
3000 grit still leaves a uniform dull haze, and that is the polish’s job. Apply a plastic-safe polishing compound in small dots across the lens rather than pouring it on, then spread it with a clean microfiber or a foam pad before you add any pressure.
With a DA polisher, keep it on the lower speed setting, flat against the lens, and move constantly. A drill with a foam pad works at its lowest RPM for the same reason detailers use it, because a spun-up pad generates heat and heat is what you are trying to avoid. On a badly faded lens expect 10 to 20 minutes of polishing per side.
Wipe the residue off with a damp microfiber and inspect with the lights on. If the lens still looks milky, go back to 1500 or 2000 grit for a second pass rather than grinding harder with the compound. Finish with isopropyl alcohol to strip any remaining film and let the lens dry completely.
5. Apply UV-resistant headlight sealant
What you put on after sanding is what determines how long the work lasts. Bare polycarbonate oxidizes faster than the original coating did, so sealing is not optional. Automotive wax with UV inhibitors is the cheap option and body shops still recommend it for a quick refresh. A dedicated UV-resistant clear coat lasts longer because it is a proper film rather than a wax layer.
Apply it to a clean, dry, cool lens in thin coats with the foam applicator, working one small section at a time so you can buff off each coat before it skins. Follow the product’s cure time rather than your impatience, and keep the car out of direct sun and away from rain until it has set.
Skip any coating described as for chrome, glass or interior plastic, and be careful with cheap sealers. Some yellow within a couple of seasons and peel in flakes, which takes the clear look straight back off. A reputable plastic-safe UV coating is worth the small extra cost here.
6. Check the restored beam and maintain the result
Look at the lens from several angles and in daylight, then at night against a wall. Clarity is not always the same as light output: an oxidized lens scatters the beam, which means less light lands on the road and more glare comes back at oncoming drivers, so a properly restored lens is the safer car, not just the better-looking one.
Confirm there is no moisture trapped inside. If you see fog or water lines behind the lens, you have an internal problem that sealing the outside will not solve.
Expect a DIY restoration to hold for roughly six months to a couple of years, depending on climate and how the car is stored. Road salt winters and desert sun both shorten that window noticeably. A wax or sealant coat every few months, a gentle car wash instead of automatic brushes, and prompt cleanup of bug and road grime will stretch it out. Keeping the lens sealed is the single biggest factor.
Common Mistakes
Sanding dry. Dry sanding puts heat into the plastic and leaves deep scratches that a polish cannot fully remove. The lens can come out worse than it went in, which is exactly the complaint people post about in headlight restoration groups. The paper stays wet from the first pass to the last.
Skipping grits or going backwards. Each grit removes the scratches of the one before it. Jump from 1000 straight to 3000 and you are polishing a surface full of 1000-grit scratches, which is what produces that permanent orange-peel look.
Adding pressure. Grit does the cutting, not force. Pressing hard just wears the paper unevenly and digs in at the edges of the lens where the plastic is thinnest.
Running a drill buffer at full speed. A spun pad heats the lens, melts the plastic slightly and can leave a lens that looks wavy from every angle. Low speed and constant movement.
Polishing the wrong surface. Do not polish the inside of the lens hoping to clear internal fog, and do not coat a lens that still has moisture behind it. The coating traps the moisture in and makes the fog worse.
Working in direct heat. A hot hood and a hot lens dry the paper mid-stroke and warm the plastic. Shade the car, work in the morning or evening, and keep the water coming.
Trusting household fixes on real UV damage. Toothpaste or baking soda paste will take a shine off light surface haze. It will not touch genuine oxidation, and the abrasive in it is coarse enough to leave micro-scratches that show up as soon as light hits the lens at an angle.
Skipping the seal. A lens sanded and polished but left bare will re-fog faster than it started, because you removed the protective layer along with the oxidation.
Frequently Asked Questions
How hard is it to restore foggy headlights yourself?
Restoring foggy headlights is beginner-level work that takes 2 to 3 hours for both sides. The physical demand is low, but the patience demand is not. The lens needs to be wet at all times, grit steps are not skippable, and most of the clock time is spent on polishing out the sanding haze rather than on sanding itself.
Do household fixes like toothpaste, WD-40, Dawn or a Magic Eraser work on headlights?
Only for light haze. Toothpaste or baking soda paste acts as a mild abrasive and can take an even surface haze off a recently protected lens. WD-40 and Dawn are cleaners, so they remove road grime but leave oxidation in place, and a Magic Eraser will take the gloss off without removing the cloudiness. None of them fix real UV damage, and all of them leave micro-scratches that catch the light.
How long does a DIY headlight restoration last?
Expect six months to about two years, depending on climate, parking and whether the lens stayed sealed. Desert sun and road salt both pull the timeline shorter, which is why a UV-resistant clear coat beats wax for the first application. Reapplying a sealant or wax every few months and washing by hand rather than through an automatic car brush will add months.
Are cloudy headlights unsafe or illegal to drive with?
They are a safety problem first. An oxidized lens scatters the beam, so less light reaches the road and more glare is thrown back at oncoming drivers, which matters most on unlit roads. Inspections are the second issue, since a lens that no longer passes a clear-light check can fail in states that test headlamp condition. Check your own state rules rather than assuming either way.
When is replacing a headlight better than restoring it?
Replace the assembly when the lens is cracked, when the fog is inside the housing rather than on the surface, or when a vent or bulb seal has failed and moisture keeps coming back. Also stop sanding if the lens is deeply gouged or visibly thinned at the edges, because a clear coat magnifies that instead of hiding it. A sealed, even, sanded lens is the point where restoration succeeds.
Conclusion
Start with the least aggressive thing that could work. Wash and degrease the lens, confirm the fog is on the outside rather than trapped inside, and if it is mild, an abrasive paste and a seal coat will do it in an afternoon. For genuine yellowing, start at 1000 grit wet and climb the ladder to 3000 without skipping a step, polish until the haze is gone, and seal it the same day. The lens stays clear for as long as that coating survives, and the coating is the part people skip.