
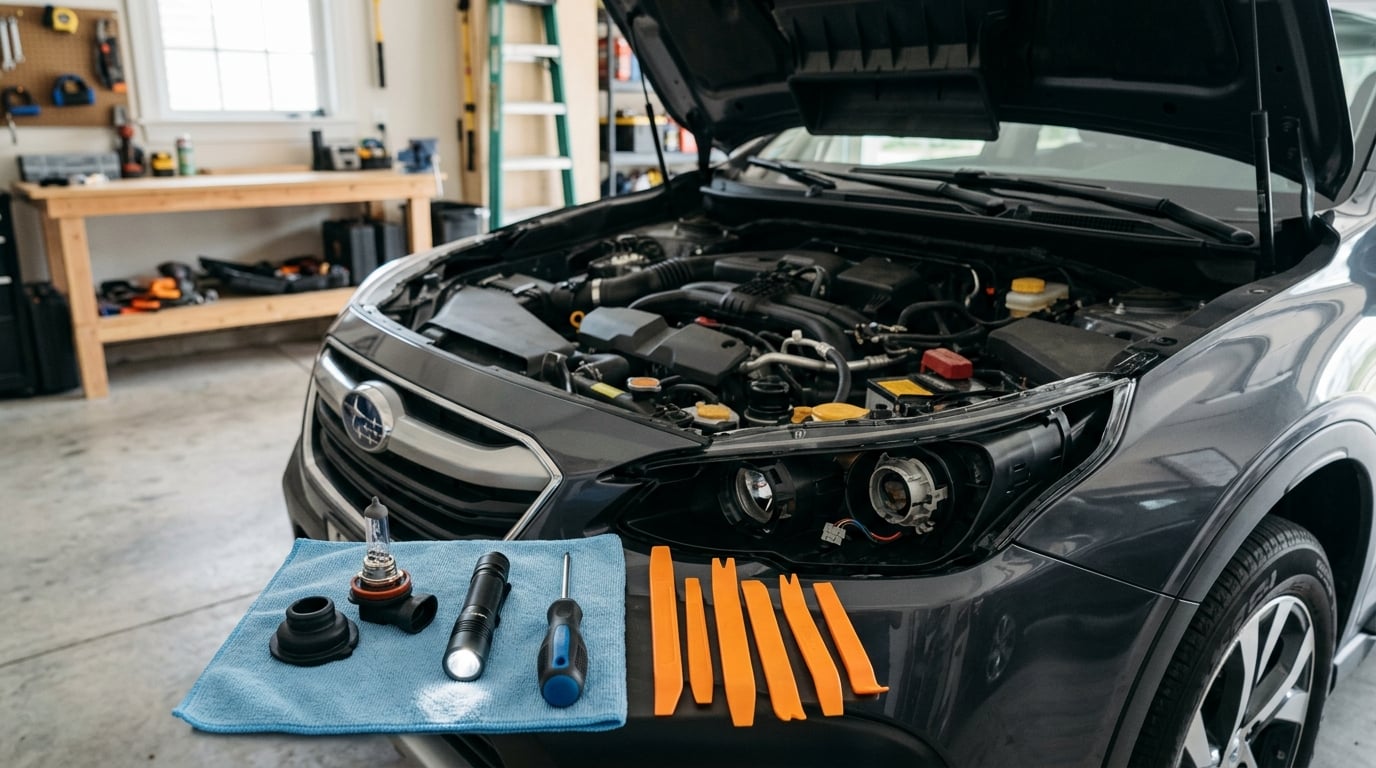
Yes, you can do this yourself, and on most cars it takes 15 to 30 minutes. The job is: open the hood, take the dust cover off the back of the headlight housing, unplug the connector, swap the bulb, put the cover back on, and test the beam. There are no special tools on most models.
Where it gets fiddly is the bulb itself. Headlights have changed more in the last two decades than in the fifty years before that, and the same procedure does not apply to a halogen reflector and a xenon projector, let alone a sealed LED or laser assembly. Getting the right bulb number first saves every other headache.
This guide covers the full procedure, with the model-specific differences called out, because the worst outcome is a bulb that goes in, looks fine, and then flickers or throws glare at oncoming traffic. The last section lists the errors that cause exactly that.
Table of Contents
- What You Need
- Step-by-Step: How to Replace Headlight Bulbs Yourself
- Common Mistakes
- Frequently Asked Questions
- Do I need to replace both headlight bulbs at the same time?
- Can I replace a headlight bulb with the engine running?
- Why does my replacement headlight flicker or show a warning message?
- Is condensation inside the headlight normal after replacing a bulb?
- Can I replace a xenon or LED headlight bulb myself?
- How long does it take to replace a headlight bulb?
- Conclusion
What You Need
The short list is more important than the long one. Most of it is one small bulb, a pair of gloves, and whatever screwdriver fits the fasteners on your headlight.
- The replacement bulb, matched to the base type and wattage printed on the old one
- Your owner’s manual, or the lighting specification page for your exact year and model
- Clean nitrile gloves, plus a lint-free cloth as a backup
- A flashlight, since you will be working inside a housing with the hood up
- Flat-head and Torx screwdrivers or plastic trim tools, depending on the fasteners
- A 10 mm socket and ratchet for models that use a shield or bracket bolt over the bulb
- Needle-nose pliers for clips and the odd stuck connector tab
- A penetrating lubricant such as WD-40 for a collar that has not moved in years
- A paper towel or clean cloth to lay parts on, so you do not scratch paint or drop a bulb into the housing
On a BMW specifically, the bulb type and the access route have varied a lot across model years and headlight designs. Older cars in the range use halogen bulbs with a base you will recognize by its three flat blades, and higher-spec cars use xenon projectors with a glass bulb that clips into a weather-sealed connector. Recent cars with adaptive LED or laser headlights have no user-replaceable bulb at all. That is why the first step below is verification, not removal.
Park on level ground before you start. A sloped driveway makes the beam aim test at the end meaningless.
Step-by-Step: How to Replace Headlight Bulbs Yourself
1. Confirm the Correct Bulb and Access
Start by reading the bulb specification. Check the owner’s manual lighting section, look for a sticker on the door frame or inside the glove box, and read the marking printed on the bulb you are pulling out. If the bulb is already out and you cannot read it, the part number is often molded into the plastic housing itself.
Do not match a replacement bulb by shape alone. This is the single most common way people end up with the wrong part. Bases that look nearly identical can differ in wattage, in connector layout, and in beam pattern. A 9006 and a 9005 are a good example of a pair that fits the same general hole but throws completely different light, because one has a cutoff shield and the other does not. A 9006 in a high-beam housing gives you glare straight into the mirrors of the car in front of you.
Then work out how you will actually reach the bulb. Most cars open from the engine bay, where a round or oval dust cover sits at the back of the headlight and a few fasteners let you pull the whole assembly forward for better access. Plenty of modern cars, BMWs included, put the bulb behind a wheel-well liner, so you end up turning a wheel, pulling a liner clip, and reaching in through the fender instead. On the hardest layouts, the headlight assembly has to come off, and that is a body-panel job rather than a bulb job. Find out which one you have before buying anything.
2. Prepare the Vehicle and Headlight
Switch off the ignition, switch off the lights, and let any hot components around the engine bay cool down. Pop the hood and use the prop rod or the gas strut, because a head partly supported by your body while both hands are inside a housing is how people pinch a wiring harness.
Disconnect the battery only if the manufacturer tells you to. On a car with a coded battery or an alarm, disconnecting it clears radio presets, window settings and, on some models, headlight leveling and bulb-out monitoring until the car is re-initialized. For most bulb swaps you do not need to go near it.
Put your gloves on before you touch anything in the housing, and drape a clean cloth over the fender edge so the housing does not get scratched when it moves. The same gloves are handling the new bulb, for a reason that gets its own explanation in the mistakes section below.
3. Remove the Old Bulb
Take off the dust cover first. It is usually a twist-and-pull plastic cap or a rubber plug, and on some cars it comes out with a flat screwdriver. If it is stuck after years in place, warm it with a hair dryer or work the edge loose rather than levering hard and cracking it.
Now release the power connector. Most have a small tab or latch that you press or lift before the plug slides straight off. Do not pull the bulb by the wires. You are pulling the connector off the bulb’s terminals, and the wires behind it are thinner than they look.
Release the bulb itself. A locking collar turns roughly a quarter turn counterclockwise, and some halogen sockets use a spring clip that you flip down and away from the flange. This is where most people force things. If it will not turn, it is usually corrosion or a collar that is under tension, not a mechanism that needs more arm strength. A small amount of penetrating lubricant and a few minutes of patience saves the housing.
On xenon and HID systems the bulb clips into the back of the connector and a locking collar holds the whole assembly, and the glass envelope must not be opened, prised or touched at all. On modern LED assemblies there is no bulb to remove.
If the old bulb shattered in the socket, put on cut-resistant gloves, cover the socket opening with a wide strip of tape before you turn anything, then vacuum the fragments with a crevice tool. Wear gloves and eye protection, because the dust from a broken bulb is glass. Note the bulb type and part number on the socket or the old connector while it is accessible, since the housing no longer holds the answer.
4. Install the Replacement Bulb
Put the new bulb in with the same orientation the old one came out. On halogen bulbs the tabs and flanges only line up one way, so if it will not go in, check that rather than applying force. Seat it evenly all the way, then turn the collar clockwise until it locks, or snap the spring clip back over the flange.
Reconnect the plug until it clicks. A connector that is half-seated is the most common cause of a new bulb that flickers or works only on one beam, and it is easy to miss because the bulb still looks seated.
Two cautions are specific to the technology you have. Do not fit an LED bulb into a halogen reflector housing: the emitting chip sits in the wrong place, the beam pattern breaks up, the light scatters above the cutoff line, and most cars will throw a bulb-out or CAN-bus error because the bulb draws current in a way the body electronics do not expect. Mechanic-community consensus on forums is strongly against it for street use, and that advice holds. If your car came with a sealed LED or laser headlight, the assembly is replaced as a unit and is not opened or modified.
5. Check Alignment, Fit, and Seals
Before you run the lights, look at what you just did. The bulb should sit flat, with no gap and no tilt. The dust seal should be seated evenly in its channel, and the rubber should not be folded, pinched or rolled under the rim. Wiring should run free, with nothing caught between the bulb and the housing.
Check the headlight and the panel around it too. If you pulled the assembly forward or loosened the bumper, make sure it sits back square in its mounting points, with fasteners snug but not overtightened. A loose or misaligned assembly causes flicker at the connector, lets moisture in, and puts stress on the mounting points until something gives.
If the car has automatic headlight leveling or adaptive lighting, it often needs the vehicle cycled through ignition on and off so the level sensor and the electronic module reinitialize. On cars that store an alignment or a bulb-out history, a scan with a diagnostic tool clears it. Both are simple, and both are worth doing before you decide the job failed.
6. Test Low Beams, High Beams, and Indicators
Turn the lights on before anything goes back together. Confirm low beam, high beam, turn signals, parking lights, and daytime running lights, on both sides. Listen for a relay click and watch for a warning message, a flicker, or a bulb that dims when the turn signal runs.
Then check aim against a flat wall on level ground, roughly 25 feet away. The cutoff line on the beam should be even and at the same height on both sides, with the high beams aimed slightly higher. A noticeable difference between the two sides usually means one bulb is not seated correctly, or a housing is sitting high after being reseated. Flicker means a poor connection. Condensation inside the lens on a cool morning is normal, since the housing is vented and the water should clear; condensation that stays is a seal problem.
Do not try to correct aim by eye against a wall unless the car is level, properly inflated and on flat ground. If you cannot verify the aim, or if you had to remove the assembly, get it aligned at a shop. Beam aim is one of the few car jobs where being close is not good enough.
7. Reinstall Covers and Clean Up
Put the dust cover back on and press it until it seats evenly, reinstall any retainers, clips, liner panels and body fasteners you removed, and pull the protective cloth off the fender. Clear your tools off the engine bay before you close it, because a 10 mm socket left in a fan shroud is an expensive lesson.
Dispose of the old halogen bulb the way your local rules require. Many areas ask for old halogen bulbs to be taken back to a parts retailer rather than put in household trash, and it is easy enough to do on the same trip as the new one. If anything behaved unexpectedly, write down the bulb part number from the new bulb and check it against the manual before you buy a second one. Cheap bulbs with the same number are not always the same bulb.
Common Mistakes
These are the errors I see repeated, and most of them show up as a light that flickers, shines into the wrong direction, or fails within months.
- Buying by shape instead of by number. Bases that look the same can have different wattage and different beam patterns. Read the part number off the old bulb or the housing and match that.
- Touching the glass. Your fingertip leaves an oil film. A halogen bulb runs hot enough that the film burns onto the quartz envelope in patches, those patches get hotter than the rest, and the filament fails early. On HID and xenon bulbs the same contamination is worse and shortens life dramatically. The tip of the bulb is a piece of metal, not glass, so you can hold the base or the flange with a clean cloth and be fine.
- Forcing a locked collar. If it does not turn, it is tension or corrosion. Penetrating lubricant and patience cost nothing; a cracked housing costs a great deal.
- Snapping the retaining clip. The spring clip or plastic retainer is the most commonly broken part during removal, and it is not always sold separately. Read the owner’s manual for the release direction before you lever on it.
- Dropping the bulb into the housing. The moment this happens the assembly comes off the car, and a ten-minute job turns into a two-hour one. Lay parts on a cloth, and work over the opening rather than beside it.
- Pinching the wiring harness. Route the connector and loom back into their original path before you close the cover. A trapped wire fails intermittently and is miserable to find later.
- Swapping halogen for LED in the same housing. It fits, which is the problem. You get glare, a bad beam pattern, and often a bulb-out warning or CAN-bus error.
- Ignoring the beam aim and the warning light. If one side looks different from the other, or a message stays on, the job is not finished. Re-seat the bulb and recheck the connector first, then get the aim verified.
- Replacing only one bulb when the other is on its way out. Halogen bulbs dim as they age, so a fresh bulb next to a tired one gives you uneven brightness and uneven depth perception at night. If the pair is close in age, replace both.
One more worth naming: replacing a bulb is not the same as replacing a whole headlight. The lens and housing on a modern assembly are not user-serviceable, and if the lens is cracked, the housing is cloudy, or the assembly has moisture inside it, the assembly is the part that gets replaced. You can swap that yourself on many models, but it is body work with alignment afterward, not a bulb change.
Frequently Asked Questions
Do I need to replace both headlight bulbs at the same time?
Only one is required, but replacing both is the sensible call when the working bulb is already visibly dim or the same age as the dead one. Halogen bulbs lose brightness gradually, so a new bulb beside an older one gives uneven lighting and poorer depth perception at night. If the other bulb is nearly new, replace just the failed one and keep the spare in the glove box.
Can I replace a headlight bulb with the engine running?
Do not. A running engine gives you a moving fan, hot exhaust components, and an electrical system that is not asleep. Switch the ignition off, remove the key, and let hot parts around the bulb cool before you reach in. You do not need the engine running for anything in this job, and nothing is gained by it.
Why does my replacement headlight flicker or show a warning message?
A new bulb that flickers is almost always a connection problem, not a bad bulb. The usual causes are a connector that did not fully click into place, a bulb that is not seated evenly, a socket or ground point with corrosion, or wiring pinched by the dust cover. A warning message usually means the body electronics measured current outside their expected range, which is common with LED bulbs fitted to a halogen housing.
Is condensation inside the headlight normal after replacing a bulb?
A light mist that forms on the inside of the lens overnight and clears in a few hours is normal. Headlight housings are vented, and that water is designed to escape. Condensation that stays, pools in the bottom of the housing, or appears with water tracks on the inside means the dust seal, cover or connector is not seated properly. Reseat the seal and cover, then check again in dry weather.
Can I replace a xenon or LED headlight bulb myself?
Xenon and HID bulbs are user-replaceable on most cars, and the swap is similar to a halogen one with a locking collar and a sealed connector. The glass envelope must stay untouched, and the bulb matches the housing it came from. LED is different: an LED bulb in a halogen housing gives poor beam pattern and glare, and a sealed LED or laser headlight assembly has no replaceable bulb at all.
How long does it take to replace a headlight bulb?
About 15 to 30 minutes when the bulb is reachable through the engine bay or a wheel-well liner. If the headlight assembly has to come off, add an hour or more, and expect to want an alignment afterward. Budget extra time if the housing is corroded, the clips are brittle, or the old bulb broke and the socket needs cleaning.
Conclusion
The first thing to do is confirm the exact bulb specification and the access path for your car, then follow the manufacturer-specific steps rather than a generic one. Most of the job is unclipping, swapping and reclipping.
Stop and take it to a qualified shop if the headlight is a sealed LED or laser assembly, if the housing or lens is cracked, if a clip or the bulb base is broken, or if you cannot verify the beam aim after reassembly. Those four cases are the ones where a save turns into a much larger bill, and the bulb swap is never the reason to push through them.