
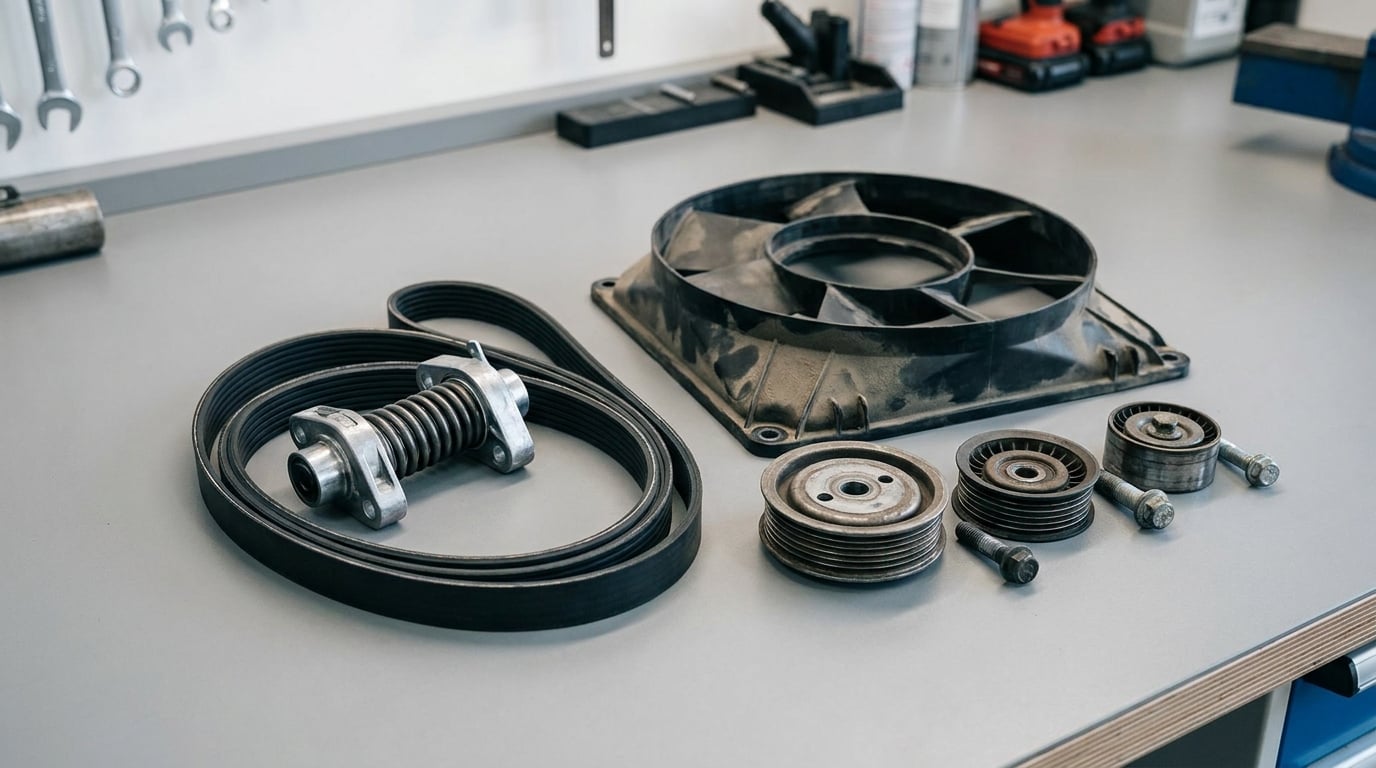
BMW idle drive belt and tensioner replacement is usually a one- to three-hour job with hand tools, but the phrase covers more than one part. On most BMWs it means the accessory drive belt plus the tensioner and idler pulleys that drive the alternator, water pump and power steering pump. A few four-cylinder models also carry a small separate belt for the idle control valve.
Start with the spelling, because it decides which part you order. An idler pulley is a bearing that changes the direction of the belt. An idle is what the engine does with no throttle. Search engines quietly rewrite “idle pulley” to “idler pulley,” and the owners typing that query almost always want the serpentine belt system, not a seat belt and not a timing belt.
The job is harder than the ten minutes a dealer would like you to believe, mostly because access is awkward. Removing the fan and shroud with a 32mm wrench on a reverse-threaded fan clutch stops more people than the tensioner does. Budget a couple of hours on a driveway, and read this through once before you start pulling fasteners.
If the belt lets go while you drive, you lose power steering, charging and coolant circulation in the order those systems need them. The temperature gauge climbs within minutes on most BMWs. Treat a screaming belt, a visibly cracked one, or a tensioner arm that flails as a no-drive condition.
Table of Contents
- What You Need
- BMW Idle Drive Belt and Tensioner Replacement Steps
- 1. Identify the Correct BMW Idle Drive Belt and Tensioner System
- 2. Inspect the Belt, Pulleys, and Tensioner
- 3. Remove the Accessory Drive Belt
- 4. Replace the Belt and Damaged Tensioner
- 5. Route and Tension the Belt Correctly
- 6. Torque the Mounting Hardware
- 7. Verify Rotation, Alignment, and Belt Movement
- 8. Test the Repair and Reinspect the Belt
- Common Mistakes
- Frequently Asked Questions
- Does every BMW have an idle drive belt?
- How do I know whether my BMW needs a new tensioner?
- Can I replace an accessory drive belt without special tools?
- How often should a BMW drive belt and tensioner be inspected?
- What does it mean if a new BMW drive belt squeals after replacement?
- Should the tensioner be replaced with every drive belt?
- Conclusion: Verify the Repair Before Driving
What You Need
BMW does not fit one belt system across the range. A 1995 E36 with an M44, a 2004 E60 with an N62, a 2007 E90 with an N54 and a 2013 F30 with an N20 use different pulleys, different tensioners and different routing. Nobody should tell you which part number you need without three pieces of information from your car: the VIN, the model year, and the engine code stamped on the block. The BMW service manual for that exact vehicle is the fourth thing, and it is the one that settles arguments.
With the manual open, the tool list is short:
- T60 Torx socket, the primary fastener for most tensioners and idlers on the M54 and N52/N54/N55 families
- T50 Torx and E12 Torx for engine covers, fan shrouds and some bracket hardware
- 32mm wrench for the fan clutch, which is normally reverse-threaded and turns the wrong way on many cars
- 8mm Allen key, ratchet, extension bars and a breaker bar or pipe for holding a rotated tensioner
- Torque wrench covering the low range these fasteners use, roughly 20 to 65 Nm
- Belt tension gauge, optional, if your car uses a manually adjusted spring arm instead of an automatic tensioner
For parts, most owners end up replacing four things at once: the belt, the tensioner, every idler pulley on the system, and any bracket or fastener that came off. Many BMW tensioners use one-time-use aluminum stretch bolts that are torqued to yield. Reusing the old bolt leaves you with a joint that can loosen, and the fasteners are cheap enough that replacing them is not a place to economise. Keep the hardware in labelled bags as it comes off so the washers, spacers and shims go back where they came from.
Add penetrating oil for hardware that has been in a car for twenty years, a clean rag, a flashlight, eye protection and gloves. If your engine is an M54 or a V8, bring a pan. The oil filter housing gasket on those engines is a well-known oil source, and it drips straight onto the belt you just fitted. Check for it before assembly, not after.
BMW Idle Drive Belt and Tensioner Replacement Steps
Everything below describes a method, not a set of fixed values. Torque figures, tensioner positioning and belt routing all change with the engine, and the routing diagram in your service manual is the authority. Where numbers appear here they are typical published values, and you verify them against your car before you torque anything.
1. Identify the Correct BMW Idle Drive Belt and Tensioner System
Stand at the front of the car with the engine cold and trace the belt with your hand. Count the pulleys. Note whether the tensioner has a spring arm and a pivot bolt, which is a mechanical unit you rotate by hand, or a sealed body that moves on its own, which is an automatic or hydraulic tensioner. A mechanical tensioner, common on the E39 and E46 with the M54 and on earlier four-cylinder cars, sets tension with a spring and a fixed arm position. An automatic tensioner uses engine oil pressure or a spring-and-damper assembly to hold the correct load and lets you install the belt without priming anything.
Count the belts too. The E46 M3, the E53 with the V8 and the E65 run a main accessory belt plus a separate air conditioning belt with its own tensioner. The E30 through E46 four-cylinder engines may also have a small toothed belt to the idle control valve, sitting on the intake manifold at the front of the engine. If the part you are about to order is a smooth rubber loop a few millimetres wide, you are holding an ICV belt, not a serpentine belt. Verify the part number against your VIN rather than trusting a forum post or a parts-store search result.
2. Inspect the Belt, Pulleys, and Tensioner
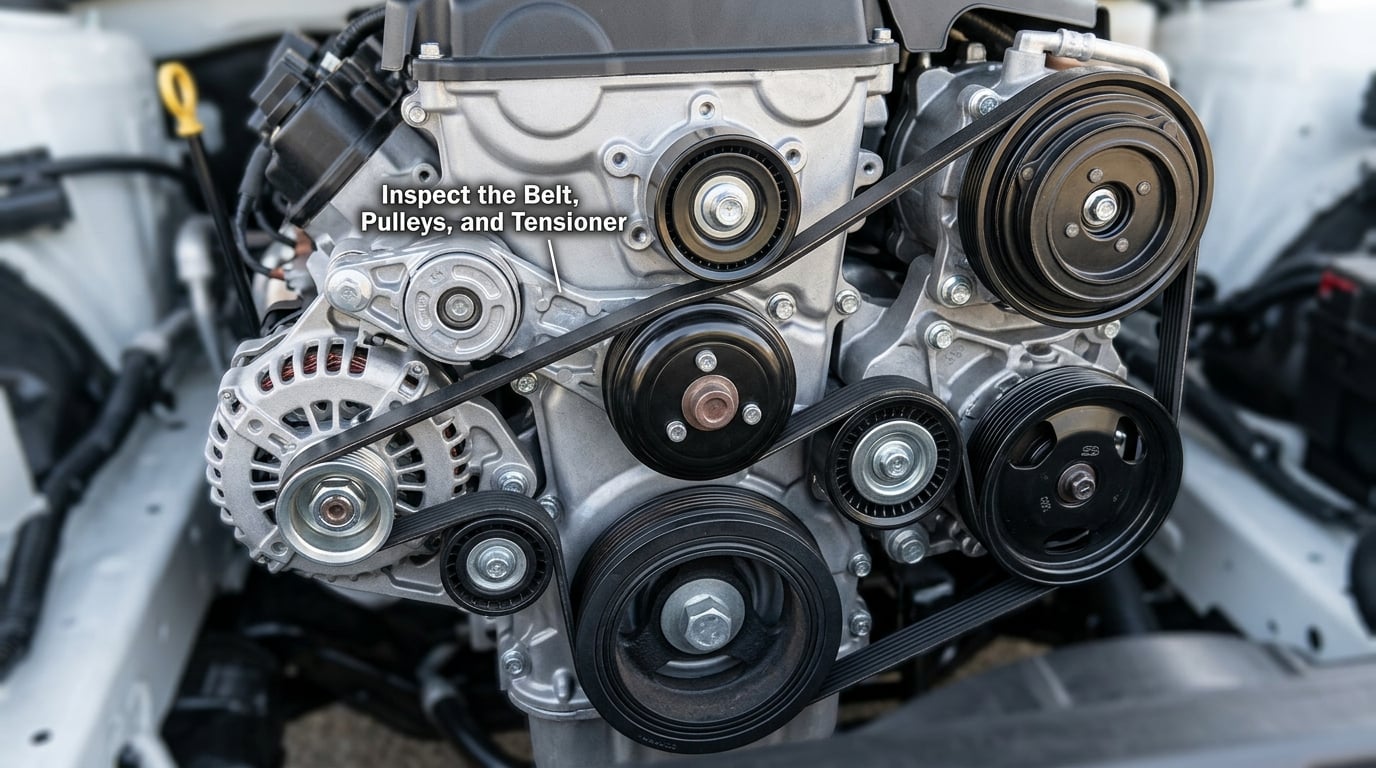
Take the old belt off the pulleys and hold it up to the light before you throw it away. Look for cracks running across the ribs, frayed cord edges, missing or rounded rib peaks, and shiny glazing on the flank. A belt that looks clean can still be stretched, and if it feels slack on the tensioner when the arm is pushed all the way in, it has grown.
Spin every pulley by hand and watch the rim, not the face. A good pulley spins smoothly and stops. A rough one grinds, catches, or has a visible dark ring around the bearing where the seal has weeped. Grab the outer edge and rock it: perceptible play means the bearing is gone and a new belt will not survive contact with it. Check the alternator pulley and the air conditioning pulley the same way.
Look at the back of the belt and the tensioner body for oil. A film of engine oil on a fresh belt will glaze it in a few hundred miles. On M54 and V8 engines, trace the oil back to the filter housing gasket and the oil filter housing area. Fix that leak now, while the belt is off, because you will not enjoy doing it with a tensioner in the way.
3. Remove the Accessory Drive Belt
Work cold, with the key out. On a mechanical tensioner, fit the T60 into the tensioner pulley, rotate the tensioner fully in the direction that relieves the spring, and hold it there. A breaker bar across the pulley is steadier than a ratchet handle, and it frees your other hand. When the slack is obvious, walk the belt off the alternator or the power steering pulley one at a time. On an automatic tensioner, back the engine over by hand or with a bar on the crank pulley until the tensioner backs off, then slip the belt.
Do not pry the belt over a pulley lip. If it will not come off, you are fighting a pulley that needs replacing anyway. Mark the old belt’s orientation before it comes away, because a ribbed belt can go on backwards and appear to sit correctly while riding on the rib edges. A paint pen mark on the flank of the belt and the corresponding pulley saves an argument later.
4. Replace the Belt and Damaged Tensioner
Unbolt the tensioner and any idler pulleys that need replacing, taking photos first so the washers and spacers stack the right way round. Clean every pulley face and groove with a rag and a degreaser, and look down each groove for the shiny witness line a glazed or contaminated belt leaves behind. Install the new tensioner with new one-time-use stretch bolts, and do not tighten them yet. Hand-tight is right at this stage.
Fit new idler pulleys while the system is apart. The tensioner arm and the idlers on most BMW engines have worn together, and fitting a new belt to a marginal bearing is how a job becomes a second job two weeks later. If the tensioner arm is pitted, the pivot is stiff, or the body rocks, replace it. Inspect the alternator and air conditioning pulleys while the belt is off and replace any that wobble or rumble.
5. Route and Tension the Belt Correctly
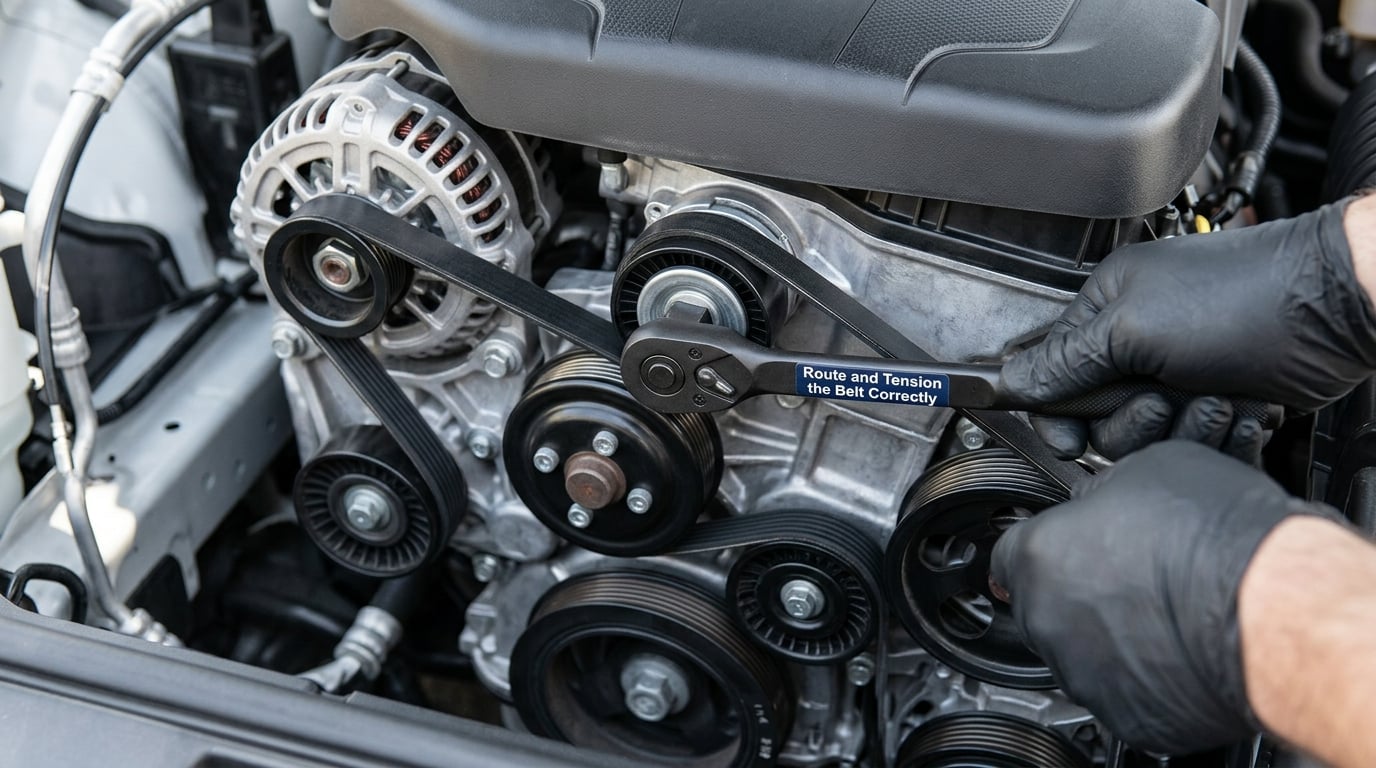
Follow the routing diagram rather than memory. On the inline-six engines the belt starts at the crankshaft pulley, runs up and across the alternator, over the tensioner, around the water pump and power steering pump, and back to the crank. The direction of travel matters on a ribbed belt, and the flat back of the belt faces the pulley, not the ribs.
Seat the belt by hand in every groove before you tension it. Nothing should need a screwdriver, a pry bar or force to get past a pulley lip. If it takes more than a firm push, stop and find the pulley or bracket that is out of line. On a manual spring tensioner, set the arm to the index mark or the position your manual specifies before you release it, because the arm position sets the tension. On an automatic tensioner, run the engine briefly and let the tensioner set itself, then recheck that the belt is not riding the rib edges.
6. Torque the Mounting Hardware
Torque the tensioner, the idler pulleys and any bracket you removed to the value in your service manual, in the sequence it gives. These are stretch bolts on many models, which means the correct figure matters more than usual and the old bolt is finished. Do not reuse it. The values in the table are typical published figures for the common engines; your manual overrides them.
| Fastener | Typical value | Notes |
|---|---|---|
| Automatic tensioner mounting bolt | around 47 Nm | One-time-use stretch bolt on many models; never reuse the old bolt |
| Idler pulley mounting bolt | around 45 Nm (33 ft-lb) | Check whether your engine uses a stretch bolt |
| Hydraulic tensioner retaining bolt | around 25 Nm (18 ft-lb) | Applies to hydraulic units and common upgrades on older six-cylinder cars |
| Alternator pulley and bracket fasteners | around 60 Nm (44 ft-lb) | Only if the alternator had to be moved to reach the belt |
7. Verify Rotation, Alignment, and Belt Movement
Before you start the engine, turn the crankshaft by hand with a bar on the centre bolt and watch the whole system turn. This is the cheapest test in the job. The belt should track in the same plane across every pulley, the tensioner arm should move smoothly through its travel, and no pulley should wobble faster than the belt moves. If the belt walks to one side on any pulley, that pulley or its bracket is not square to the others and the new belt will be chewed up within a few minutes of running.
Some engines leave a factory index mark on the tensioner plate or the bracket. If yours has one, confirm the tensioner body lines up with it before you tighten down. Then check the ribs sit centred on the pulley faces all the way round, and run a fingernail along the belt edge. A finger that catches a rib corner means the belt is riding on its edges, which means wrong routing or a pulley that has to come out.
8. Test the Repair and Reinspect the Belt
Start the engine and listen. The first fifteen seconds should be quiet, with maybe a brief chirp as the automatic tensioner takes up the slack. A chirp that fades within a minute is normal on some cars. A chirp that does not fade means routing, alignment or a pulley, and you should stop rather than drive it.
Let the engine idle, then go through a full throttle pull in gear and watch the belt in the mirror. Any wobble, any side-to-side hunting, or a tensioner arm moving much further than the manual describes means stop and fix it. Park, shut down, and let the engine cool before touching anything. Then re-inspect the belt with the engine off. A black powdery residue on the tensioner body is rubber dust, which is normal. Shiny gouges in a groove, a belt that has walked, or a tensioner arm that now sits differently from where you left it are not.
Recheck tension after a short drive. Automatic tensioners settle, and a spring arm can lose a little tension on first run. Owners on the E90 and N55 forums generally change belt, tensioner and idler together around 60,000 miles, and the E90 threads are unanimous that a worn belt and worn pulleys arrive as a set.
Common Mistakes
These are the errors that cause an immediate failure or bring the noise back within a month.
- Replacing the wrong system. An ICV belt and a serpentine belt are not interchangeable, and a two-belt car needs both routes understood before anything comes off.
- Forcing the belt over a pulley lip. A belt that will not seat is telling you a pulley is out of line or a bearing is failing. Fix the cause.
- Wrong tensioner type, or a belt fitted backwards. Ribbed belts are directional. The flat side runs on the pulley face.
- Skipping the tension release. Fighting a spring tensioner without holding it back damages the arm and the socket.
- Cross-threading fasteners. Start every tensioner and idler bolt by hand on the thread before you take a socket to it.
- Over-torquing the tensioner arm. A generic torque estimate is not the specification. Stretch bolts yield once, and only once.
- Fitting a belt that was already damaged. Old belt on new pulleys, or a new belt into a glazed groove, undoes the job.
- Diagnosing a tensioner when the real fault is elsewhere. A water pump weep, a seized pulley or a bracket that has shifted all mimic belt noise. One owner chasing a chirp on new parts turned out to be weeping coolant from the water pump housing, which is a common false trail on these engines.
- Ignoring the oil leak. An oil filter housing gasket drip onto a new belt will glaze it fast. Fix the gasket first.
On safety: never work around a hot engine or with the fan turning. A 32mm wrench on a reverse-threaded fan clutch is the moment most injuries happen on this job, so support the wrench rather than throwing your weight at it. Keep your hands, hair and loose clothing clear of the fan shroud drive, and disconnect the battery before working near wiring in the engine bay.
Frequently Asked Questions
Does every BMW have an idle drive belt?
No. Most BMWs do not have a belt called an idle belt at all. What people mean is the accessory drive belt, the tensioner and the idler pulleys. Some four-cylinder engines from the E30 through the E46 also have a small separate belt driving the idle control valve, which is a completely different part. Check your engine code and routing diagram before you order anything.
How do I know whether my BMW needs a new tensioner?
Watch the arm. A healthy tensioner holds a steady position and moves a little as the engine loads. One that swings wildly, sits at the end of its travel, or visibly rattles has lost its spring or its hydraulic pressure. Add a wobbling or noisy idler pulley and a belt that will not stay tight, and replacing the tensioner alone will not fix it. Replace the whole set.
Can I replace an accessory drive belt without special tools?
Almost. A ratchet, the right Torx socket for your engine, typically T60, and a 32mm wrench for the fan clutch cover it. A breaker bar helps hold a spring tensioner in its released position, and a torque wrench is worth having. The only regular reason people buy a dedicated tool is the BMW locking tool for some tensioner systems, and a long bar usually substitutes.
How often should a BMW drive belt and tensioner be inspected?
Look at it whenever the belt is off and whenever you have the engine bay open, which for most owners is at every oil service. Owners running the N55 and the E90 generation generally change belt, tensioner and idlers around 60,000 miles, and industry guidance for these systems runs to somewhere between 60,000 and 100,000 miles. A belt that has seen ten years of summer heat is done regardless of mileage.
What does it mean if a new BMW drive belt squeals after replacement?
Short chirping that fades after a minute usually means the automatic tensioner is still setting itself and the belt is seated correctly. A squeal that stays means the belt is on the rib edges, the routing is wrong, or a pulley is misaligned. A rhythmic rattle points at a bearing. Remove the belt and spin every pulley by hand before you replace anything a second time.
Should the tensioner be replaced with every drive belt?
On these systems, yes. Belt, tensioner and every idler pulley wear on the same timeline, and the tensioner is the part that quietly loses the ability to hold tension. Owners on the E90 and E46 forums consistently replace all three together. A new belt on an old tensioner is the most common reason a repair sounds fine for a week and then starts chirping again.
Conclusion: Verify the Repair Before Driving
Before anything else, identify the exact belt system on your car. Get the VIN, the model year and the engine code, open the service manual, and confirm the routing diagram, the tensioner type and the torque values for your engine. Everything in this guide assumes you did that first, because a belt, tensioner and pulley set is cheap and a wrong part is a second afternoon.
Then close the job the same way every time. Confirm the belt is centred in every groove and running the right direction. Confirm the tensioner arm sits where the manual says. Confirm the one-time-use bolts are new and torqued to spec. Turn the engine over by hand and watch the whole system track. Start it, listen, and take a throttle pull. Shut it down, let it cool, and look at the belt again for dust, glazing or a wandering edge.
If a noise survives all of that, the belt is not the problem. Look at the water pump weep, the alternator bearing and the alignment of the pulleys before you buy another part. And if your car spends its life parked, the same walk-around takes ten minutes and it is worth pairing with the rest of a neglected inspection, including how to maintain brakes on a car you rarely drive.